WaasMedic Agent.exe High Disk Usage: How to Stop It?
Explore the expert-recommended methods to reduce disk usage
![]() 4 min. read
4 min. read
![]() Updated on
Updated on
Share this article

Improve this guide
Read our disclosure page to find out how can you help Windows Report sustain the editorial team Read more
Key notes
- The WaasMedic Agent.exe represents the Windows Update medic service and is an essential component of the Windows operating system.
- Its task is to ensure the Windows update process stays smooth and uninterrupted.
WaasMedic Agent.exe is a legit process that runs in the background and plays an integral part in installing Windows updates smoothly.
If you see high disk usage due in Task Manager and the reason is WaasMedic Agent.exe, then you are not alone.
In this guide, we will cover some methods to fix high disk usage caused by WaasMedic Agent.exe after discussing the cause. Let’s begin!
Why is WaasMedic Agent.exe causing high disk usage?
There could be several reasons for the issue; some of the common ones are mentioned below:
- Conflict with security software – If misconfigured, the security software may conflict with third-party antivirus on your computer, causing this issue.
- WassMedic Agent busy with updates – If WaasMedic Agent.exe is busy processing updates, you may also see a spike in your computer’s disk usage.
- System files are damaged – If your system files are corrupt or damaged, you may experience high disk usage. To fix it, you need to repair the system files.
How do I fix WaasMedic Agent.exe, causing high disk usage?
Before moving on to the troubleshooting steps, you should consider performing the following checks:
- Please wait a couple of hours to let WaasMedic Agent.exe finish its work.
- Disable all antivirus apps temporarily.
- Install pending Windows updates.
- Remove unnecessary peripherals and drives.
1. Repair the system files
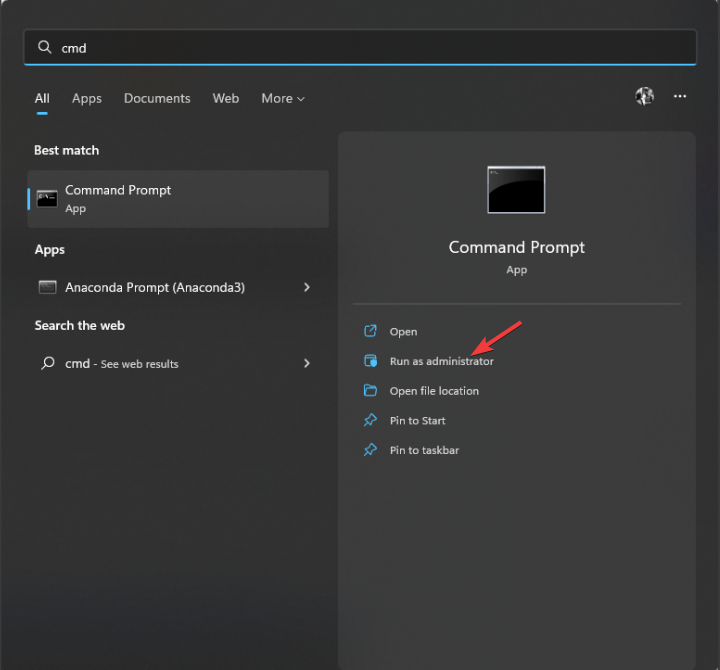
- Press the Windows key, type CMD, and click Run as administrator.

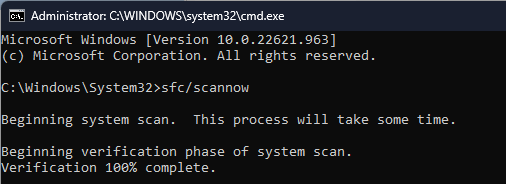
- Type the following command and press Enter:
sfc/scannow
- Once the process is complete, restart your computer.
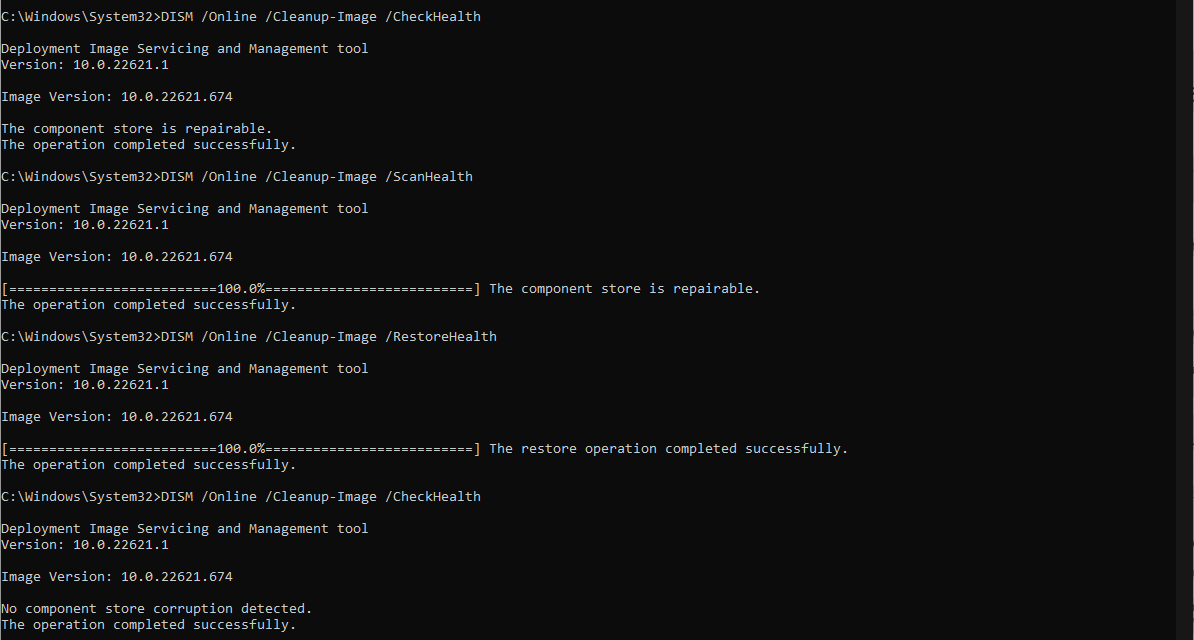
2. Repair Windows Update components
- Press the Windows key, type CMD, and click Run as administrator.
- Copy and paste the following commands one by one and press Enter after each command:
DISM /online /cleanup-image /checkhealthDISM /online /cleanup-image /scanhealthDISM /online /cleanup-image /restorehealth
- Once the process is complete, restart your PC.
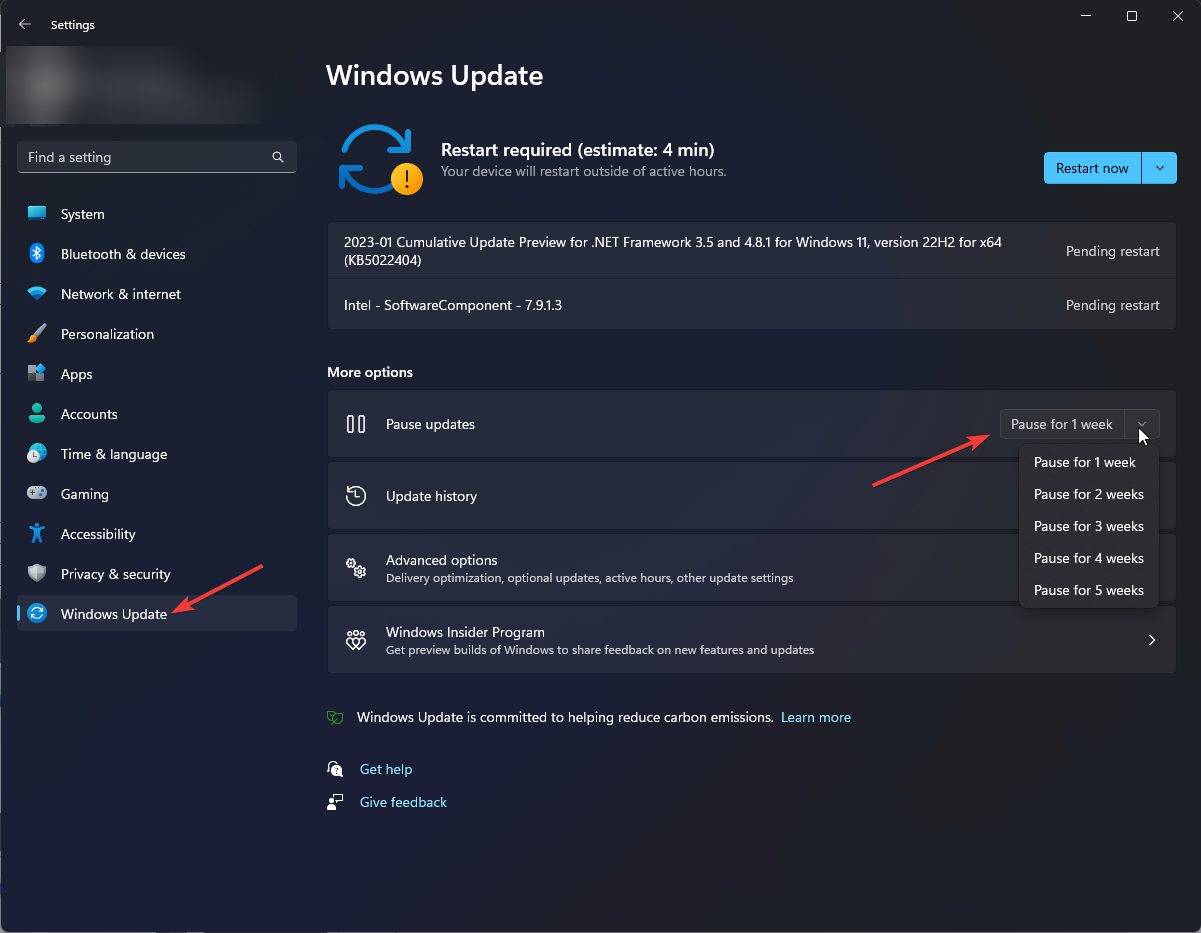
3. Pause Windows Updates
- Press Windows + I to open Settings.
- Click Windows Update from the left pane, and go to Pause updates. Then, from the drop-down, select an appropriate option.

- Restart your computer and check if the issue persists. If it still causes high disk usage, resume the updates and proceed further.
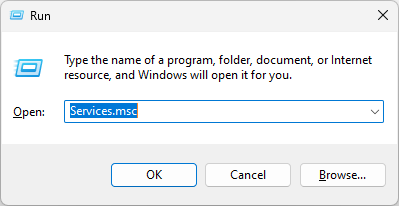
4. Disable WaasMedic
- Press Windows + R to open the Run box.

- Type services.msc and press Enter to open Services.
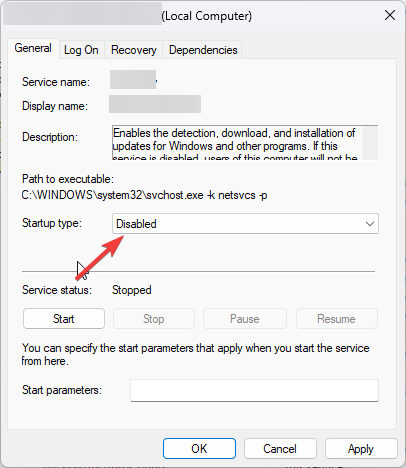
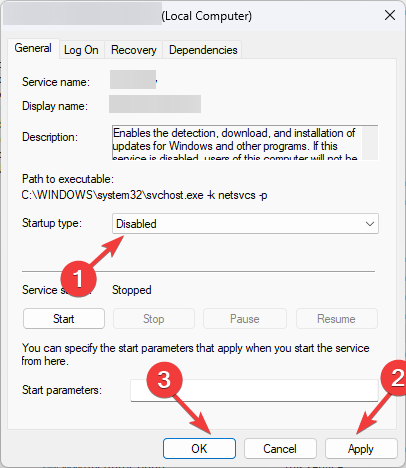
- Locate and double-click the Windows Update Medic service to open Properties.
- For the Startup type, select Disabled from the drop-down.

- If it is disabled, then restart your computer. However, if you get Access is denied error, proceed.
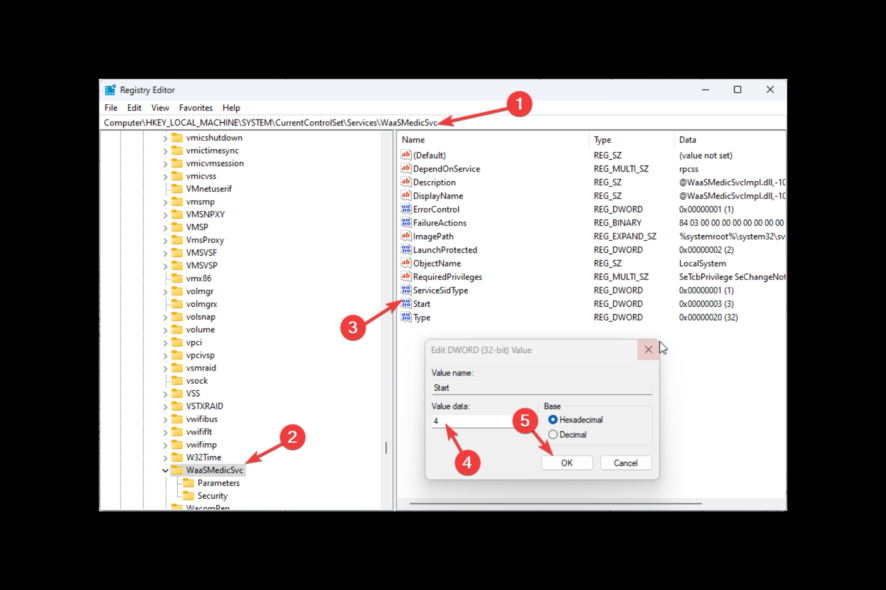
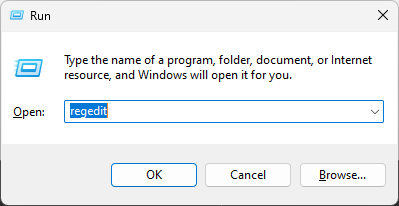
- Press Windows + R to open the Run box.
- Type regedit and hit Enter to open Registry Editor.
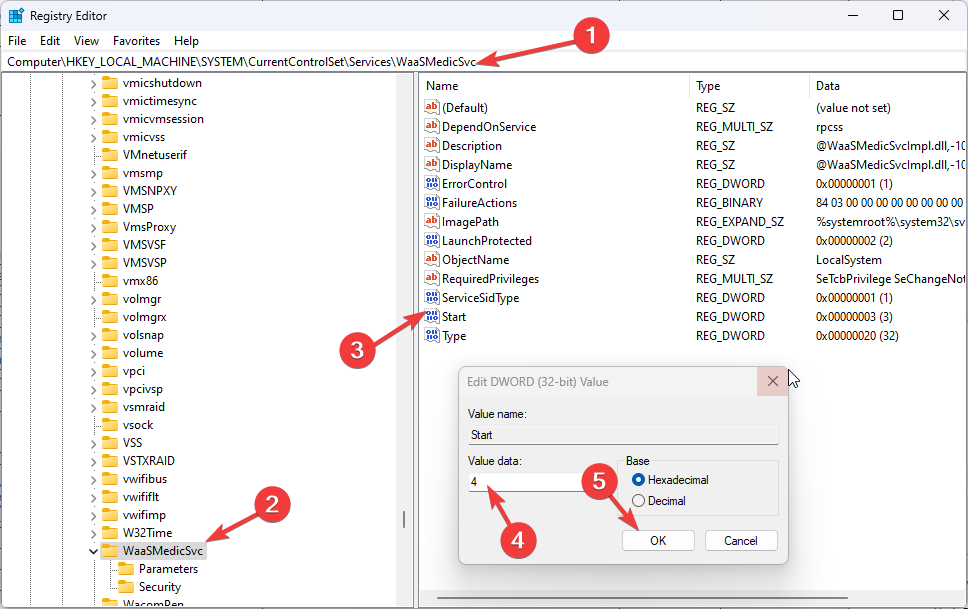
- Follow this path:
Computer\HKEY_LOCAL_MACHINE\SYSTEM\CurrentControlSet\Services\WaaSMedicSvc
- From the right pane, locate and double-click Start, and modify the Value data from 3 to 4.
- Now go to Services again and try to disable the service. Once done, click Apply and OK.
- Restart your PC to save the changes.
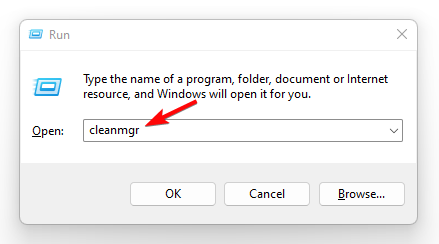
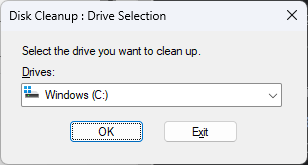
5. Use the Disk Cleanup
- Press Windows + R to open the Run window.

- Type cleanmgr and press Enter to open Disk Cleanup.
- On the next window, select C drive and click OK.

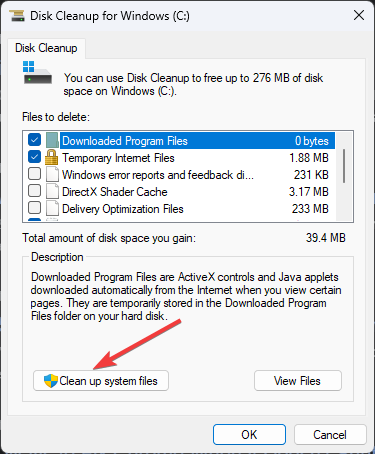
- Now click Clean up system files.

- Again select C drive and click OK.
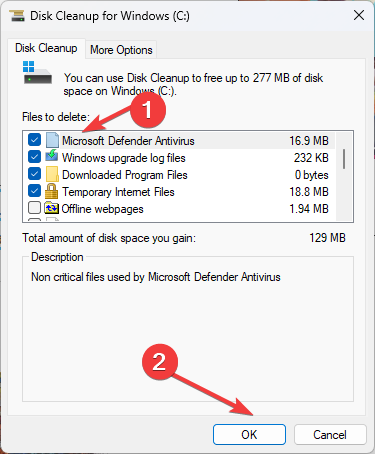
- Select the files listed under Files to delete option and click OK.
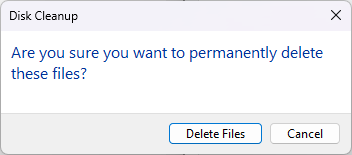
- Click Delete Files to confirm.

6. Enable DEP( Data Execution Prevention)
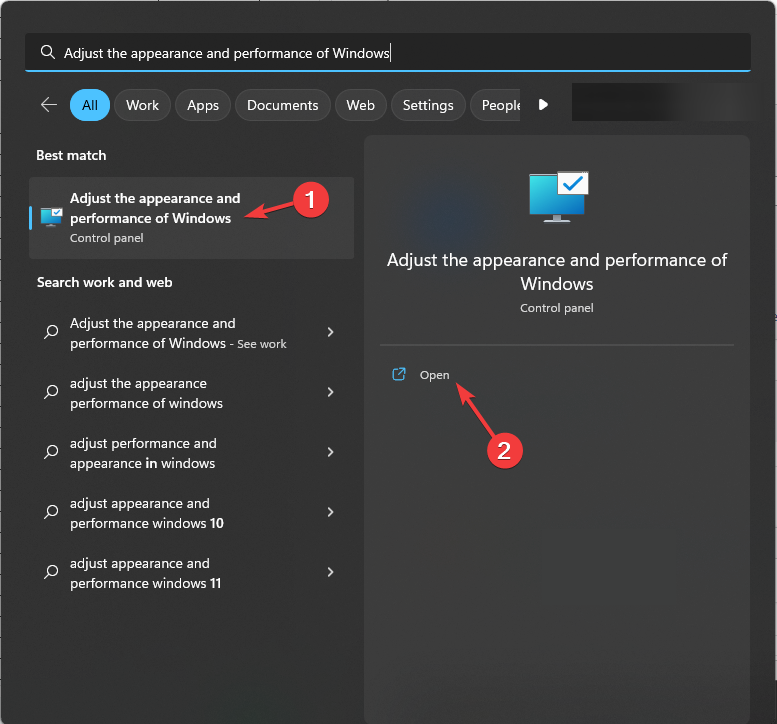
- Press the Windows key, type Adjust the appearance and performance of Windows and click Open.

- Switch to the Data Execution Prevention tab and select the radio button next to Turn on DEP for all programs and services except those I select.
- Click Add.

- Select the file and click Open to add.
- Click Apply, then OK to save changes.
- Restart your computer.

So, these are the methods to fix the WaasMedic Agent.exe causing high disk usage issues. If you have questions about WaasMedic Agent.exe, feel free to mention them in the comments below.