Fix: Wdcsam64.sys Memory Integrity Error on Windows 11
Corrupt Windows files often cause the memory integrity error
Key notes
- The Wdcsam64.sys Memory Integrity error on Windows 11 is usually triggered by corrupt system files.
- Installing Autoruns usually resolves the wdcsam64.sys error.
- Always install drivers from the official manufacturer’s website.

Since Windows 11 launched, some users have experienced memory integrity error often caused by incompatible system files.
The wdcsam64.sys error prevents the system from enabling core isolation. If you’re currently experiencing this error, we’ve got the perfect solutions to help you resolve the error.
What causes wdcsam64.sys memory integrity error?
The following are some of the most common causes of wdcsam64.sys memory integrity error:
- Corrupt Windows files – If your system has corrupt Windows system files, it can cause the wdcsam64.sys memory integrity error.
- Incompatible drivers – Incompatible drivers are among the most common causes of the wdcsam64.sys error.
- Virus and malware – In rare cases, the wdcsam64.sys error is triggered when the system is infected with viruses and malware.
Now that we know what we’re dealing with, let’s fix this issue once and for all.
How do I resolve incompatible drivers for memory integrity?
1. Delete WD Discovery using Sysinternals tool autoruns
- Visit the Microsoft Official Autoruns Download Page and download the zip file.

- After the download, press Windows key + E to open File Explorer.
- On the left pane, click on Downloads and locate the file you just downloaded. Right-click on the file i.e Autoruns.zip and select Extract all.

- After the extraction, open the newly created folder, locate supporting.exe, and double-click the file to launch the app.
- Once the tool loads successfully, type wdcsam64 in the Search box and hit Enter.
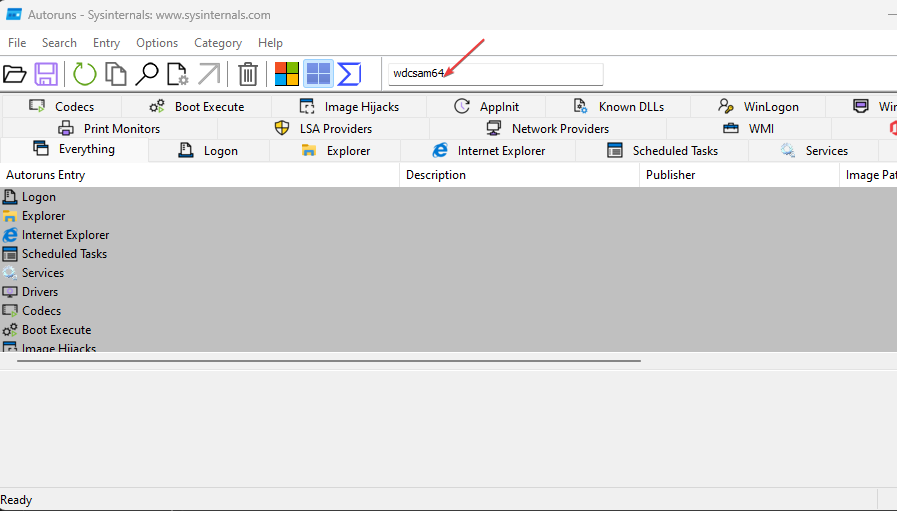
- Locate any item related to wdcsam64 and delete them.
- Restart your PC to enable memory integrity.
Autoruns is a tool designed specifically for Microsoft to identify software configured to run in a system when the device is booted, or a user logs into their device.
2. Uninstall WD Discovery
- Press Windows key + R, type in appwiz.cpl in the dialog box, and hit Enter.
- In the Programs and Features window, locate WD Discovery, right-click on it, and select Uninstall.
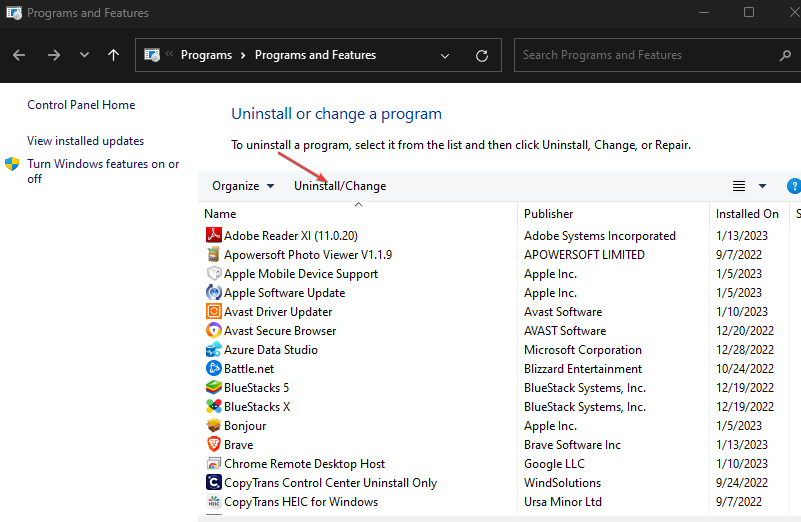
- In the next window, click on Uninstall.
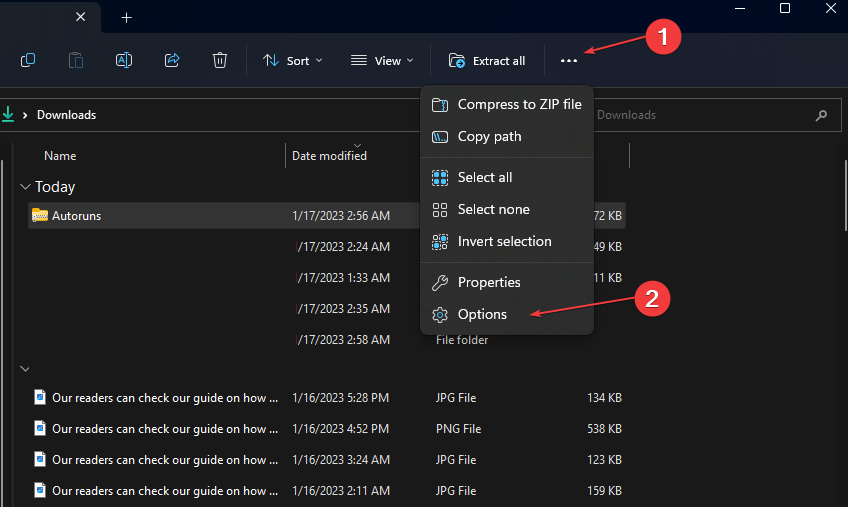
- Press Windows key + E to open File Explorer.
- In the File Explorer window, hover on the See more tab and select Options.
- Navigate to the View tab and check the option to Show hidden files, folders, and drives.
- Then, click on Apply and close the window.

- On the left pane of File Explorer, click on Local Disk (C:), click on Users, and select the folder with your username.
- Locate the .wdc file and hit the Delete key on your keyboard.
- Then, open AppData, navigate to Local, and select the Temp directory.

- Highlight all the folders titled WD Discovery and delete them.
By uninstalling and deleting the files related to WD Discovery, you should be able to fix the wdcsam64.sys memory integrity error.
3. Remove the WD devices
- Right-click the Start button and select Device Manager.
- Click on View and select Show Hidden Files.

- Locate WD Drive Management devices, right-click on WD SES Device, and select Uninstall.
- In the next popup window, check the option of Delete the driver software for this device, and click on Uninstall and restart your PC.
4. Run an SFC Scan
- Type in cmd in the Windows Search bar and click on Run as administrator to open the Command Prompt window.
- Type the following and hit Enter:
sfc /scannow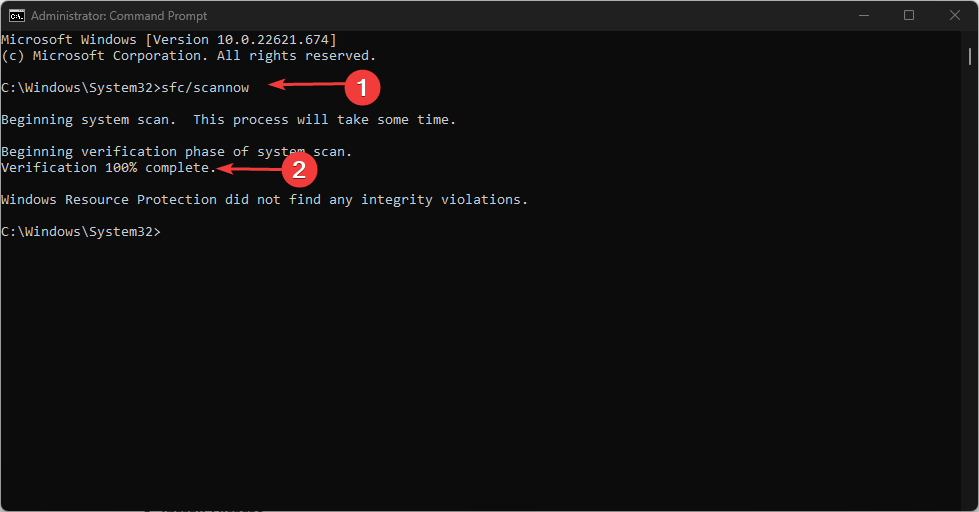
- Wait for the scan to finish.
Windows Resource Protection may indicate that the SFC program detected no integrity issues or found corrupt or broken files but could not repair some.
If Windows displays the message Windows Resource Protection discovered corrupt files but could not fix some of them, you’ll need to run a DISM scan.
If you want to use an automatic alternative for SFC and DISM scans, you can try using a specialized repair tool because it offers a thorough scanning report of your corrupt or missing OS files, and ultimately finds healthy components
Further, the wdcsam64.sys error is usually triggered by incompatible drivers. If you’re installing drivers manually, ensure you install the latest version from the official manufacturer’s website.
We have another guide dedicated to HtcVComV64.sys and its issues, so don’t hesitate to check it out.
In conclusion, you can leave your questions and suggestions below in the comments section if you have any regarding this guide.
Read our disclosure page to find out how can you help Windows Report sustain the editorial team. Read more


Improve this guide


User forum
1 messages