Get-MpComputerStatus: What is it And How to Use it?
Learn everything there is about Get-MpComputerStatus command
2 min. read
Updated on
Read our disclosure page to find out how can you help Windows Report sustain the editorial team Read more
Key notes
- PowerShell commands can be quite useful in showing information or making system changes quickly.
- Get-MpComputerStatus is a popular command that can give you useful information about your antivirus.
PowerShell is an extremely powerful tool, and many users wonder what the Get-MpComputerStatus command does.
In case you’re not familiar with this tool, we have a great guide that explains what is PowerShell, so we encourage you to read it before using this command.
Now that you’re familiarized yourself with PowerShell, let’s see how we can use this command on our PC.
What is Get-MpComputerStatus?
- Get-MpComputerStatus is a PowerShell cmdlet.
- It’s used to get the status of the anti-malware software on your PC.
- You can use Get-MpComputerStatus on a remote computer to check antimalware status.
What are Get-MpComputerStatus properties?
- -AsJob – Runs the cmdlet as a background job.
- -CimSession – Run the cmdlet on a remote computer.
- -ThrottleLimit – Specifies the maximum number of concurrent operations.
How do I check my Defender status with Get-MpComputerStatus?
Use PowerShell
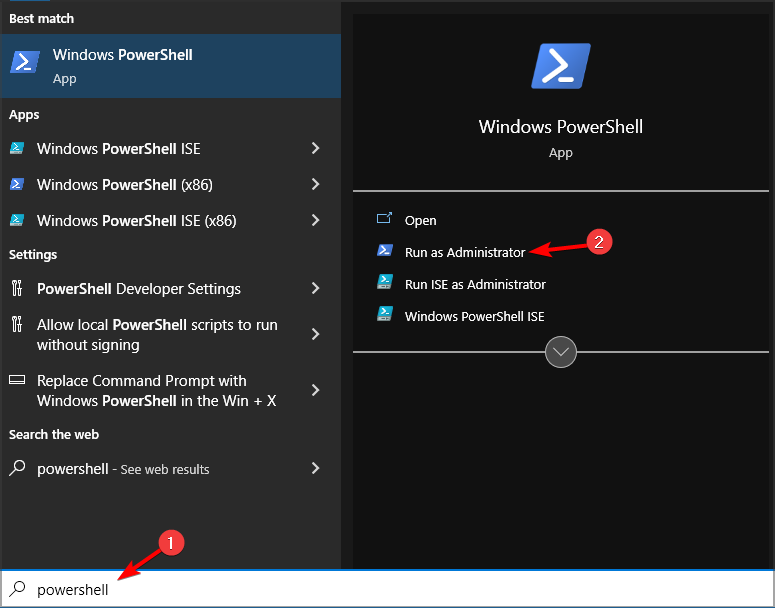
- To do so, open the search box with the Windows key + S hotkey.
- Input PowerShell in the Type here to search box.
- Right-click Windows PowerShell and select its Run as administrator option.
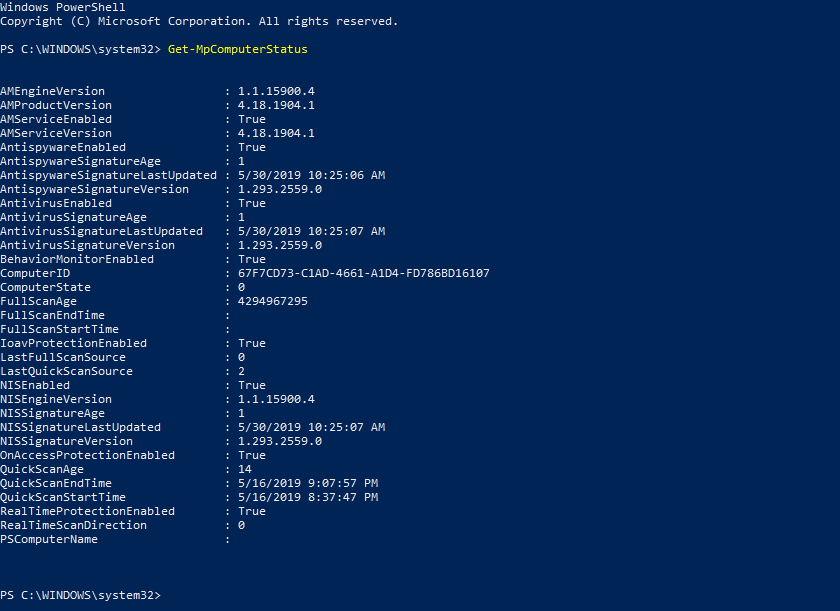
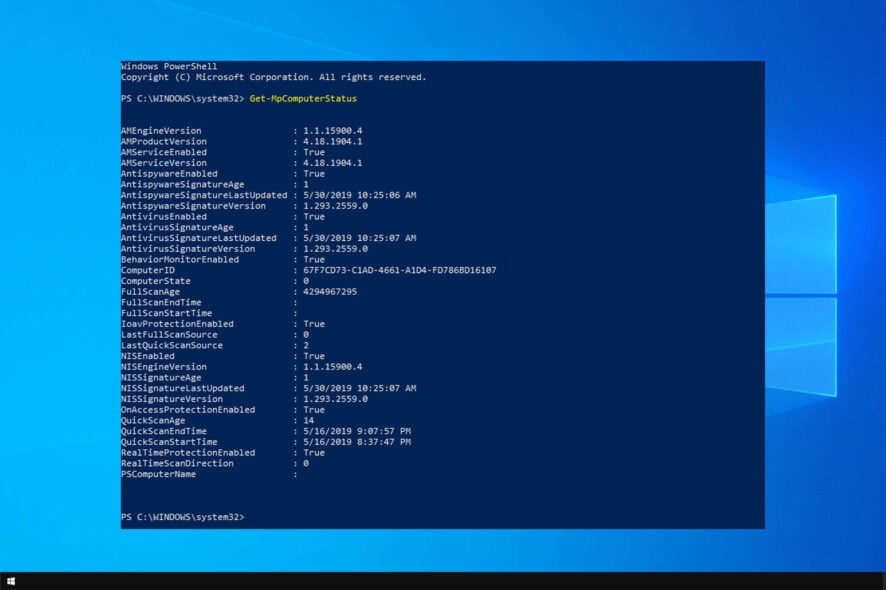
- Input the following and press Return:
Get-MpComputerStatus - PowerShell will then display a list of Windows Defender properties as shown directly below.
Make sure that the following properties are enabled to ensure that Windows Defender is working:
- AntispywareEnabled
- AntivirusEnabled
- IoavProtectionEnabled
- NISEnabled
- OnAccessProtectionEnabled
- RealTimeProtectionEnabled
As you can see, this command is pretty simple, and it will give you the status of Windows Defender on your PC or a remote one.
PowerShell is an amazing tool, and we hope this guide helped you understand how Get-MpComputerStatus works and how to use it on your PC.
If you want to learn more about this command line tool, we have a great guide on how to find and replace multiple lines in PowerShell, so be sure to check it out.
Have you ever used this command? Let us know in the comments section below.

