Windows 11 Can't Find Printer: How to Get It Detected
Easy steps to find your printer on your network

One such error is that Windows 11 can’t find the printer. Many users have complained that they face this problem after installing the KB5006746 update on their computers.
In this guide, we will cover some expert-recommended methods to get rid of the issue. Just follow the step-by-step instructions below:
Table of contents
What can I do if my Windows 11 computer can’t find a printer?
Before diving into actual troubleshooting steps, make sure you go through these quick fixes:
- Restart your printer and computer
- Disable antivirus temporarily.
1. Check for Windows updates
- Press Windows + I to open Settings.
- Go to Windows Update, and click Check for updates.
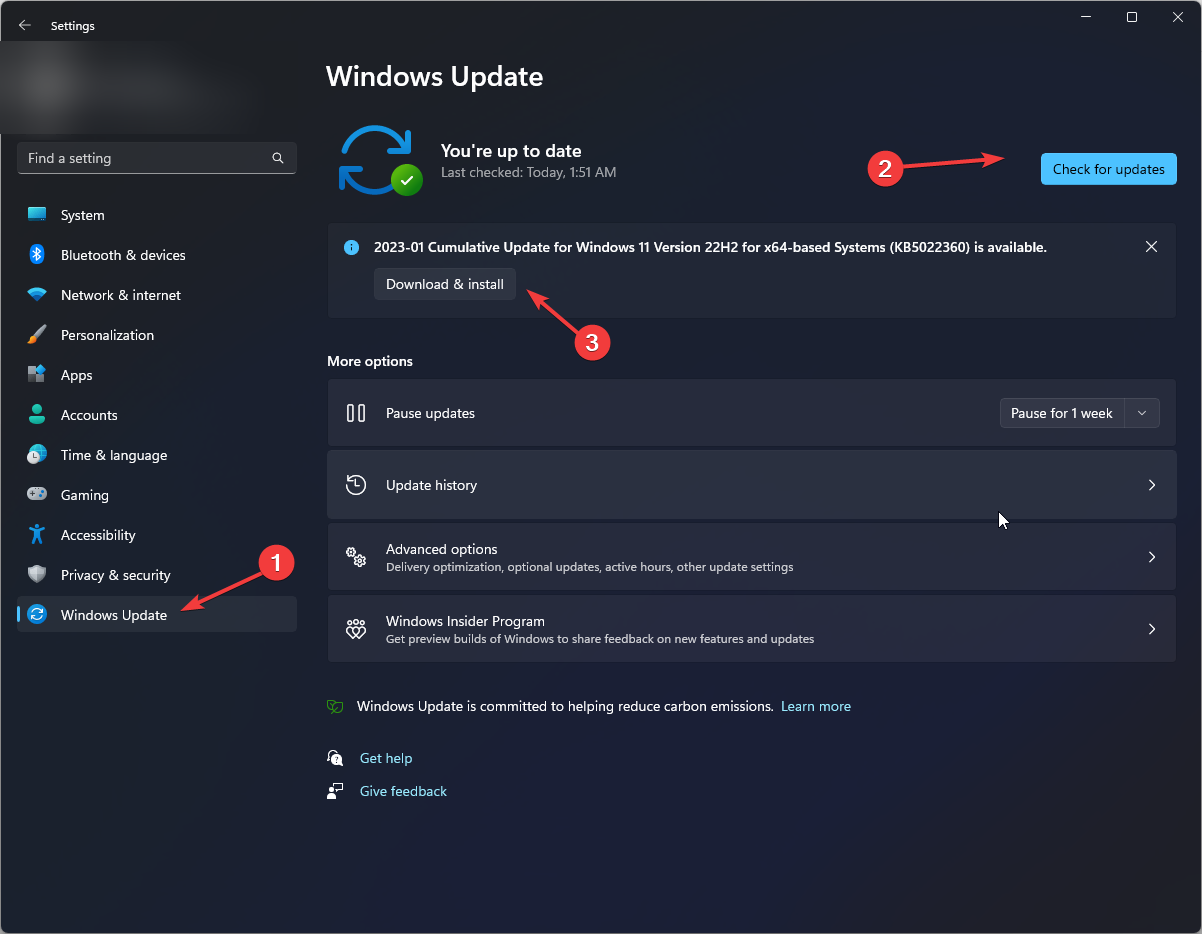
- If there is an update available, click Download & install.
- Reboot your computer once done.
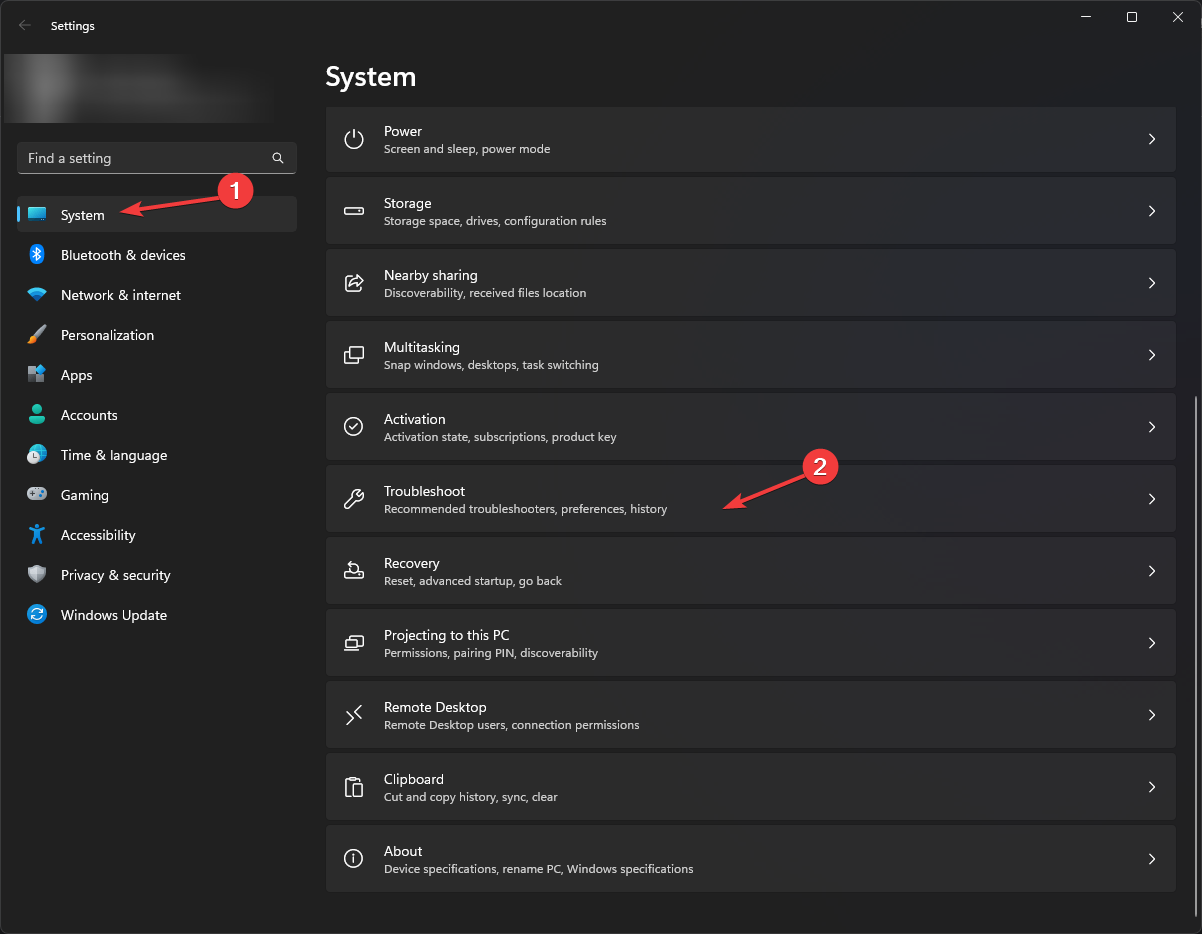
2. Run the Windows troubleshooter
- Press Windows + I to open Settings.
- Go to System, then click Troubleshoot.
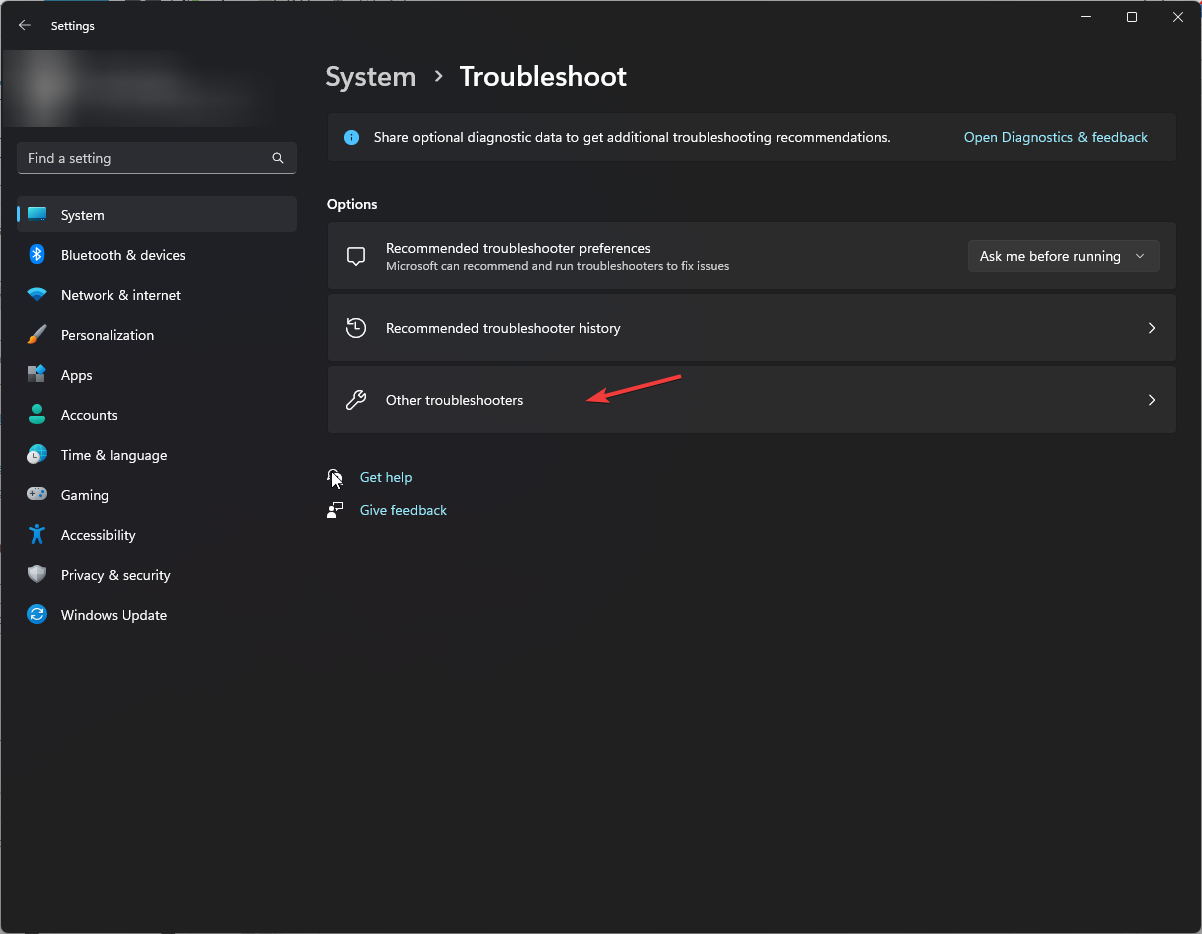
- On the next page, click Other troubleshooters.
- Now, locate the Printer and click Run.
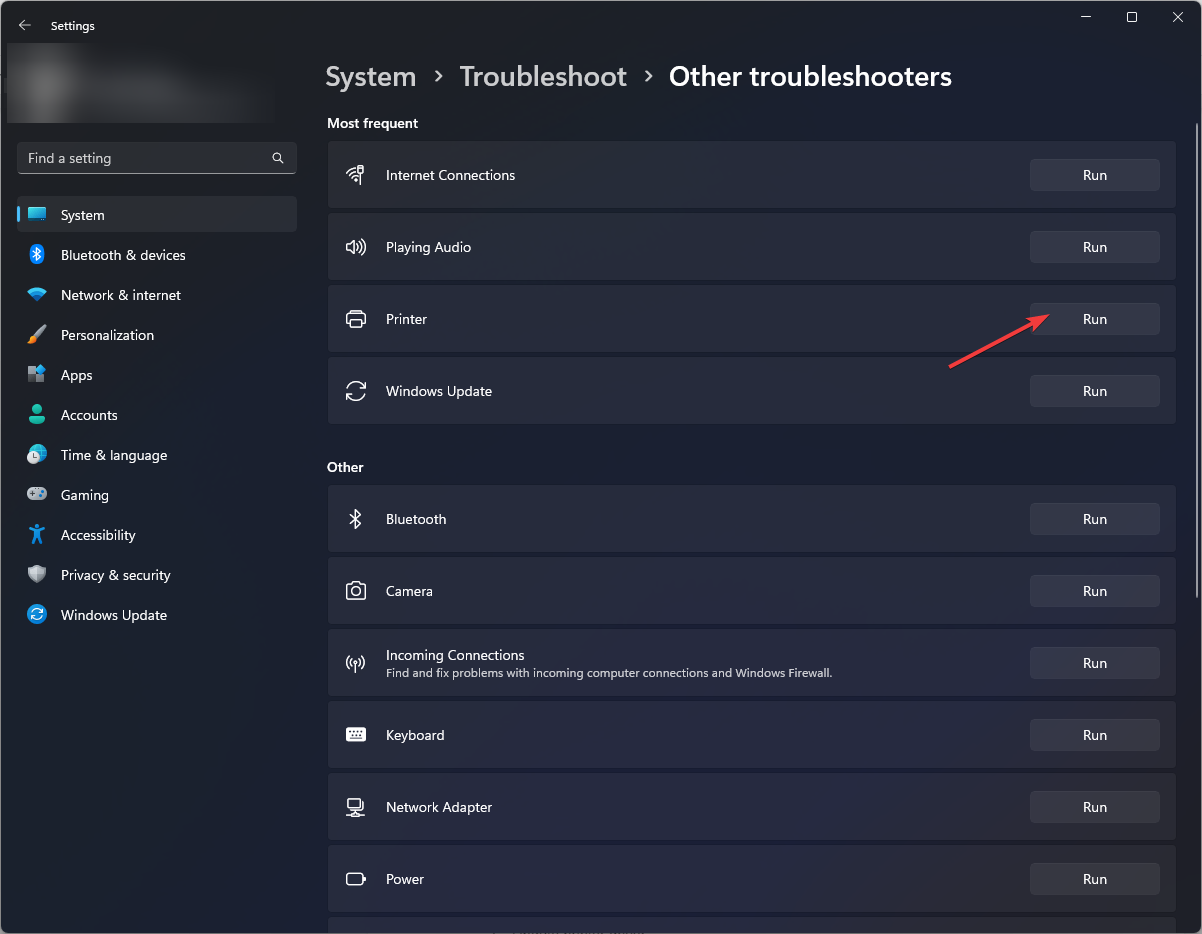
- Choose the printer from the list and click Next.
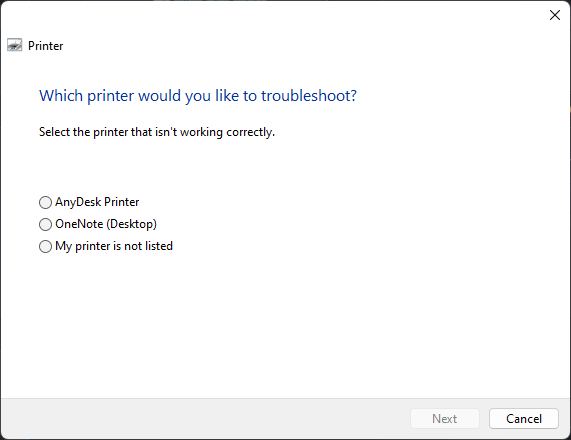
- Follow the onscreen instructions if prompted and wait till it’s done.
3. Update the printer driver
- Press Windows + R to open the Run window.
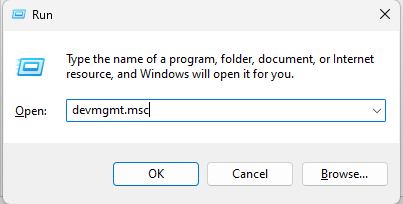
- Type devmgmt.msc and press Enter to open Device Manager.
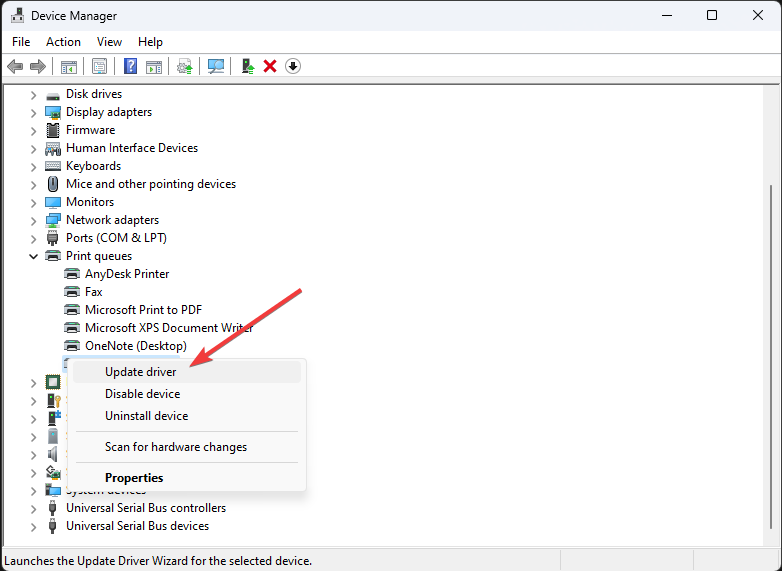
- Go to Print queues and expand it. Then, select the driver, right-click it and select Update driver.
- Now, click on Search automatically for drivers.
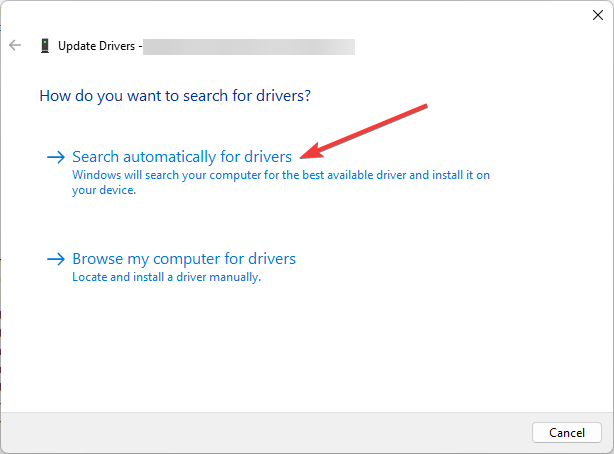
- If available, Windows will download the suitable driver.
- Restart your PC once the work is done.
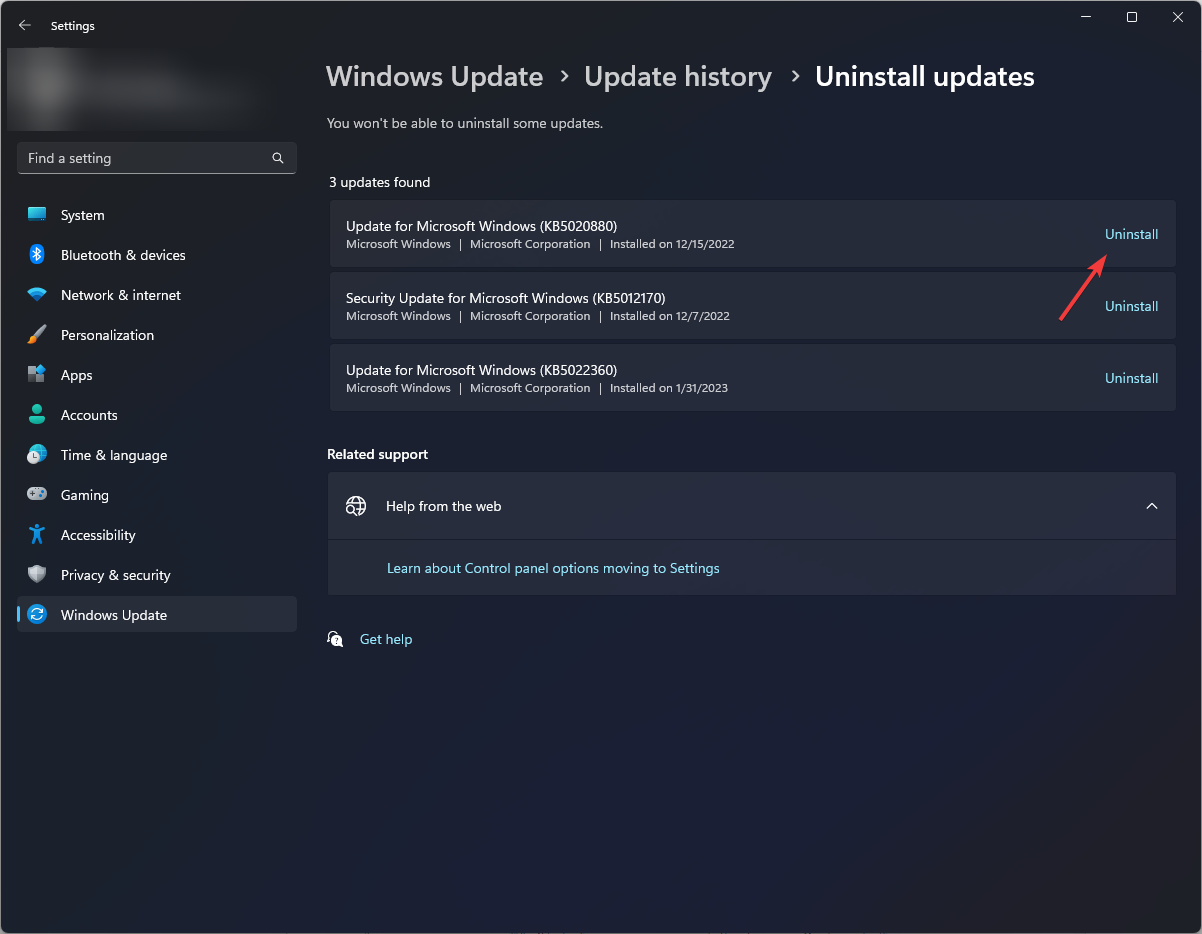
4. Rollback to the previous version
- Press Windows + I to open Settings.
- Go to Windows Update, and click Update history.

- Click Uninstall updates.
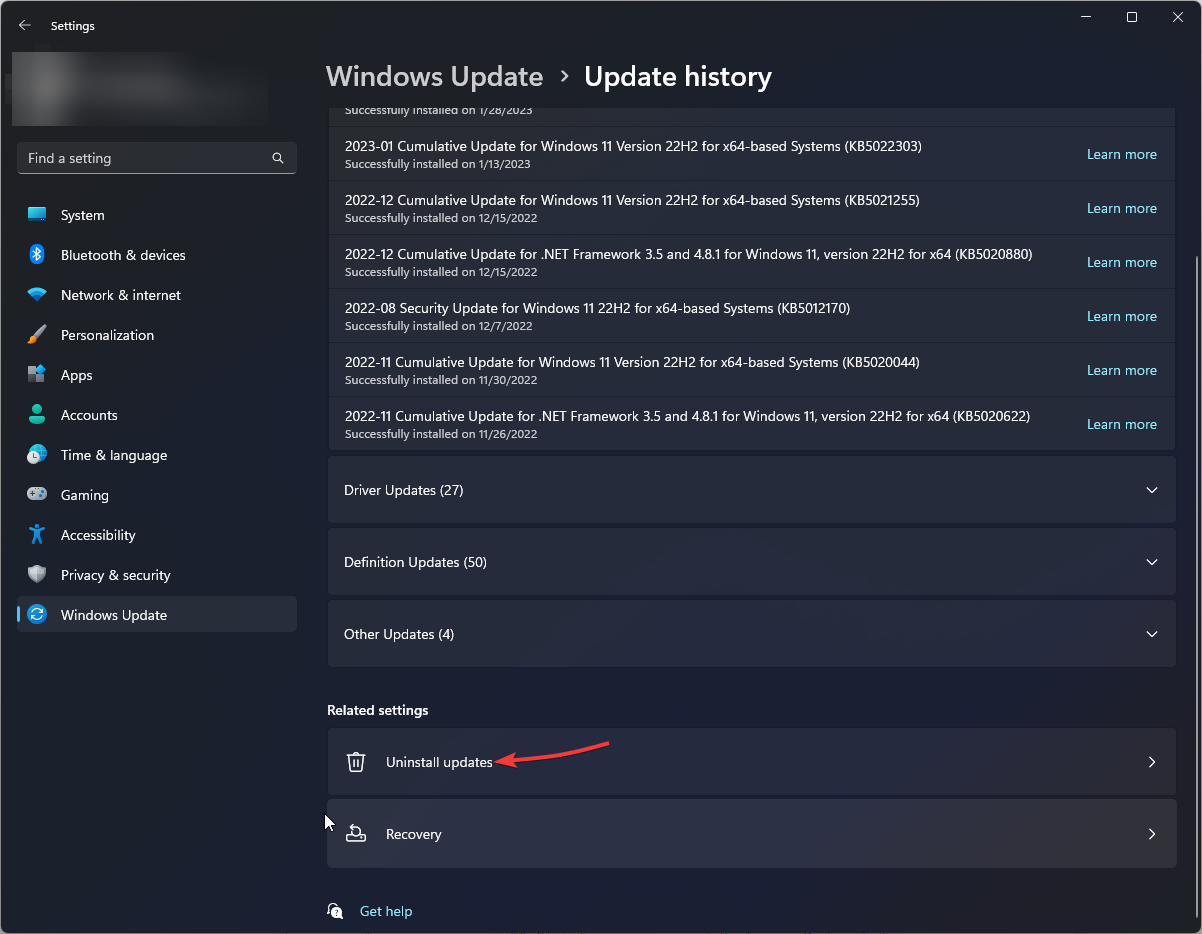
- Go to the update you want to uninstall, and click Uninstall.
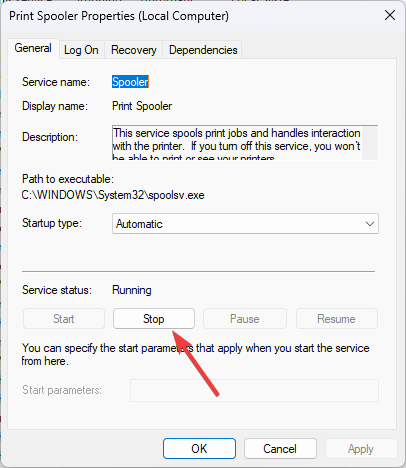
5. Reset the Printer Spooler
- Press Windows + R to open the Run console.
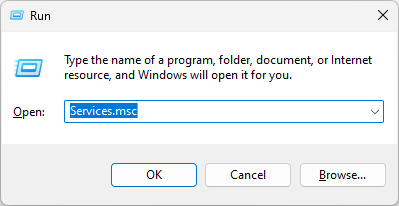
- Type services.msc and press Enter to open Services.
- Locate and double-click Printer Spooler.
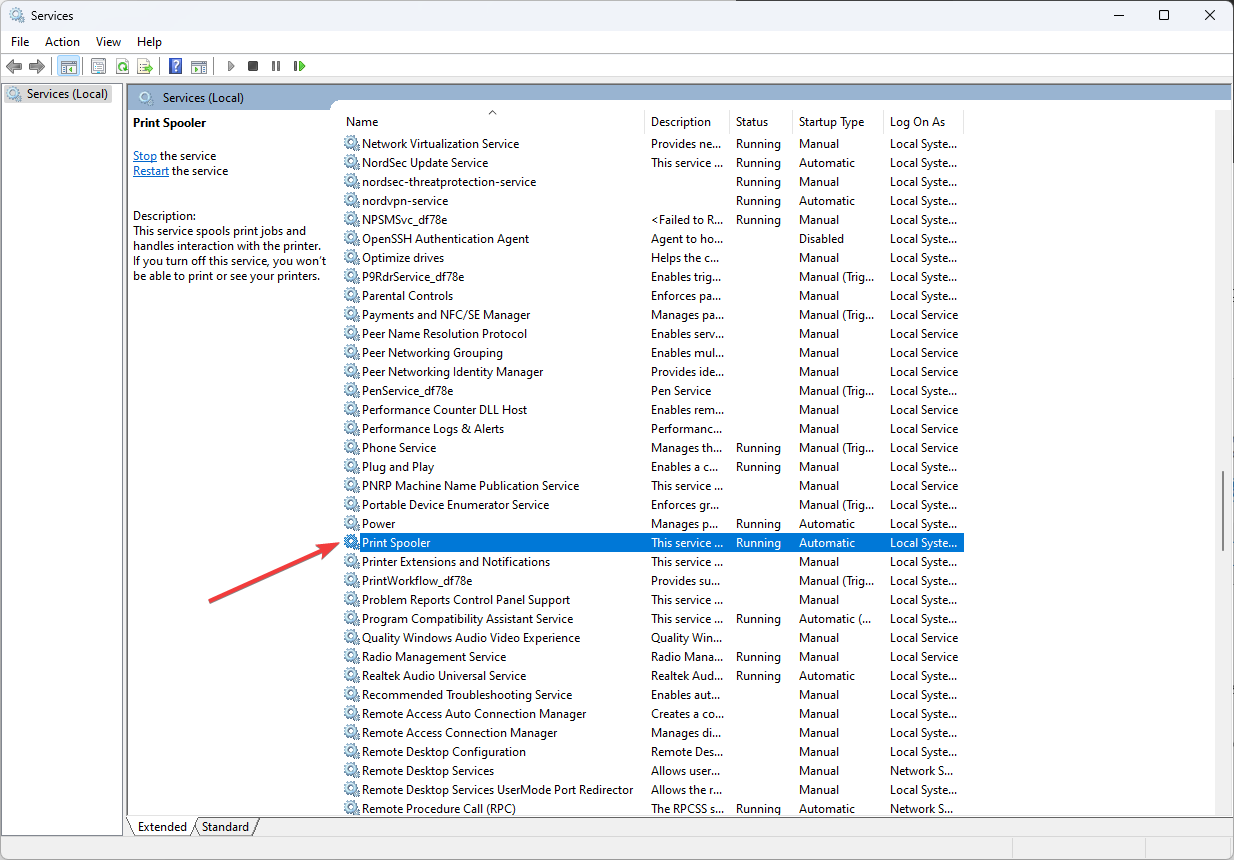
- Under the Service status, click the Stop button.
- Now on your computer, navigate to this path:
C:\Windows\system32\spoolsv.exe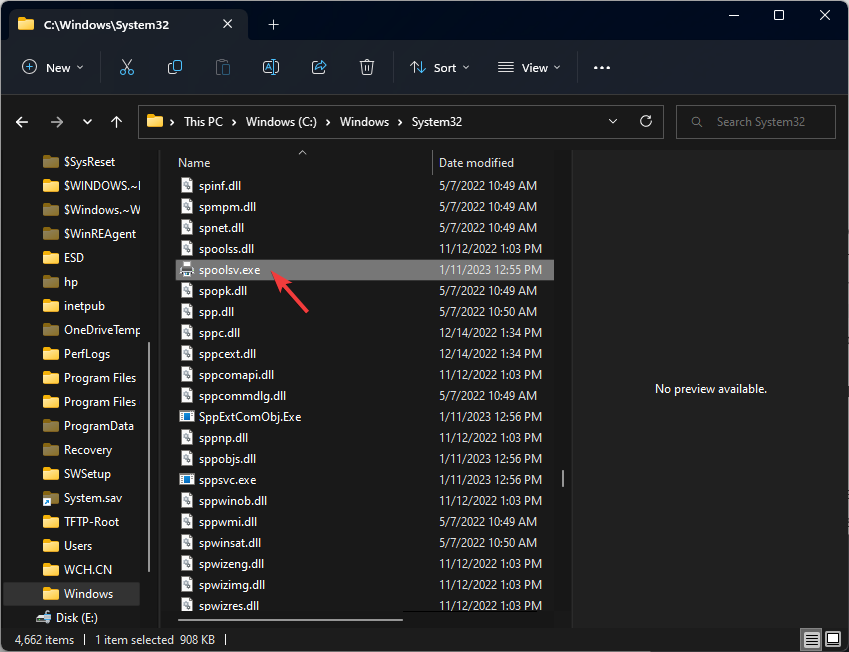
- Open the Spool folder, and delete everything inside.
- Go to Services and click the Start button on Printer Spooler Properties.
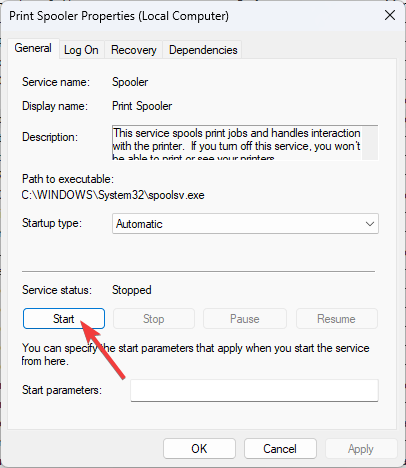
- Reboot your computer to let the changes take effect.
6. Make changes to Printer properties
6.1 Set default printer
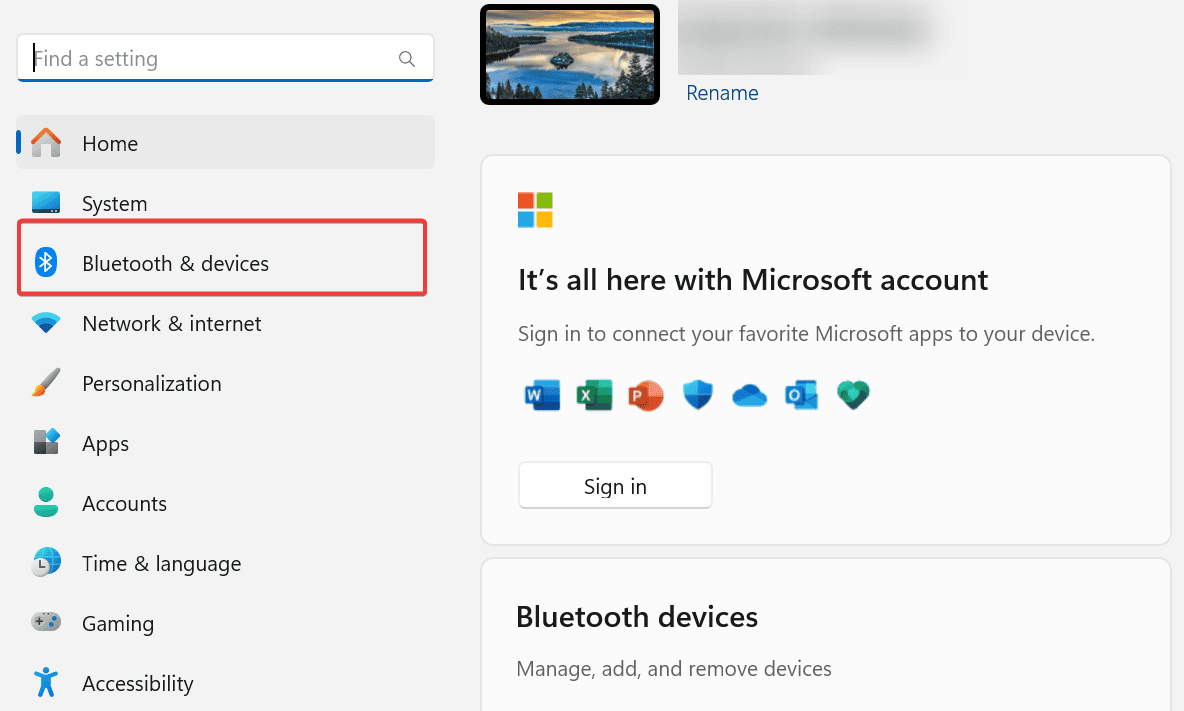
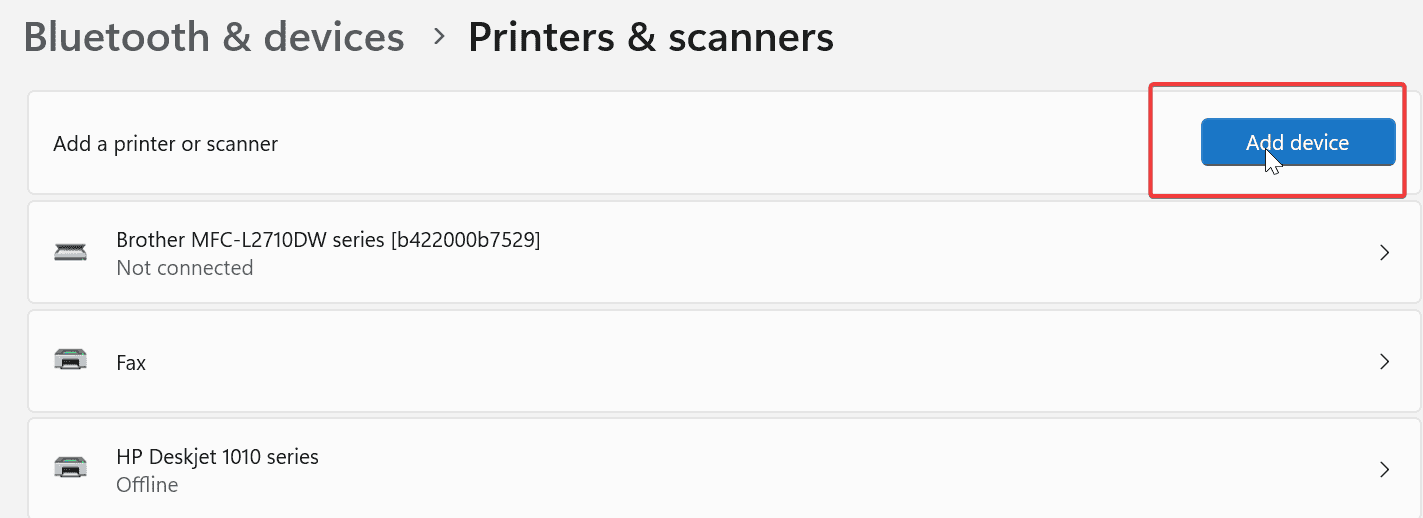
- Press Windows + I to open Settings.
- Go to Bluetooth & devices, click Printers & scanners.
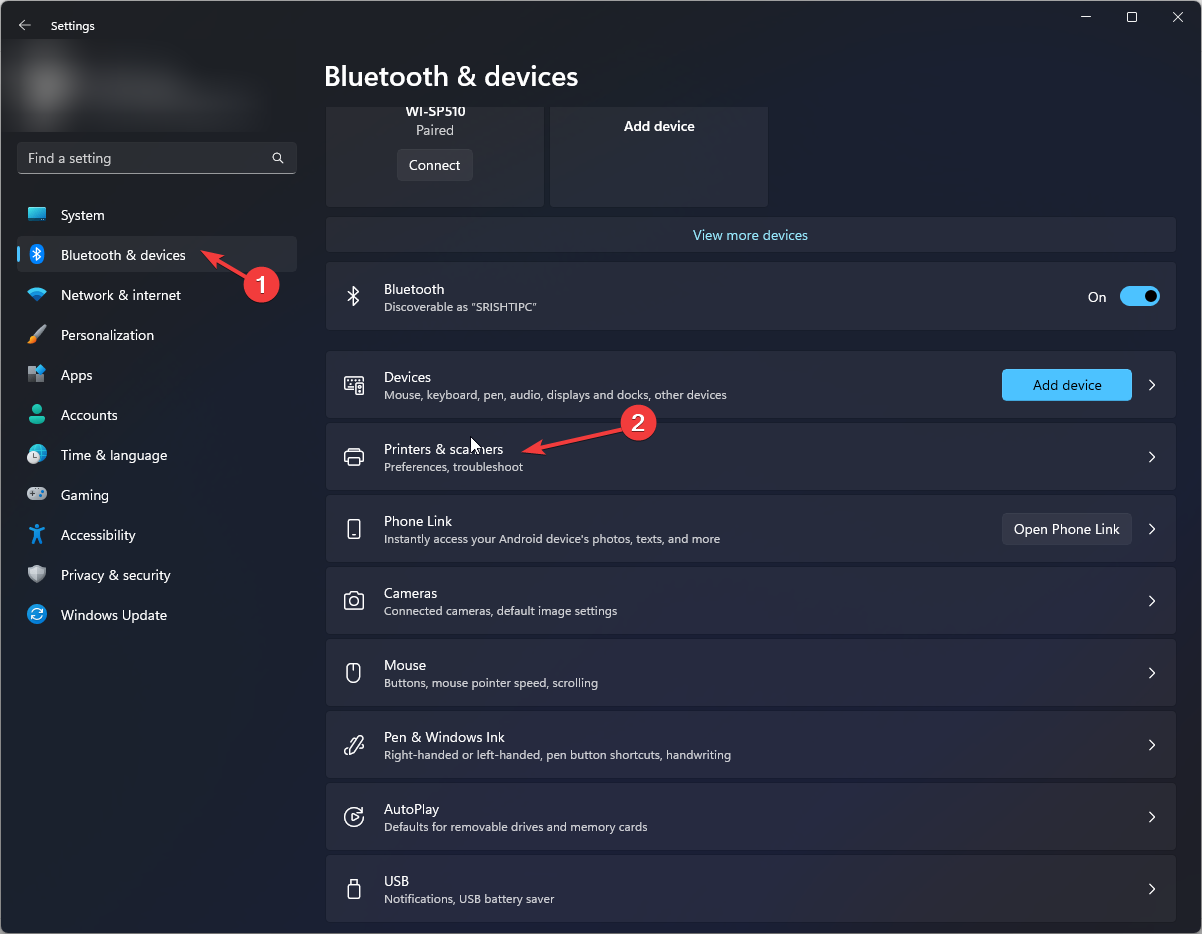
- Under Printer preferences, toggle off Let Windows manage my default printer option.
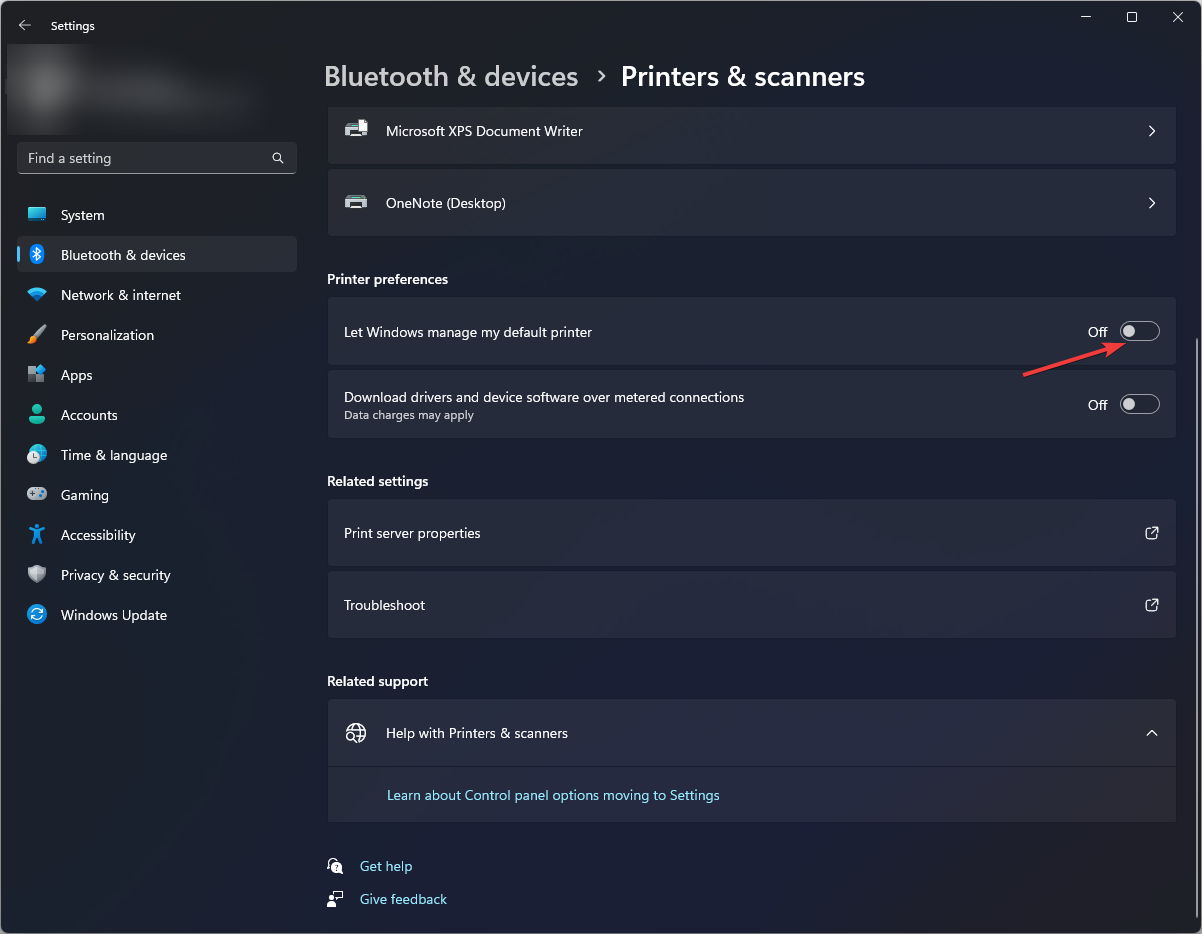
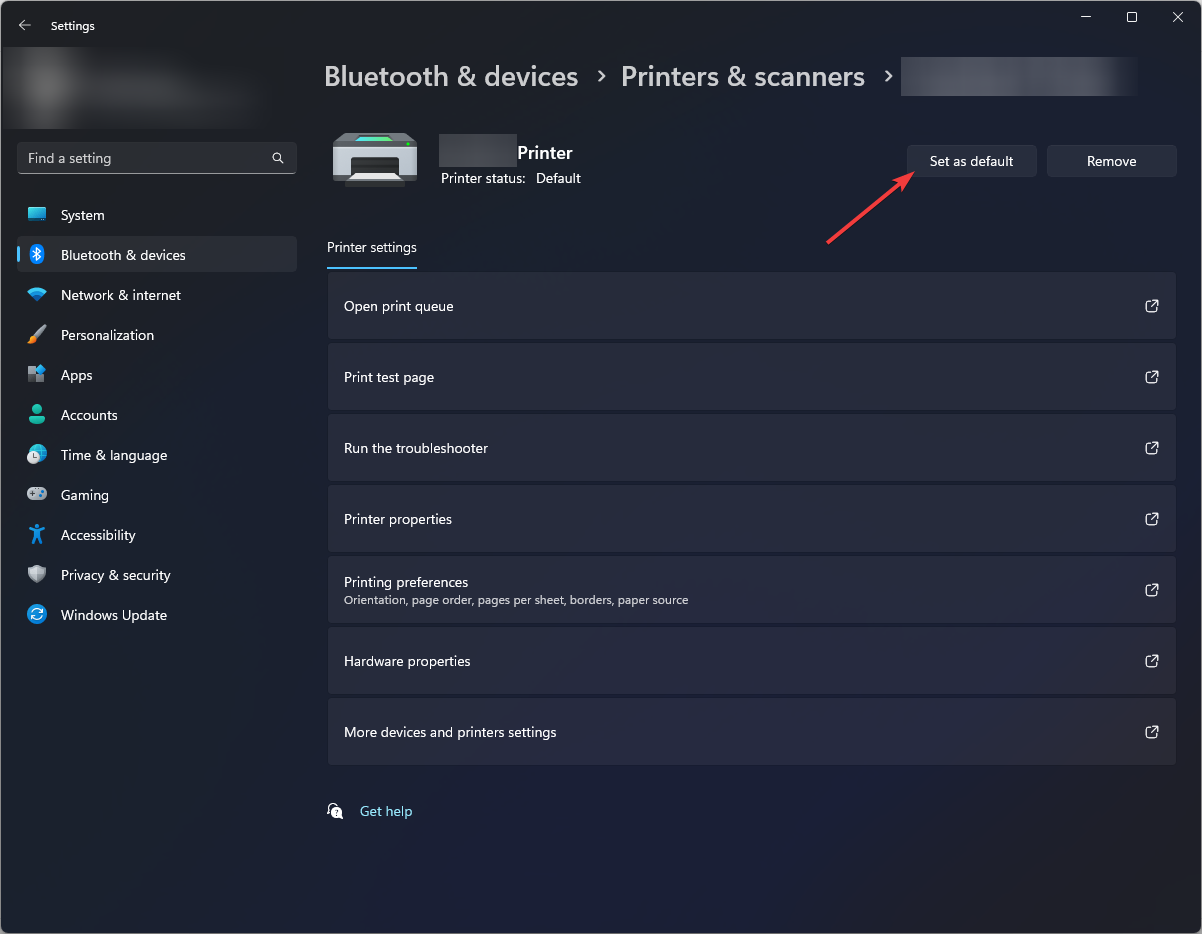
- Navigate to your printer, right-click it, and choose Set as default.
6.2 Configure Port
- Go to the printer again, right-click it and select Properties.
- Switch to the Ports tab on the properties window.
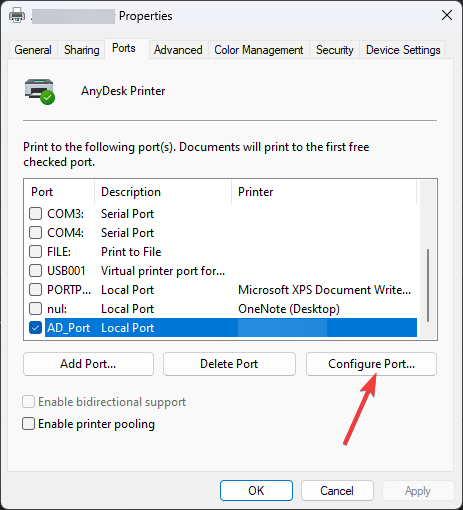
- Look for a port compatible with your printer, select it, and click Configure port.
- Click Apply and OK.
7. Add printer manually
- Press Win + I to Go to Settings:
- Click on Bluetooth & devices.
- Select Printers & scanners.

- Click the Add device button next to Add a printer or scanner.
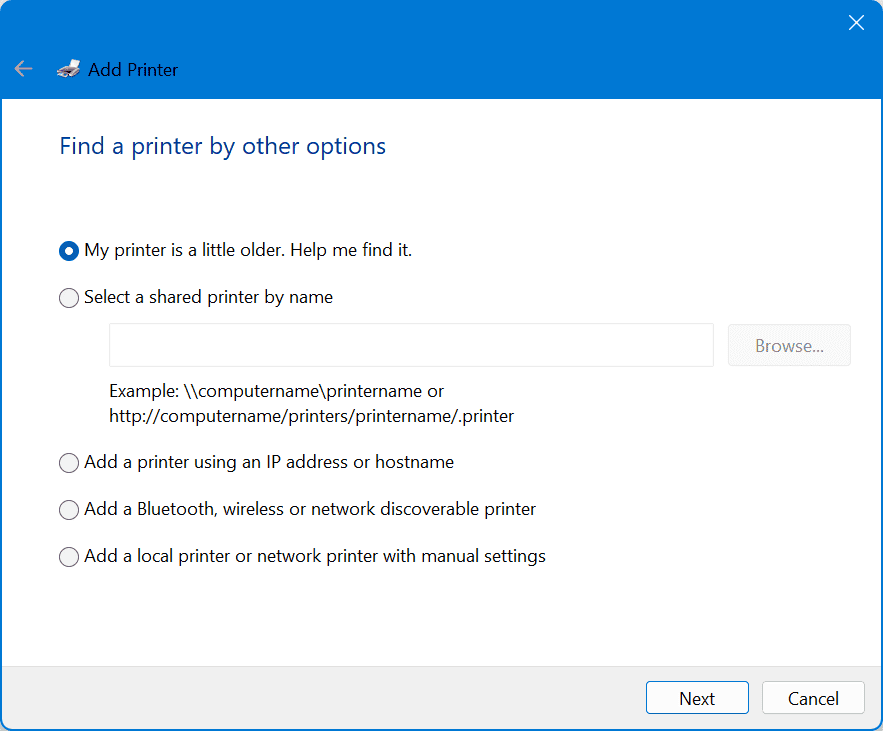
- Select the Add manually option next to The printer that I want isn’t listed.
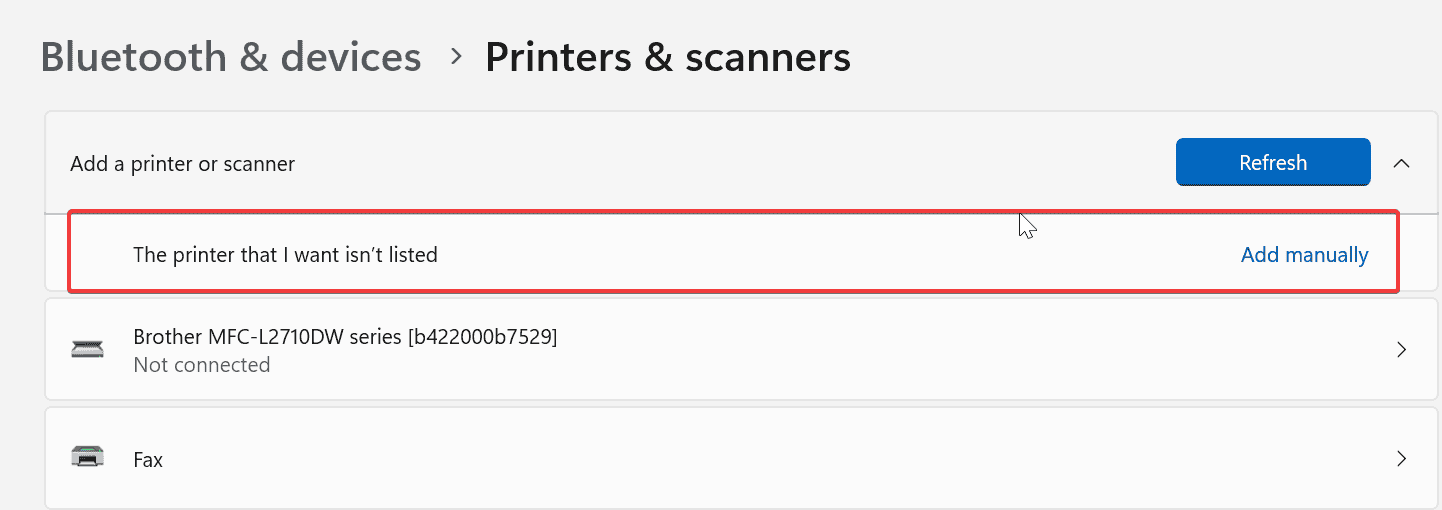
- Follow the on-screen instructions to add the printer manually.
What causes the Windows 11 can’t find printer error?
There could be several reasons for Windows not being able to identify your printer, some of the popular ones:
- Outdated printer driver – If you have not updated your printer driver in a while, it could be the reason for the issue. To get rid of this, update the drivers.
- Windows update – If the Windows update on your computer is pending, or you have installed a bad update, you may get this problem. Check for updates if available or remove the previous update to fix it.
- Security software interference – If your antivirus is conflicting, then your printer might not be able to get detected. Try to disable the antivirus temporarily and check if it fixes the issue.
- Printer not connected to the network – If your printer is not connected to your computer or network, you may find it difficult to connect. To fix this, check the cables and network settings.
- Network connectivity issues – If you have a weak internet connection, you might face this problem. To resolve this, you need to reset the network or contact your ISP.
So, the steps you need to follow to fix Windows 11 can’t find printer issue. Please, let us know in the comments section below if you have any questions or concerns.
Read our disclosure page to find out how can you help Windows Report sustain the editorial team. Read more


Improve this guide


User forum
1 messages