How to Enable or Disable Password After Sleep in Windows 11
You can use either the Windows Terminal to adjust these settings
4 min. read
Updated on
Read our disclosure page to find out how can you help Windows Report sustain the editorial team Read more
Key notes
- It's easy to disable or enable passwords after sleep on Windows 11, and this guide will provide the necessary step-by-step instructions.
- You can change the wake-up behavior of your system via the Command Prompt and elevated Windows Terminal.
- There is also a simple way to enable or disable passwords when your PC wakes from sleep through Settings.
Sign-in on wake means the system requires you to sign in with your login password when it wakes from sleep mode. Hence, we’ll take you through how to enable or disable Windows 11 passwords after sleep.
Can I change the sleep settings on Windows 11?
Sleep mode in Windows PC is a power-saving state that stops all actions and program activities on the computer. It allows the system to save power by moving running services and open applications to the system memory (RAM).
However, Windows users can change their PC’s sleep settings to suit their preferences. Settings include how long you want the system to wait before going to sleep when you’re not using it and what shortcuts to put your device to sleep.
How do I turn off login after sleep in Windows 11?
1. Use the Settings app
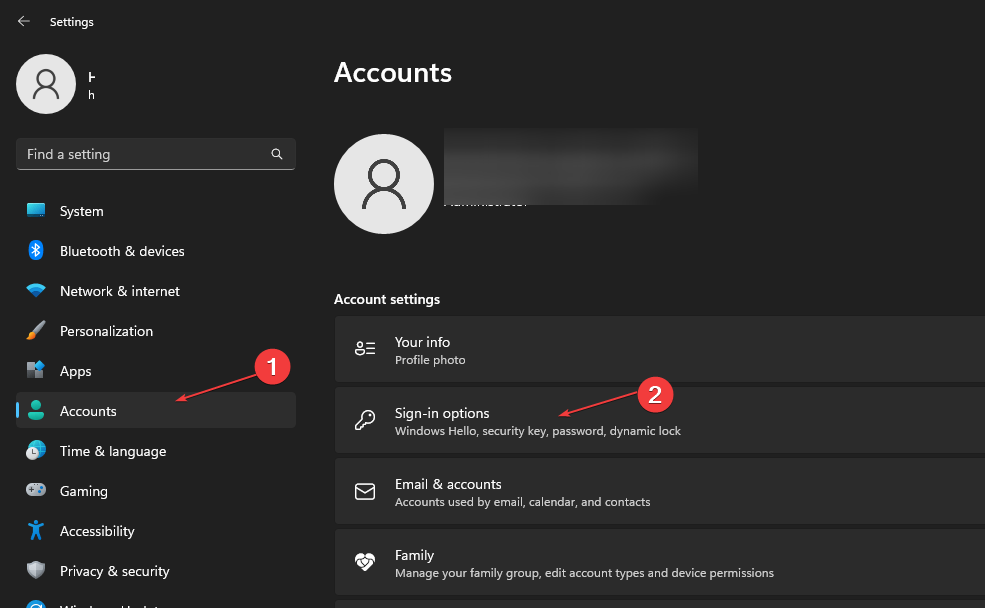
- Press Windows + I to open the Windows Settings app.
- Click on Accounts from the left pane and select Sign-in Options from the right-hand side of the screen.
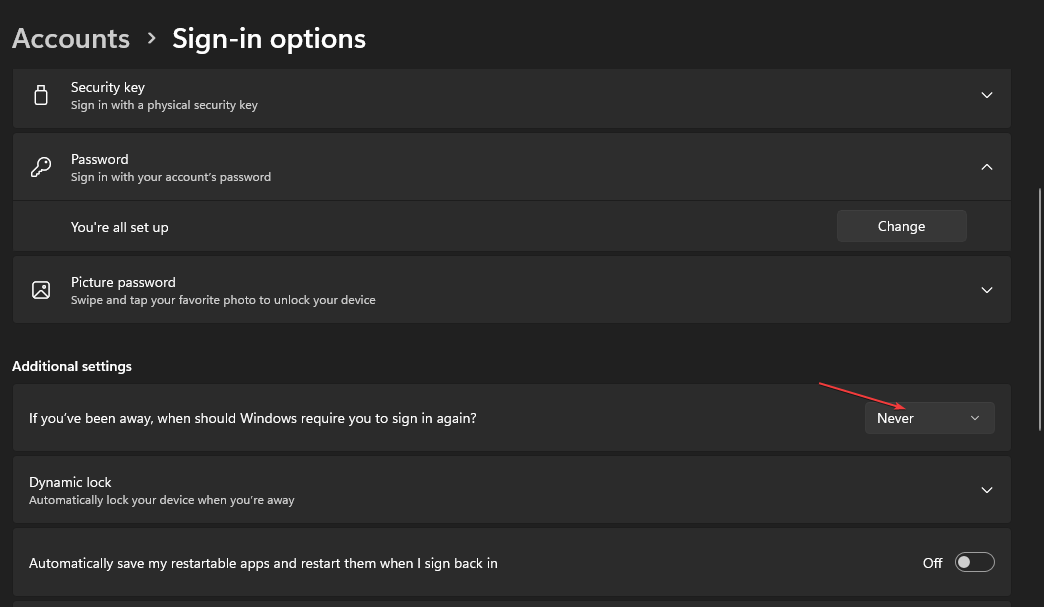
- Click the drop-down button for If you’ve been away, when should Windows require you to sign in again? option and select Never.
- Apply the changes and put the new settings to the test by putting your system on Sleep mode.
The above steps show how to disable or enable passwords after sleep on Windows 11 without tweaking any advanced directory. Read what to do if the Settings app won’t launch on Windows 11.
2. Use Windows Terminal
- Press Windows + R key to open the Run dialog box, type wt in the text bar, and then press Ctrl + Shift + Enter to open an elevated Windows Terminal.
- Click Yes when prompted by the User Account Control (UAC).
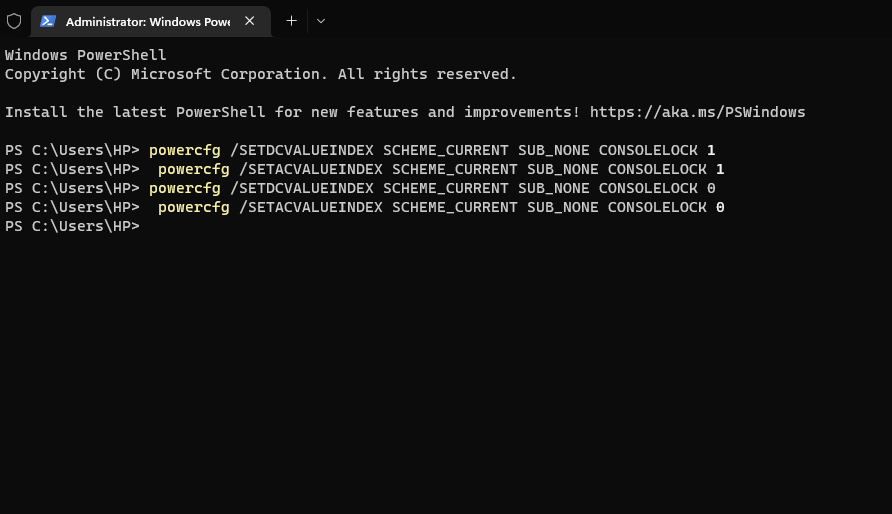
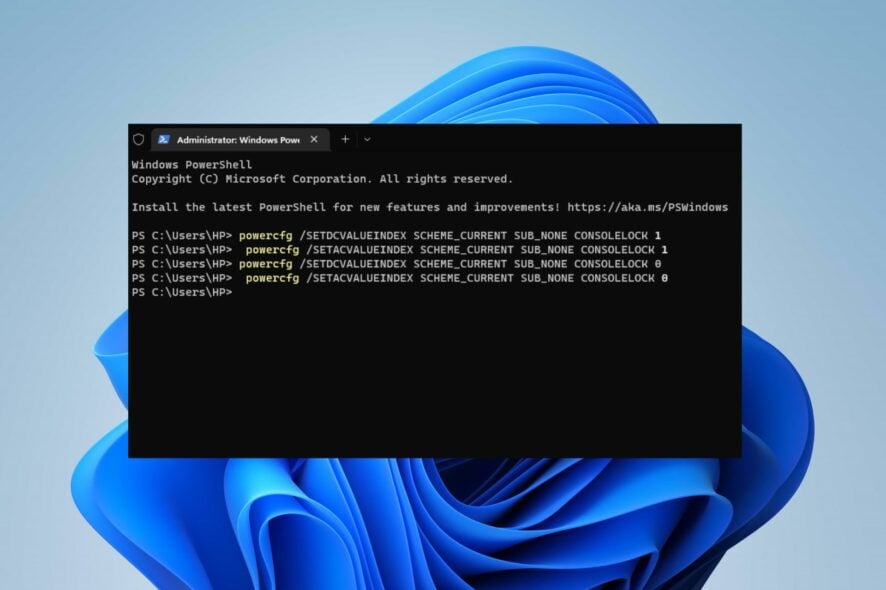
- To enable the password whenever your system wakes from sleep, copy and paste the following commands and press Enter:
- On Battery:
powercfg /SETDCVALUEINDEX SCHEME_CURRENT SUB_NONE CONSOLELOCK 1 - Plugged in:
powercfg /SETACVALUEINDEX SCHEME_CURRENT SUB_NONE CONSOLELOCK 1
- On Battery:
- To disable the password whenever your system wakes from sleep:
- Close the elevated Windows Terminal and put your system in sleep mode to check if the command is effective.
Running those commands in the Windows Terminal will either disable or enable the password after sleep on Windows 11. Check what to do if Windows 11 monitor won’t go to sleep.
3. Use Command Prompt
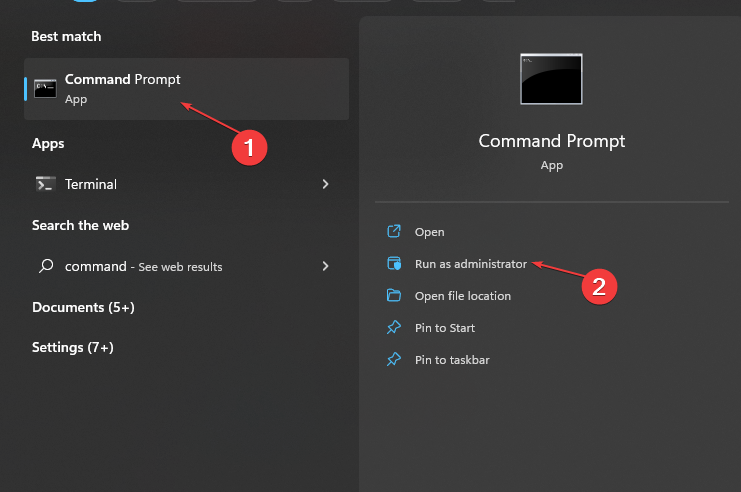
- Press Windows + R key to open the Run dialog box, type cmd, then click on Run as administrator to open Command Prompt with full privileges.
- Type the following into the Command Prompt depending on what you want to do, and press Enter:
- Disable password when you wake your system sleep on battery:
powercfg /SETDCVALUEINDEX SCHEME_CURRENT SUB_NONE CONSOLELOCK 0 - Disable password when you wake your system sleep when the system is charging:
powercfg /SETACVALUEINDEX SCHEME_CURRENT SUB_NONE CONSOLELOCK 0 - Enable password when you wake your system sleep on battery:
powercfg /SETDCVALUEINDEX SCHEME_CURRENT SUB_NONE CONSOLELOCK 1 - Enable password when you wake your system sleep when the system is charging:
powercfg /SETACVALUEINDEX SCHEME_CURRENT SUB_NONE CONSOLELOCK 1
- Disable password when you wake your system sleep on battery:
- Close the Command Prompt and restart your PC.
This solution will help you disable password on wakeup in Windows 11. Check how to personalize Command Prompt in Windows 11.
4. Use the Registry Editor
- Press Windows + R key to open the Run dialog box, type regedit, then press Ctrl + Shift + Enter to open the elevated Registry Editor.
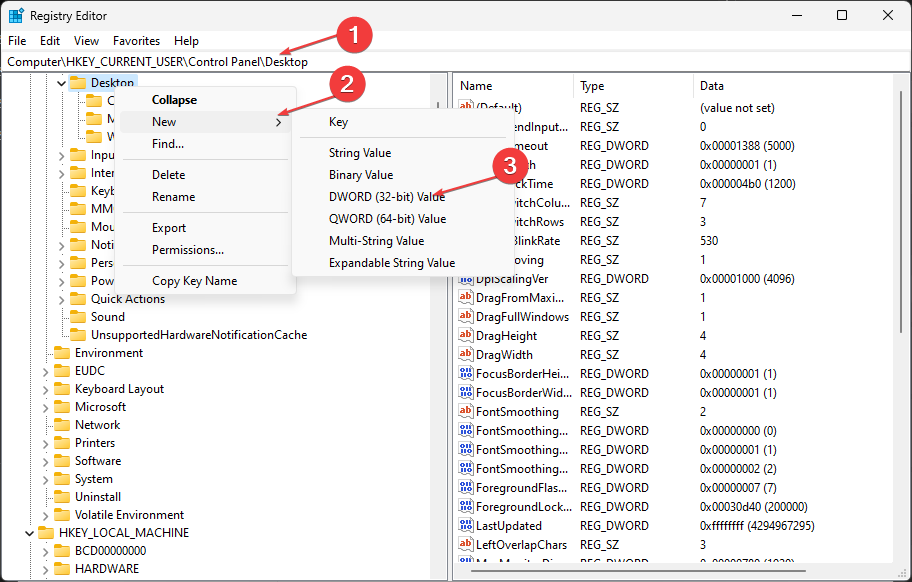
- Navigate to the following location:
HKEY_CURRENT_USER\Control Panel\Desktop - Right-click on the Desktop registry key and choose New from the drop-down, then Dword (32-bit Value) from the new menu that appears.
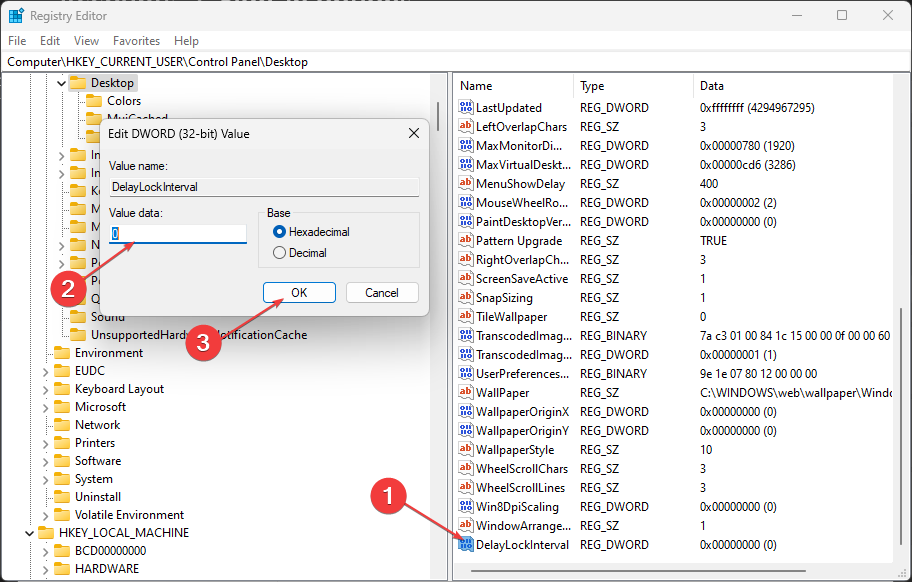
- On the right pane, type DelayLockInterval as the name of the new DWORD value.
- Double-click on the newly created DWORD value DelayLockInterval and set the Value data to 0.
- Close the Elevated Registry Editor, then restart your PC to allow the changes to take effect.
Tweaking the Registry Editor will change the wake preference of the system.
Also, you can read our article about Windows PC waking from sleep by itself for steps to fix it.
Further, you may check the steps to fix a computer going to sleep too quickly on Windows 11. Likewise, we have a guide about how to find the Sleep Button on a Windows PC.
In conclusion, you should be able to disable password after sleep on Windows 11 with the steps above. If you have further questions or suggestions, kindly drop them below in the comments section.

