How to Change Sleep Setting in Windows 7
Change Sleep settings on Windows 7 right from Control Panel
Key notes
- The sleep mode in Windows 7 is valuable for keeping your system cool when you need to take a break from work.
- The option cuts the power to your monitor and hard drive and pauses all functions until you wake up your PC.
Some users claim they’ve forgotten how to change the sleep setting in Windows 7. If you’re one, worry less, as we’ve got you covered.
If you don’t have issues with PC not staying in Sleep Mode, keep on reading to find out how to properly adjust the sleep settings.
What is the Sleep Mode on Windows?
The Sleep Mode on Windows is a valuable part controlled by the system’s display driver, which allows users to put their computer in low-power mode. It allows them to get back where they left it exactly.
Here are the benefits of Sleep Mode are:
- For laptop users, it helps to conserve the battery.
- For PC and laptops, it helps prevent burn-in for the monitor screen.
- The Sleep Mode allows you to grant your system a respite.
- For people whose system overheats, the Sleep Mode helps to cool off your system without losing the progress of your work.
- Whether you have a laptop, desktop, or workstation, switching to Sleep Mode on your computer will reduce your electric cost and help you save money.
You can use the change sleep setting in Windows 7 to enjoy the above benefits.
How do I change the sleep settings in Windows 7?
1. Edit Power plan settings
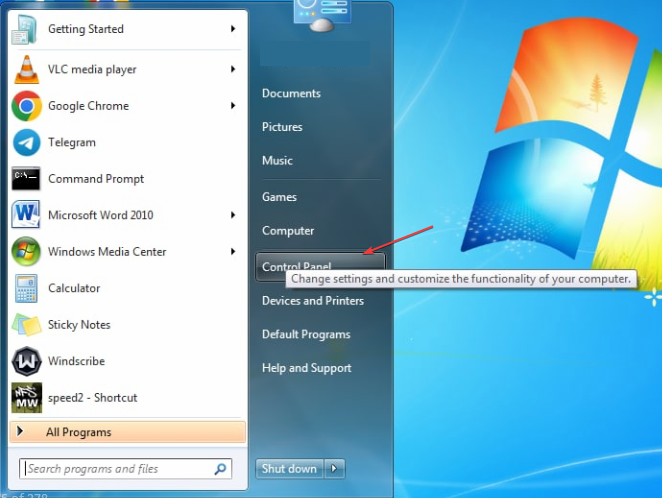
- Click on Start on your Taskbar, type Control panel, and launch it.
- Select the Power Options icon.
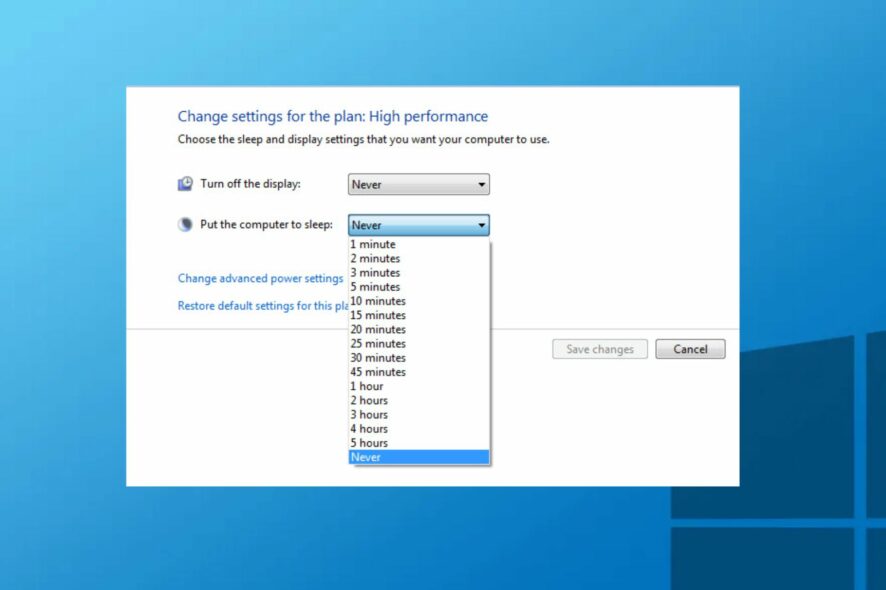
- Click on Change plan settings next to your power plan.
- Next, under the Put the computer to sleep settings, choose how long you want the PC to wait before going to sleep while on battery power, and when plugged in.
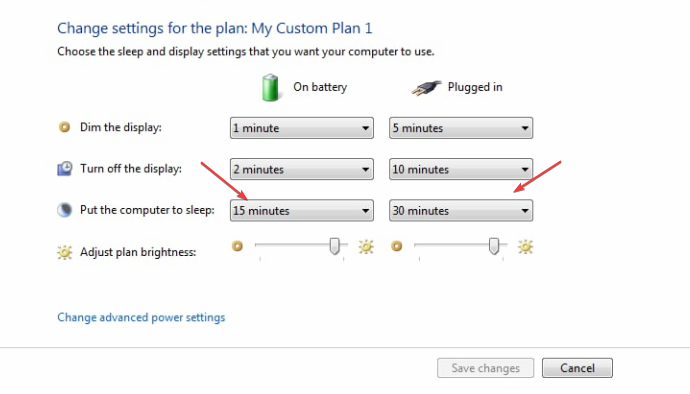
- Then select Save changes.
Once you’ve saved the changes made, whenever your computer stays idle for the long time that you set it at, it goes to sleep. This makes your computer sleep automatically so that power can be saved.
2. Via the Command Prompt
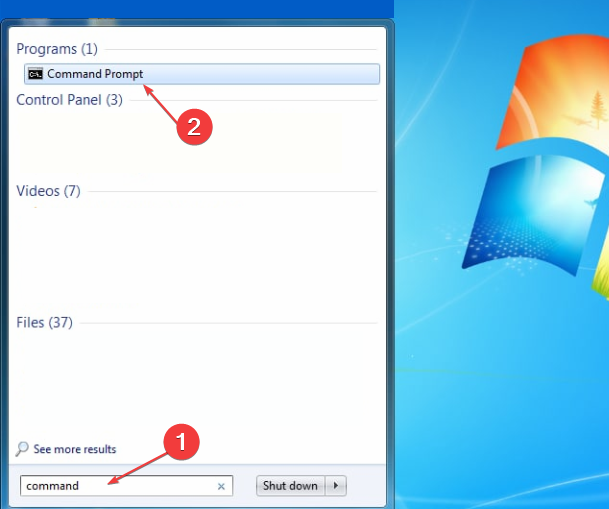
- Left-click Start and type command in the text box, and open it.
- Run the following command to show the devices that can wake the computer:
Powercfg -devicequery wake_armed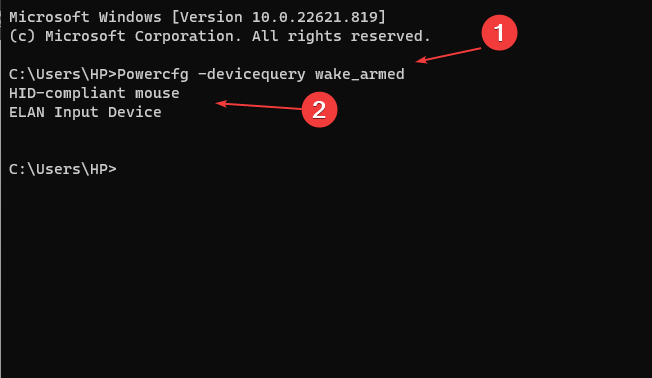
- Then run the following command and press Enter:
Powercfg -devicedisablewake devicename
If the issue is not resolved, run the following command to enable the disabled device: Powercfg -deviceenablewake devicename
3. Force your Windows 7 to Sleep Mode
The power button or a keyboard shortcut can put your Windows 7 computer into Sleep Mode if it doesn’t do so automatically.
Using the Alt + F4 keyboard shortcut you can put Windows 7 to sleep. A single press of the power button will put it into Sleep Mode depending on your settings.
If your computer turns off instead of entering Sleep mode, you check our article on how to fix the issue.
And that’s it on how to change sleep settings in Windows 7 and the benefits of doing so. You can also check our article on how to fix Sleep Mode on Windows 10 for other relative information.
If you have any questions or suggestions, do not hesitate to comment below.
Read our disclosure page to find out how can you help Windows Report sustain the editorial team. Read more


Improve this guide


User forum
0 messages