Printer is Greyed Out? How to Fix it in 7 Steps
Printers greyed out is no longer an unfixable problem
![]() 5 min. read
5 min. read
![]() Updated on
Updated on
Share this article

Improve this guide
Read our disclosure page to find out how can you help Windows Report sustain the editorial team Read more
Key notes
- Windows 11 users may not be able to print because of the device greyed-out issue on the printer list.
- Connectivity problem or incompatible drive is the most common reason behind this issue.
- You should make sure the printer is connected properly and then follow the methods from this article to solve the problem.
Are Windows 11 printers greyed out on your computer? Since you want to overcome this situation, this article will help with the most effective solutions.
This OS comes with excellent compatibility with modern devices, particularly printers. Windows 11 users may encounter many types of printer problems.
However, you may notice that you are not being able to print anything suddenly. This is one of the most common issues.
While investigating, you may end up finding that the printer you are going to use is greyed out or offline. Even though this is not a new problem, many Windows 11 users have been encountering it and are unable to fix this issue.
Why are all my printers greyed out in Windows 11?
Your printers may be greyed out on Windows 11 or 10 for the following reasons:
- The printer device was disabled
- Connection problem
- Incompatible printer driver
- Physical fault
Else, any external or internal issues also cause this problem.
Why is add printer greyed out?
Usually, the Add printer button should be available at all times. But, if any modification by the computer administrator happens, that may prevent you from adding printers.
Another thing is if any relevant service related to the printers is disabled, you may find that the Add printer button is not clickable. Else, corrupted system files can be another reason for this issue.
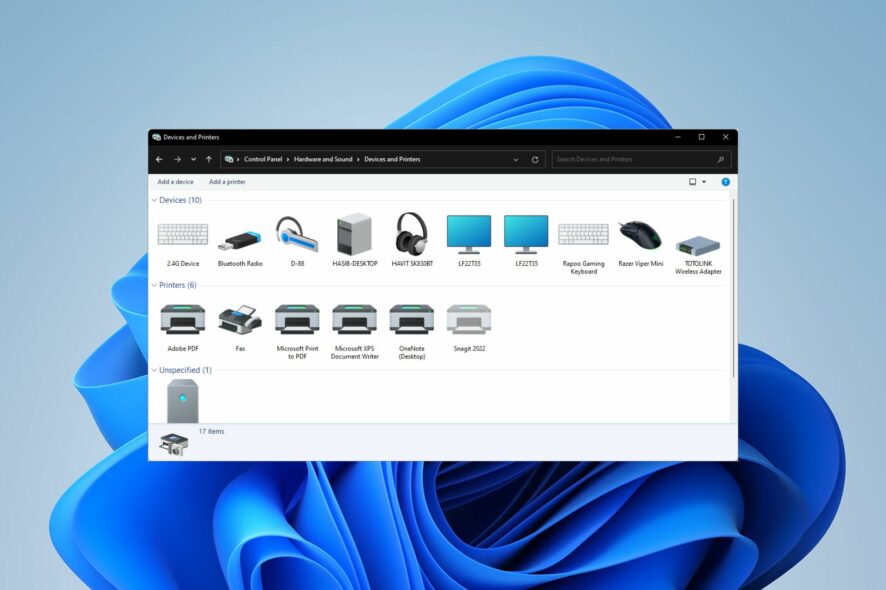
How do I fix my printer that is greyed out?
1. Check both physical and wireless connection
If it’s connected using a wire with your PC, you should make sure the printer is turned on and is connected to the correct port. If necessary, you should try another USB port to make sure everything is in the right state.
For the wireless printer, make sure both your PC and the printer are connected to the same local network.
2. Make sure the printer has been shared correctly
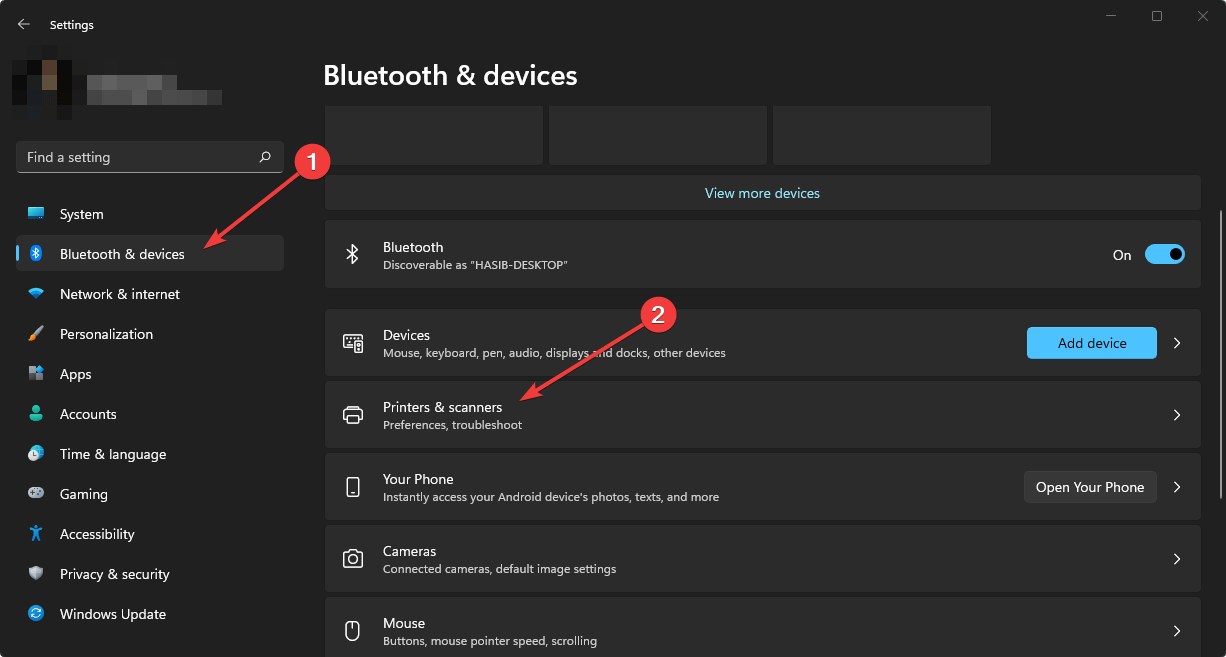
- Press Win + I on the keyboard to open Windows Settings.
- Click on Bluetooth & devices and then on Printers & scanners.

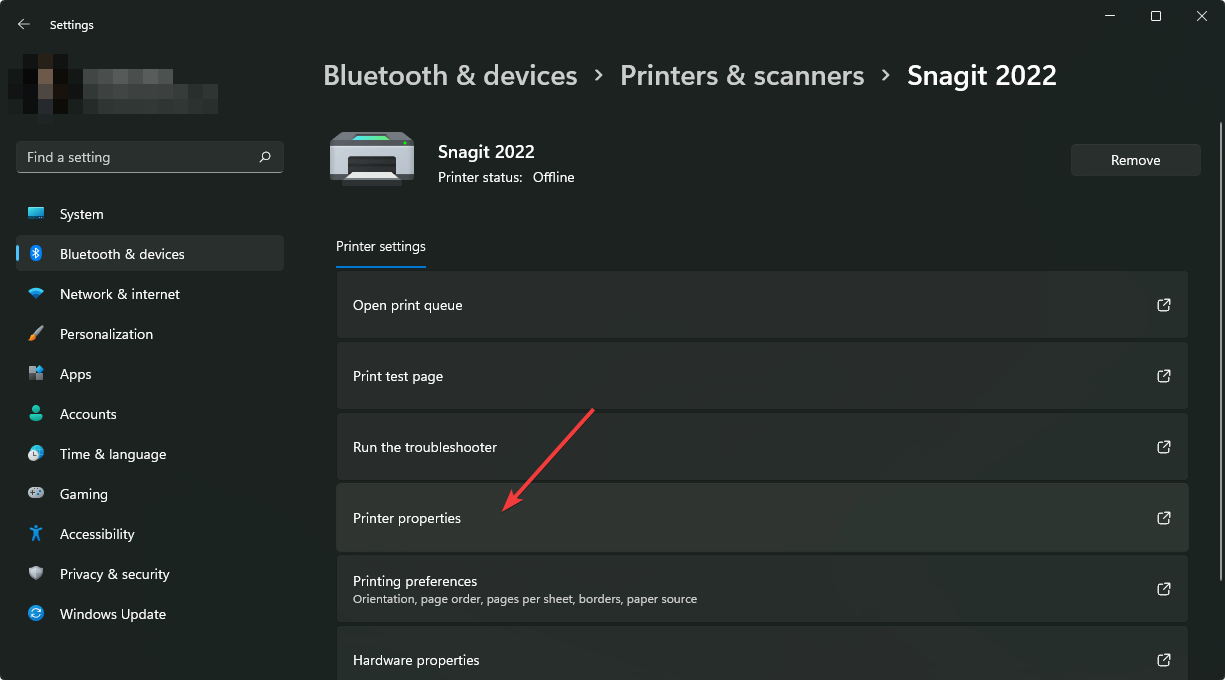
- Go to the printer you want to share.
- Click on Printer properties.

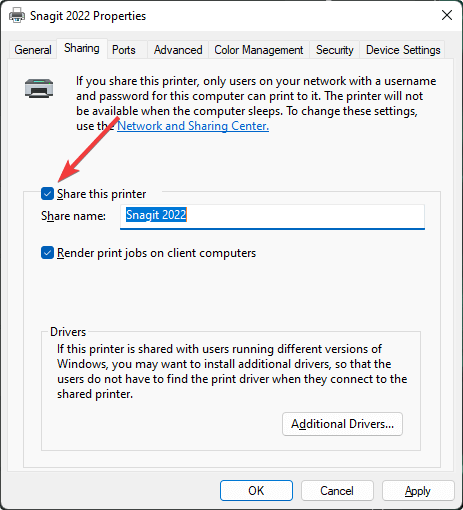
- Go to Sharing tab.
- Click on Change Sharing Options.
- Tick Share this printer.


If it’s a printer shared from another computer, you must verify that it has been shared correctly. If there is a printer sharing problem on Windows 11/10, on another computer, the printer may appear as greyed out.
You should make sure that there are no such problems. Otherwise, no other solutions will fix the Windows 11 printer’s greyed out problem.
To make sure you have shared the printer correctly, do the following things from another PC where the printer is connected.
Now, if the problematic device is connected to the same local network, the offline or greyed-out issue should no longer appear.
If you face a problem while following the above steps, learn how to fix printer sharing not working issues on Windows 11.
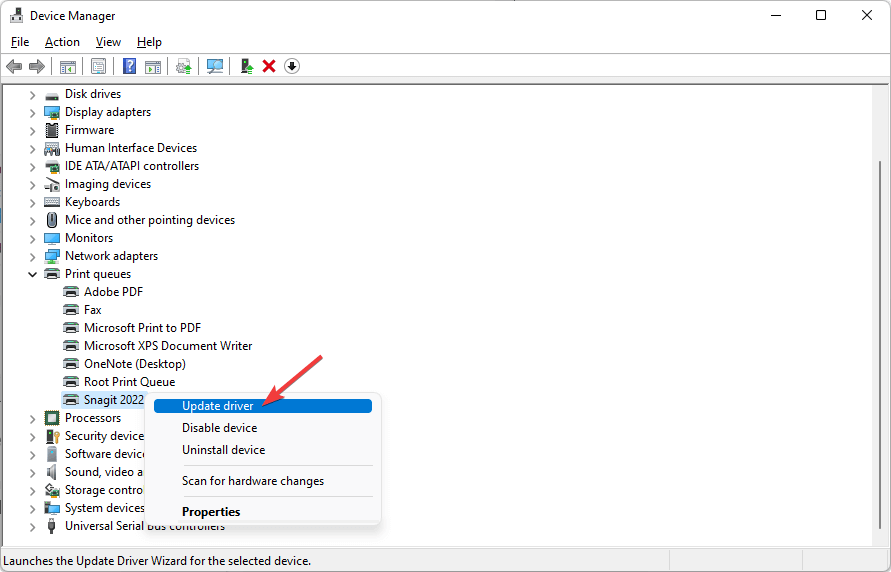
3. Update the printer driver
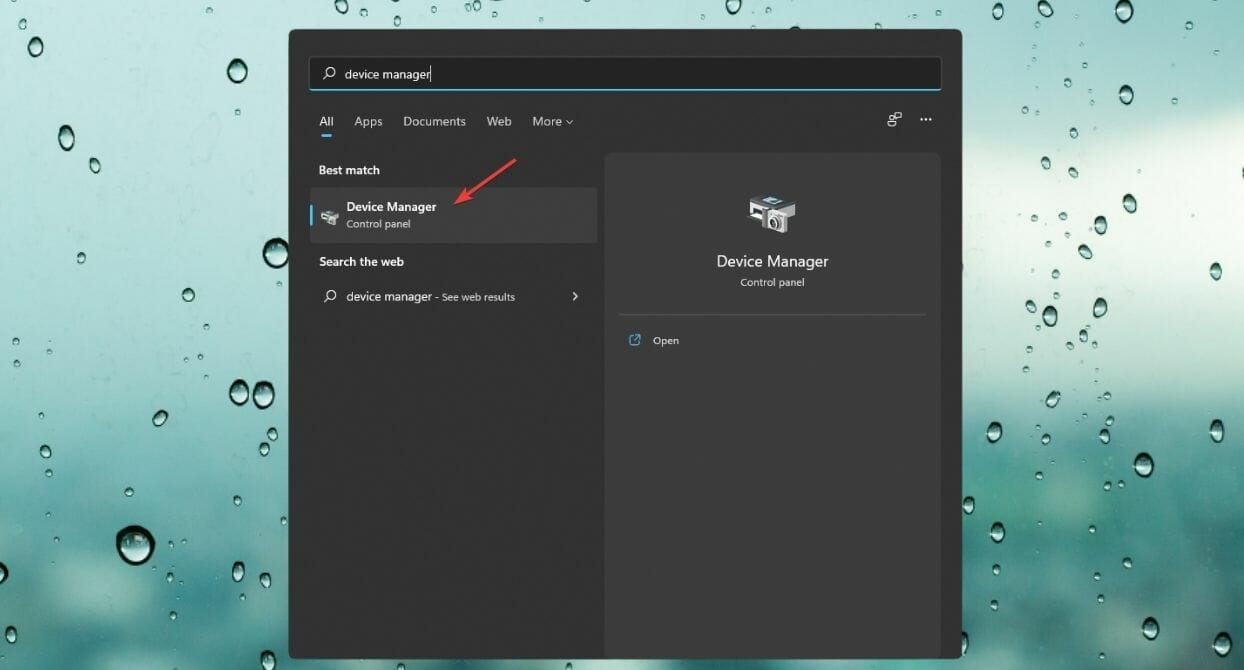
- Open the Start Menu, type device manager, and hit Enter to open it.

- Find the printer driver, right-click on it and choose Update driver device.

- Follow onscreen instructions to complete the update.
Alternatively, you can use a tool that will scan your computer, find all outdated drivers and automatically update them. By using third-party software, you ensure that the installation will be safer and faster.
- Download and install the Outbyte Driver Updater app.
- Launch the software and wait for the app to detect all incompatible drivers.
- Now, it will show you a list of all outdated drivers to select the ones to Update or Ignore.

- Click on Update & Apply Selected to download and install the latest versions.
- Restart your PC to ensure the applied changes.


Outbyte Driver Updater
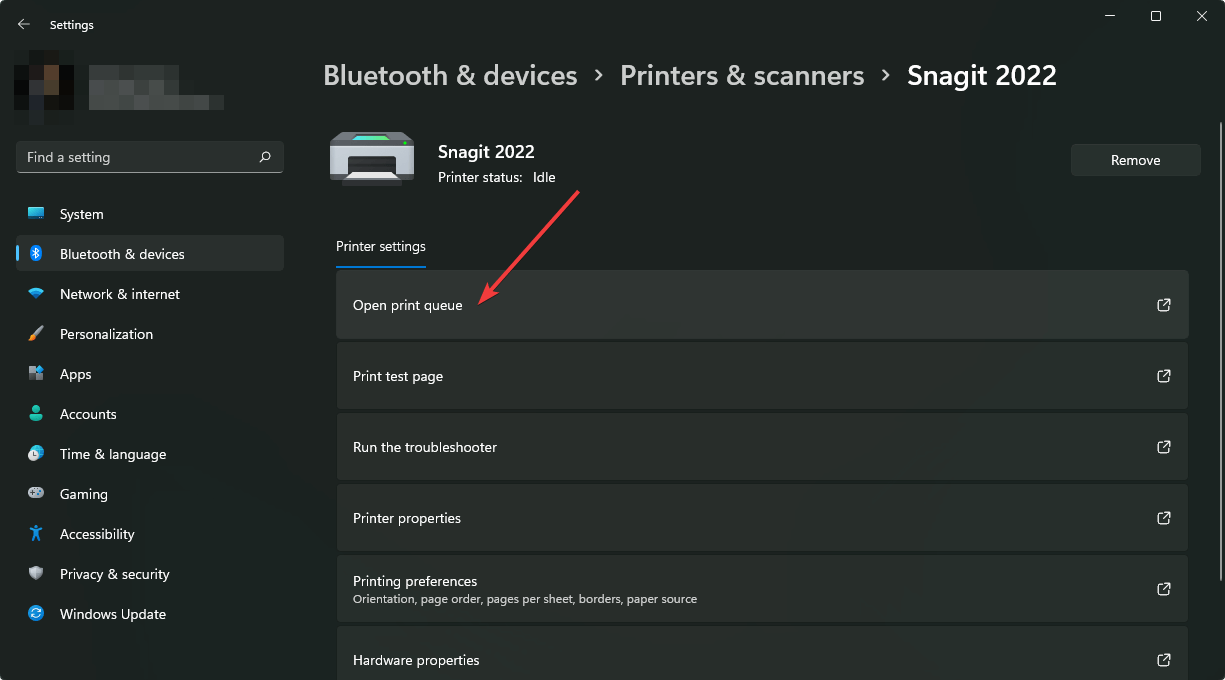
Maintain your device healthy by letting OutByte Driver Updater find the latest driver options.4. Enable offline printing
- Go to your preferred printer settings like before.
- Click on Open print queue.
- Click on Printer from the menu and select Use printer offline.

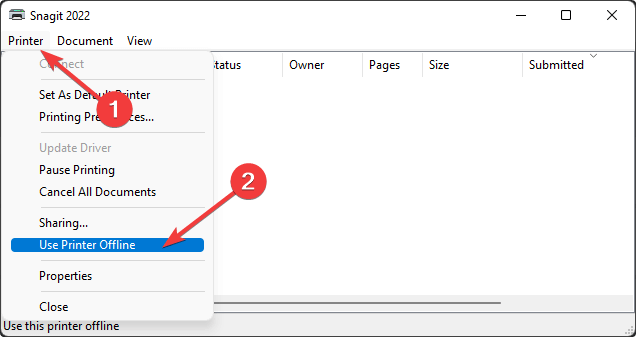
Now, check and verify if it has solved your problem or not.
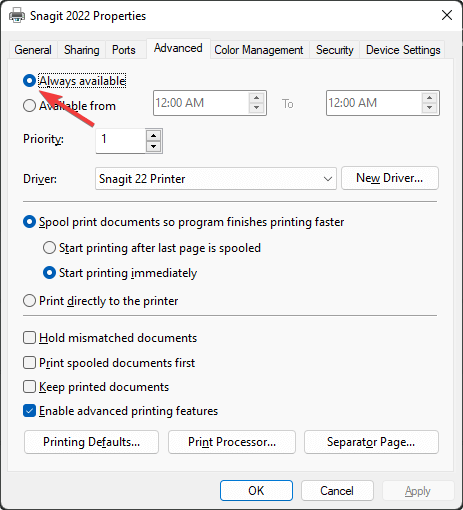
5. Make printer available for all time
- As shown in method 2, go to Printer Properties.
- Go to the Advanced tab.
- Check Always available.
- Click on Apply and OK.
6. Re-install the printer
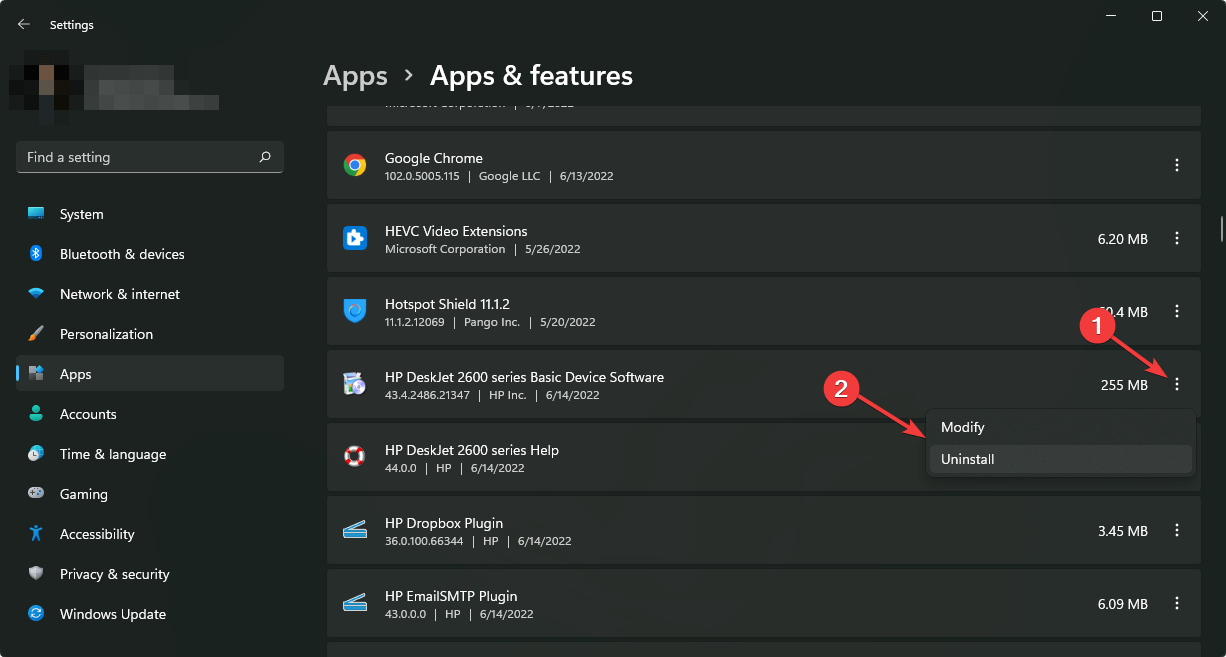
6.1 Uninstall printer software
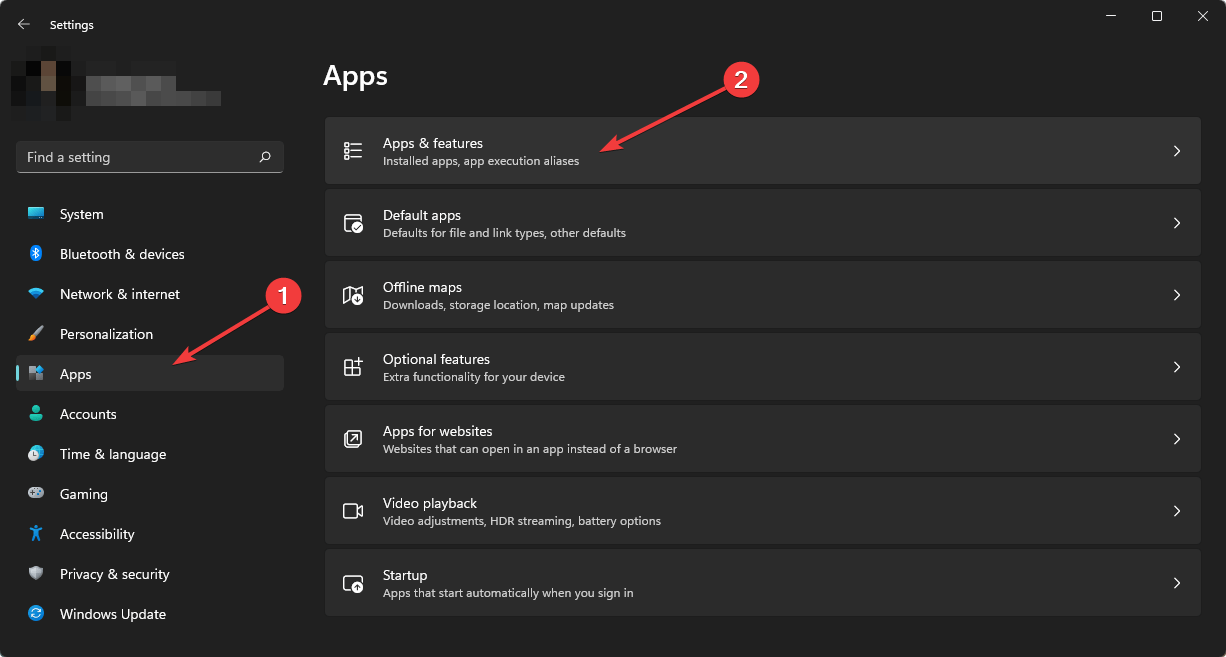
- Open Windows Settings.
- Go to Apps and click on Apps & features.
- Search for the printer software.
- Click on the three vertical dots and choose Uninstall.
6.2 Uninstall printer driver
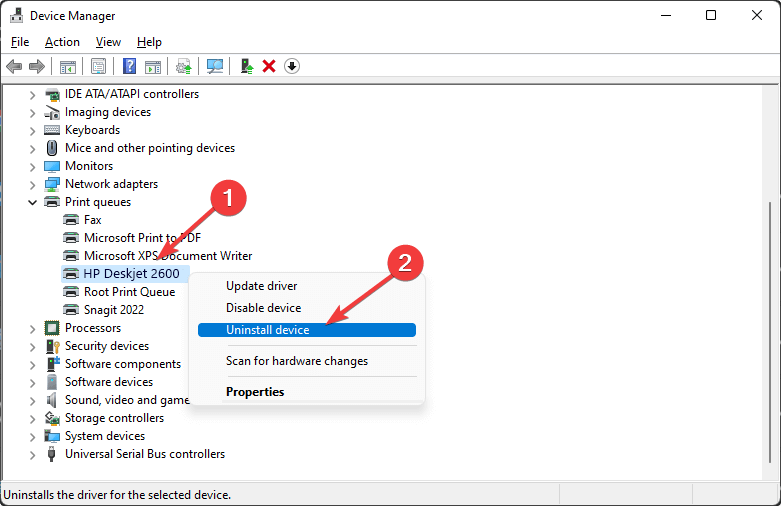
- Open the Device Manager like before.
- Find the HP printer, right-click on it and choose Uninstall device.

- Check Attempt to remove the driver for this device and click on Uninstall.
6.3 Delete the printer
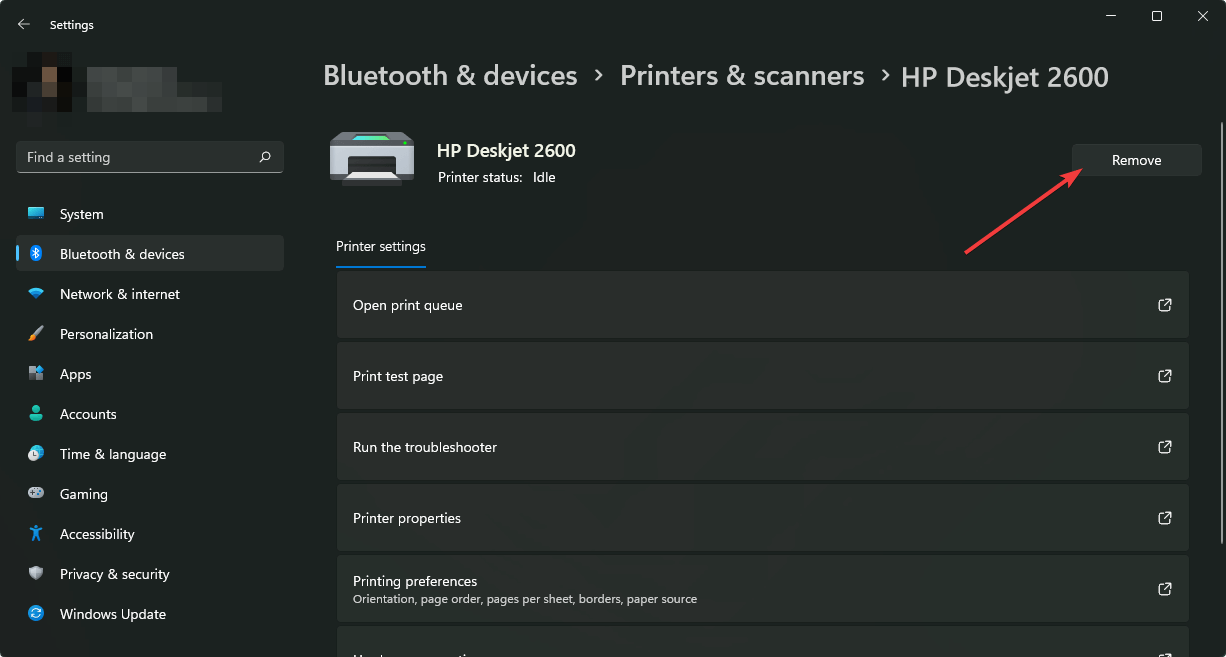
- Go to Printers & scanners like before.
- Click on your preferred printer.
- Next, click on Remove.
- Do this for any other printers one by one.
- Restart your computer.
6.4 Install again
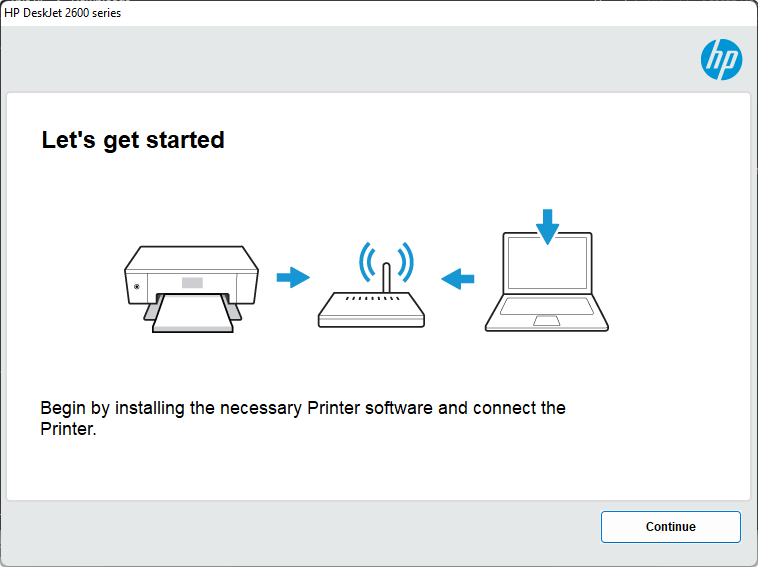
- Download the official printer software from the printer manufacturer’s website.
- Install it on your computer.

If you notice that the printer greyed out issue has appeared, update installing the new driver, you may consider using an old driver software and see if it helps.
7. Check for hardware fault
If you are unlucky, the problem may be related to the hardware. So, make sure the printer you are trying to use is in good condition and doesn’t have any physical damage.
If a physical problem exists, trying out the above solutions, including inserting printer cables in different ports, etc., will not help, and there will still be the greyed-out issue on Windows 11/10.
You can connect it to another PC and see if it works there or not. In this way, you can understand the actual issue. If you see the printer has physical damage, repair it or buy a new one.
Do all printers work with Windows 11?
Yes. All modern printers work with Windows 11 without any problem. However, if you have a very old printer that reached its end of the software support life cycle years ago, it may or may not work with this OS.
These are the most working ways to fix the Windows 11 printers greyed out problem. If you know any better method, feel free to let us know in the comment box.