2 Quick Ways to Disable Search Highlights on Windows 11
Learn to toggle this feature on and off with a few clicks
Key notes
- Windows 11 Search Highlights is an impressive system functionality that allows you to capture the most notable moments.
- In order to take advantage of this feature, you'll need to run specific Windows builds.
- If you want to disable Windows 11 Search Highlights, keep in mind that you can easily do it through the main Settings menu.
![How to disable Windows 11 Search Highlights [Quick Guide]](https://windowsreport.com/wp-content/uploads/2022/03/Untitled-design-2022-03-22T115234.611-1-2-886x590.jpg)
Microsoft producers released the new Search highlights feature for Windows 11. If you’re unsure what this is all about, remember that search highlights extend the operating system’s search functionality.
 NOTE
NOTE
In this matter, you can highlight anything special about users’ moments, like impressive moments of the day or organization content.
So, all of these excite us because it lets users learn about significant events around them, on the Internet, in the world, and in your organization.
The feature includes notable moments such as holidays, anniversaries, and other educational moments. This happens both globally and in your region.
However, it can also become a distraction and clutters the useful Search interface. In this matter, some users seem to be interested in discovering how to disable Windows 11 Search Highlights.
How can I disable Windows 11 Search Highlights?
1. From Windows Settings
1. Press the Windows + I keyboard shortcut to open Windows Settings.
2. From the left window pane, click on Privacy & security.
3. Scroll down until you reach the Search permissions section. Click on it.
4. Under More Settings, you can see a toggle next to Show search highlights. Toggle it off.
5. That’s it. Search Highlights are now turned off on your Windows 11 PC.
If you ever need to turn them back on, simple return to the same window and toggle the feature on with a simple click.
In Windows 11, Search Highlights is a feature that can be easily enabled or disabled via Windows Settings. All you need to do is navigate to the Show search highlights option and toggle it on or off, according to your preference.
2. Via Taskbar
- Right-click on an empty space on your taskbar. A context menu will appear.
- Hover over the Search option. A drop-down menu will open.
- Click on the Show search highlights option to toggle it off.
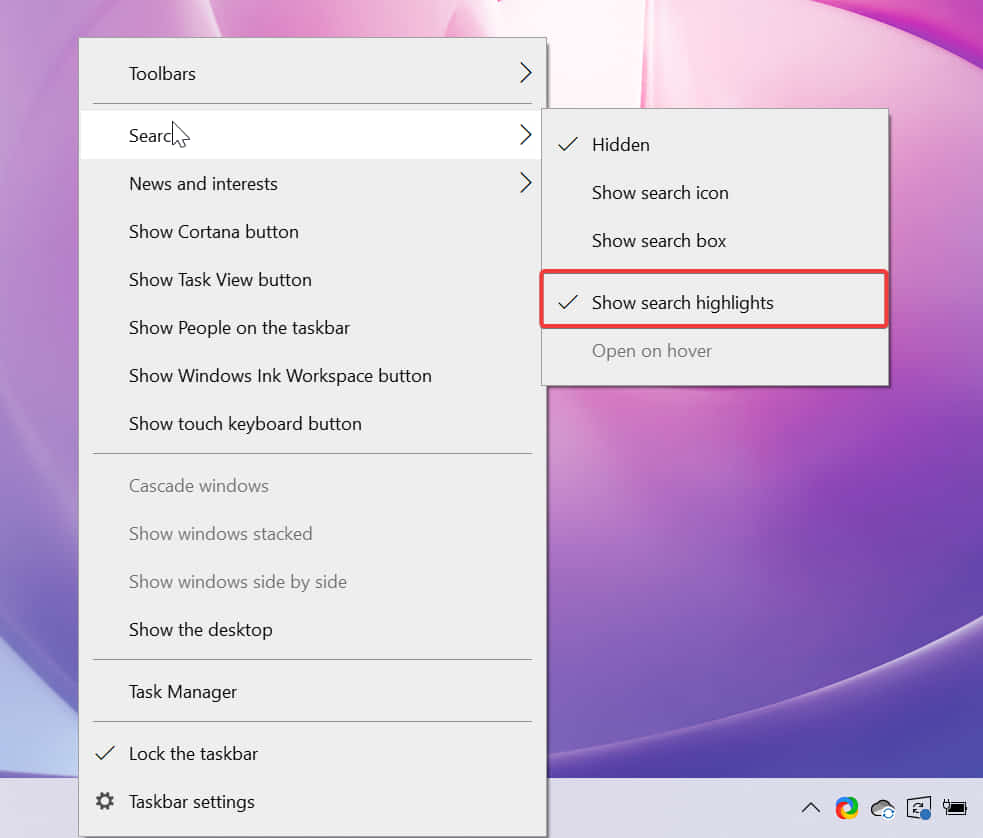
An even faster method to disable Search Highlights on your Windows 11 PC involves using your taskbar’s settings. From it, you can toggle the feature on and off in just three moves.
How do I turn off Search Highlights on Windows 10?
On Windows 10, you can use the same methods we previously described. You can choose whichever you prefer.
The fastest and easiest way to do it on Windows 10 is, once more, via the Taskbar by right-clicking on an empty space on it, opening the Search options, and then toggling Search Highlights off.
So, this is the guide that you’ll definitely need to save somewhere, just in case you ever need to disable Windows 11 Search Highlights quickly.
In case you don’t want the Search interface to be bloated with unwanted trending searches and information, these are the easiest steps to turn it off. In the same way, for a seamless search experience, try disabling trending searches on Google.
Microsoft is ready to bring some new impressive features to the latest OS. In this matter, we strongly recommend checking how to activate Windows 11 File Explorer tabs.
Are you facing any other related questions? Feel free to use the comment section below.
Read our disclosure page to find out how can you help Windows Report sustain the editorial team. Read more


Improve this guide


User forum
0 messages