Windows 11 Startup Folder Not Working? Fix it in 6 Steps
Key notes
- If the Window 11 startup folder is not working, your favorite apps won’t load at startup, and you will have to launch each of them manually.
- The problem could arise due to issues with the app itself, corrupt system files, misconfigured Registry, or if the concerned application does not have the required permissions.
- To fix the error, check the app settings, disable UAC (User Account Control) settings, manually add the app to the Startup folder, amongst other methods here.
We have all got certain apps that are booted along with the OS when the computer is turned on. And these are stored in the startup folder. But, you might encounter issues with them if the Windows 11 startup folder is not working.
The startup folder here contains just the shortcuts for the apps that you want to load when your turn on the system. Microsoft has now made adding or removing these simpler. So, instead of going to the folder, you can directly manage these from the Task Manager.
Though with the Windows 11 startup folder not working, things won’t be as smooth and you might experience issues. If that’s the case, go through the following sections to find out the most effective solutions.
Why is the Windows 11 startup folder not working?
One of the most important things, before you begin troubleshooting any error, is to find out what’s actually causing it. And once identify that, eliminating the error becomes a cakewalk.
The primary reason here is problems with the program itself. So, if an app has not been properly installed or some of its critical files are missing, it wouldn’t load at startup. Also, a misconfigured Registry too can cause issues with the startup apps.
Apart from that, issues with the UAC (User Account Control) may also lead to Windows 11 startup folder not working. This is because certain apps require administrative permissions and if these are not granted by the UAC due to issues, the app may fail to launch.
If you are able to identify the problem here, just head to the relevant fix and execute it. Otherwise, follow the steps in the listed sequence for quick troubleshooting.
What do I do if the Windows 11 startup folder is not working?
1. Verify if the app is meant to load at boot
- Press Ctrl + Shift + Esc to launch the Task Manager, and navigate to the Startup tab from the top.

- Locate the program that’s not loading along with the OS here, select it, and click on the Enable button, if it appears.

- Once done, restart the computer for the changes to come into effect and check if the app now loads at boot.

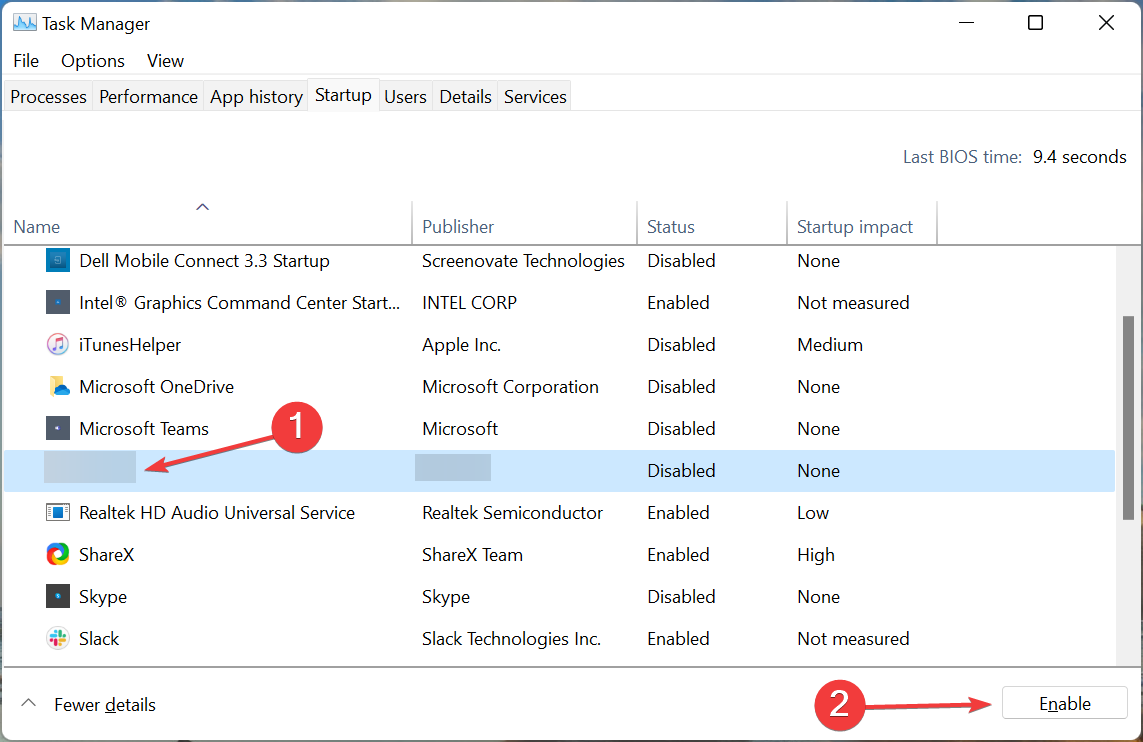
In most cases, users found that the app they had trouble with was not configured to load at startup. Therefore, we recommend that you check that first and enable the app to fix the Windows 11 startup folder not working issue.
In case the app was already enabled and yet doesn’t launch, head to the next method.
2. Check app settings
 NOTE
NOTE
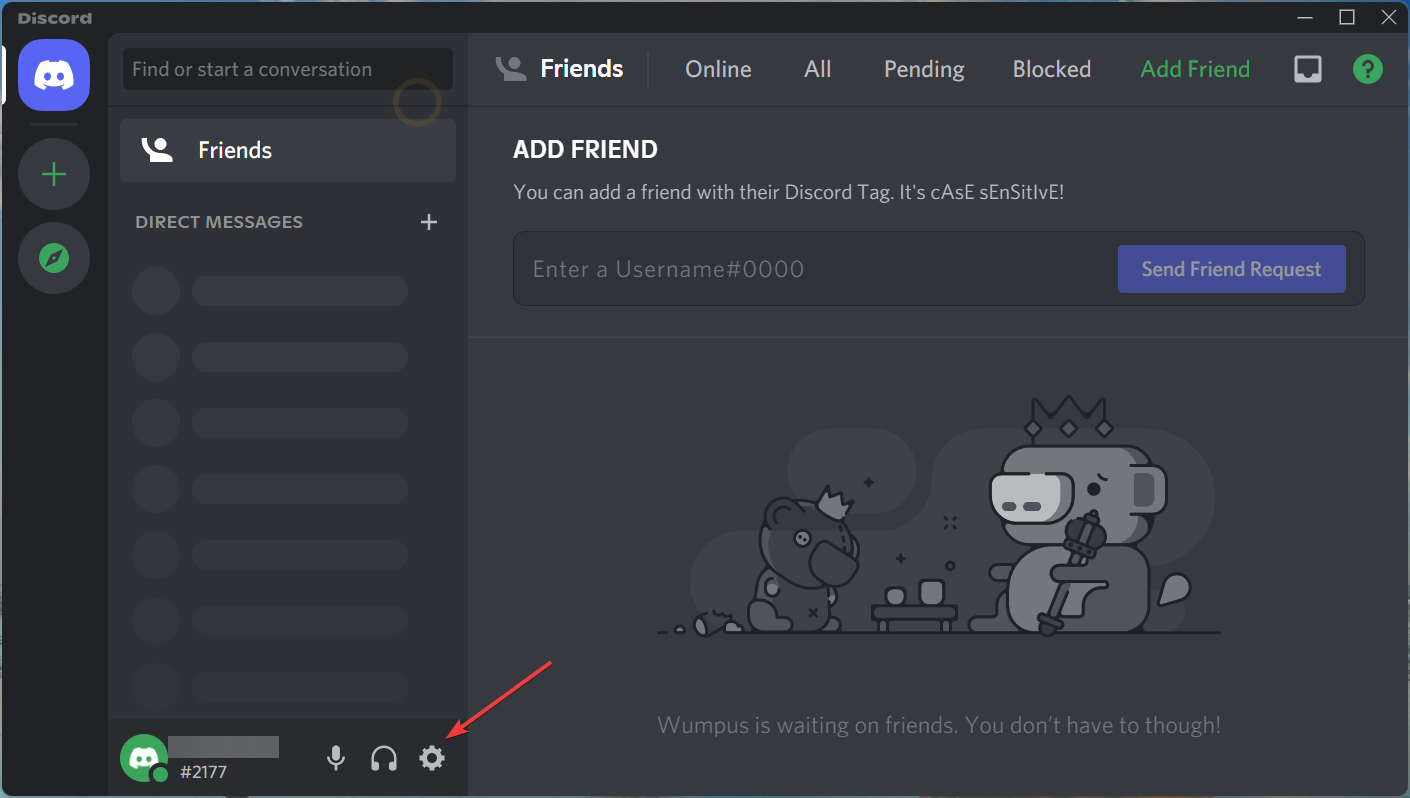
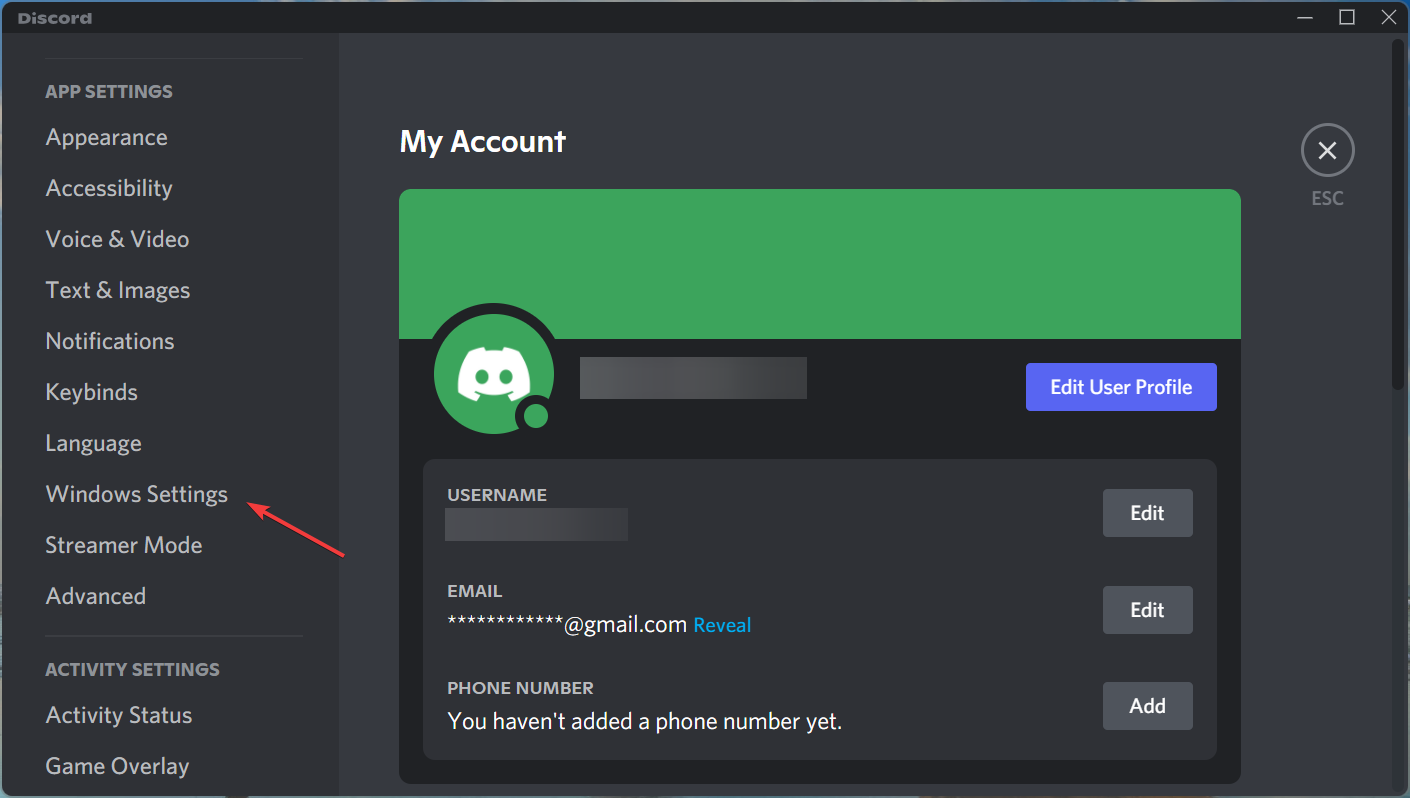
- Launch the Discord app, and click on the User Settings icon near the bottom-left.

- Now, select the Windows Settings option under App Settings from the navigation pane on the left.

- Make sure the toggle for Open Discord is enabled.
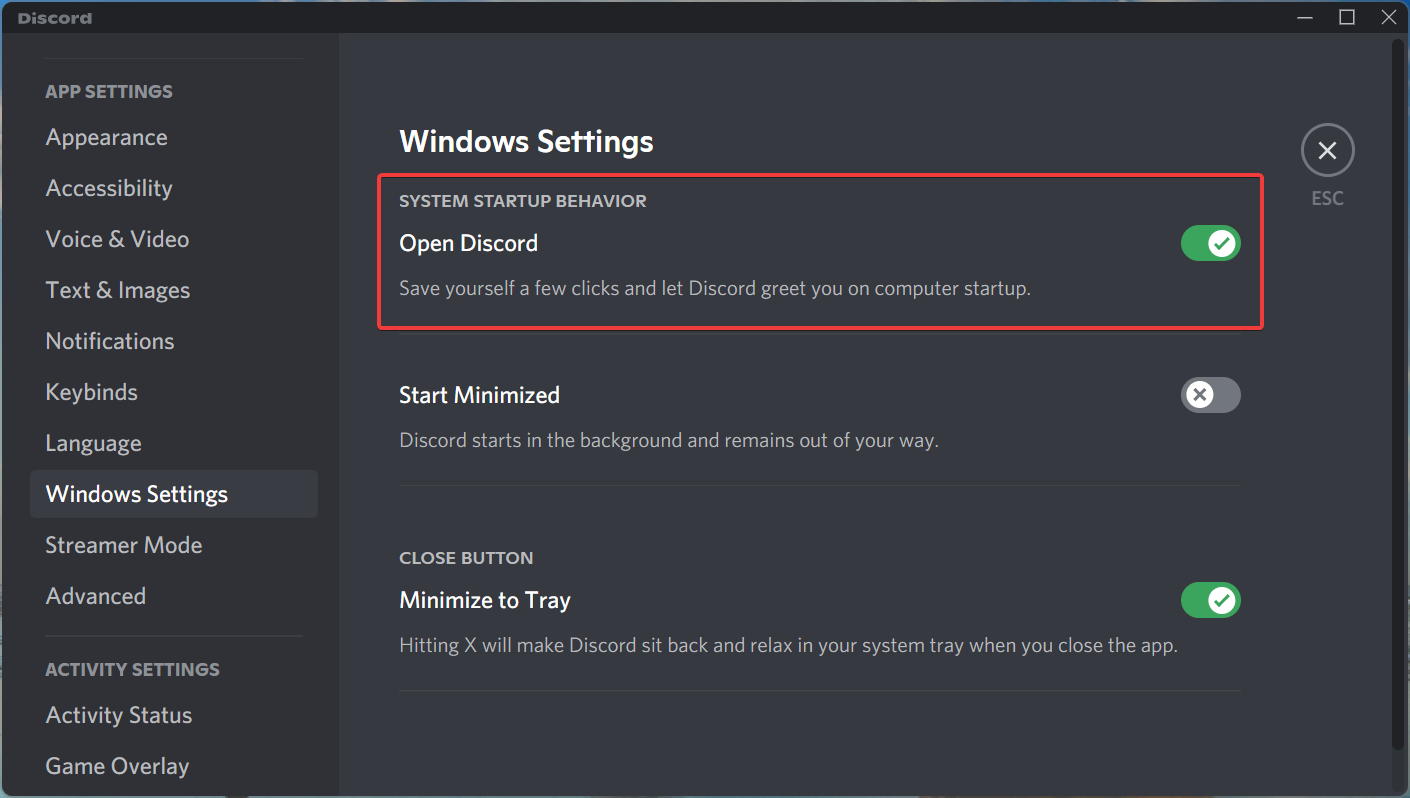

Most of the apps offer a similar option to launch that particular one when you boot Windows. So, check if it’s enabled as well along with having the relevant permission in the Task Manager.
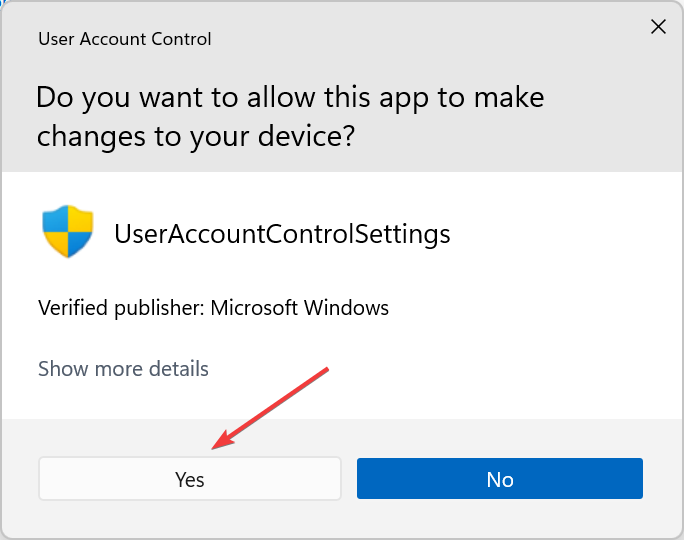
3. Disable UAC
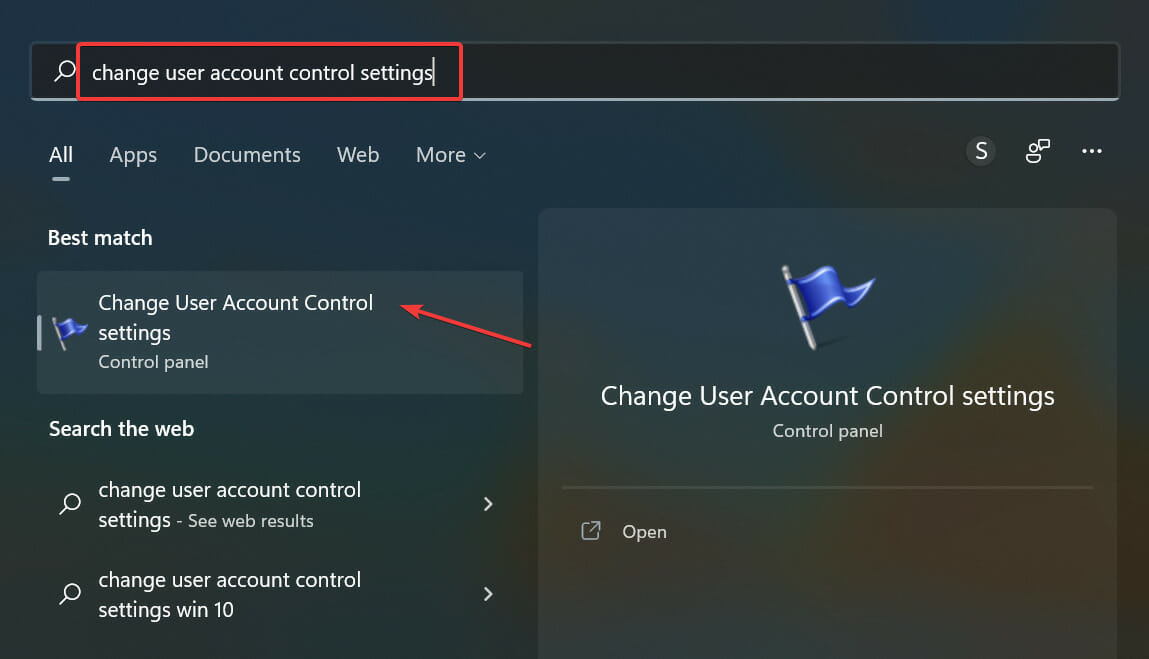
- Press Windows + S to launch the Search menu, enter Change user account control settings in the text field, and click on the relevant search result that appears.
- Now drag the slider to the bottom, i.e., to Never notify, and click on OK at the bottom to save the changes.
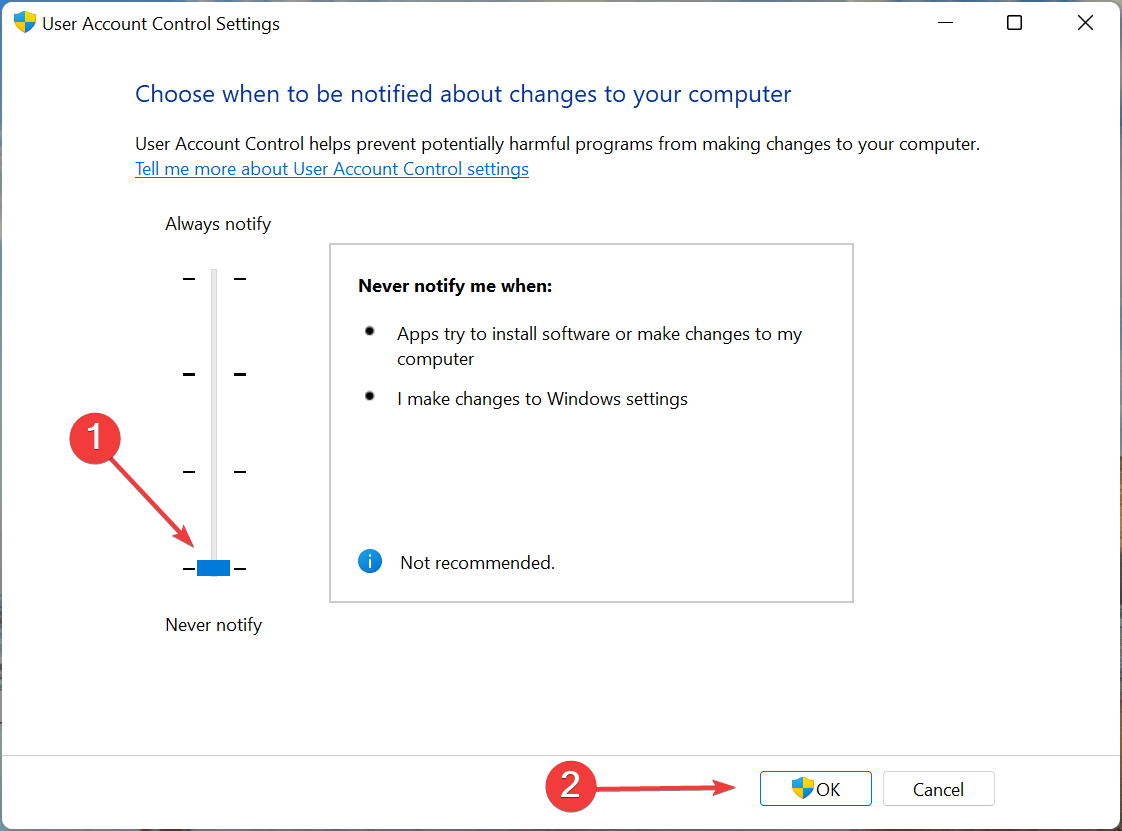
- Click Yes in the UAC (User Account Control) prompt that pops up.


As discussed earlier, certain apps require administrative permission to load. If there is a problem with the UAC and it doesn’t launch, this could lead to Windows 11 startup folder not working. The best resort here is to disable it.
But remember that disabling UAC exposes your system to threats and it’s not as secure anymore. So if this solution doesn’t work, make sure to re-enable it.
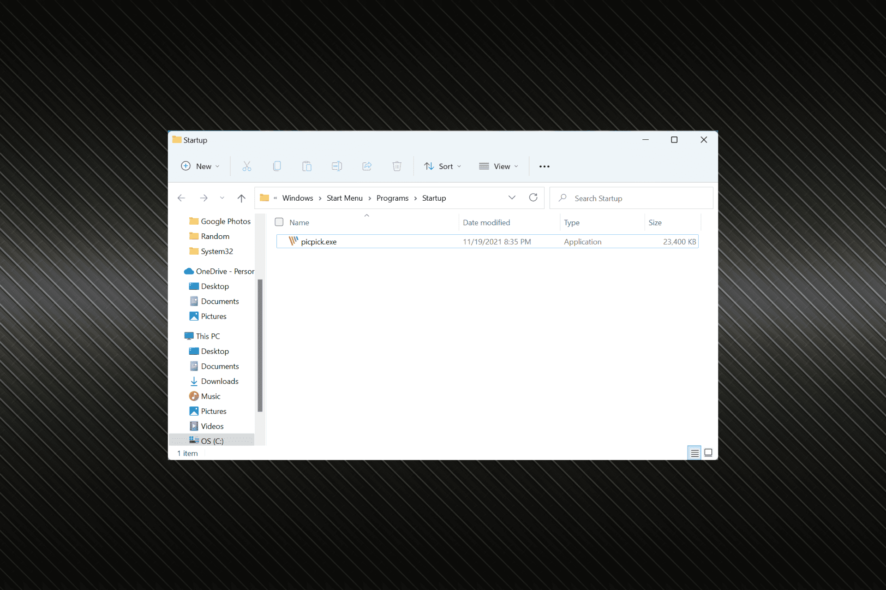
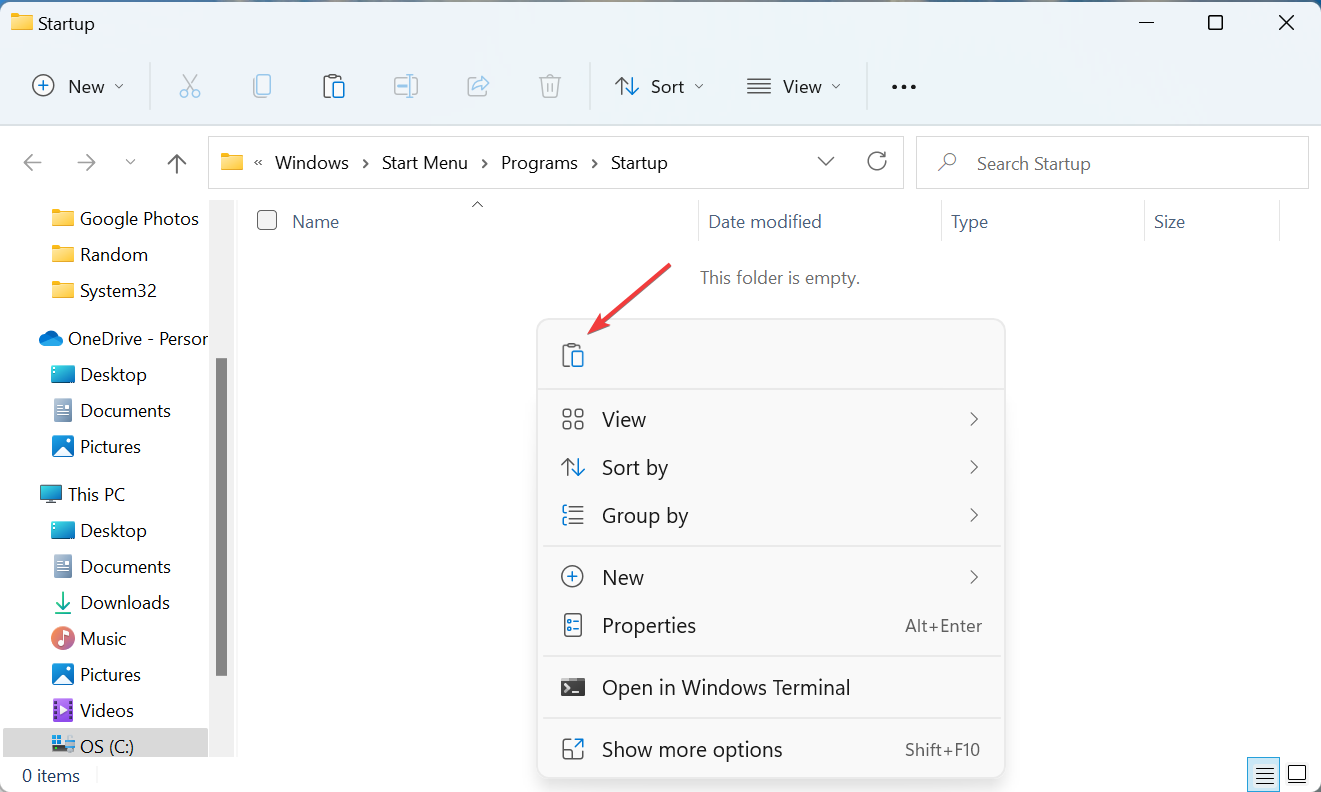
4. Manually add the shortcut to the Startup folder
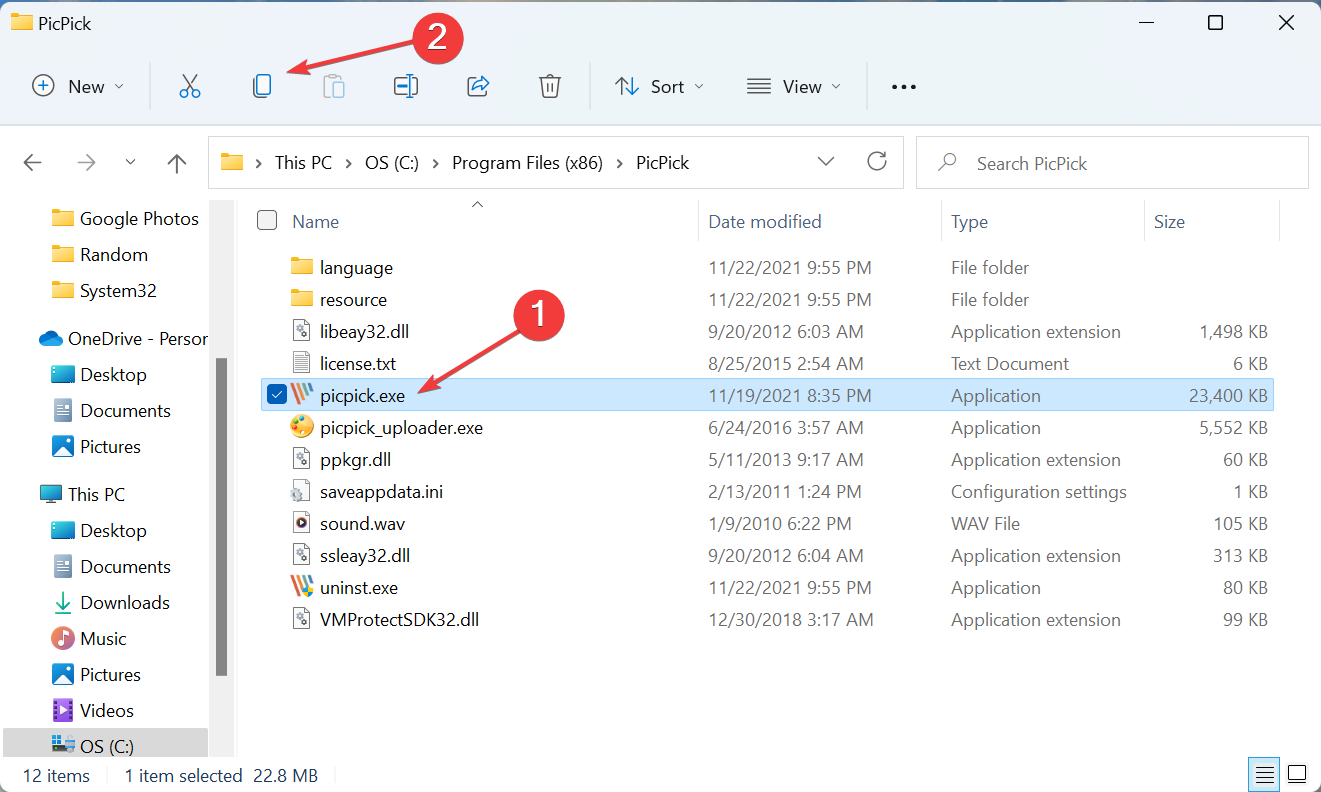
- Navigate to the folder where the launcher (.exe file) for the problematic app is stored, select it, and click in Copy icon in the Command Bar at the top.

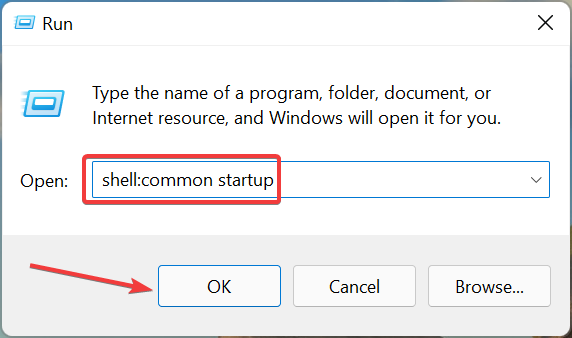
- Press Windows + R to launch the Run command, type shell:common startup in the text field, and either click on OK or hit Enter to launch the Common Startup folder.

- Now, right-click here and select the Paste icon. Alternatively, you can hit Ctrl +V to paste the launcher.
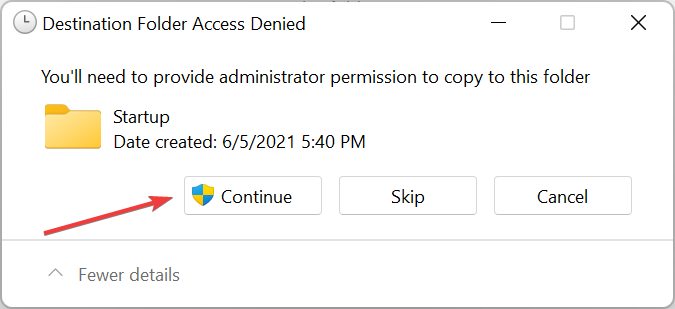
- Click Continue in the confirmation prompt that pops up.
- Once done making the changes, restart the computer for these to fully come into effect.


5. Run SFC scan and DISM tool
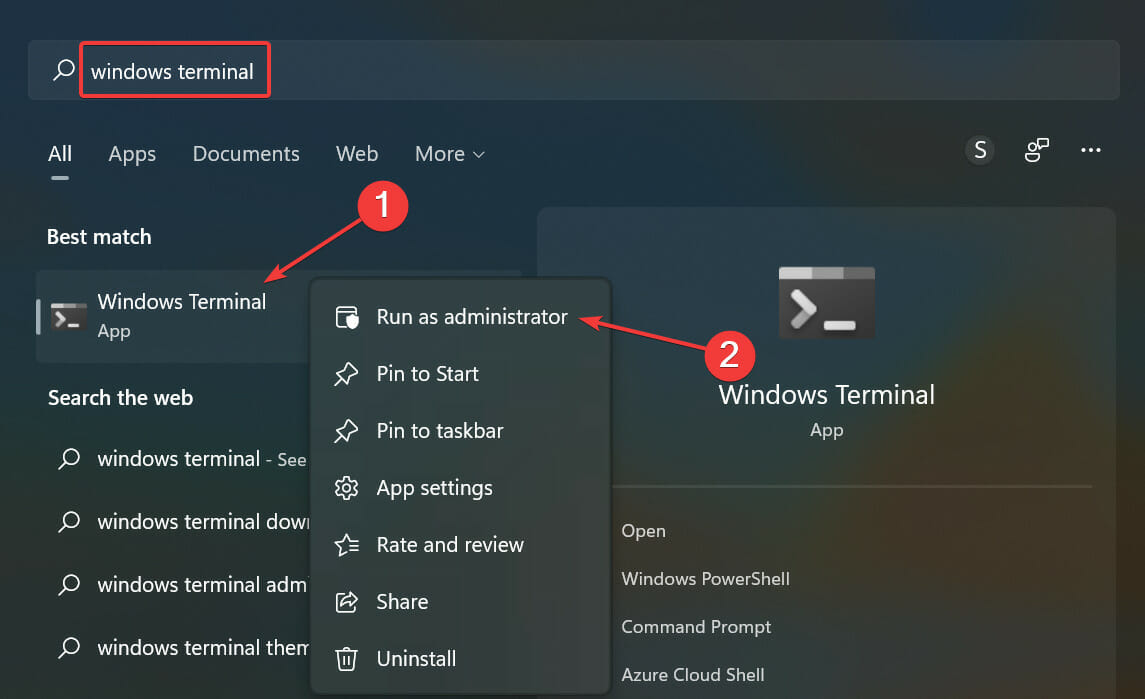
- Press Windows + S to launch the Search menu, enter Windows Terminal in the text field, right-click on the relavant search result, and select Run as administrator from the context menu.
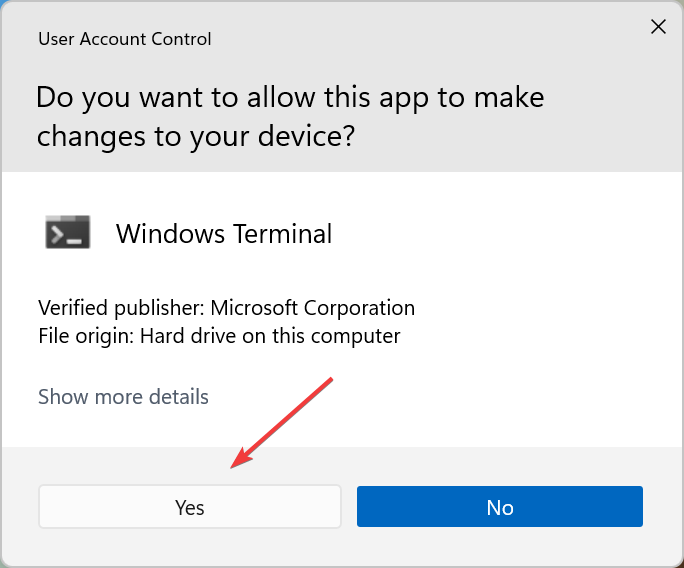
- Click Yes on the UAC (User Account Control) prompt that pops up.

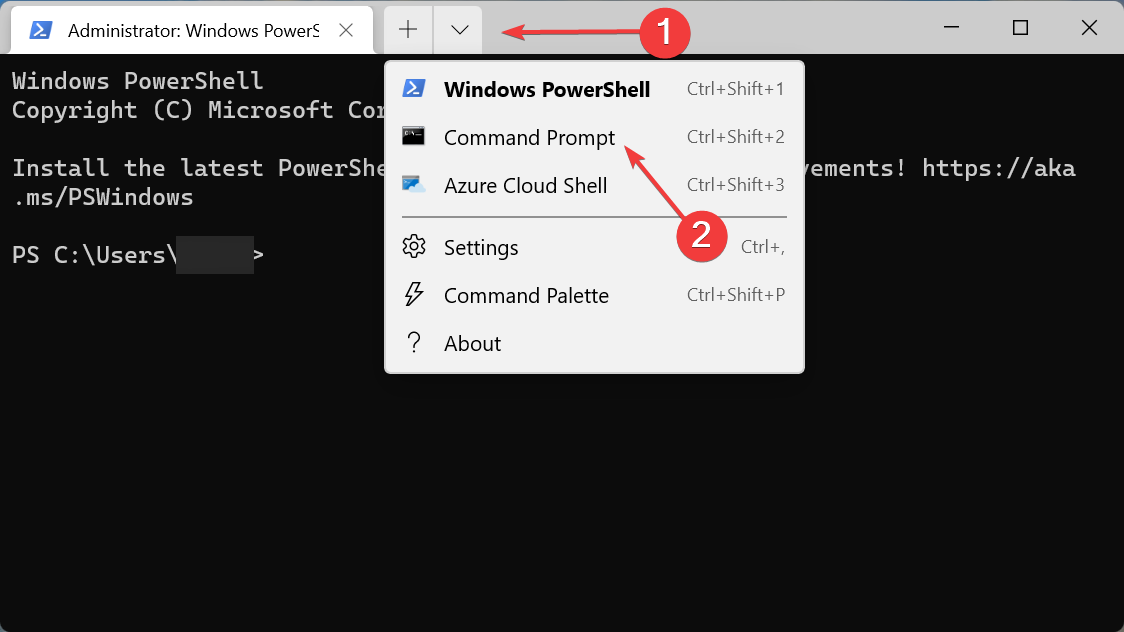
- Now, click on the downward-facing arrow at the top, and select Command Prompt from the list of options. Alternatively, you can hit Ctrl + Shift + 2 to launch Command Prompt in a new tab.

- Type/paste the following commands one a time, and hit Enter after each to run the DISM tool:
DISM /Online /Cleanup-Image /CheckHealthDISM /Online /Cleanup-Image /ScanHealthDISM /Online /Cleanup-Image /RestoreHealth - Once done, type the following command and hit Enter to run the SFC scan:
sfc /scannow

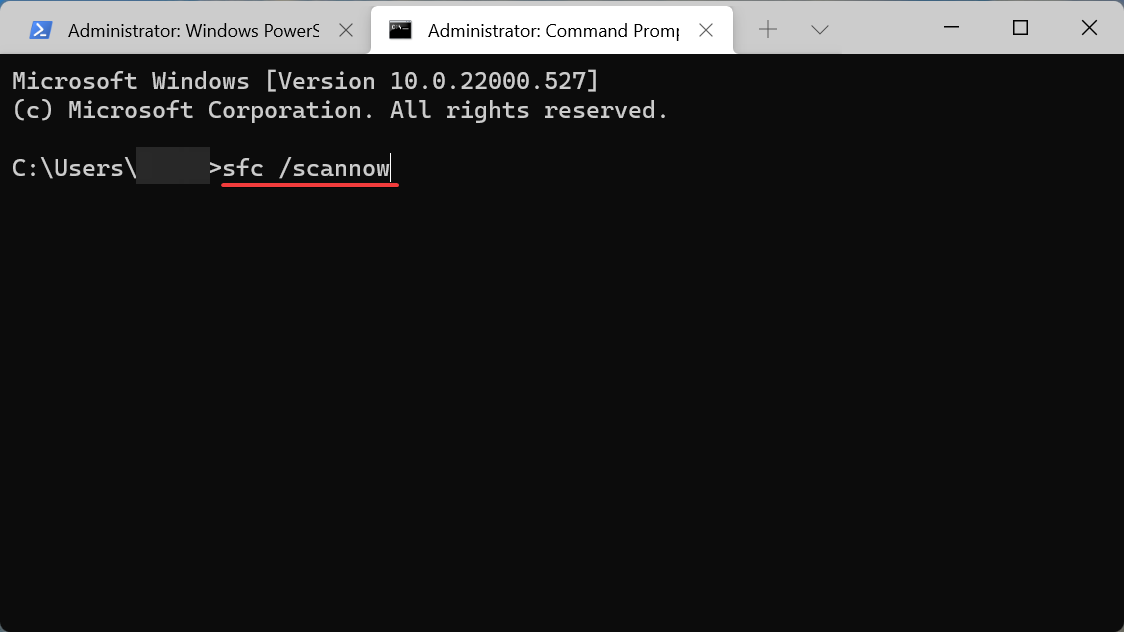
If it was the corrupt system files or a problem with the Windows installation files causing the Windows 11 startup folder not working issue, running the SFC scan and DISM tool should fix it.
6. Modify the Registry
NOTE
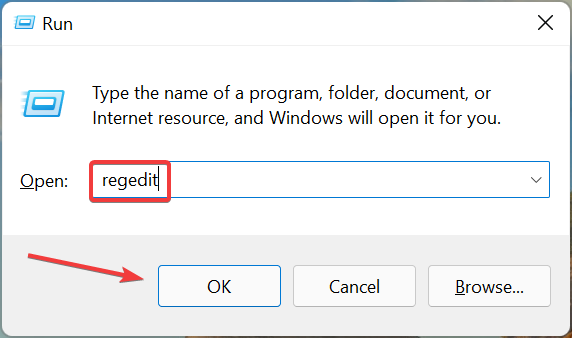
- Press Windows + R to launch the Run command, enter regedit in the text field, and either click on OK or hit Enter to launch the Registry Editor.
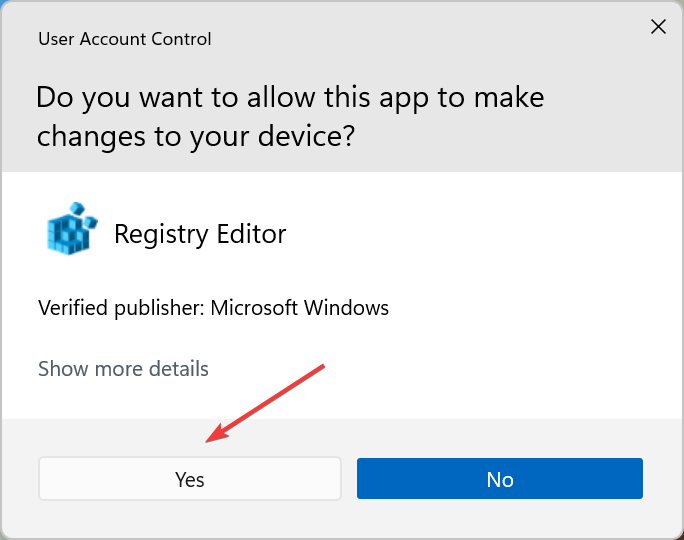
- Click Yes in the UAC (User Account Control) prompt that pops up.
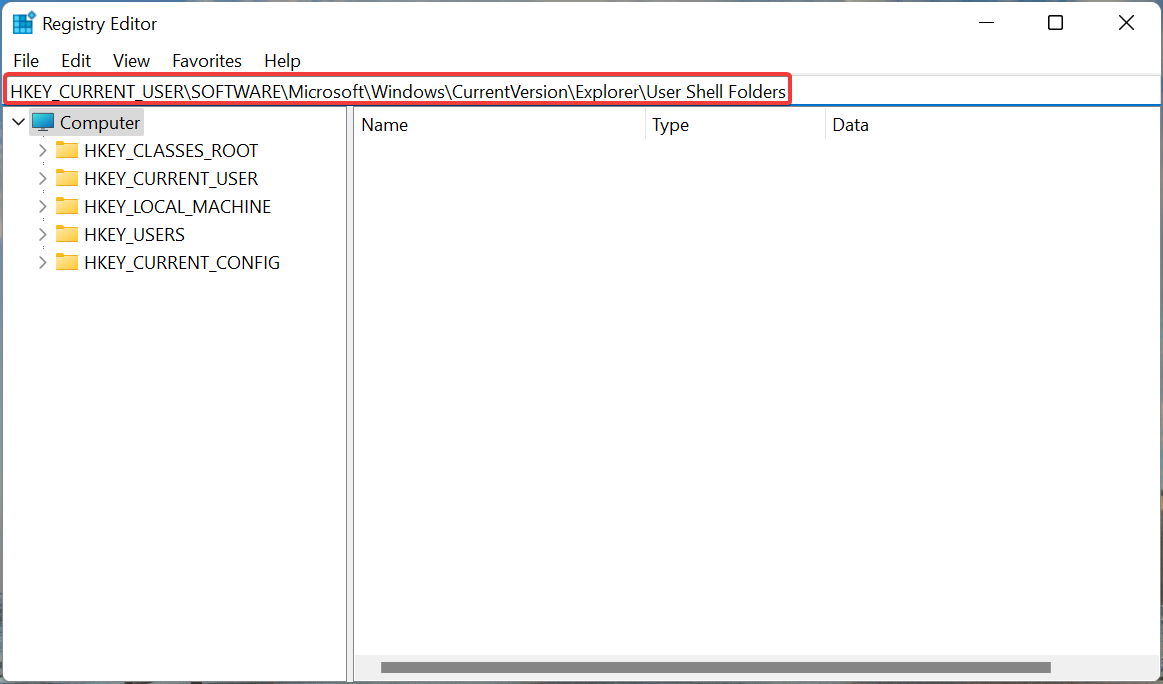
- Paste the following path in the address bar at the top and hit Enter to navigate to it:
HKEY_CURRENT_USER\SOFTWARE\Microsoft\Windows\CurrentVersion\Explorer\User Shell Folders
- Verify if the Startup string here has the following Value Data:
%USERPROFILE%\AppData\Roaming\Microsoft\Windows\Start Menu\Programs\Startup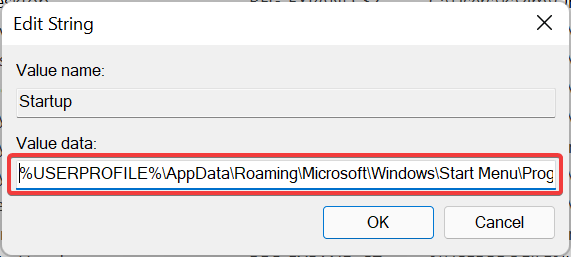
- Now, navigate the following path:
HKEY_CURRENT_USER\SOFTWARE\Microsoft\Windows\CurrentVersion\Explorer\Shell Folders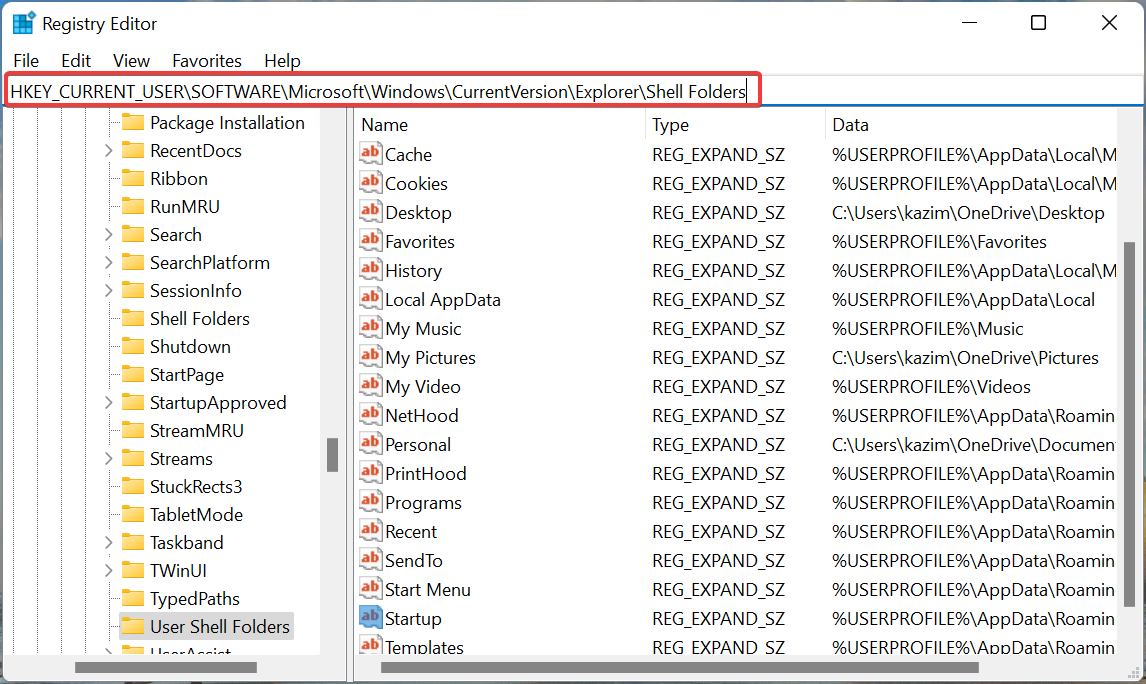
- Now, verify the Startup string has the following Value Data.
C:\Users\User\AppData\Roaming\Microsoft\Windows\Start Menu\Programs\Startup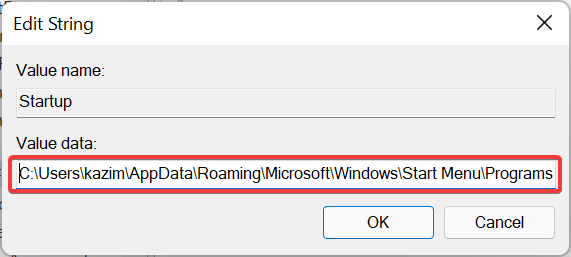
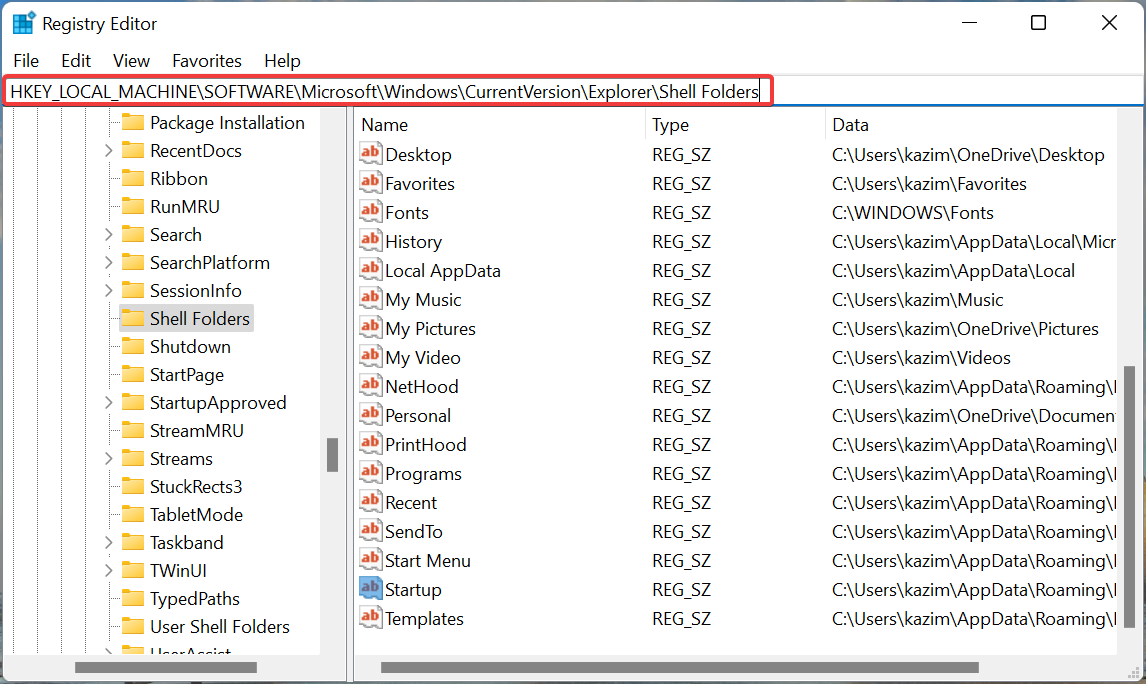
- Finally, go to the following location in Registry.
HKEY_LOCAL_MACHINE\SOFTWARE\Microsoft\Windows\CurrentVersion\Explorer\Shell Folders
- Again, verify if the Common Startup string has the following under Value Data:
C:\ProgramData\Microsoft\Windows\Start Menu\Programs\Startup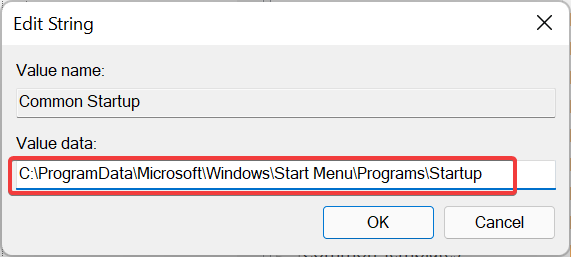
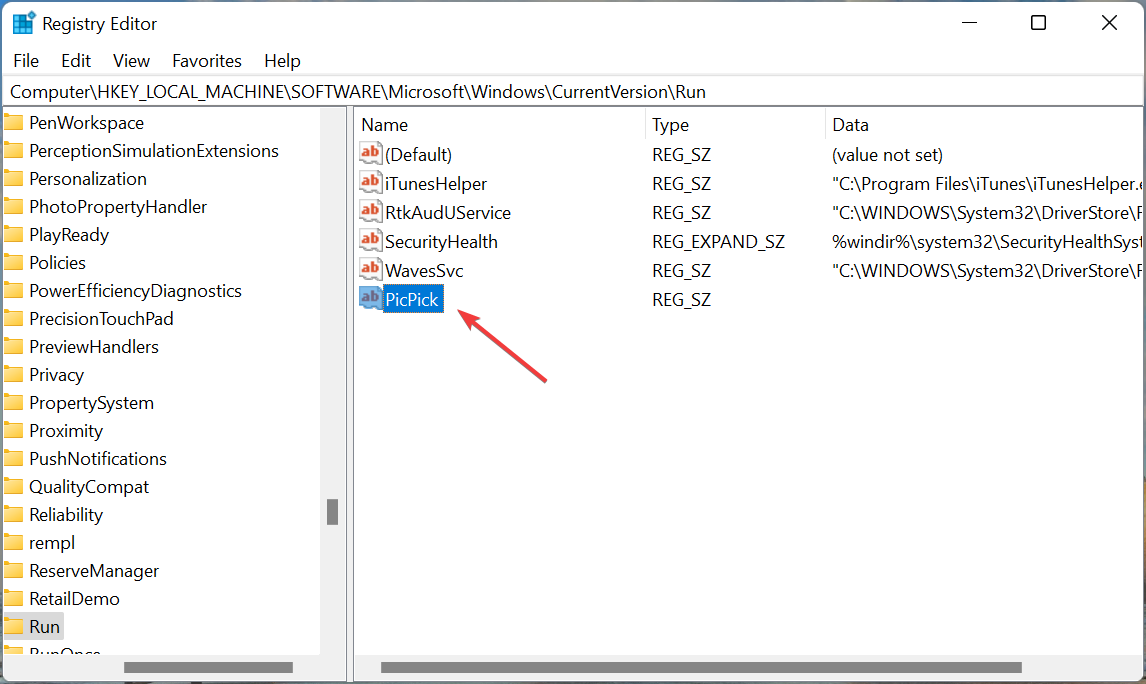
- If you find the data value to be different, just replace it with the correct ones listed here. In case everything is in order, there’s the option to manually add the app you want to load at startup to the Registry.
- To do that, navigate the following path. Do remember the changes you make here will reflect throughout the system, i.e., for other user accounts as well:
HKEY_LOCAL_MACHINE\Software\Microsoft\Windows\CurrentVersion\Run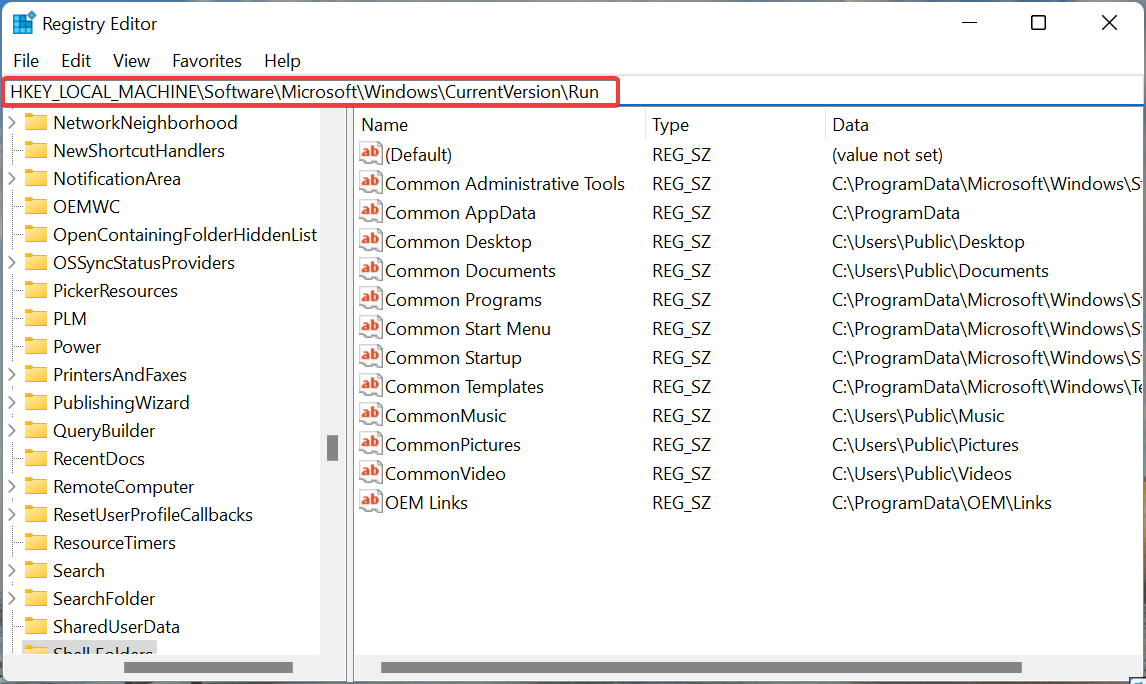
- Next, right-click anywhere on the empty portion on the right, hover the cursor over New, select String Value from the context menu, and enter the name of the desired app.

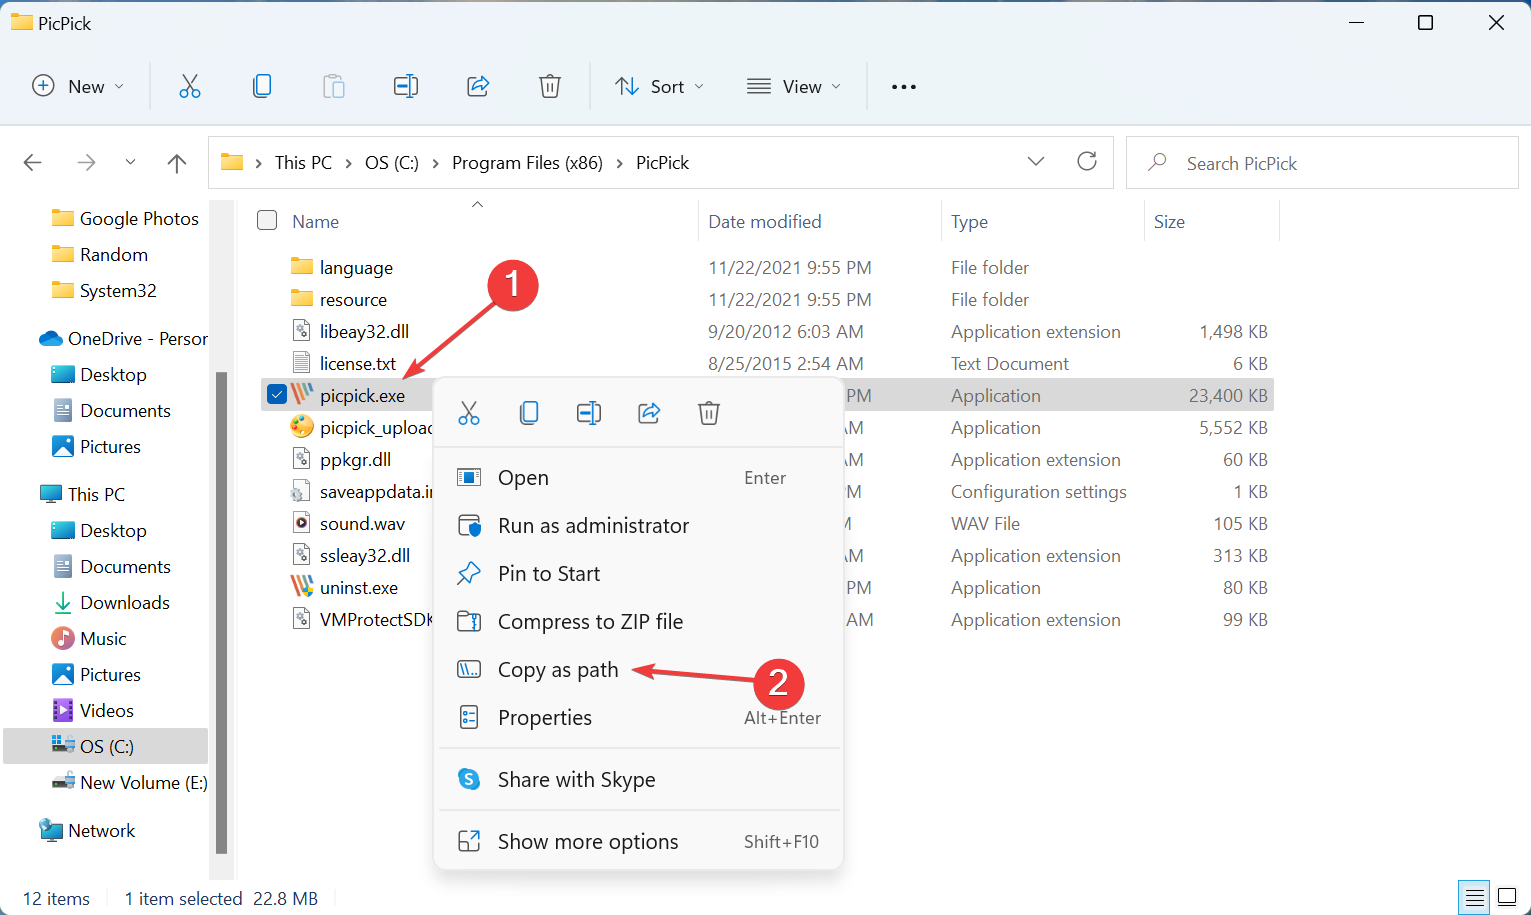
- Navigate to the location where the desired app is stored, right-click on the launcher, and select Copy as path.
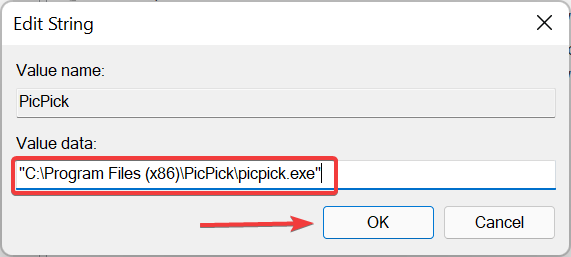
- Double-click on the the string you just created to add the Value data.

- Now, paste the path for the app in the Value data text field, and click on OK to save the changes.
- Once done, restart the computer for the changes to come into effect.


These are all the ways you can fix the Windows 11 startup folder not working error. In case the error persists, you have no option but to reset Windows 11 to its factory settings.
Also, once you have it up and running, find out how to use the Startup folder in Windows 11. Besides, the methods listed here should work on the previous iteration as well, so you shouldn’t face any trouble fixing issues with the Startup folder in Windows 10.
You can also read a guide on how to make a program run on startup in Windows 11 to ensure your preferred applications launch automatically at boot.
Do not hesitate to tell us which solution worked for you in the comments section below.
Read our disclosure page to find out how can you help Windows Report sustain the editorial team. Read more


Improve this guide


User forum
0 messages