10 Methods to Fix VPN Not Working On Windows 11
Get back to using VPN on Windows 11 with these simple fixes

Whether you’re using a VPN for work, to stream videos, or to keep your online activity secure, Windows 11 VPN issues can be a real pain.
You might be dealing with the Windows 11 L2TP VPN not working, or perhaps SSTP, PPTP, WireGuard, or OpenVPN isn’t connecting properly.
No matter the exact error you’re getting, today we’ll help you tackle it. So, whether you rely on a corporate solution or a personal one, the steps below will help you troubleshoot it.
How can I fix Windows 11’s VPN if it’s not working?
Check out a quick video overview of the steps. For a deeper dive, be sure to read the full article.
1. Update Windows 11
- Open Settings from the Start menu.
- Click the Windows Update tab on the left of Settings.

- Select the Check for updates option.

- Then download and install any Windows 11 patch updates available to you.
2. Reinstall WAN Miniport network adapters
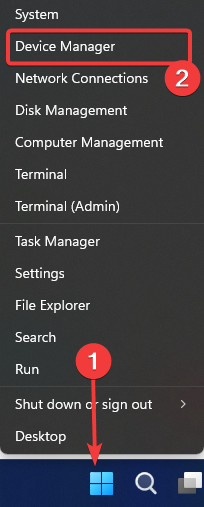
- First, right-click the Start taskbar button and select Device Manager.
- Double-click, the Network adapters category to expand it.
- Right-click WAN Miniport (IP) and select the Uninstall device option.

- Select Uninstall on the confirmation prompt.

- Repeat the previous two steps for the WAN Miniport (PPTP) and WAN Miniport(IPv6) devices.
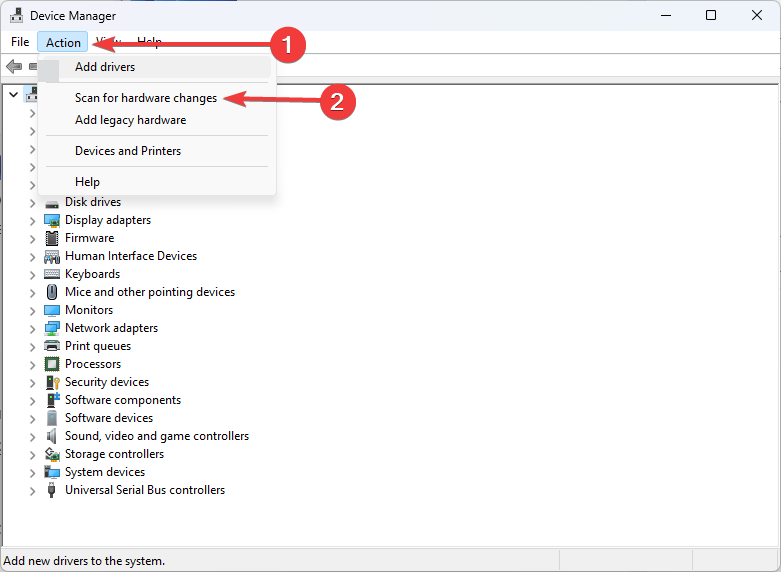
- After that, click the Action menu. Select the Scan for hardware changes option there to reinstall the adapters.
- Click Power and Restart on the Start menu.
3. Flush the DNS
- Click the magnifying glass icon on the taskbar.

- To find the Command Prompt, enter the cmd keyword in the search box.
- Next, click the Command Prompt’s Run as administrator option.

- Input these separate commands by pressing Enter after each:
ipconfig /releaseipconfig /flushdnsipconfig /renewnetsh int ip resetnetsh winsock reset - Close the Command Prompt.
- Select Power, then Restart Start menu options.
4. Disable Internet Protocol Version 6
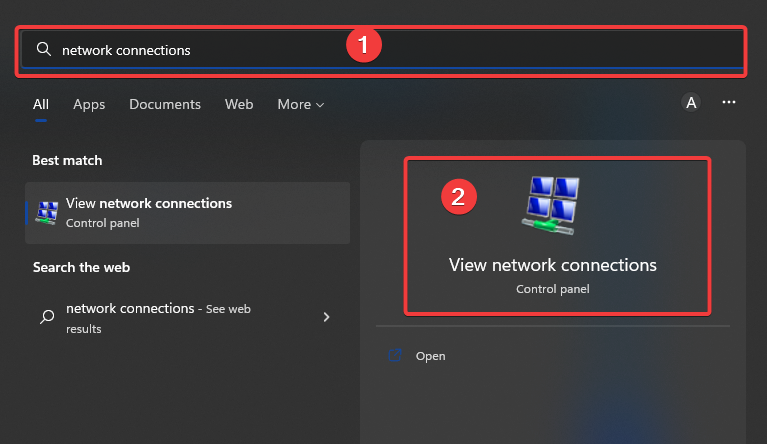
- Bring up the search utility with its handy Windows key + S keyboard shortcut.
- Enter network connections within the search text box, and click the View network connections app.
- Right-click your VPN network adapter there to select Properties.
- Uncheck the selected Internet Protocol Version 6 checkbox.

- Click OK to apply the changes.
5. Disable Proxy settings
- Open the Settings window.
- Click the Network and internet tab.
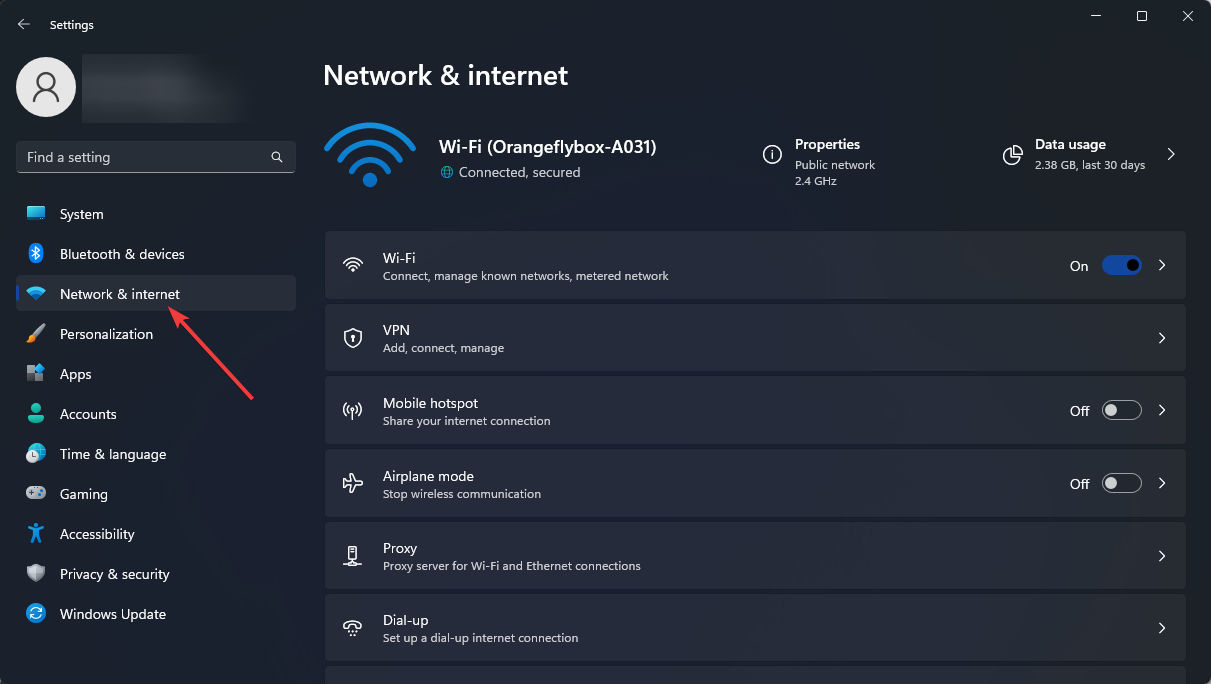
- Select the Proxy option.

- If the Use proxy server is enabled, press the Set up option.

- Then turn on the Use proxy server option.

- Press the Save button.
6. Turn off firewalls
- Press the search tools’ Windows key + S hotkey.
- Enter the keyword firewall within the search tool, and select the Windows Defender Firewall search result.
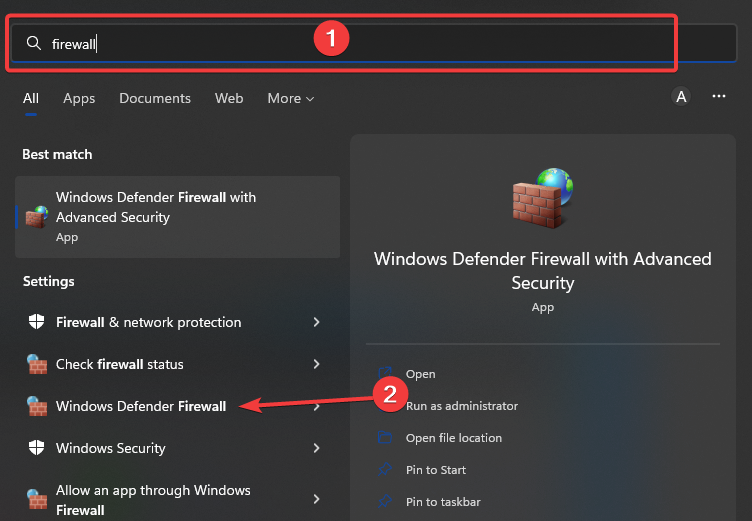
- Then click the Turn Windows Defender Firewall on or off navigation option on the left side of the Control Panel.

- Select the Turn off Windows Defender Firewall radio buttons.

- Click OK to apply the settings and exit the window.
If you’ve installed third-party antivirus or firewall software, disable it via its context menu. Right-click your antivirus utility’s system tray icon to open its context menu.
Select to disable your antivirus utility for a few hours before connecting to a VPN server.
Should this resolution resolve the issue, change Windows Defender Firewall’s settings for your VPN software. To do so, click the Allow an app through the firewall option.

Make sure the Public and Private checkboxes for your VPN software are selected. Then you can turn the firewall back on.
7. Set up an exception for UDP
- Press the Windows and R keyboard keys simultaneously to bring up the Run accessory.
- Enter this text in Run’s Open box and click OK:
regedit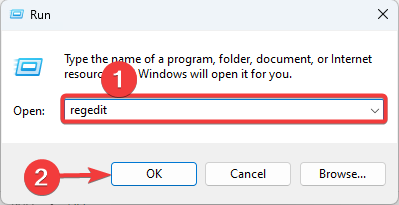
- Then open this key within the Registry Editor window:
HKEY_LOCAL_MACHINE\SYSTEM\CurrentControlSet\Services\PolicyAgent - Next, right-click the PolicyAgent key to select New, then DWORD (32-bit).
 Value option")
- Input AssumeUDPEncapsulationContextOnSendRule for the DWORD’s title.
 Value window")
- Double-click the AssumeUDPEncapsulationContextOnSendRule DWORD you’ve just set up.
- Input 2 within the Value data box to replace the current value.
- Then press the OK button to confirm.
8. Reinstall your VPN software
- Press the Windows and X keys simultaneously, and select Run on the menu that pops up.
- Then type in this Run command and press Enter or click OK:
appwiz.cpl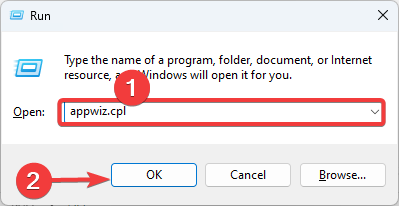
- Select your VPN software in the program list, then click Uninstall and any confirmation options to remove the VPN software.
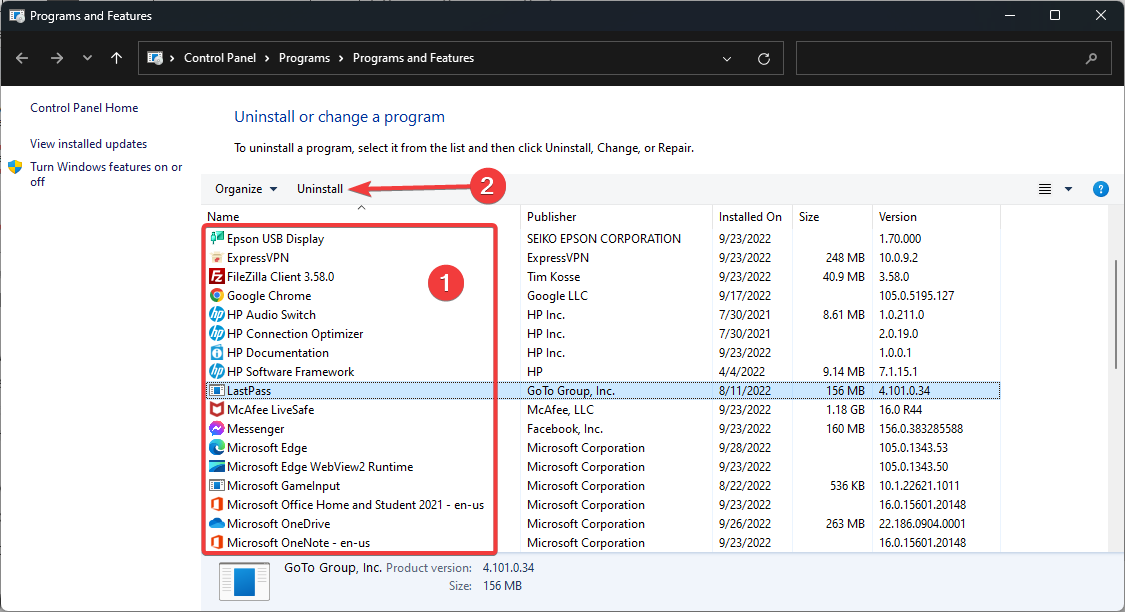
- Restart Windows 11 when you’ve uninstalled the VPN software.
- After that, open the download page for your VPN software within a browser. Then, select to download the latest version from there.
- Reinstall the VPN software with its setup wizard.
9. Try another VPN
If you’re facing VPN issues on Windows 11, consider a more reliable solution. Nordsec, the company behind NordVPN offers something for everyone:
NordVPN is excellent for personal use, offering strong encryption, over 5,000 servers, and high-speed connections.
Plus, if you want to set up your own VPN, the?free Meshnet feature lets you create secure personal networks across multiple devices.
It’s built-in within the NordVPN app, but you can use it without a subscription. It could be a good choice for remote work and file sharing. Alternatively, if you need more security and enterprise-oriented solutions, consider NordLayer.
NordVPN
Upgrade to NordVPN for top-notch security and zero errors on Windows 11!10. Reset Windows 11
 NOTE
NOTE
- Launch Settings by pressing the Windows + I keys.
- Click the Recovery navigation option on the System tab.

- Press the Reset PC button for the Reset this PC tool.

- Select Keep my files within the Reset this PC window.
- Next, choose the Cloud download or Local reinstall option however you prefer.

- Select the Next option, and click Reset to confirm.
How do I enable VPN in Windows 11?
- Open the Settings app.
- Click on the Network & Internet tab on the left pane, then select VPN from the right.
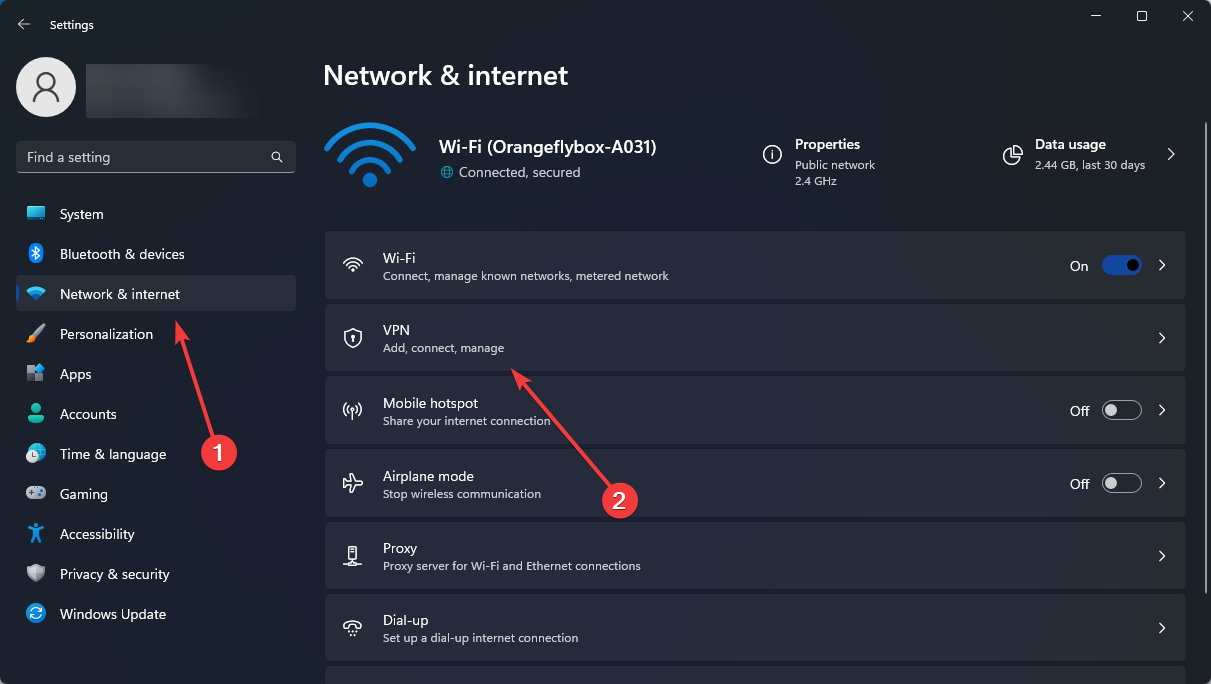
- On the right pane, click the Add VPN button.
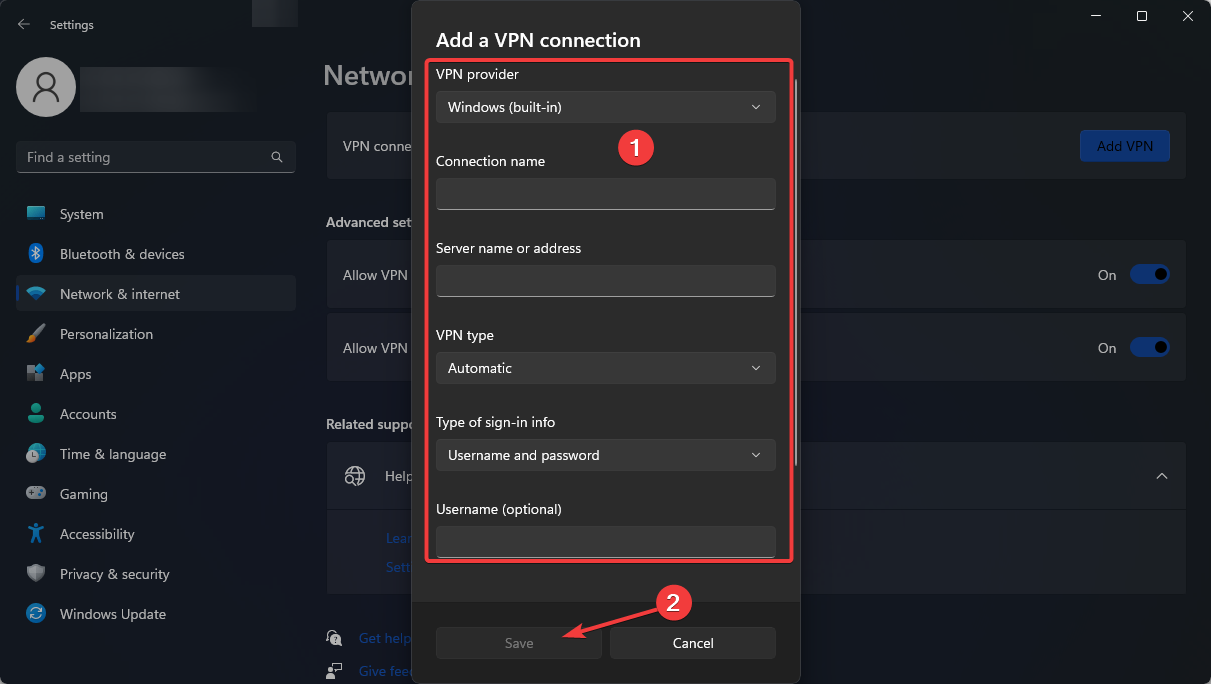
- Input your VPN parameters and click on Save.
- Now click the connect button, and you are done.
Why is my VPN not working on Windows 11?
- Third-party applications – Apps such as antivirus software are one of the main contributors to this issue. Unfortunately, a few third-party programs interfere with the VPN client, causing VPN connection problems. The VPN is, therefore, not functional on your Windows 11 computer.
- Drivers – A second factor contributing to the VPN not functioning issue on Windows 11 systems is problematic network device drivers.
- Windows Firewall – Windows Firewall blocks the VPN client. Sometimes, the Windows Firewall willfully blocks the VPN client network, causing your VPN connection to fail.
You’ve seen some potential causes of the VPN issue on a Windows 11 computer. In the following section, we’ll show you several tried-and-true fixes for the issue.
How can I manually add and connect to VPNs in Windows 11?
- First, press the Start button to select the pinned Settings app.
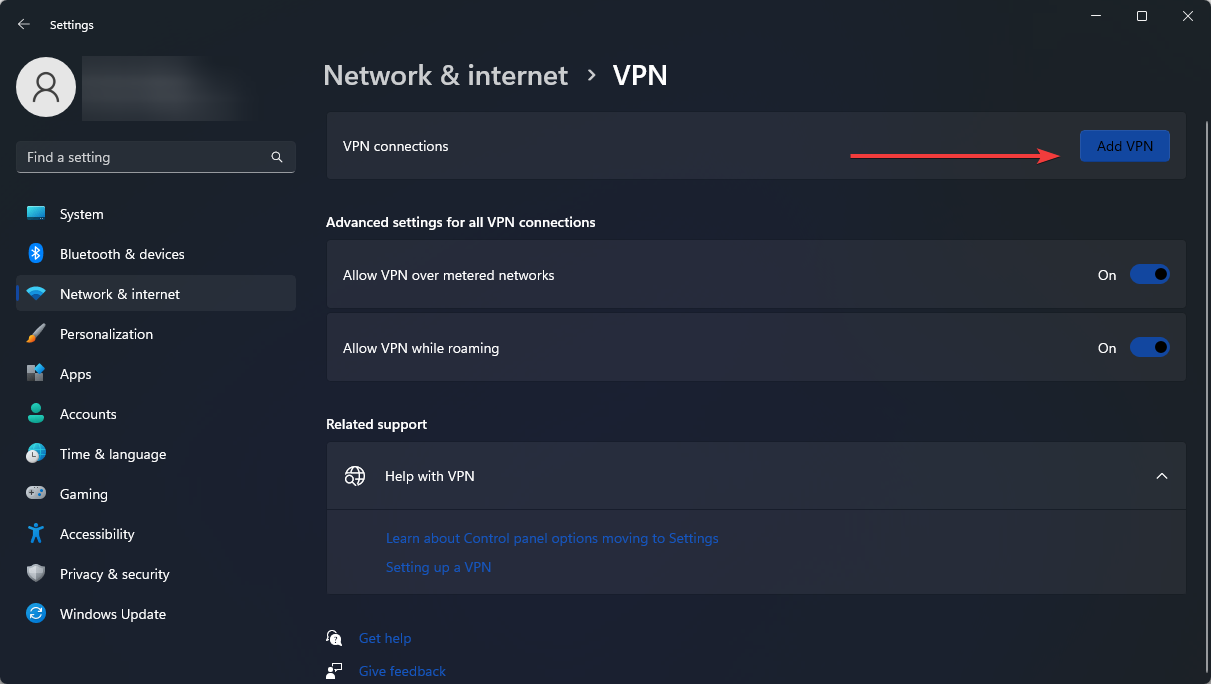
- Then select the Network and Internet tab on the left side of Settings.
- Finally, click the VPN navigation option.

- Press the Add VPN button.

- Fill out the VPN connection window with all the required details.

- Press the Save button.
- After that, you can select a Connect option for your VPN service under the Add VPN button.
Note that the solutions we will share are vital for many instances of this VPN problem, including Windows 11 IPsec, SSTP, Forticlient, PPTP, and L2TP VPN not working.
You will also find them helpful if your Touch VPN, Unifi VPN, or OpenVPN are not working on Windows 11.
Wrapping up
If you fixed your VPN not working in Windows 11 with a different method, let us know in the comments section below. You can also add any questions about fixing VPNs in Windows 11 there.
Read our disclosure page to find out how can you help Windows Report sustain the editorial team. Read more


Improve this guide


User forum
2 messages