Windows 7 Disk Management: How to Access & Use it
Disk Management can also help you extend or shrink partitions
Key notes
- The easiest way to access Disk Management in Windows 7 is to type diskmgmt.msc in Windows Search.
- Disk management allows you to partition your disk drives, change their letters, delete partitions, format new drives and more.

The Windows 7 Disk Management tool is extremely helpful because it allows you to partition the drives, change the drive letter, or format them. In this article, we will show you how to access Disk Management in Windows 7 and use it.
If you’re wondering where is Disk Management in Windows 7, its executable file is diskmgmt.msc and you can find it in the System32 folder on your PC: C:\Windows\System32\diskmgmt.msc.
How do I get to Disk Management in Windows 7?
1. Using the search field
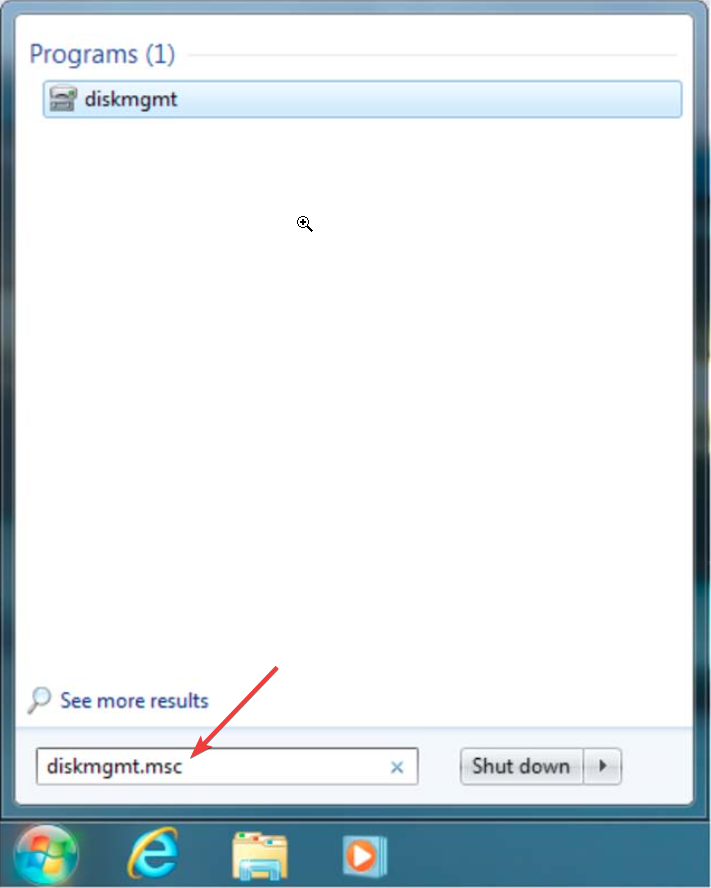
- Click the Start button.
- Type diskmgmt.msc in the search box and click the file in the results.
This is probably the easiest and quickest way of starting Disk Management whether you’re running Windows 7, 10 or 11.
2. Using the Run console
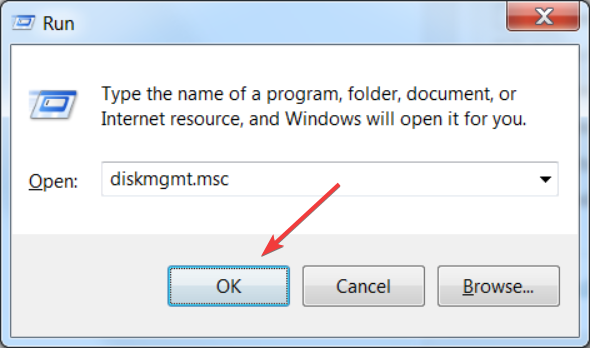
- Press the Windows key + R to start the Run console.
- Type diskmgmt.msc and press Enter or click OK.
3. Using Control Panel
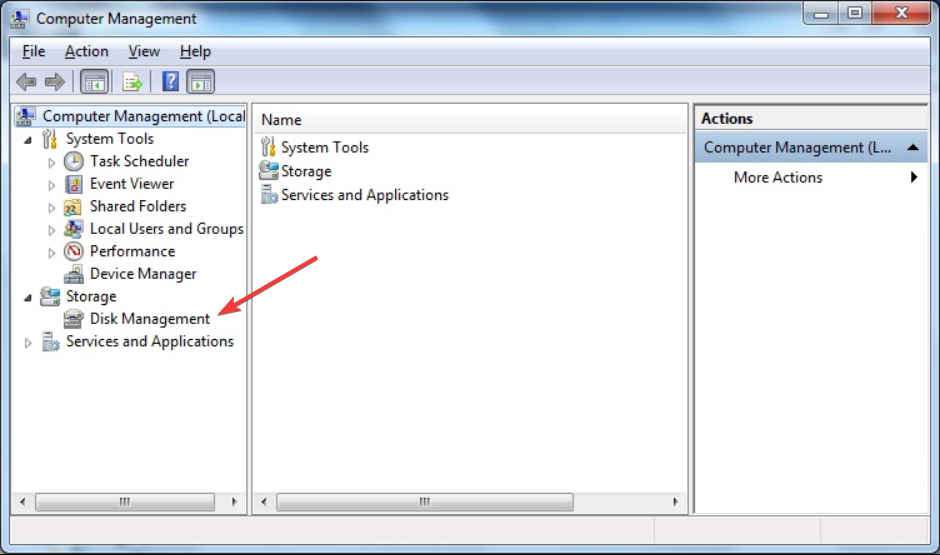
- Click the Start button and open Control Panel.
- Now, go to Administrative Tools and access Computer Management.
- Next, double-click on Disk Management.
4. Using Command Prompt
- Click the Start button and type cmd in the search box.
- Then, right-click on cmd in the results and select Run as administrator.
- Now, type the Windows 7 Disk Management command and press Enter to start the app:
diskmgmt.msc
Exploring the User Interface of Windows 7 Disk Management
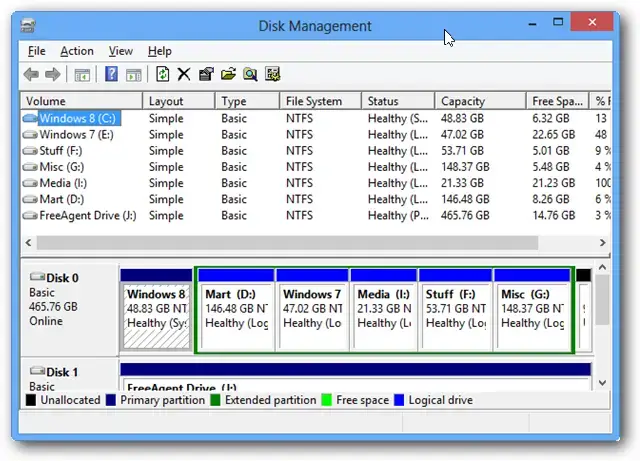
In the upper part, you have the command tabs, and right below, you will see the list of your volumes with their drive letter, type, file system, status, capacity, free space on each one in data volume, and percentage.
You will also notice that your partitions will also feature the operating systems, whether you have one or more on the same PC.
Right below, you will have the color-coded list of drives and the partitions on each one. On the bottom, the Disk Management interface shows you the color map.
The disk partitions can be modified, extended, or merged, as long as they have the same file system. You can’t merge an NTFS partition with a FAT partition unless you delete or convert one of them first.
We also have a helpful guide on how to resize a partition without losing data if that’s what you’re looking for.
How do I use Disk Management in Windows 7?
All the functions of the tool are available at a right click away. Select the drive you want to modify, right-click on it, and you will see all the available options.
For instance, to delete a volume, right-click on that volume, and select Delete from the drop-down menu.

If you have unallocated space on your disk, you may either create a simple volume or extend an adjacent partition to its left with the amount of space of the unallocated one.
Right-click on the volume to its left and select Extend Volume. The app will detect and add the unallocated volume to its right.

With Disk Management, you can only extend the partition to the left of the unallocated disk space, whereas more advanced tools will allow you more options.
What are the differences between Basic and Dynamic Disk?

Some of our readers ranked us if they should go for a Basic Disk or a Dynamic Disk. By default, when setting up a disk, the settings lead you to a basic one and if you have a simple PC for personal use, it’s the simplest way to go.
The main difference between basic and dynamic disks is that basic disks are structured in partitions, and dynamic disks can be split into volumes. Basic drives can have a maximum of four partitions (three primary and one extended).
Dynamic disks can have an infinite number of volumes. You will also benefit from advanced features like disk spanning, software RAID, fault tolerance, and more so they are used by more advanced users in complex hardware environments.
Why is Disk Management not working?
- Problems with the Storage Service – If the Storage Service is not enabled or poorly configured, Disk Management will fail to start or crush.
- Hardware issues – Disk Management will likely fail if one or more drives on your PC are malfunctioning or have bad sectors. This is a sign you should check the drives using the chkdsk tool in Command Prompt (change the drive letter according to your needs): chkdsk C: /f
- Corrupted system files – As Disk Management is part of the Windows 7 system, it’s likely to be affected by corrupted system files or a corrupted Registry.
- Unable to start Virtual Disk Services – If the app can’t start the Virtual Disk Services it will fail to launch, prompting an error.
These are the main problems why this app is not working but luckily, our guide on how to fix Disk Management issues will help you straighten things out.
We hope that our guide provided useful information on how to access the Disk Management utility in Windows 7 and how to use it.
If the built-in tool is not up to your standards, you may also check our list of the best disk management tools for Windows.
Feel free to use the comments section below if you have any questions about any of the information provided.
Read our disclosure page to find out how can you help Windows Report sustain the editorial team. Read more


Improve this guide


User forum
0 messages