How to Resize Partition Without Losing Data [3 Safe Ways]
All the ways you can safely do it
5 min. read
Updated on
Read our disclosure page to find out how can you help Windows Report sustain the editorial team. Read more
Key notes
- Many PC users find it difficult to resize partition without losing data because there's always a fear of things going wrong.
- The process is simple, and there are a few ways to resize disk partitions in no time.
- While many prefer the built-in ways, i.e., Disk Management and Diskpart, others find dedicated tools to be a simpler option.
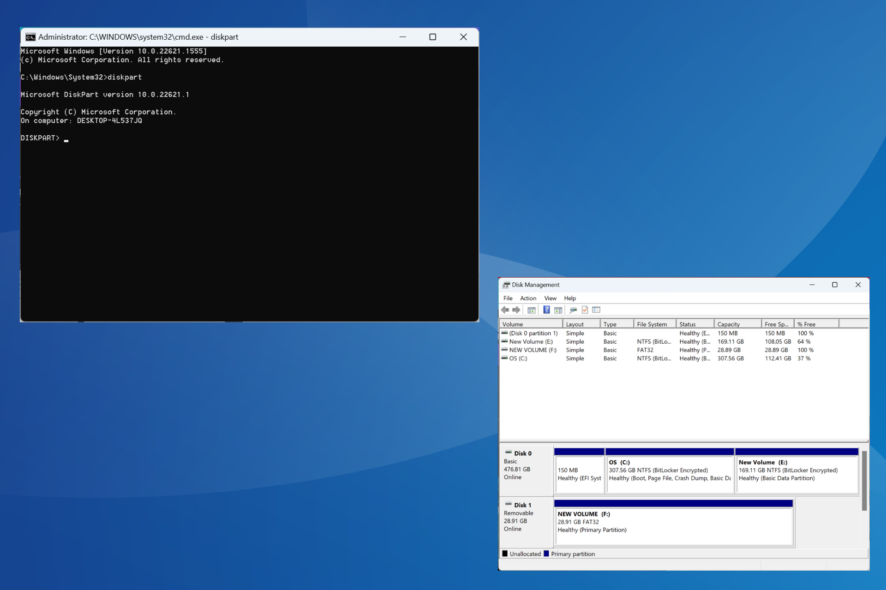
Systematic data storage and organization are critical to seamlessly accessing files on the PC, and partitions often help achieve this. But many wonder if one could resize the partition without losing data and whether there are safe methods.
While you could easily split disk space, losing personal files bothers many. So, let’s find out all about it and the options to resize partitions in Windows 10 for free.
Can I resize the partition without losing data?
Yes, you can resize partitions without data loss. This is because the disk space used to store data can’t be shrunk and is not affected in the process. Only the free storage on the disk can be changed into an unallocated state. So you can safely resize the partitions and not worry about the critical files.
Here are the primary benefits of creating partitions on the disk:
- Organized data storage: One of the primary pros of disk partitions is how well the data can be organized. The default system partition could be used for Windows files, while others can store personal or work-related files.
- Better security: This may be a surprise, but partitioning a hard disk can increase security. Malware and viruses often tend to attack the partition where system files are stored, while others remain relatively safer.
- Run multiple operating systems: There’s nothing better than running multiple operating systems on the PC for some of us. It saves quite a few bucks and eliminates hassle. Partitioning is an easy way to go, though you can use a virtual machine.
- Simplified backups: Backing up the data is vital to avoid the loss of important files, and with it being optimally organized in various partitions, you can choose one without having to select files and folders individually.
How do I resize the partition without losing data?
1. Via Disk Management
1.1 Shrinking a partition
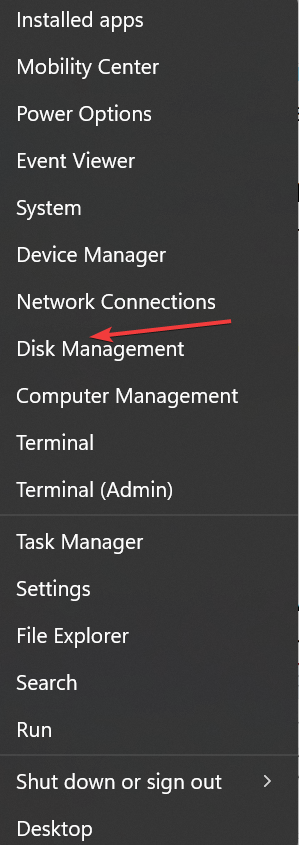
- Press Windows + X to open the Power User menu, and select Disk Management.
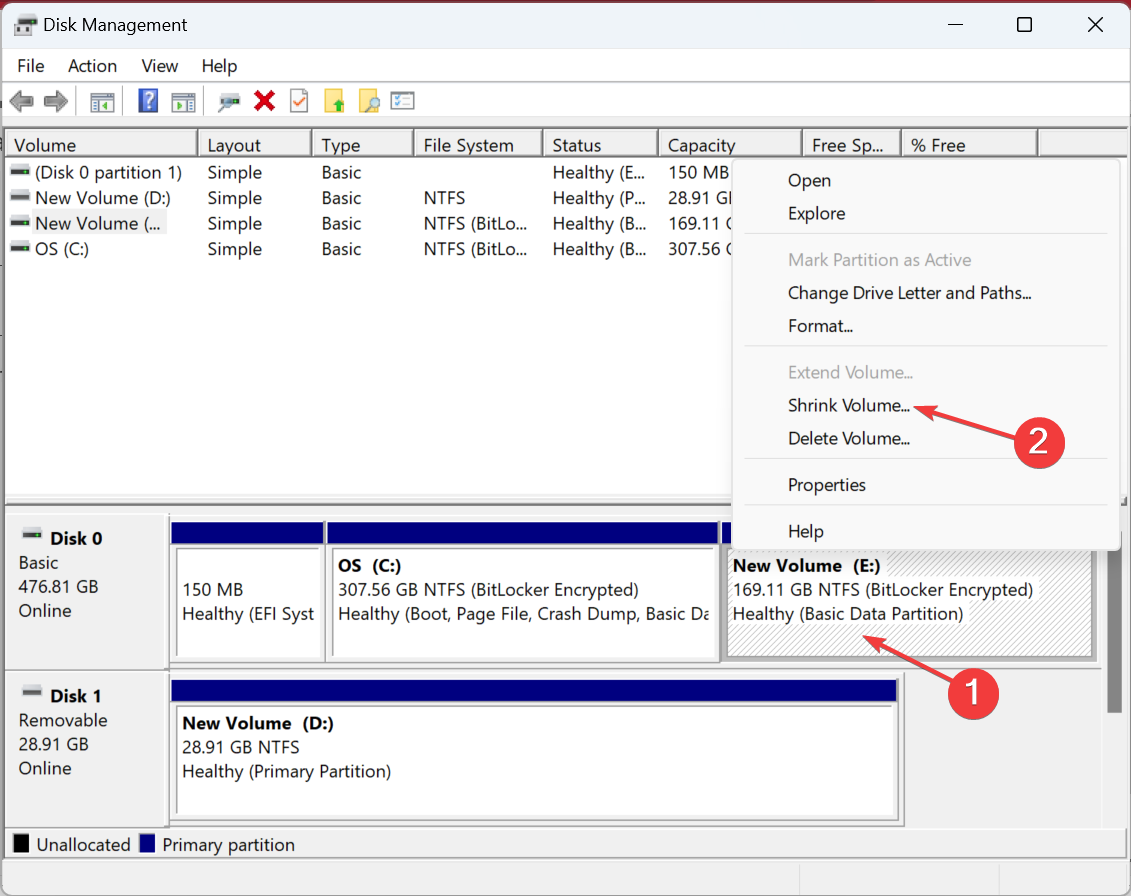
- Right-click on the partition that you want to resize, and select Shrink Volume.
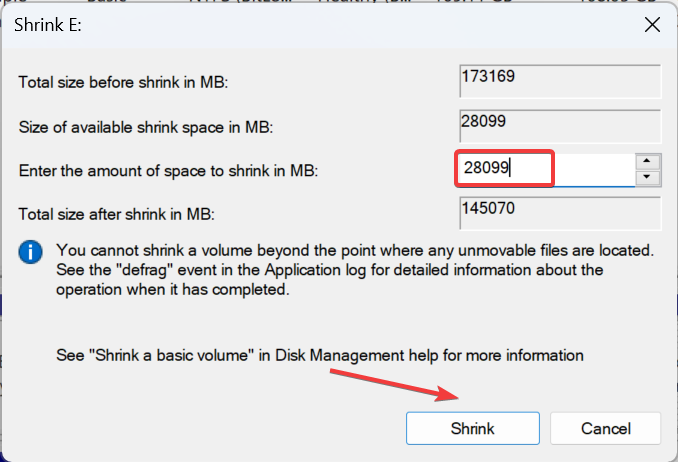
- Enter the storage space to reduce in the field, then click Shrink, and wait for the operation to complete.
1.2 Extending the volume
- Once done, right-click on the partition to the left of the unallocated space, and select Extend Volume.
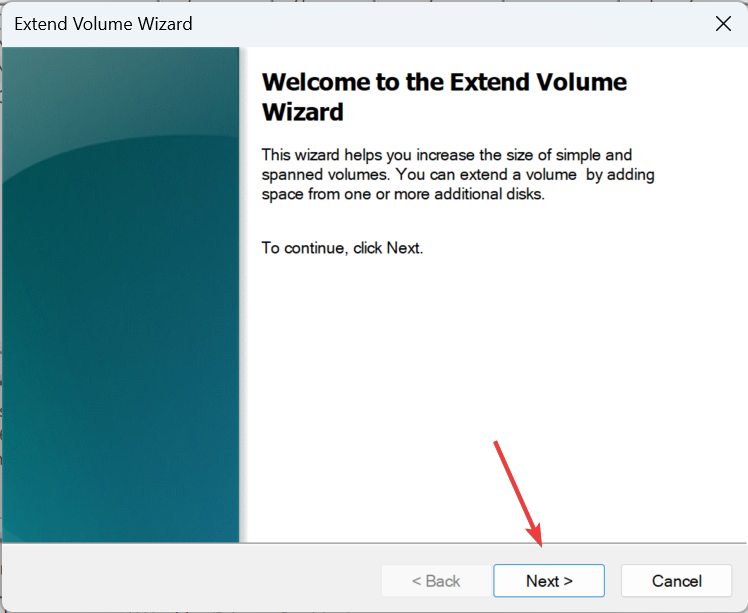
- Click Next to proceed.
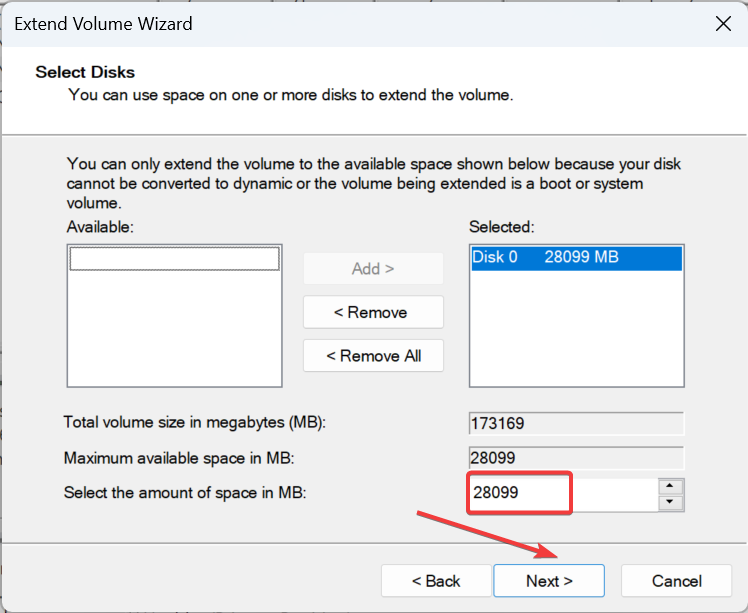
- Make sure to enter the maximum available storage in the Select the amount of space in MB text field unless you want to create another partition on the unallocated space, as detailed in the next section, and click Next.
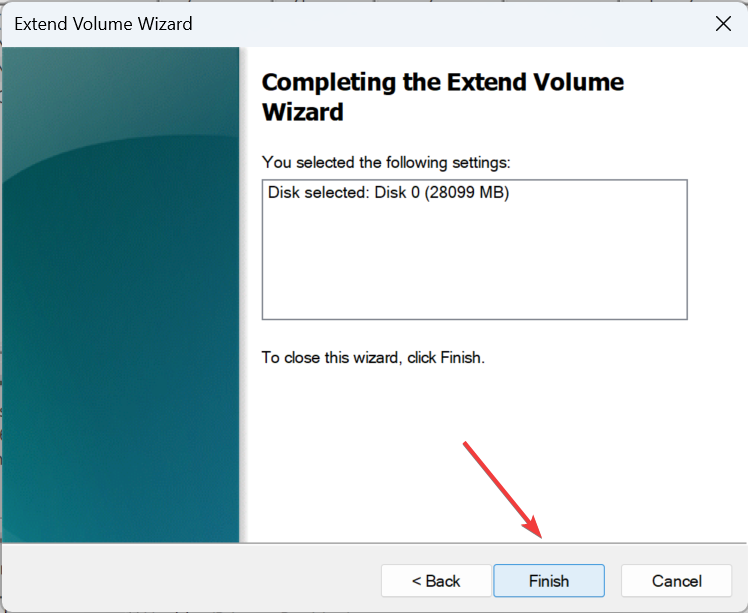
- Finally, click on Finish to extend to partition to the unallocated space.
1.3 Creating a new simple volume
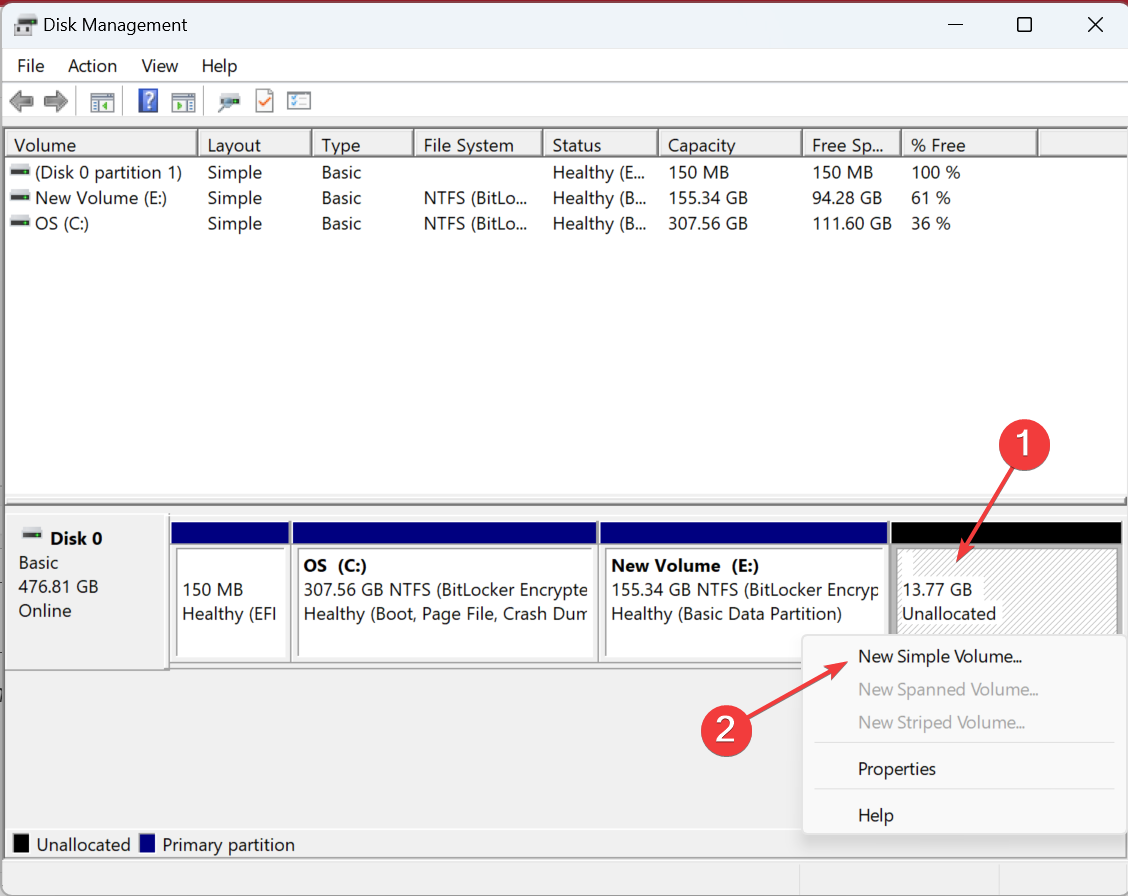
- Right-click on the unallocated space in Disk Management, and select New Simple Volume.
- Click on Next.
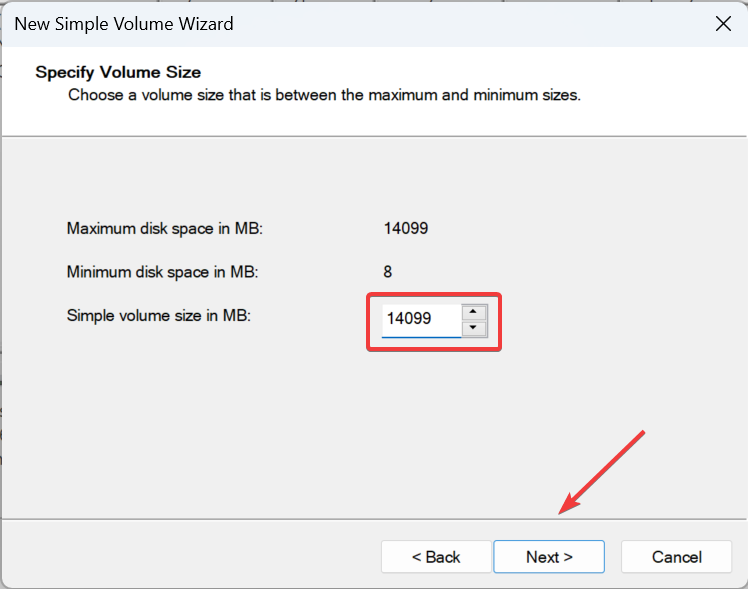
- Make sure the maximum available disk space is entered in the Simple volume size in MB text field, and click Next.
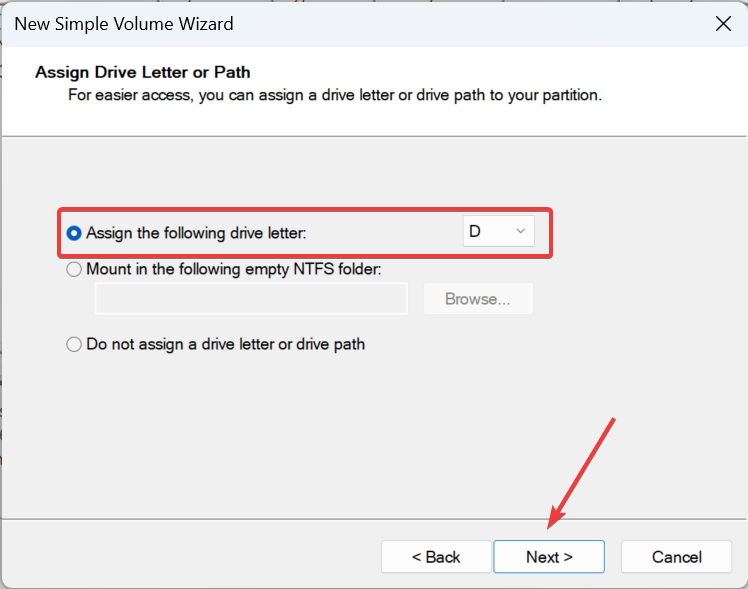
- Assign a drive letter or go with the default selection, and click Next. Remember, a drive not assigned a drive letter won’t show up in the File Explorer.
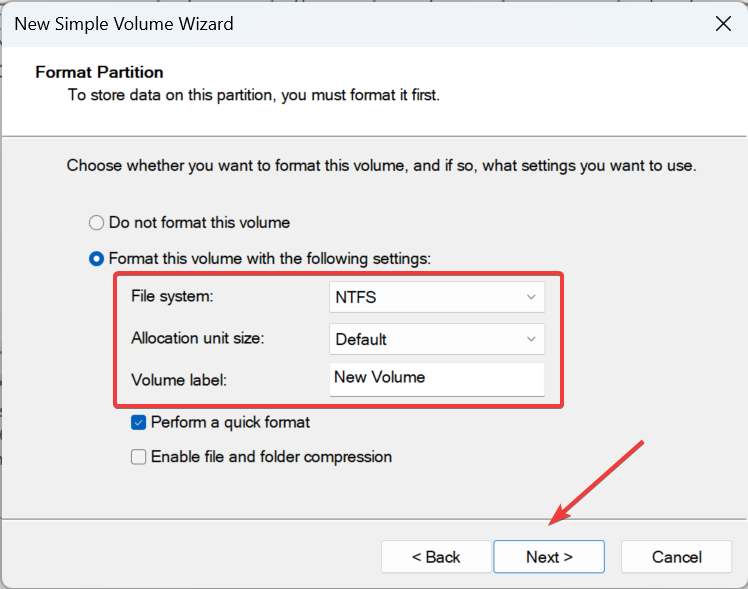
- Now, choose a File system, Allocation unit size, and Volume label, and click Next to proceed. It’s best that to go with the default settings unless you are fully aware of the process.
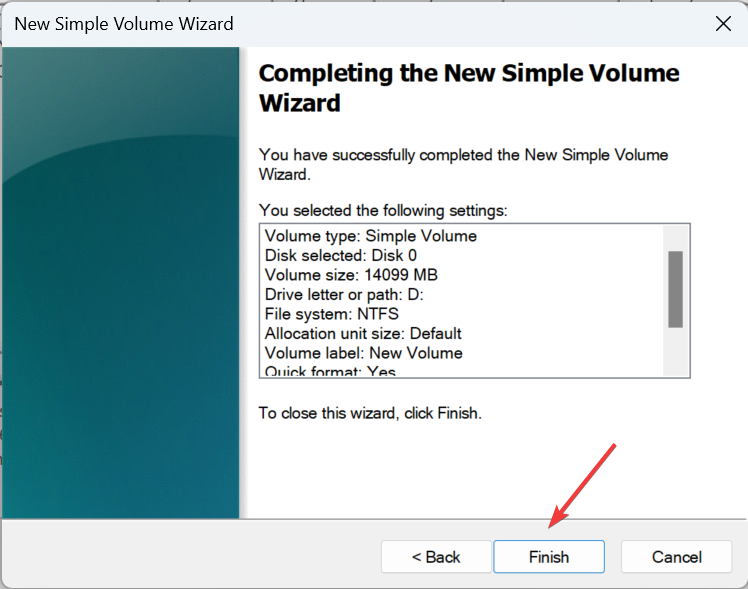
- Finally, verify the details, and click on Finish.
That’s how you can resize a partition in Windows 10 without losing data. While doing so, you can either extend another partition or create new ones from the unallocated space created after deleting a partition.
2. Use Diskpart
2.2 Selecting and shrinking a partition
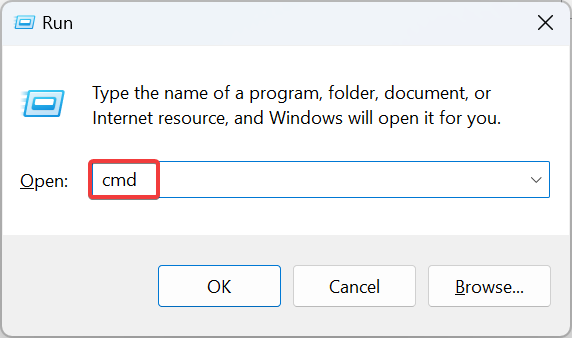
- Press Windows + R to open Run, type cmd in the text field, and hit Enter.
- Click Yes in the UAC prompt.
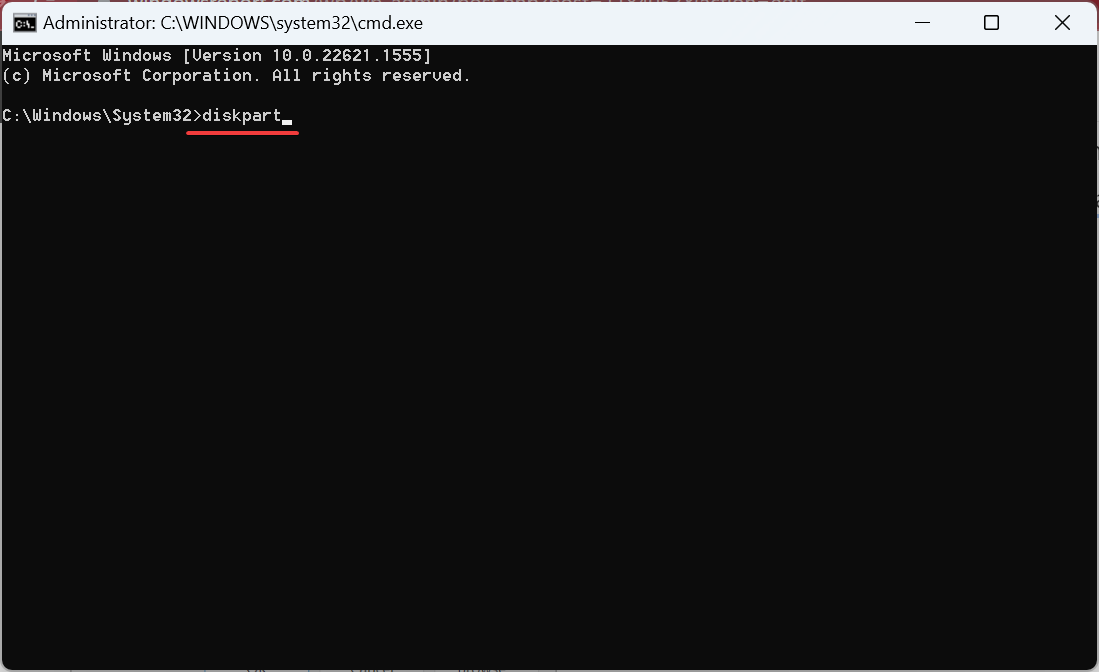
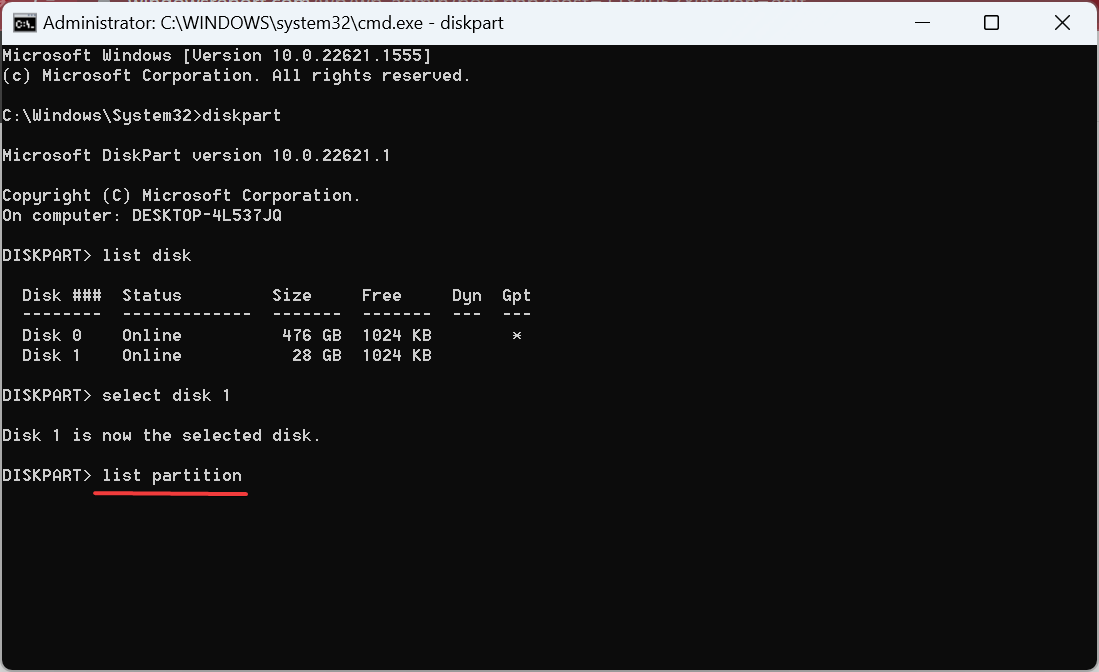
- Use this command to run the Diskpart utility:
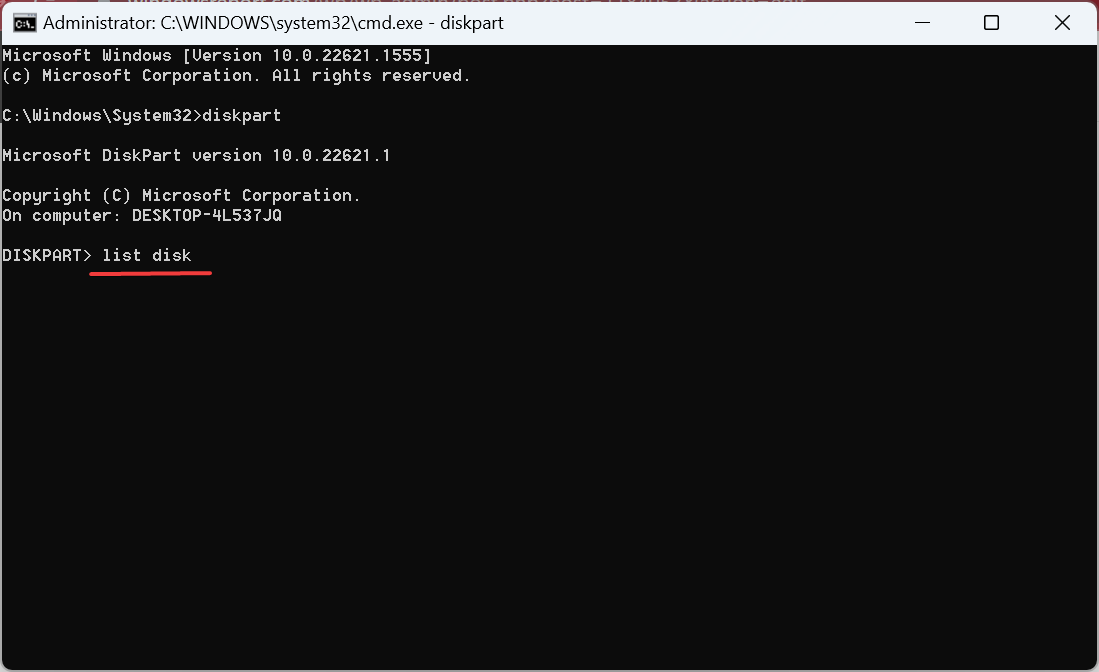
diskpart - Paste the following command and hit Enter to view the available disks:
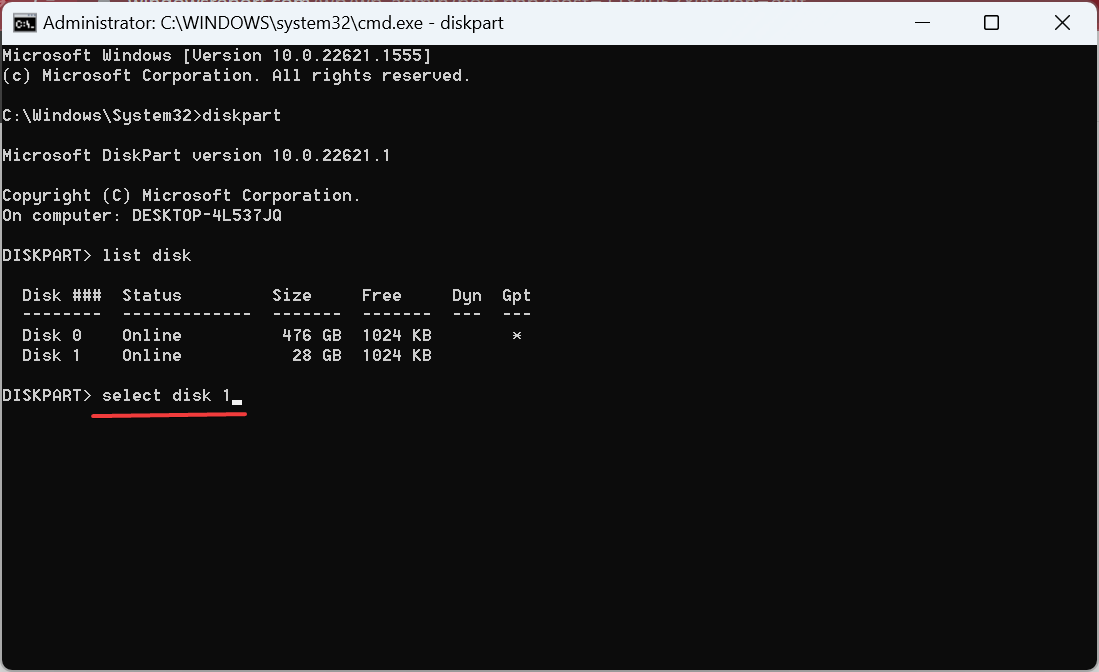
list disk - Now, run this command while replacing X with the number allotted to the desired disk:
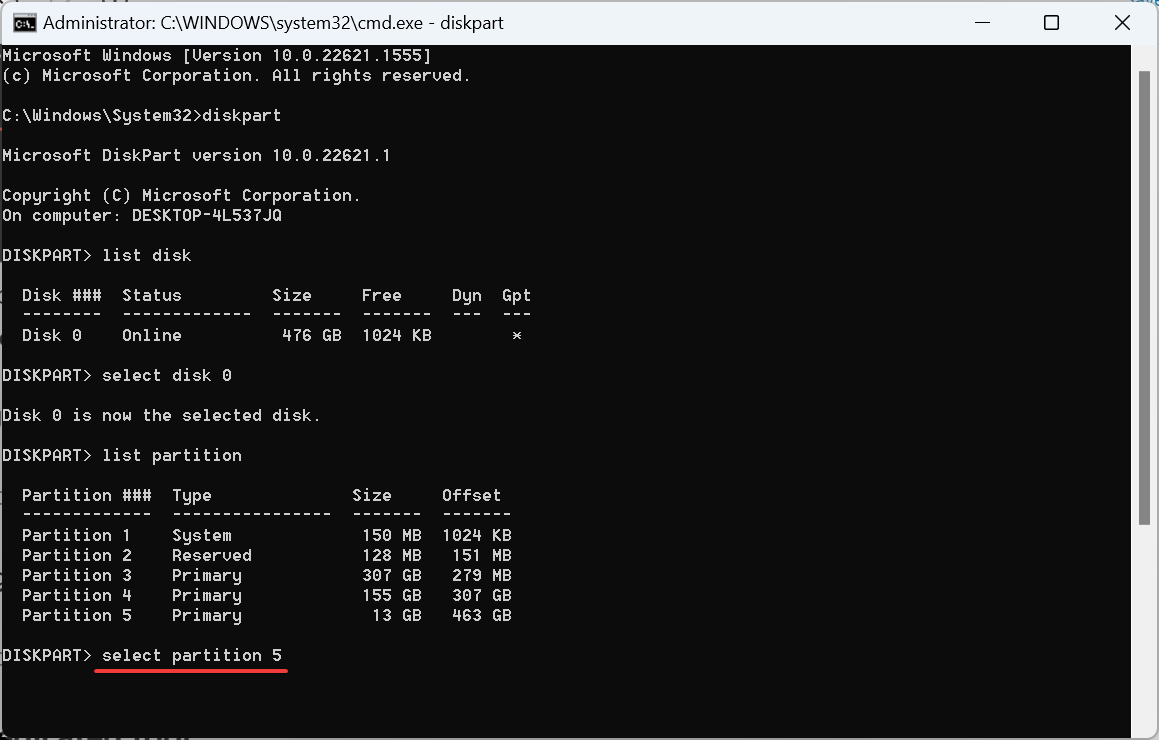
select disk X - Execute the following command to view the partitions:
list partitions - Use this command while replacing X with the partition number to select the desired one:
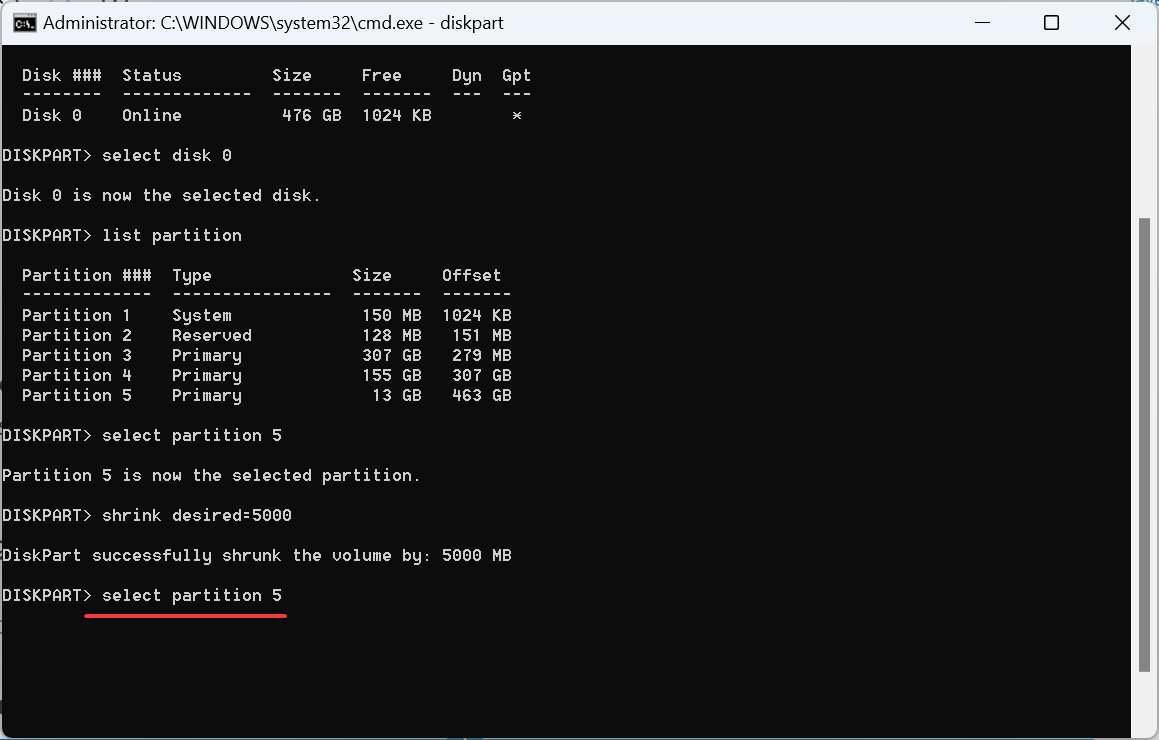
select partition X - Finally, use this command to shrink the partition by the required amount where XXXX represents the space to be shrunk:
shrink desired=XXXX
2.2 Extending another partition
- After shrinking a partition, use the following command to select another partition to be extended:
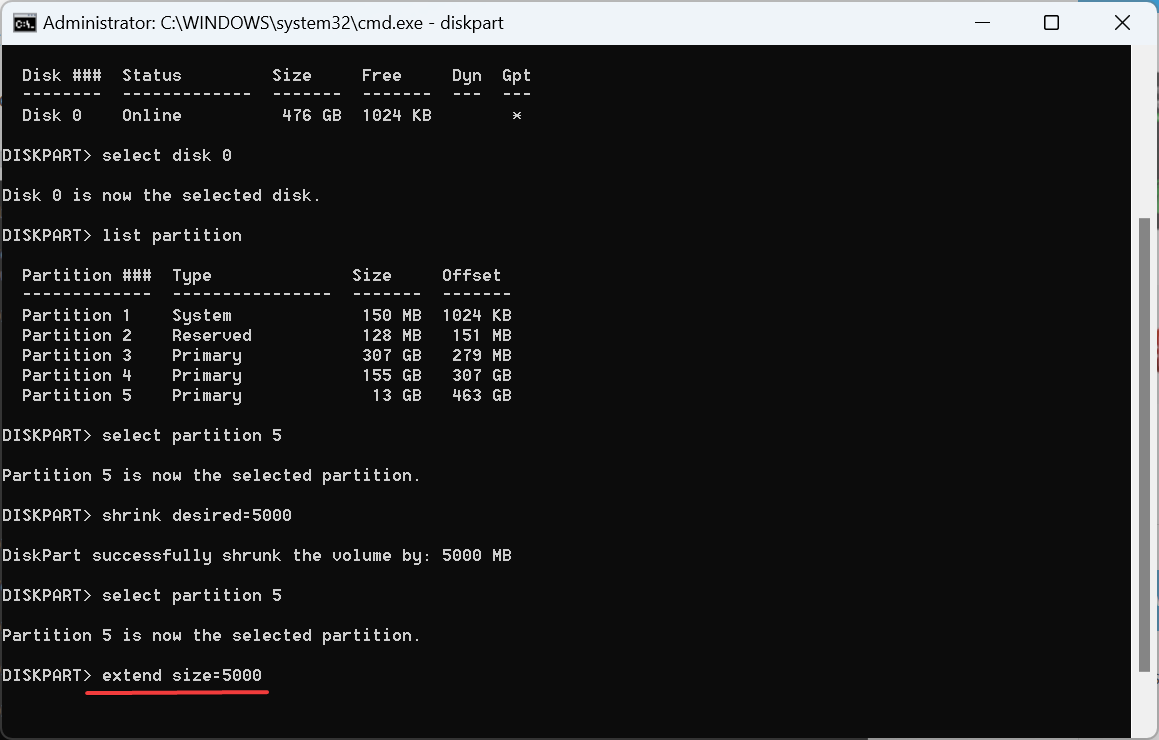
select partition X - Now, execute this command where XXXX represents the space to be extended:
extend size=XXXX
2.3 Creating a new simple volume
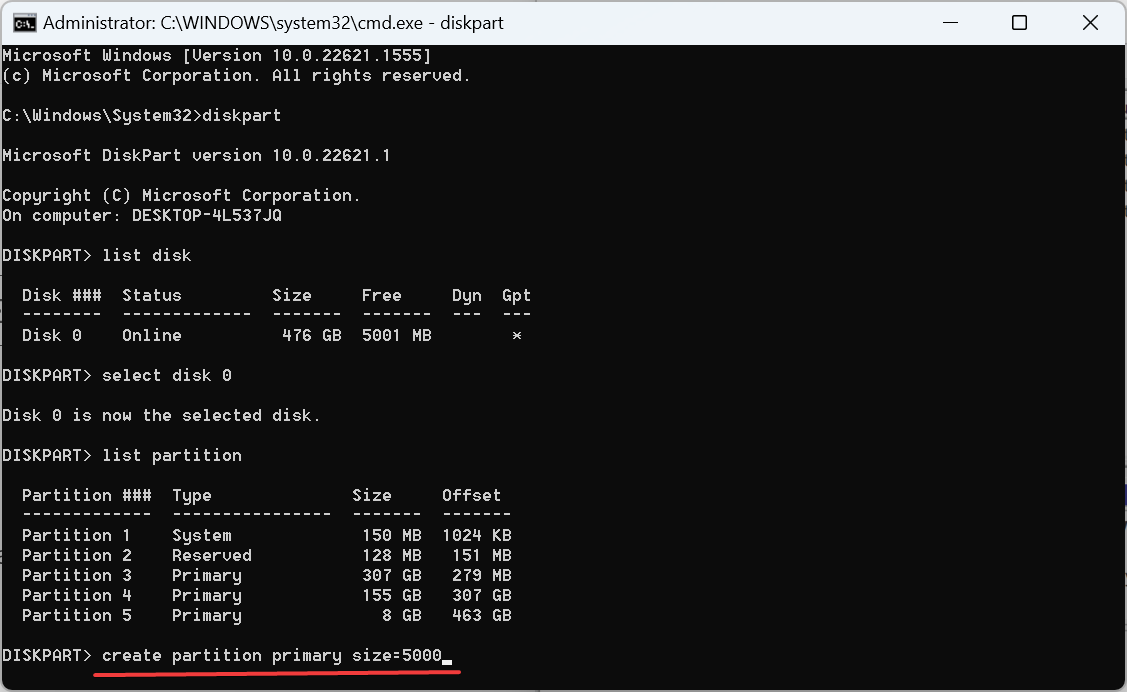
- Simply use this command to create a new partition while replacing XXXX with the available unallocated size:
create partition primary size=XXXX - Run this command to assign a drive letter where X represents an unused one:
assign letter=X - You can now format the drive with the desired disk format, be it fat32 or NTFS.
That’s it! You can always use Diskpart to shrink partitions without losing data and resize them seamlessly. Though the command line utility seems a bit intricate initially, it’s way simpler than Disk Management once you get the hang of things.
There’s also the possibility to use Disk Management in Windows 7, and the highlighted guide will provide all the information.
3. With a dedicated tool
If the two methods seem complex, there’s always the option to use a reliable and dedicated Disk Management tool to create, format, and resize partitions in Windows.
The basic functions are included in the free version for most tools, but you must subscribe to the paid version for advanced features. But owing to the simplicity offered by these, many prefer a dedicated tool.
Now that you understand how to resize partitions without losing data, check how to speed up an SSD and quick tips to increase the file transfer speed in Windows.
For any queries or to share your thoughts on the subject, drop a comment below.



User forum
0 messages