Change Autoplay Settings in Windows 10: Set the Best Ones
Select optimal settings for the best performance
Key notes
- AutoPlay has long been a part of Windows OS and has, over time, become a critical feature.
- You can quickly change the AutoPlay settings to have the desired outcome when plugging in a storage device.
- Make sure to test every setting before you settle for one.
Just like the earlier iterations of the OS, Windows 10 also has the Autoplay feature. But if you want to be in complete control, it’s critical to change the Autoplay settings in Windows 10 and configure them for the best performance.
Over the years, the AutoPlay feature has remained the same, popping out a notification whenever you insert a CD, DVD, or even a USB stick. If you were wondering how to access its settings to turn it off or tweak it further, here’s our step-by-step guide.
How do I enable AutoPlay in Windows 10?
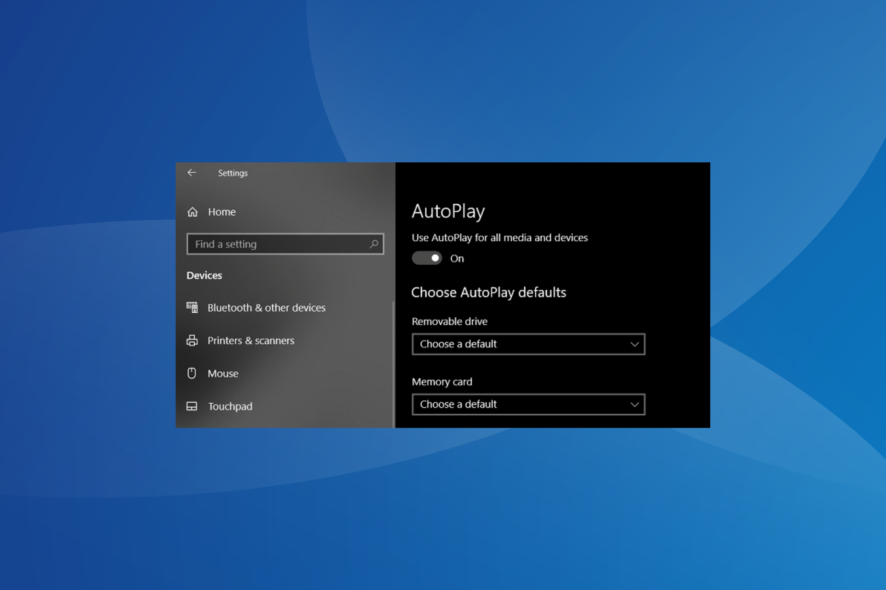
- Press Windows + S to open Search, type AutoPlay settings, and click on the relevant search result.
- Now, enable the toggle under Use AutoPlay for all media and devices.
That’s it! Enabling AutoPlay in Windows 10 is the easier part. It wouldn’t take you more than a few seconds. What’s tricky is getting the settings right. Let’s find out more about that!
How do I change the AutoPlay settings in Windows 10?
Once in the AutoPlay settings, you can tweak them for a personalized experience. Here are a few changes you can make:
- If you would like AutoPlay to stop notifying you, you can easily turn it off.
- Next, you will have a list of all the external drives that you have connected. According to the type of device, you can enable various actions to take place.
- For a removable USB drive, you can choose from the following:
- Configure storage settings
- Take no action
- Open folder to view files (File Explorer)
- Take no action
- For a memory card, you have the following options:
- Play video files (with the video media player that you have installed)
- Import photos and videos
- Play
- Take no action
- Open folder to view files (File Explorer)
- Ask me every time
That’s all for now! You should understand the various AutoPlay settings and how these can be changed in Windows 10. The options are pretty much self-explanatory. Just choose whichever one has the desired effect.
Before you leave, find out how to make your Windows 10 PC run faster than ever.
For any queries or to share your favorite AutoPlay settings with us, drop a comment below.
Read our disclosure page to find out how can you help Windows Report sustain the editorial team. Read more


Improve this guide


User forum
0 messages