How to Edit Windows Live Mail's Signature in Just a Few Steps
3 min. read
Updated on
Read our disclosure page to find out how can you help Windows Report sustain the editorial team Read more
Key notes
- Having an email signature in Live Mail is the professional thing to do.
- Editing the signature is very easy by accessing the Signature tab from the app.

Windows Live Mail and Outlook Express by default support email signatures. Adding an email signature allows you to embed a snippet of information with all the emails sent from your email account.
Now, what if you want to edit a Windows Live Mail signature? It’s actually pretty easy. You can edit the existing Windows Live Mail signature from the Options.
In this article, we show you how to edit and add Windows Live Mail signatures.
How can I edit the Windows Live Mail’s signature?
1. Edit the Windows Live Mail signature
- Open Windows Live Mail app.
- Click on File and select Options, then Mail.
- If you don’t see the File option, click on Tools and select Options.
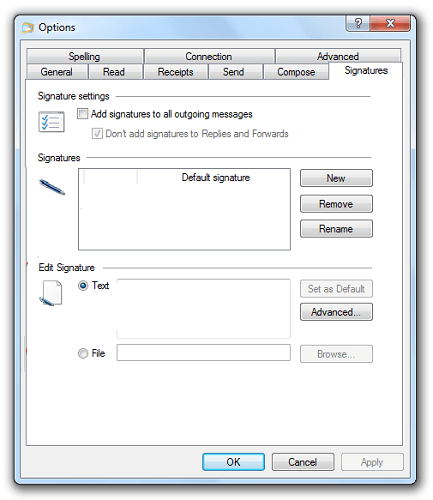
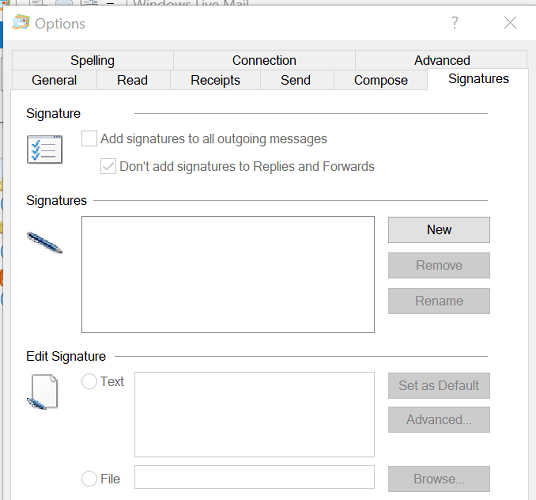
- Open the Signatures tab.
- Here you can see all the previously created email signatures.
- Click on the signature you want to edit.
- You can edit plain text signatures directly from the Live Mail editor.
- If not, note the path and file name in the box.
- Open File Explorer and navigate to the path you noted earlier.
- Open the file in Notepad and make the changes.
- Save the file and exit.
2. Add a signature to Windows Live Mail
- Start Windows Live Mail.
- Click on File and select Options, then Mail.
- On older versions, click Tools and choose Options instead.
- Open the Signatures tab.
- Select New from the Signatures section.
- Under the Edit Signature section, create your email signature.
- Click OK to save the signature.
- Open the Signature tab again and make sure the option Add signatures to all outgoing messages is checked.
3. Add a signature to an email
After composing an email message, you can select which signature you want to use:
- In the Compose window, go to Insert and click on Signature.
- Press and hold the Alt key if you can’t see the menu bar.
- Choose the signature you want to use and send the email.
While creating email signatures, make sure it is short and precise. Try to limit the email signature to a maximum of 3-4 lines to keep it professional.
If you don’t want to add a signature to replies and forwards, then follow these steps:
- Go to File.
- Select Options.
- Go to the Signature tab.
- Uncheck Don’t add signatures to Replies and Forwards option.
By following the steps in this article, you can add and edit email signatures in Windows Live Mail.
Do you prefer plain text or HTML enriched signatures? Leave your answer along with any other questions and suggestions in the comments section below.

