How to Turn Off the Hard Disk in Power Options
The hard disk will stop spinning after the set idle period
3 min. read
Updated on
Read our disclosure page to find out how can you help Windows Report sustain the editorial team Read more
Key notes
- Turning off the hard disk is one of the most efficient ways to conserve power for laptop users.
- Hard disk turn-off is similar to enabling the Sleep Mode in a system, where the HDD stops spinning.
- The fastest way to access the turn-off hard disk power settings in Windows 11 is to run a few commands.
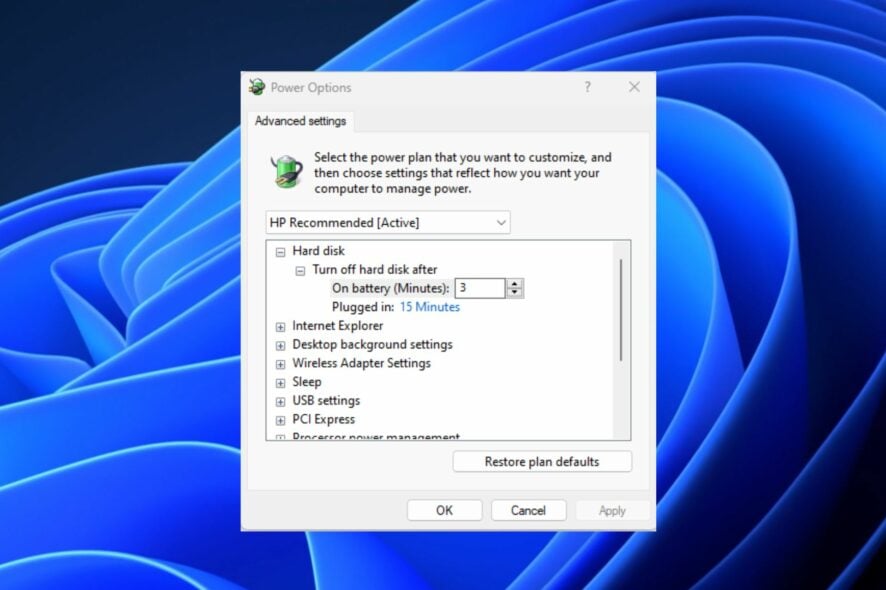
Recently, some users have reportedly made inquiries as to know what it means to turn off the hard disk in Windows power.
Getting familiar with what the option brings to bear the fact that an opportunity in Windows 11 enables the user to turn off hard disk drives for a specified period.
What does turning off the hard disk mean?
Turning off the hard disk is a part of power management options that enable users to conserve their system’s energy.
Depending on the selected power plan, the user can decide to enable or disable it out of the box. For instance, it can be enabled in the Balanced and Power Saver power profiles and disabled in the Performance power plan.
Moreover, when enabled, your hard disk drive will be turned off after your PC is idle during the specified period. Turning off the hard disk is similar to enabling the Sleep Mode in a system.
Although, when next your software accesses the drive, it will take a few seconds before the drive starts spinning and give access to files.
How do I turn off the hard disk in Windows power options?
1. Use Control Panel
- Click the Start button and type Control Panel and launch it.
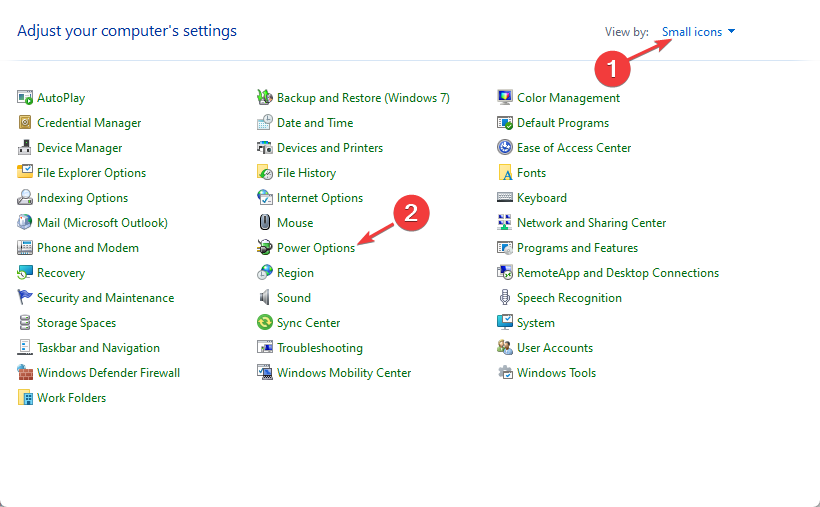
- Change the View by from Category to Small icons and open Windows 11 Power Options.
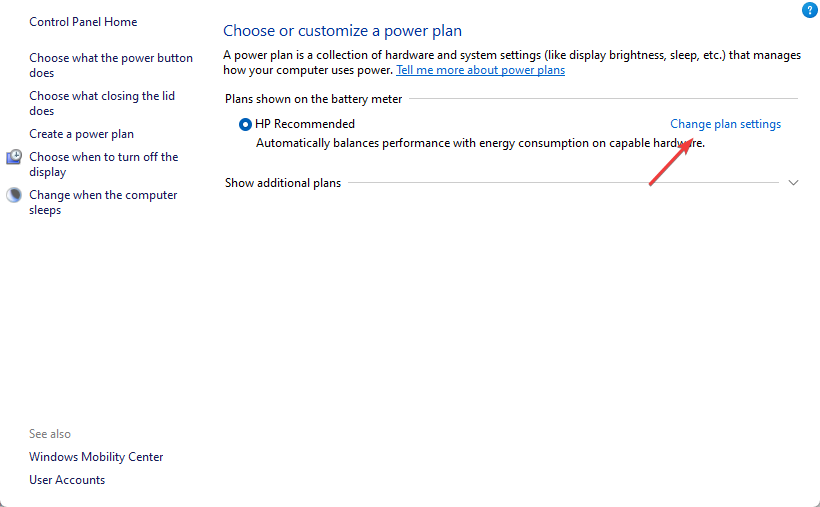
- Click on Change plan settings.
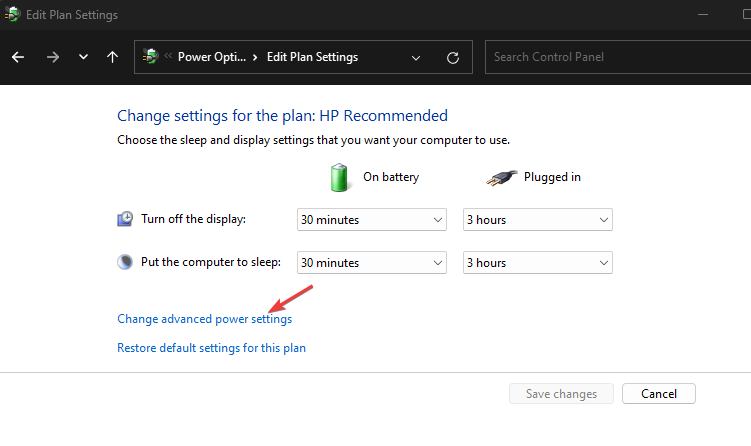
- Choose Change advanced power settings to access the disable hard drive feature.
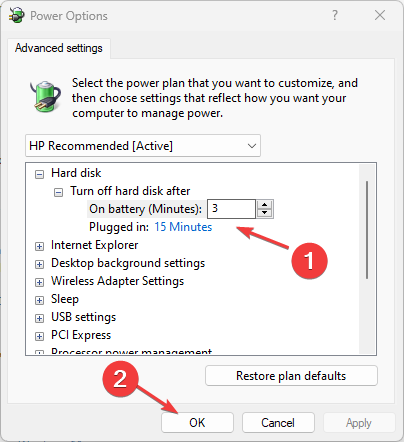
- To access the Turn off hard disk after setting if it’s greyed out, click on Change settings that are currently unavailable.
- Edit the Turn off hard disk time for the On battery field and also for the Plugged in field.
- Once done, press Apply and OK to save the changes and exit.
This should be an easy way to turn off hard disk in Windows power options. However, you can also learn how to tweak other system settings in Control Panel.
2. Use Command Prompt
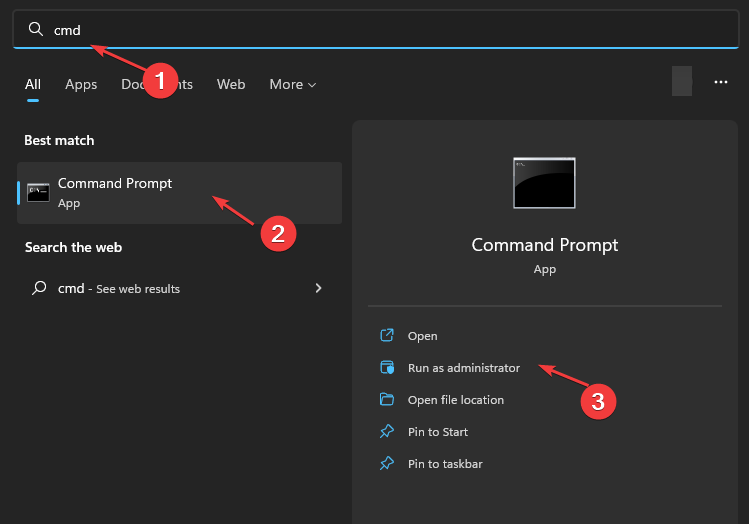
- Press the Windows key, input the cmd in the search space, and select Run as administrator.
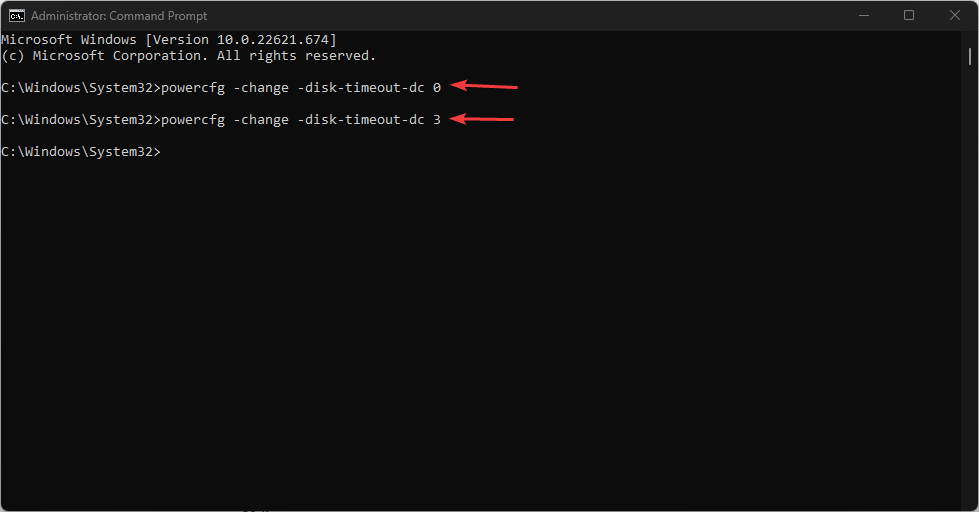
- Type the following command in the space and press Enter:
powercfg -change -disk-timeout-dc 0 - Replace 0 with the number of minutes you want your hard disk to turn off after idle for the On battery option.
- Next, run the below command in the space and press Enter:
powercfg -change -disk-timeout-ac 0 - Now, replace 0 with the number of minutes you want your hard disk to turn off after idle on the Plugged in option.
- Restart your PC for all the changes to take effect.
Make sure not to set the idle period to a few minutes. It can wear out your HDD and trash its head.
For users who can’t access Command Prompt as administrator, you should check this guide for a quick fix.
Many of our readers asked: Does turning off the hard disk affect SSDs? No, it doesn’t, since it has no moving parts, unlike the HDD.
For users willing to know how safe it is to turn off a hard disk on HDD, it is recommended to keep the disk spinning than to make it stop and start all the time. This will help prevent HDD wear out.
Further, you can learn how to fix any Windows 11 disk error by following the solutions provided in this guide.
If you have further questions or suggestions, do not hesitate to use the comments below.

