How to Update WSL2 Kernel on Windows 11
Install the latest Windows update to get the latest WSL2 version
Key notes
- WSL2 update can be done by ensuring your PC runs the latest update.
- Else you can manually force the WSL2 update by following the steps mentioned in our guide.

On Windows 11, the WSL2 or the Windows Subsystem for Linux will get updated when you install the latest update. Hence, it is a part of the Windows update.
However, if the automatic update fails, you must do that manually. In this guide, we will show you how you can update WSL2 Kernel on Windows 11. Let us check out the guide.
Why do I need to update WSL2 Kernel on Windows 11?
Why must you update the WSL2 Kernel on Windows 11 if the Windows update will update it manually?
The main reason behind this is that the Linux distro you are using might need something in the latest WSL update, and the Windows update might not have arrived.
The lag can be a big hurdle for you to run the Linux distro smoothly on your PC. So, you need to manually update the WSL2 Kerner on Windows 11.
Notably, you can force update the WSL2 Kernel from the command line itself. Note that this method isn’t similar to upgrading from WSL to WSL2.
How can I update WSL2 Kernel on Windows 11?
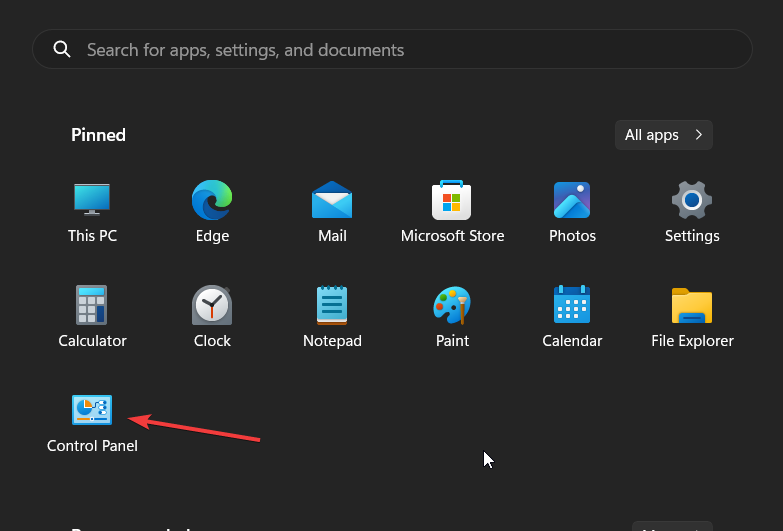
- Press the Win key to open the Start menu.
- Type Command Prompt and run it as an administrator.
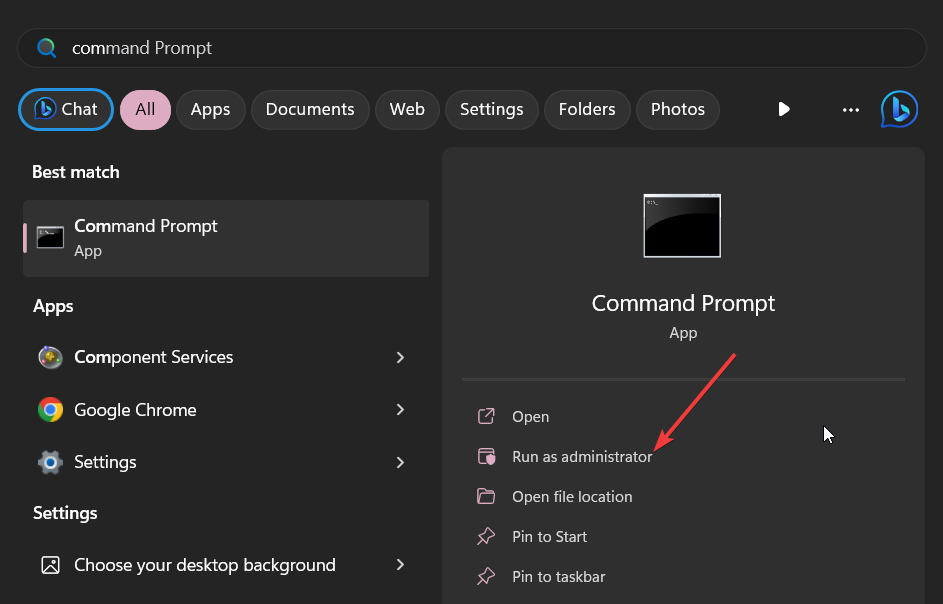
- Type the below command and press Enter to confirm the current Windows Subsystem for Linux version.
wsl --version - To update the WSL2 on your computer, type the below command and press Enter.
wsl --update
- In order to confirm the update has been installed, type the below command and press Enter.
wsl --version - In case the update is available, the command line will download the update.
Do note that there is a lag between the update becoming available through Windows update for Windows Subsystem for Linux and Microsoft releasing a new kernel to GitHub.
So, the version available via the Windows Update may not match the version you installed manually.
How do I enable automatic WSL2 updates?
- Press the Win + I keys to open Settings.
- Click on the Windows Update on the left pane.

- Select the Advanced options button on the right.

- Toggle on the Receive updates for other Microsoft products option.

- Restart your computer to apply the changes.
When you toggle on the above option, you will start receiving updates for the WSL2 Kernel automatically, and your PC will install the latest updates without your input.
This way you don’t have to worry about manually installing the WSL2 Kernel update on your Windows 11 PC. However, you should make sure that the Windows updates are installed regularly.
How can I roll back the WSL2 Kernel to the previous version?
- Press the Win key to open the Start menu.
- Type Command Prompt and open it as an administrator.
- Type the below command and press Enter.
wsl --update --rollback
- After the process completes, type the below command and press Enter to check the version.
wsl --version
Often, you might need to roll back to the previous version of the update in case there is something problematic with the current version. Following the above steps, you can easily roll back to the previous WSL2 update on your Windows 11 PC.
How do I install a specific WSL2 distro?
- Press the Win key to open the Start menu.
- Type Command Prompt and open it as an administrator.
- Type the below command and press Enter to view the list of available WSL2 distro on Windows 11.
wsl --list --online - Execute the below command to install the WSL2 with a specific distro on your Windows 11 computer.
wsl --install -d DISTRO-NAME(Replace the DISTRO-NAME with the distro you want to install) - Reboot your computer and continue with the distro setup.
How can I enable Windows Subsystem for Linux?
- Press the Win key to open the Start menu.
- Open the Control Panel.
- Select Programs and Features.
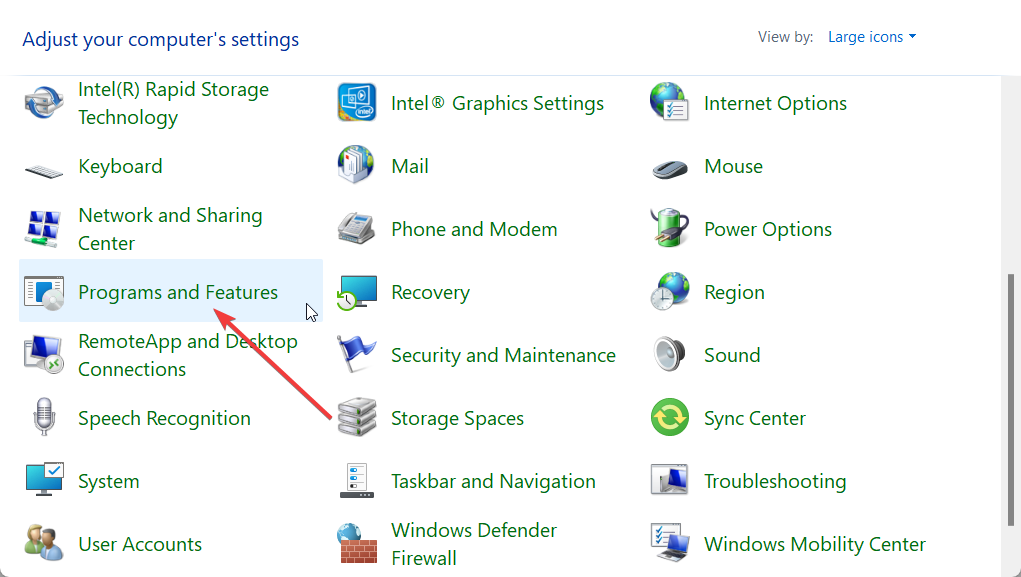
- Click on Turn Windows Features on or off from the left pane.

- Scroll down and check the box for Windows Subsystem for Linux and press OK.

Following the above steps, you will be able to enable the Windows Subsystem for Linux on your Windows 11 PC.
That is it from us in this guide. If you are getting the WSL Something Went Wrong: Please Restart error, then you should apply the fixes mentioned in our guide to resolve the problem.
We also have a guide explaining how to uninstall WSL in Windows 11. Following the steps, you will remove all remains of WSL from your PC.
For users who are coming across the WSL2 stopped working error on their Windows 11 PCs, we would suggest you apply the solutions to resolve the problem.
Now that you installed WSL2, you can even access EXT4 on Windows 11 easily.
Feel free to let us know in the comments below if the above steps helped you update the WSL2 on your Windows 11 computer.
Read our disclosure page to find out how can you help Windows Report sustain the editorial team. Read more


Improve this guide


User forum
0 messages