X3daudio1_7.dll was not Found: Fix This Error With 6 Methods
Deleted files and corrupt registry sections can cause this error
Key notes
- The x3daudio1_7.dll is missing issue can be caused due to a misplaced or deleted file or corrupted registry sections.
- Some of Windows’ built-in system tools can fix the x3daudio1_7.dll is missing from your computer issue.
- An even better way is to utilize certain third-party system repair software to fix this annoying error.
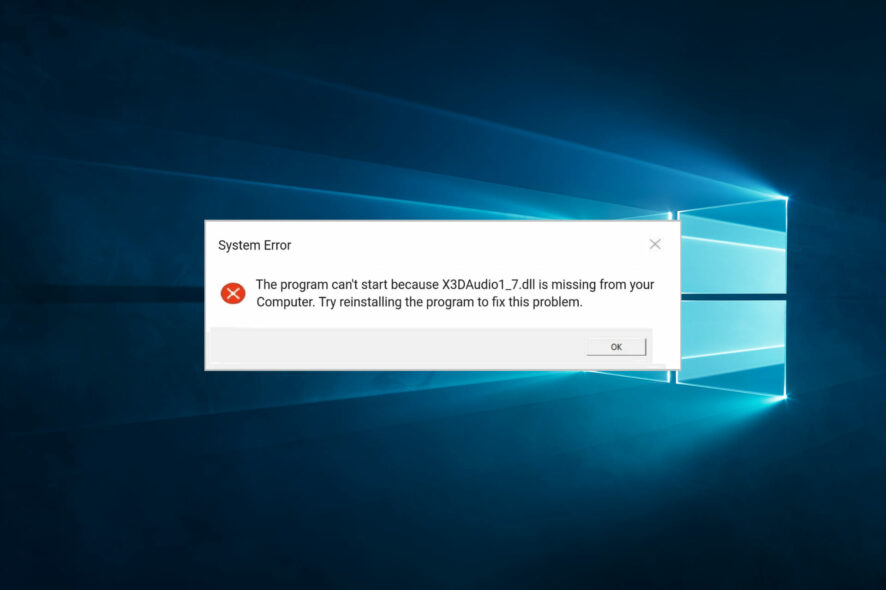
Windows has myriad DLL (Dynamic Link Library) system files. The x3daudio1_7.dll is a DirectX DLL file some games and multimedia software need. A few users have reported an error message, x3daudio1_7.dll was not found when opening some software.
The software won’t usually start because x3daudio1_7.dll was not found. So, you can’t ignore the error message if you want to utilize software that requires that DLL file. There are numerous potential resolutions for fixing it, and we explore them in this article.
Why am I getting x3daudio1_7.dll was not found?
We have figured that a few things may cause the error. At the top of the list are the following:
- Corrupt system files – These are a massive problem in computers and are known to cause many dll-related issues.
- Wrong X3DAudio library version – If the game or application requires a different version from what you have, you will get a missing dll notice.
- System requirements – For some users, it is a problem where the computer does not meet the minimum system requirements to use the application.
However, it would not matter what the cause is because you can fix the problem using the solutions we proffer.
What is X3DAudio1_7 dll?
It is a file that comes with the DirectX suite of software. It is an integrated part of this collection and helps manage graphic programs, videos, and game tasks. This component is integral to how the Windows 10 operating system handles some applications.
Let us now explore what you may do when it is missing.
How can I fix the code execution cannot proceed because x3daudio1_7 DLL was not found error?
1. Run an SFC scan
- Press Windows + R, type cmd, then press the Ctrl + Shift + Enter hotkey to open an elevated Command Prompt window.
- Type the script below and hit Enter:
DISM.exe /Online /Cleanup-image /Restorehealth - After that, type in this System File Checker command and hit Enter:
sfc /scannow
- When the SFC scan is finished, restart your PC if the scan outcome confirms Window Resource Protection has repaired files.
2. Restore Windows DLL files with third-party software
The x3daudio1_7.dll is missing, an error means that the file is deleted or damaged. You can restore Windows DLL files with dedicated tools.
For example, you can use a system repair utility that can fix many Windows-related errors, such as missing DLL or BSOD (Blue Screen of Death) issues.
Although you can manually download a fresh x3daudio1_7.dll from DLL file websites, a dedicated tool provides a quicker and more straightforward resolution.
It scans your whole machine and detects any system file issues, and with the help of its database, it replaces any faulty or missing files with fresh, well-functioning ones.
Such tools can also help you clean your PC by automatically detecting useless files such as temporary files, duplicates, etc. Plus, it is also able to fix specific files damaged by malware.
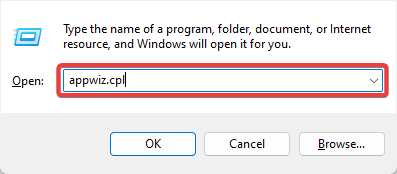
3. Reinstall software the x3daudio1_7.dll error arises for
- Press Windows + R, type appwiz.cpl, and hit Enter.
- Select the software that displays the x3daudio1_7.dll error message on the program list.

- Click the Uninstall button for the selected software (and Yes on confirmation prompts).

- Restart your PC before reinstalling the software.
- Then reinstall the uninstalled software with a downloaded installer file or DVD installation disc.
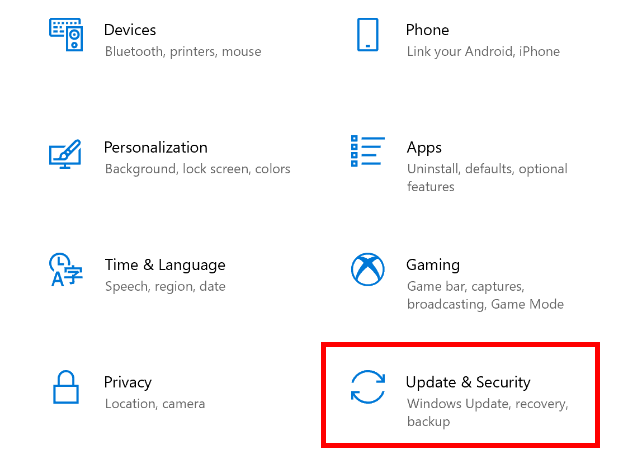
4. Update Windows
- Open Settings by pressing the Windows + I hotkey.
- Select Update & Security to open the Settings tab.
- Click on Check for updates.
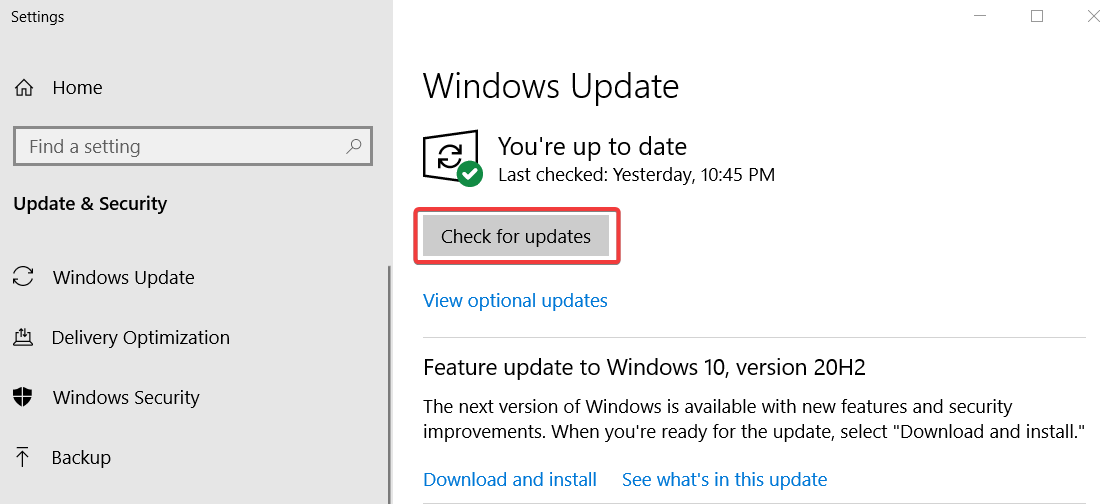
- If a new build version is available, click the Download and install option for the latest feature update.
5. Copy the x3daudio1_7.dll from another PC
5.1 Finding the file
- First, turn on a PC to copy an x3daudio1_7.dll form. That PC must have the same Windows platform and 32 or 64-bit system architecture as the one you need to fix the x3daudio1_7.dll error on.
- Open the search tool with the Windows + S hotkey.
- Type x3daudio1_7.dll in the search box to find that file, then click the Open file location option.
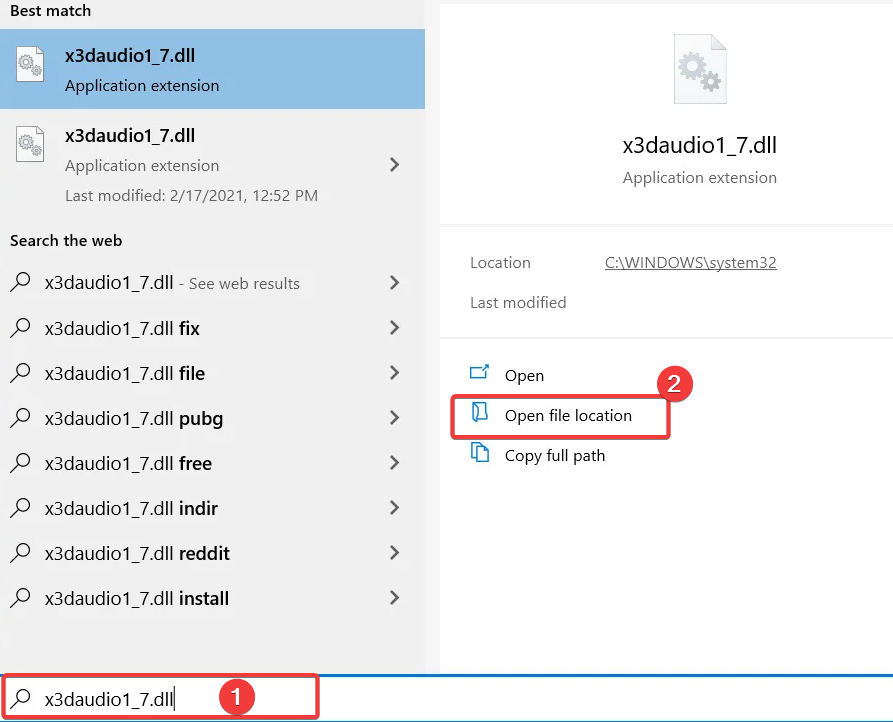
- Then insert a USB drive into your PC.
- Right-click the x3daudio1_7.dll and select Copy.
5.2 Transferring the file
- Open a folder on your USB drive within File Explorer.
- Right-click within a folder on your USB stick to select the Paste option.
- After that, turn on the PC where you need to fix the x3daudio1_7.dll error.
- Insert the USB drive that includes the x3daudio1_7.dll into the PC you must copy it to.
- After that, open one of these folders (the first for 64-bit and the second for 32-bit systems) to copy the x3daudio1_7.dll to:
C:\Windows\System32\C:\Windows\SysWOW64\ - Right-click within the folder you will copy the file to and select Paste.
- Select the Replace the file in the destination option if a Replace or Skip Files window opens.

- Open the Command Prompt as outlined for the second resolution.
- Enter this command in the Prompt’s window and press Enter:
regsvr32 x3daudio1_7.dll
- Restart Windows after registering the DLL file.
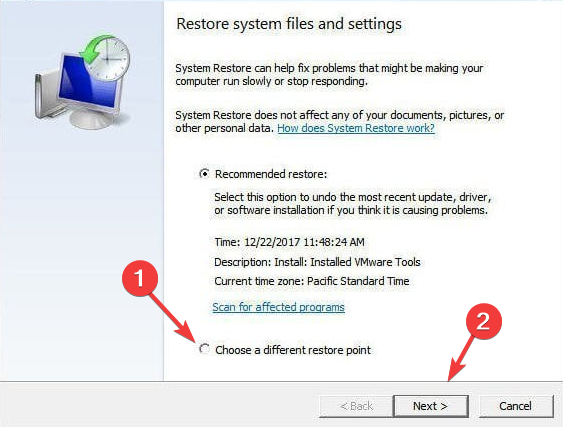
6. Restore Windows to a previous date
- Open Run’s window with the Windows + R keyboard shortcut.
- Type this command in the Open box and press Enter:
rstrui - Click the Choose a different restore point option and Next.
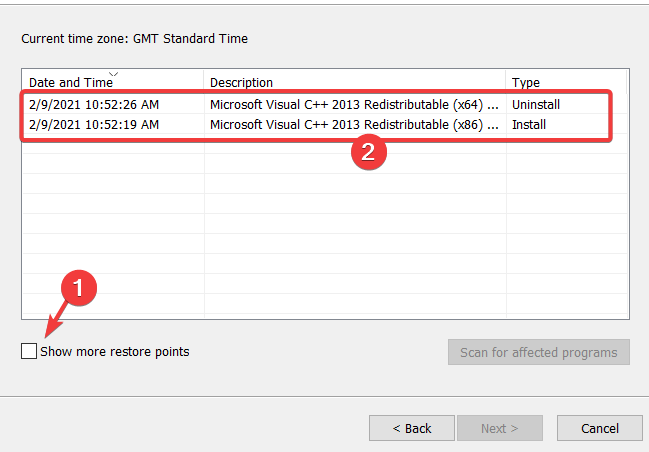
- If System Restore doesn’t display a complete list of restore points, select the Show more restore points option, then select a restore point date that will restore Windows to a time when there wasn’t an x3daudio1_7.dll issue on your PC.
- Click Next to continue.
- Select the Finish option to initiate the system restoration.
Restoring Windows will delete software installed after a selected restore point date. So, don’t be surprised if some software disappears after restoring Windows.
You can check what software a selected restore point removes by clicking Scan for affected programs in System Restore.
The resolutions above will probably be enough to fix any issues if x3daudio1_7.dll was not found for most users.
If you still need another fix, try reinstalling or resetting Windows as a last resort. You can reset Windows 10 and 8 as our Factory reset guide outlines.
We hope this has been helpful. Please leave us your comments below in the comments section.
Read our disclosure page to find out how can you help Windows Report sustain the editorial team. Read more


Improve this guide


User forum
0 messages