Fix: XP-PEN is Not Working With Windows 11
Connect using the provided USB cable for a quick fix
5 min. read
Published on
Read our disclosure page to find out how can you help Windows Report sustain the editorial team Read more
Key notes
- When XP-PEN is not working in Windows 11, update the OS, firmware and the current driver.
- The problem could arise due to incompatibility or recent changes to the PC.
- Read this guide to find out how our Windows Report hardware specialists fixed the problem.
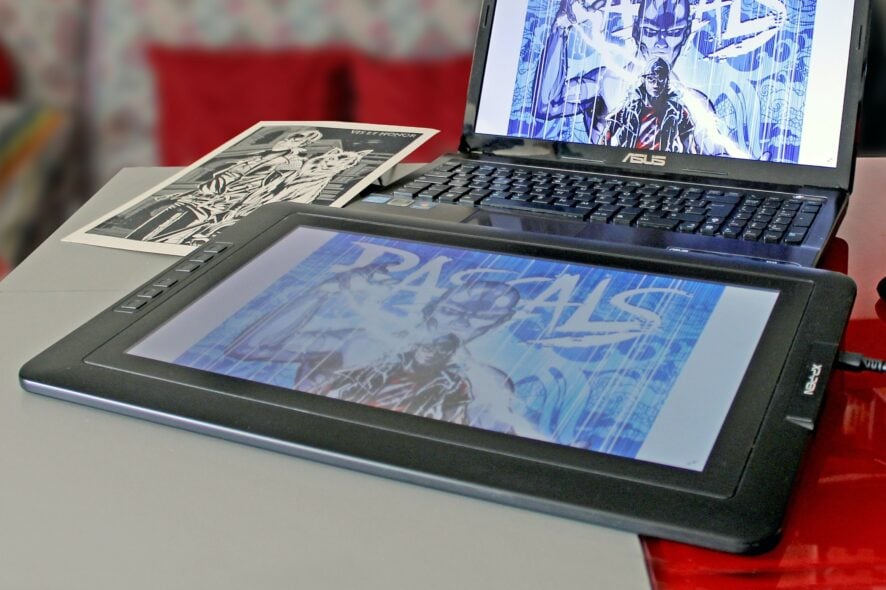
While compatibility is often a problem when we connect two devices, the number of users reporting that XP PEN is not working in Windows 11 is staggering. For some, the XP-PEN screen is not working, while others have trouble with the stylus.
Based on our research, more often than not, the problem lies at the user’s end. And it’s easy to get things up and running!
Why is my XP-PEN not working with Windows 11?
The most common underlying cause is corrupt or outdated hardware drivers. It includes both the XP-PEN drivers and the one for the USB port it’s connected to.
Also, outdated firmware, issues with the connection, or recent changes to the PC can lead to XP-PEN not being detected in Windows. Besides, a few found the problem to appear only after the computer wakes up from sleep, which should be addressed in future updates.
How do I get my XP-PEN to work with Windows 11?
Before we start with the slightly complex solutions, try these quick ones first:
- Restart both the computer and the XP-PEN graphics tablet.
- Check for all available Windows and XP-PEN firmware updates and download them. You may have to request XP-PEN support for the latest firmware version, in case one is not available yet.
- Lower the XP-PEN drawing tablet’s resolution. For a few, setting it to 720 did the trick!
- Check for improper connection. If connecting wirelessly, re-establish the connection. Also, you could use the USB cable if one came along with the tablet. Connect to a USB 3.0 port.
If none work, move to the fixes listed next.
1. Update the tablet drivers
- Disconnect the XP-PEN device from the PC.
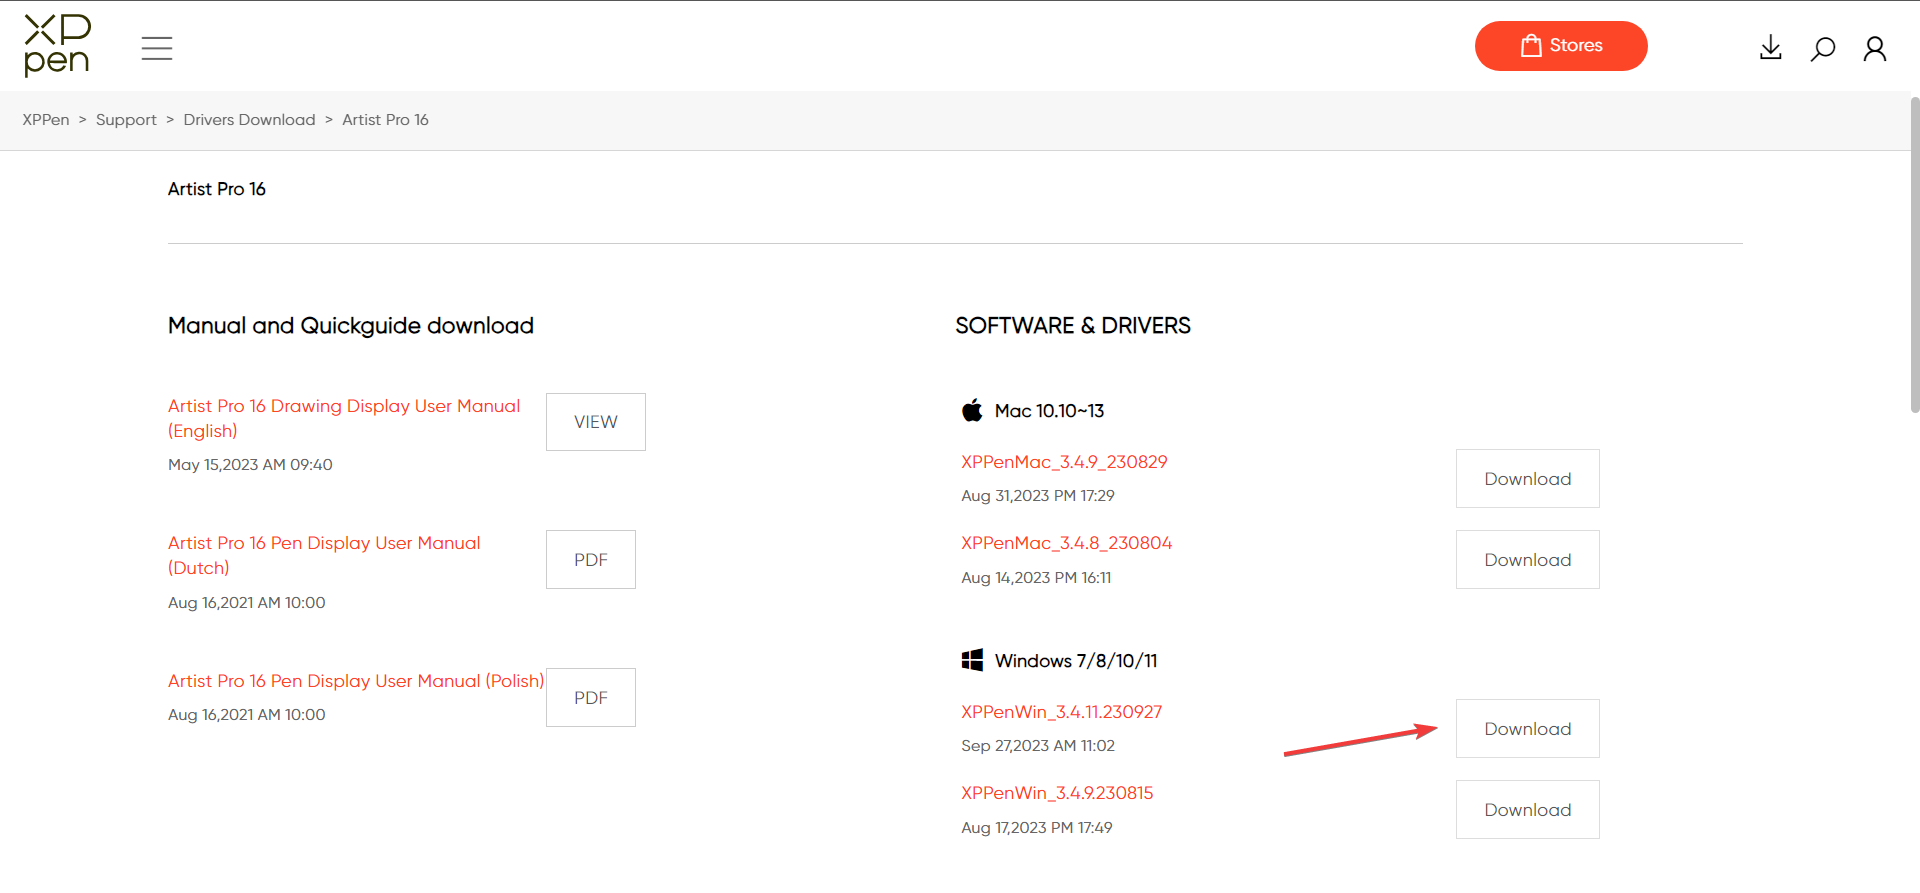
- Head to XP-PEN’s driver download page, and select your drawing tablet from the list.
- Click the Download button for the latest version under Windows drivers. The driver version will be different depending on the model and time of download.
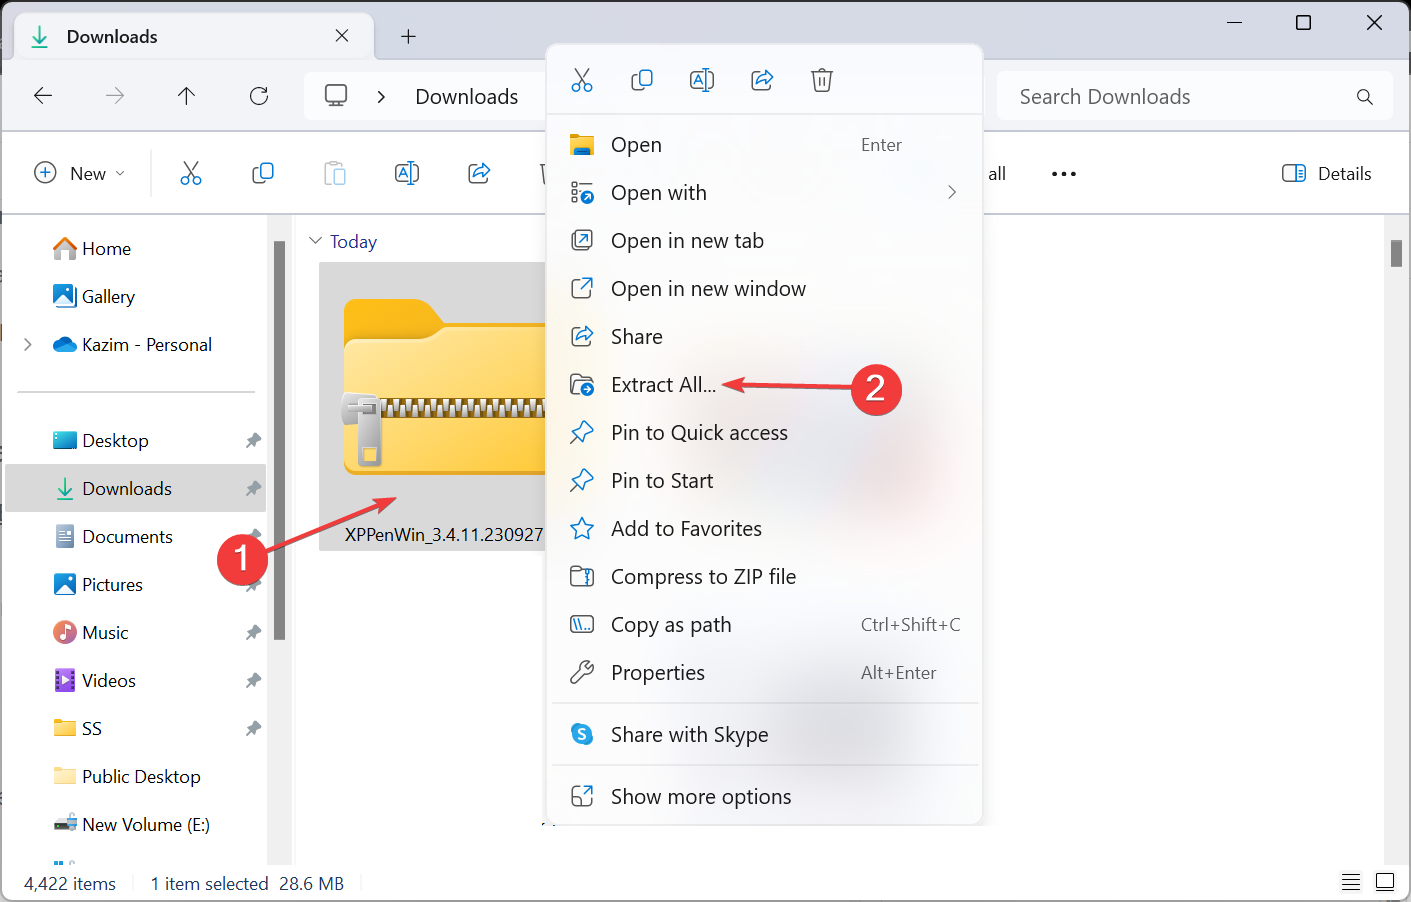
- Right-click on the downloaded file, and select Extract all.
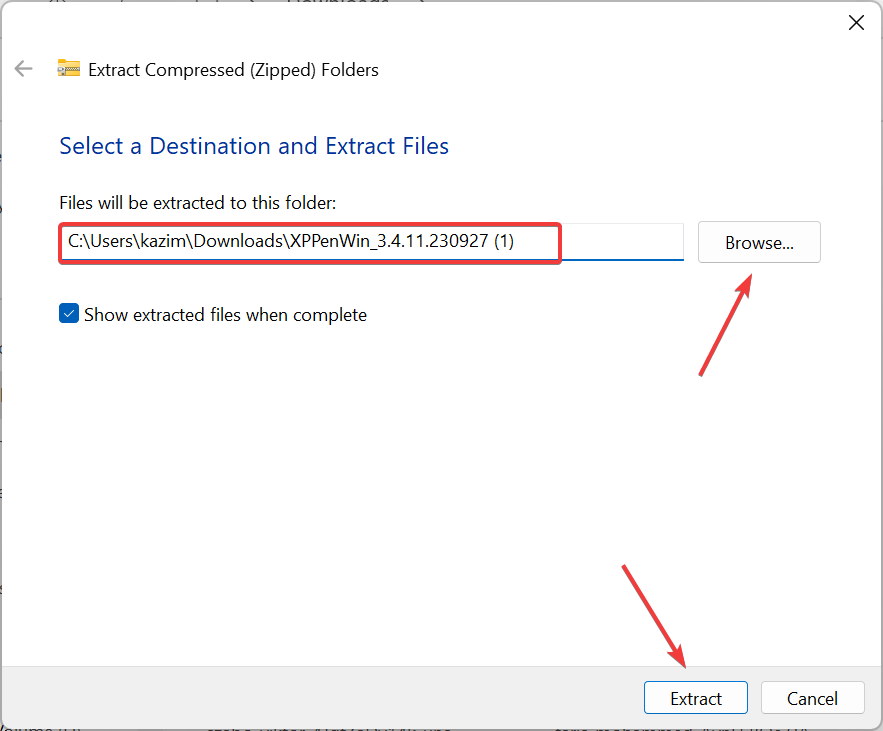
- Go with the default path, or click Browse to choose another one, and then click Extract.
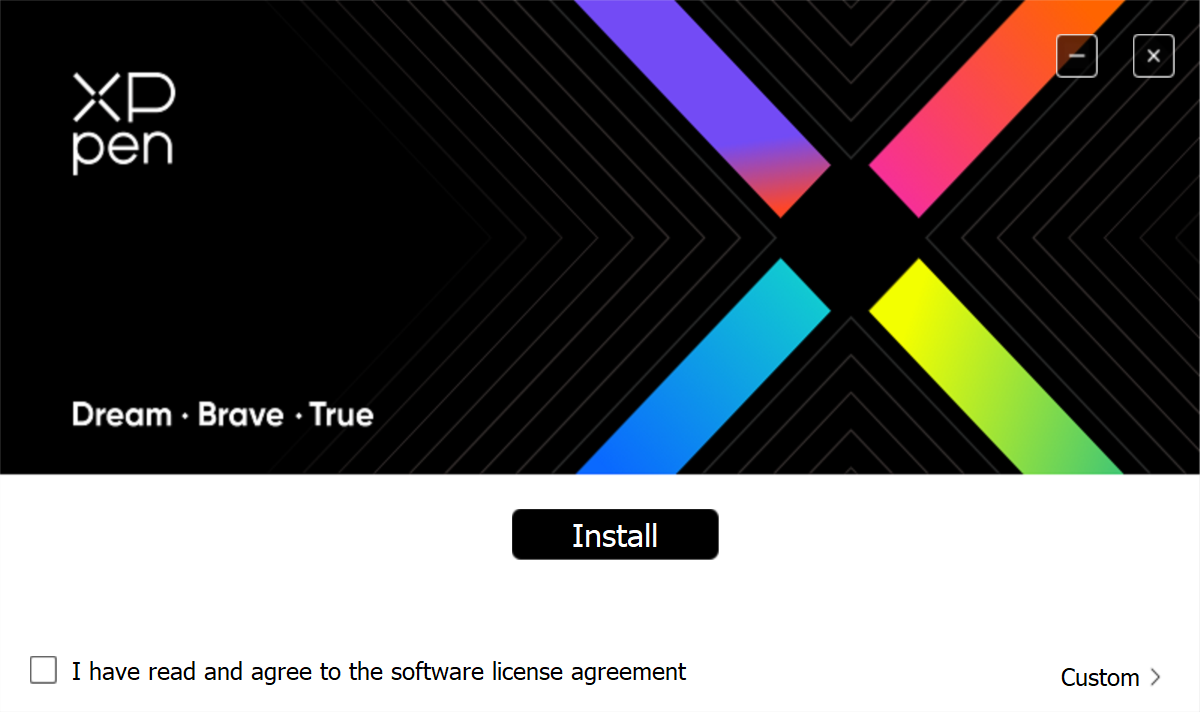
- From the extracted files, run the driver setup.
- Click Yes in the UAC prompt.
- Follow the on-screen instructions to complete the installation process. Though there’s the option to customize, we recommend going with the default installation settings.
- Once done, restart the computer, connect the XP-PEN tablet, and check whether the problem is resolved.
When XP-PEN is not working in Windows 11, it could be the outdated or corrupt drivers to blame. All you need to do is install the latest correct drivers for XP-PEN1!
If that manual method doesn’t work, use an effective driver update software, such as Outbyte Driver Updater, that can identify all available devices and automatically download the latest drivers.
2. Change XP-PEN’s power management settings
- Press Windows + X to open the Power User menu, and select Device Manager from the list of options.
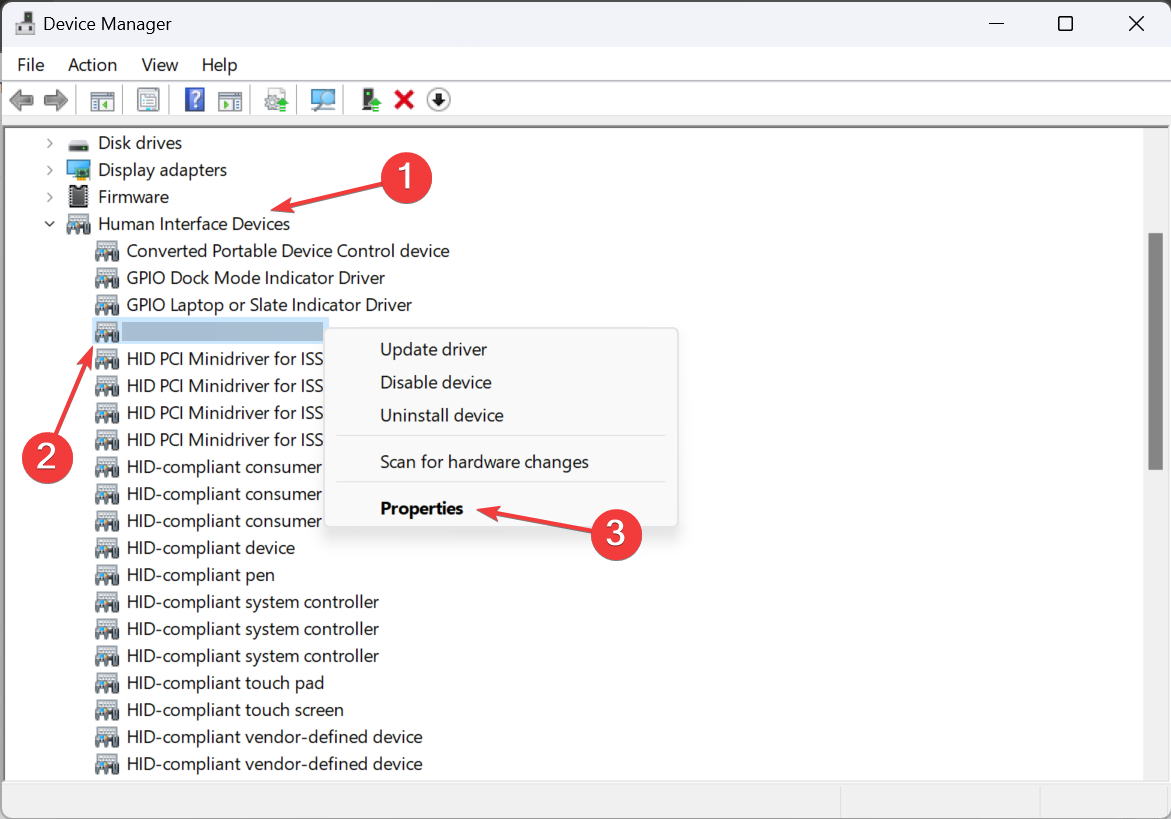
- Expand the Human Interface Devices entry, right-click on the XP-PEN tablet, and select Properties.
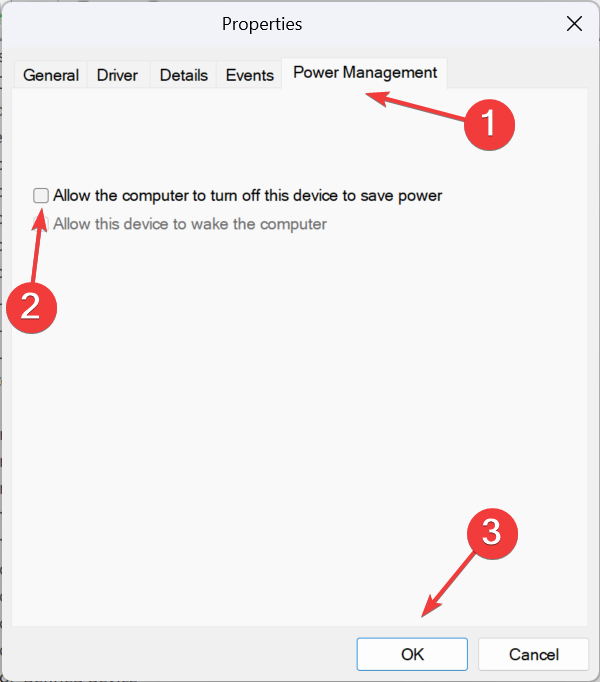
- Now, go to the Power Management tab, untick the checkbox for Allow the computer to turn off this device to save power, and click OK to save the changes.
3. Prevent the computer from going to sleep mode
- Press Windows + S to open Search, type Control Panel in the search bar, and click the relevant result.
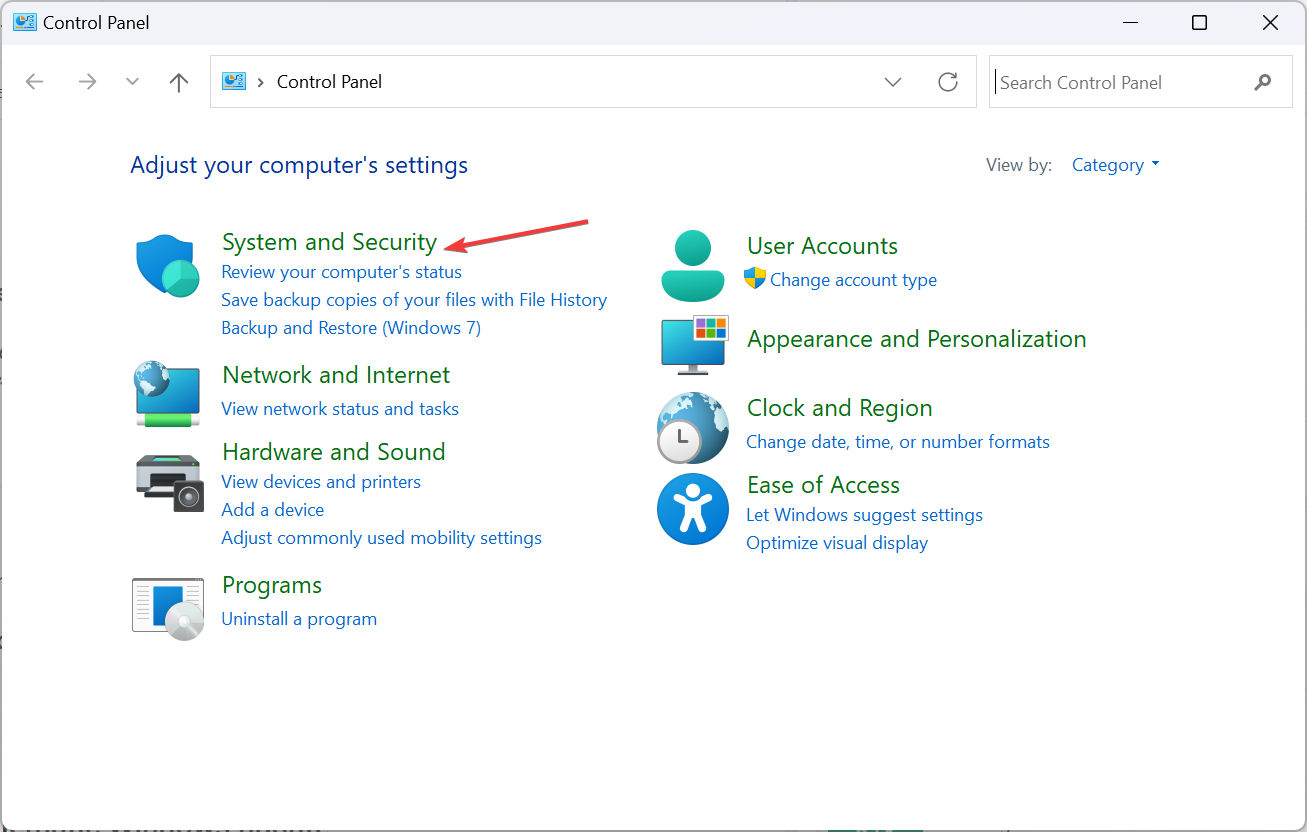
- Click on System and Security.
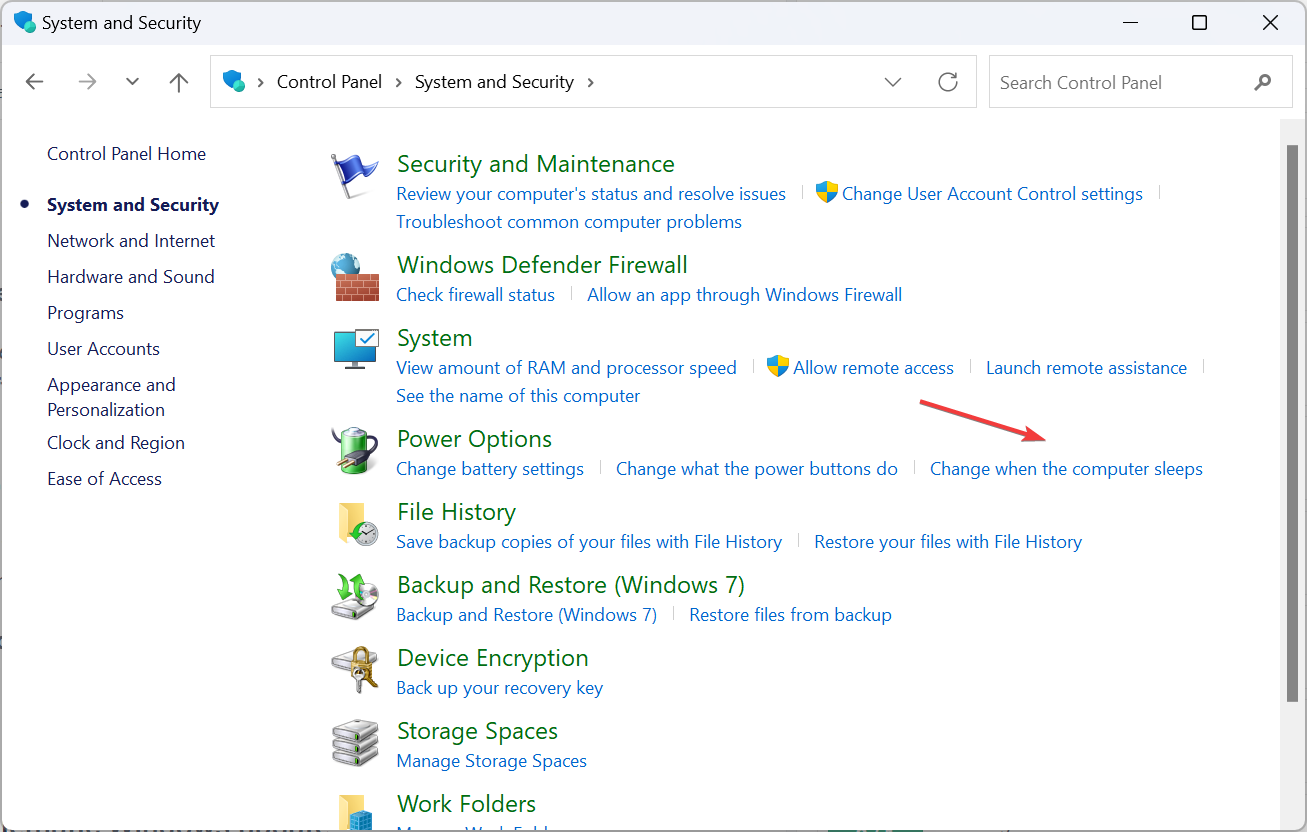
- Now, click Change when the computer sleeps under Power Options.
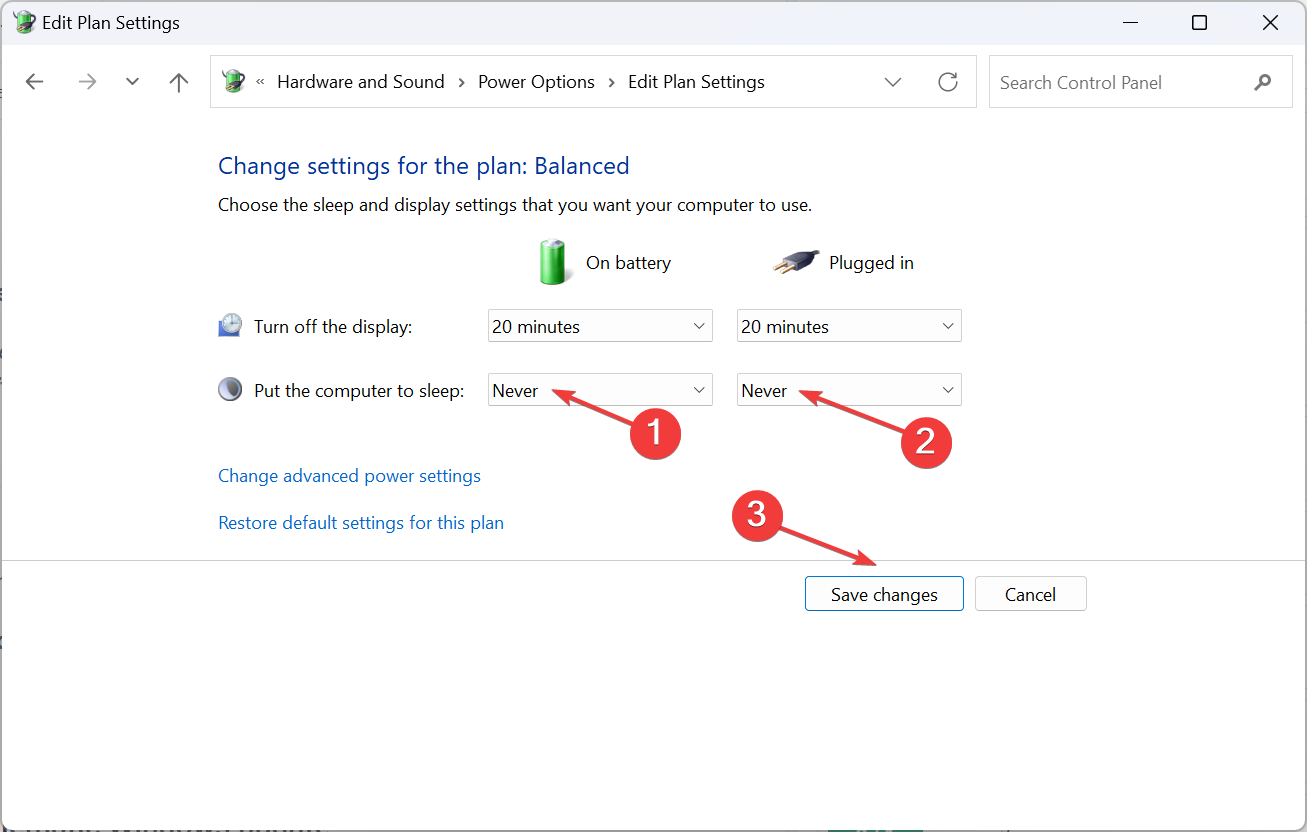
- Select Never from the dropdown menu for Put the computer to sleep under both On battery and Plugged in, and then click on Save changes.
4. Disable Windows Ink Workspace
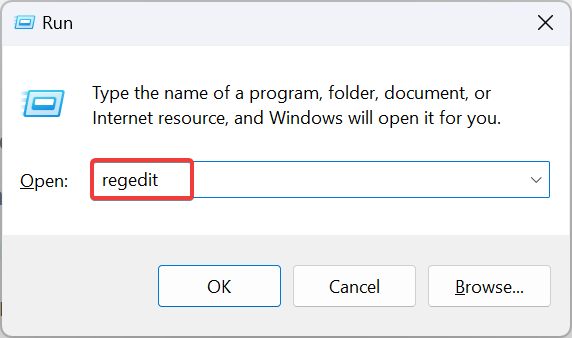
- Press Windows + R to open Run, type regedit in the text field, and hit Enter.
- Click Yes in the prompt that appears.
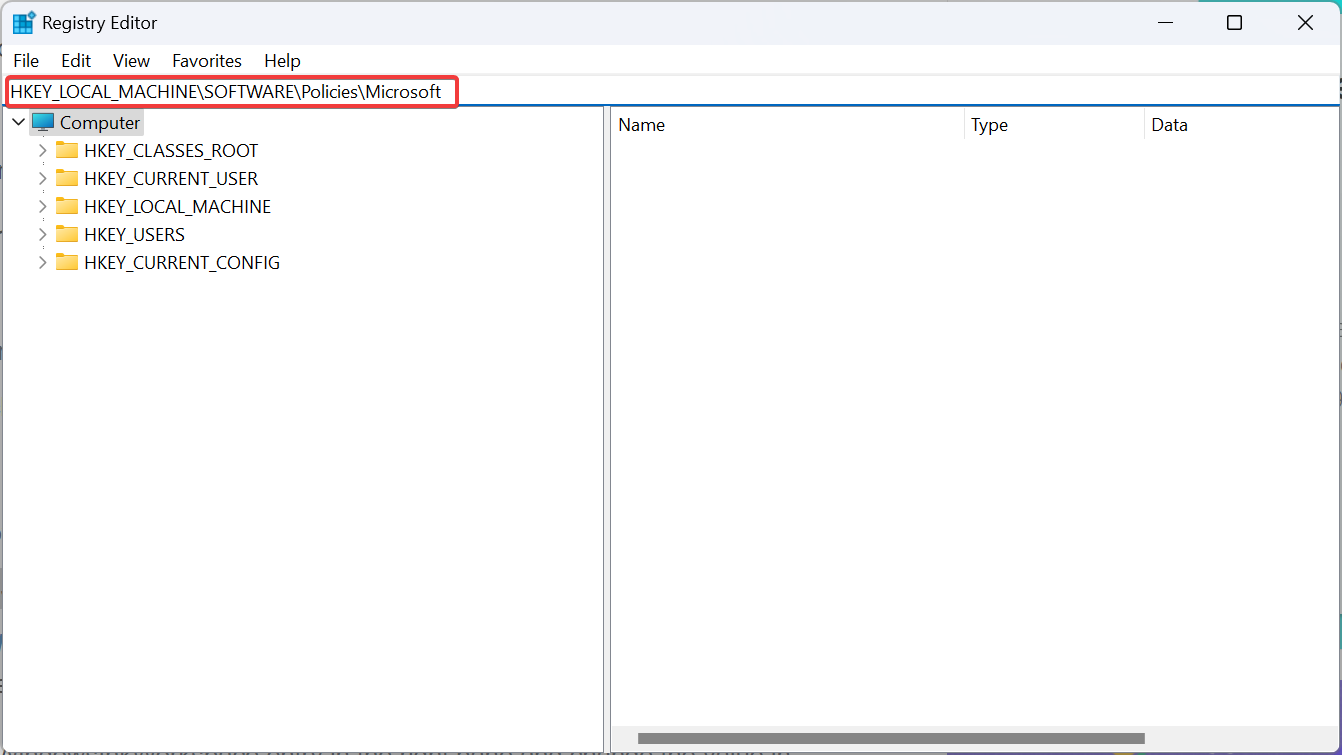
- Go to the following path or paste it into the address bar and hit Enter:
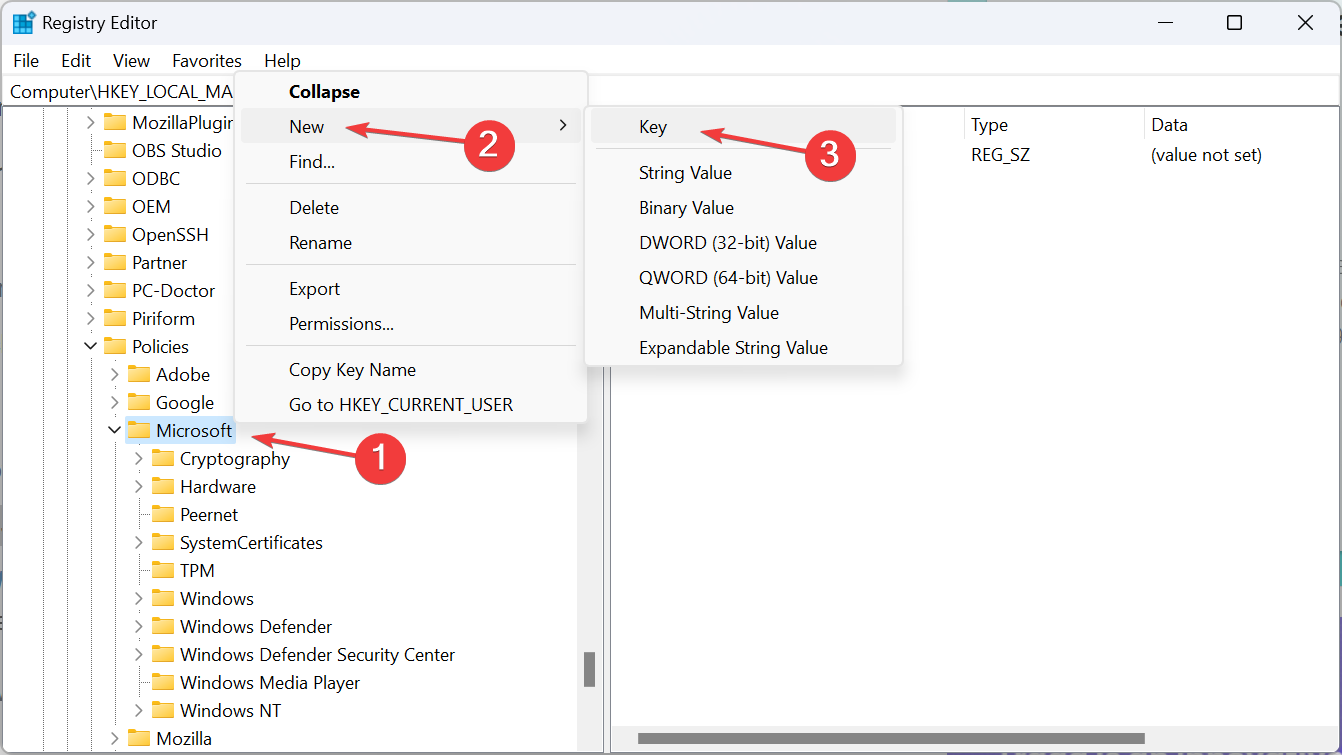
HKEY_LOCAL_MACHINE\SOFTWARE\Policies\Microsoft - Right-click on the Microsoft key in the navigation pane, select New, choose Key from the flyout menu, and name it WindowsInkWorkspace.
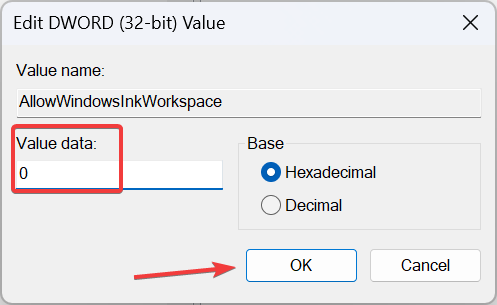
- Right-click on the empty portion, hover the cursor over New, choose DWORD (32-bit) Value, and name it AllowWindowsInkWorkspace.
- Now, double-click the newly created DWORD.
- In the Value data field, enter 0, and click OK to save the changes.
- Restart the computer and check whether XP PEN now starts working in Windows 11.
5. Uninstall the problematic Windows update
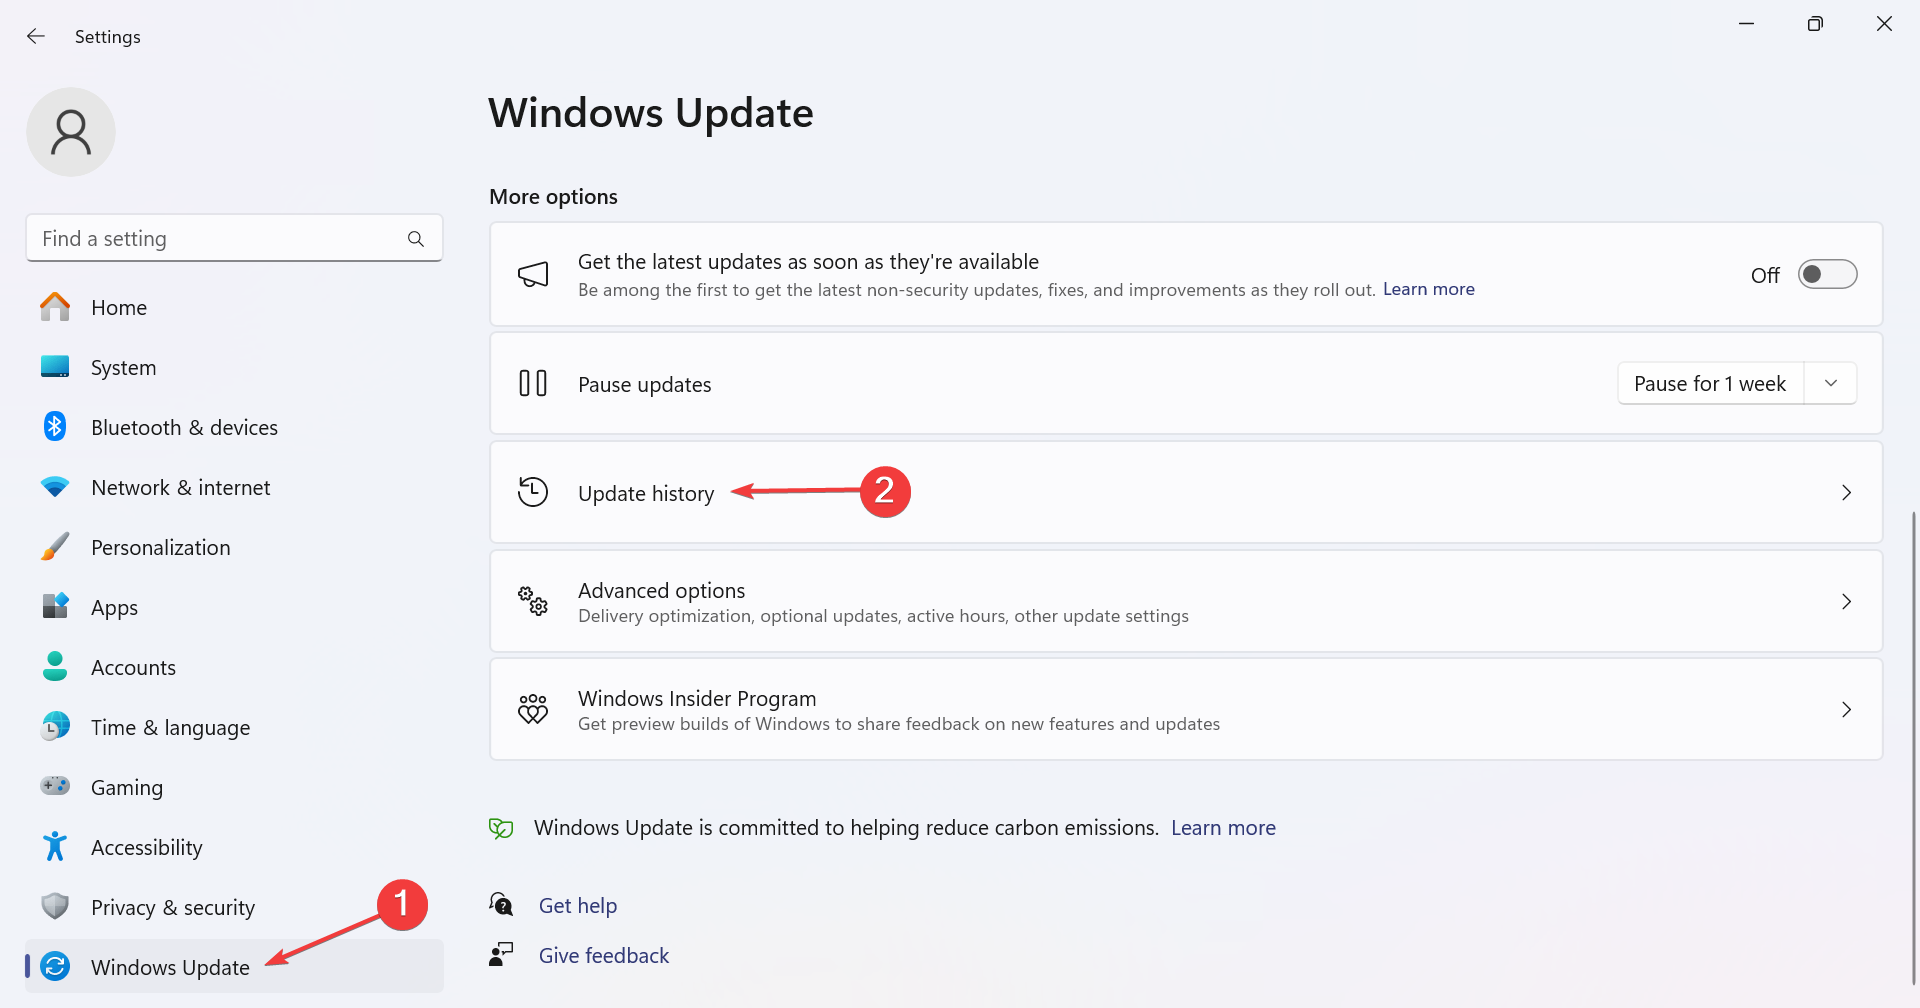
- Press Windows + I to open Settings, go to Windows Update from the left pane, and click on Update history.
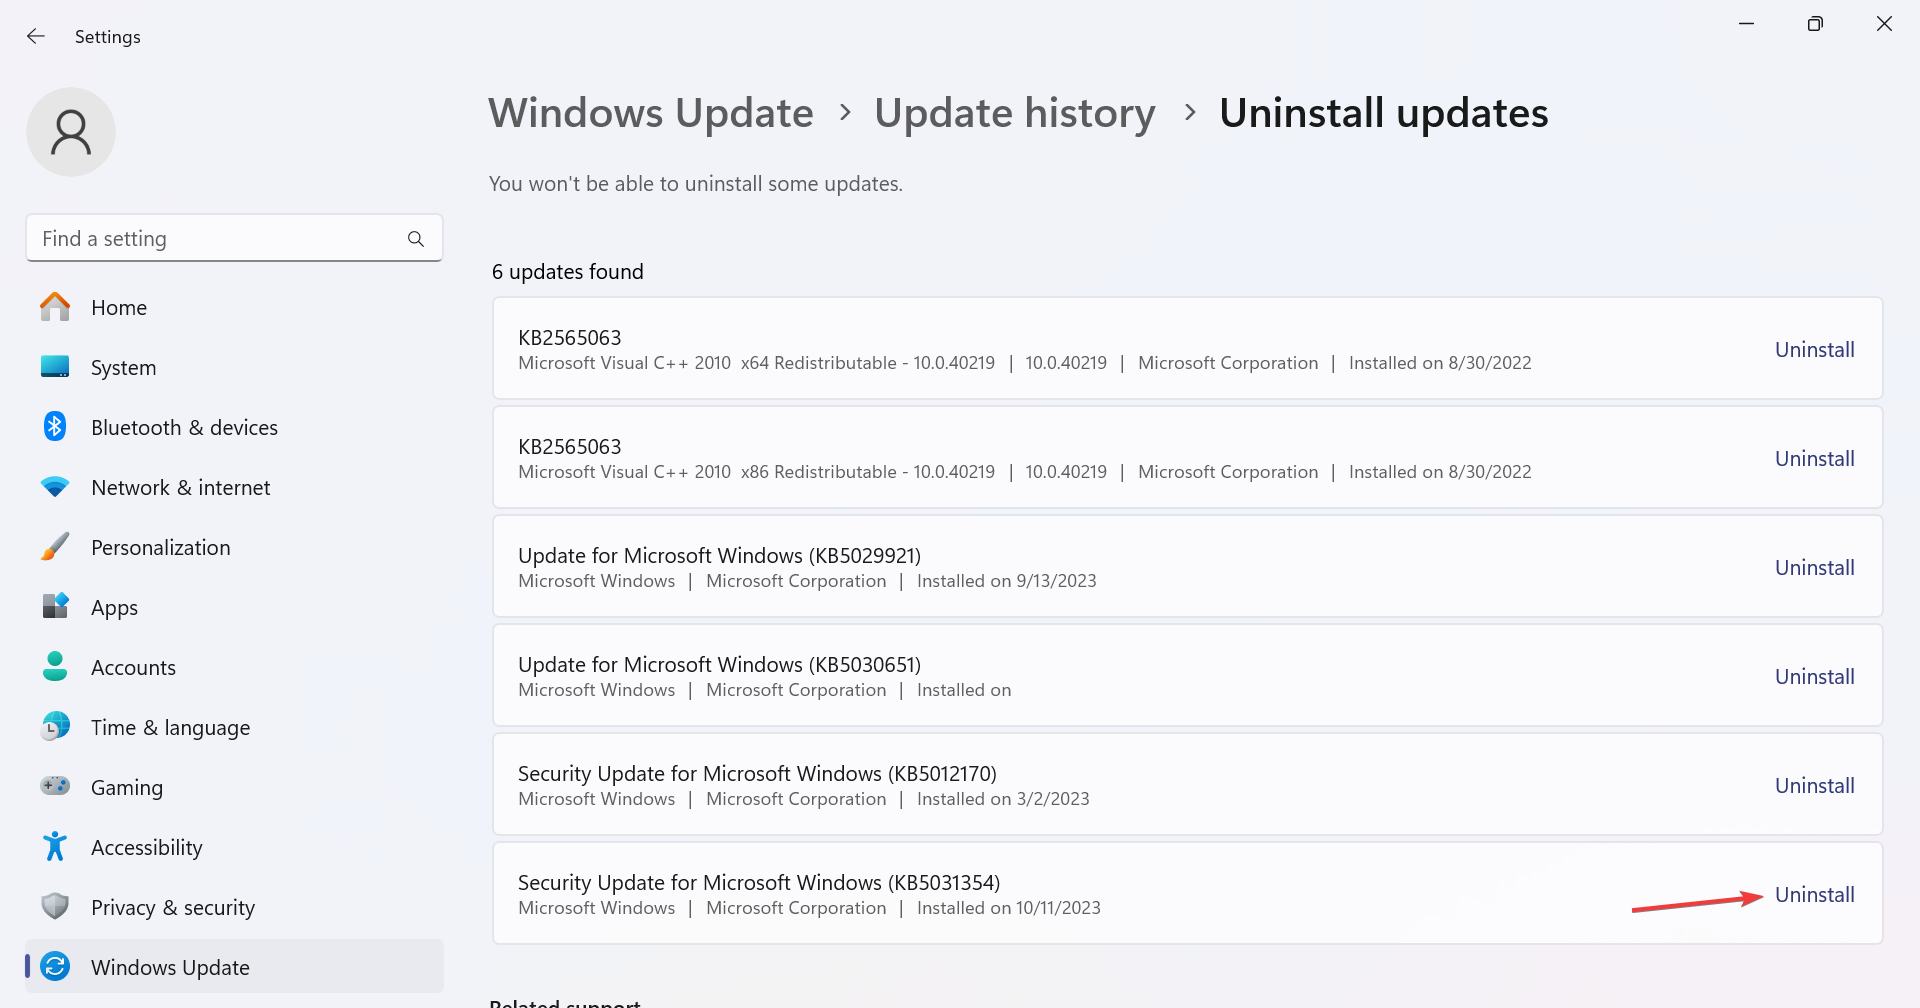
- Scroll to the bottom and click on Uninstall updates.
- Click the Uninstall button next to the update that first triggered the issue.
- Again, click Uninstall in the confirmation prompt.
Several users found out that the KB5006363 update leads to XP PEN not working in Windows 11. And uninstalling the update works!
This also helps when XP-PEN is detected as a keyboard.
6. Perform a system restore
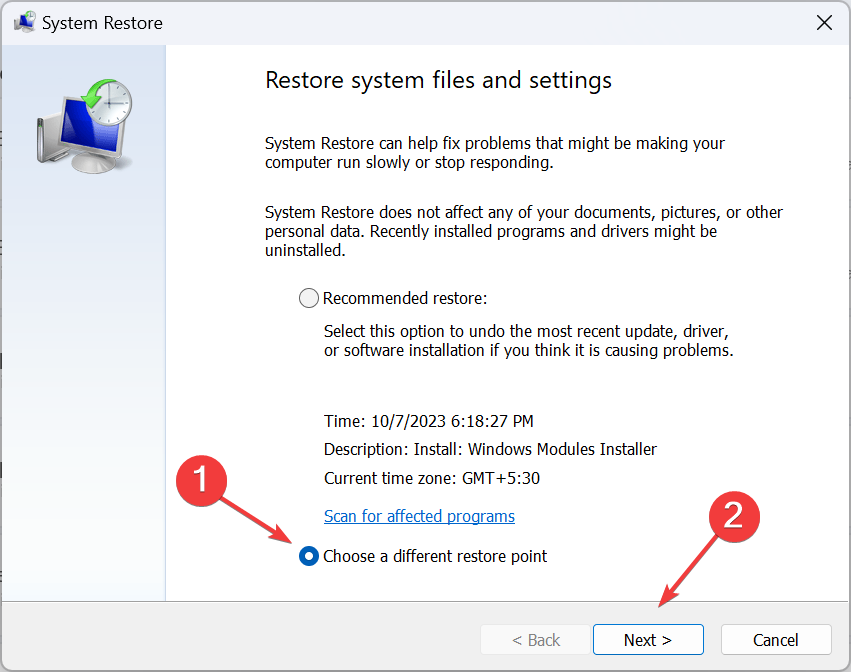
- Press Windows + R to open Run, type rstrui.exe in the text field, and click OK.
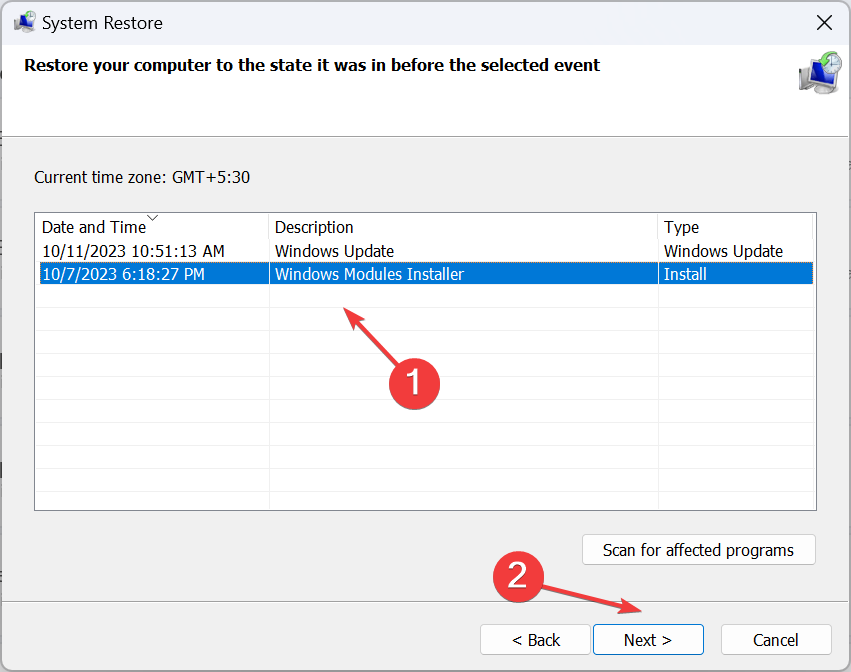
- Select Choose a different restore point, and click Next to proceed.
- Pick a restore point created before the problem first appeared, and click Next.
- Verify the restore details, and click Finish to start the process.
- Wait for the restore to complete. It may take an hour or more.
 Tip
Tip
Remember, when XP-PEN is not working in Windows 11, it’s usually the device driver, conflicting components, misconfigured power settings, or compatibility issues to blame. And they are all easy to fix!
Once you have things up and running, start using an XP-PEN drawing software for Windows to get the best experience!
For any queries or to share what worked for you, drop a comment below.

