How to Connect Xbox One to a Windows 10 PC [Expert Guide]
Use your Xbox one to play on your Windows 10 PC with a few simple steps
![]() 1 min. read
1 min. read
![]() Updated on
Updated on
Share this article

Improve this guide
Read our disclosure page to find out how can you help Windows Report sustain the editorial team Read more
Microsoft is working hard to connect both PC and Xbox One gamers on Windows 10, and in order to achieve that, Microsoft gave us the option to stream from Xbox One to our Windows 10 PCs. This is an interesting feature; if you haven’t used it before, we’ll show you how to connect Xbox One to Windows 10.
Xbox One streaming feature allows you to enjoy your favorite games on any Windows 10 device, as long as it’s on the same network. Although this option sounds amazing, you should know a few things before you start streaming to Windows 10.
How to Stream Xbox One to Windows 10?
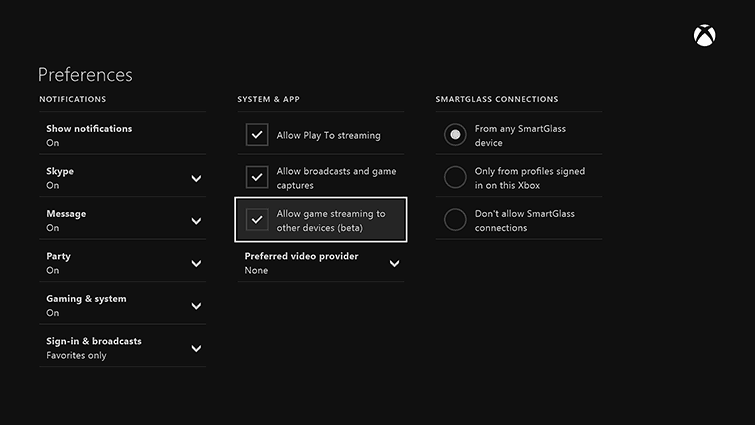
Before you can start streaming, you need to enable streaming on your Xbox One console. To do that, follow these steps:
- On your Xbox One, go to Settings > Preferences.
2. Check Allow game streaming to other devices.
After you’ve enabled streaming to other devices on Xbox One, you need to make sure that both devices are on the same network. In order to achieve the best results, it’s advised you use wired Ethernet connection. Using Ethernet connection for both Xbox One and PC isn’t mandatory, but it provides you with the most stable connection and the best performance.
In terms of hardware requirements, you’ll need a Windows 10 device with 1.5GHz processor and at least 2GB of RAM. As for additional requirements, you only need to sign in to Xbox One app on Windows 10 using your Xbox One gamertag and you’re good to go.
Now you need to connect Xbox One to your Windows 10 PC and in order to do that, you need to do the following:
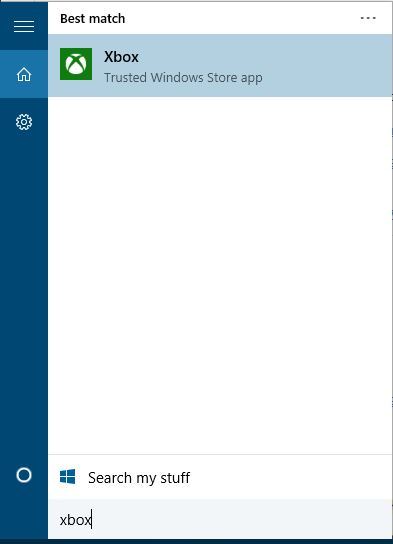
1. Press Windows Key + S and type Xbox. Select Xbox from the list of results.
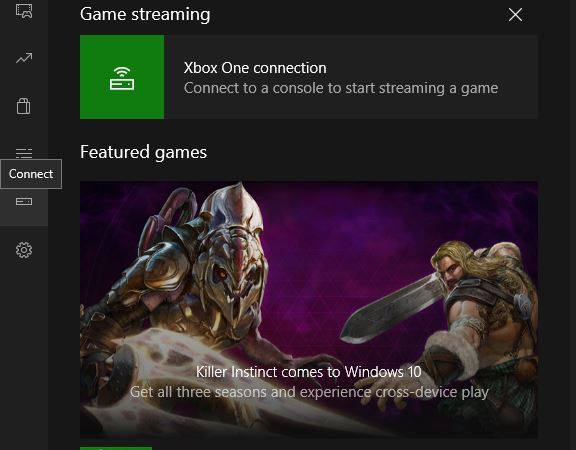
2. When Xbox app starts, click the Connect button on the left panel.
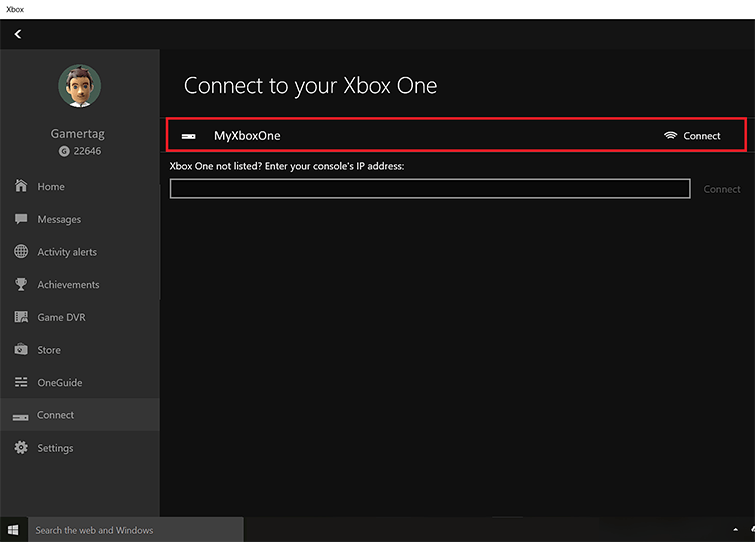
3. Your PC will scan for available Xbox One consoles on your network. After the scan is complete, you should see MyXboxOne available on the list.
4. If your Xbox One isn’t automatically recognized, you’ll see Add a device window and you’ll be asked to enter your Xbox One’s IP address. To find your console’s IP address just go to Settings > Network > Advanced Settings on your Xbox One.
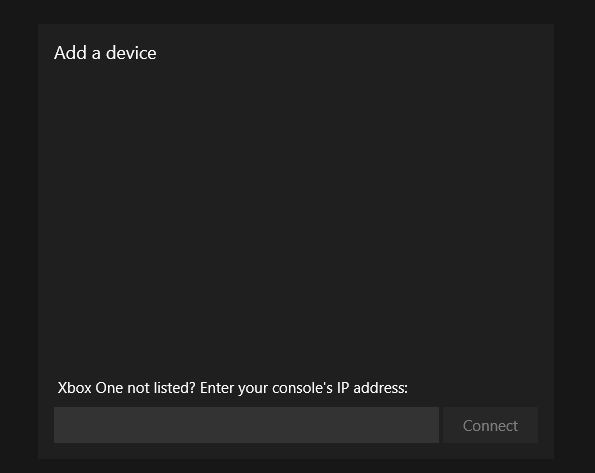
5. Click the Connect button.
6. Now connect your Xbox One controller to your PC using the USB charger cable. If you want to play wirelessly on your Windows 10 PC, you’ll need to use Xbox Wireless Adapter for Windows.
7. Now you just need to click Stream button and Xbox One will start streaming to your Windows 10 PC.
As you can see, connecting and streaming from your Xbox One to Windows 10 is simple, although you might experience a few minor network-related problems occasionally.
If you see System Error code E106 on Xbox One upon startup, read this guide to learn the solutions.