How to disable driver updates from Windows 10 updates
![]() 3 min. read
3 min. read
![]() Updated on
Updated on
Share this article

Improve this guide
Read our disclosure page to find out how can you help Windows Report sustain the editorial team Read more
Key notes
- If you want to avoid potential conflicts, you can disable driver updates from Windows 10.
- The process is simple and implies modifying the Local Group Policy from your OS.
- You can do the same by changing the registry values but that is only for advanced users.
- Manufacturers also provide optional driver updates. Learn how to find them from our guide.

One of the main causes of various Windows 10 problems ever since the operating system was released are bad drivers.
Microsoft is aware of the fact that incompatibility between drivers and the system is a major problem and made things at least slightly better.
Many device manufacturers have a partnership with Microsoft, which allows them to release driver updates through Windows Update, as regular updates for Windows 10.
Having the latest drivers installed on your computer is actually a good thing in most cases and is always recommended.
However, manufacturers can still offer optional driver updates that you can easily install. In this article, we will talk about how to install them or how to prevent installing drivers with Windows updates.
How can I block driver installation in Windows 10 updates?
1. Use the Group Policy Editor
- Press the Windows key + R keyboard shortcut to start Run.
- Type gpedit.msc and press Enter or click OK.

- Navigate to the following key in the Local Group Policy Editor:
Computer Configuration/Administrative Templates/Windows Components/Windows Update - Double click on the Do not include drivers with Windows Updates.

- Select Enable, then click on Apply and OK to enable the policy and stop including the drivers in Windows updates.

- Restart your computer.


Most of the times, getting the latest driver updates is a great thing but for some, installing a new driver can cause all sorts of problems.
System administrators especially want to install the drivers manually for their endpoints so the steps above will help you disable the automatic driver inclusion with Windows 10 updates.
 NOTE
NOTE
2. Use the Registry Editor
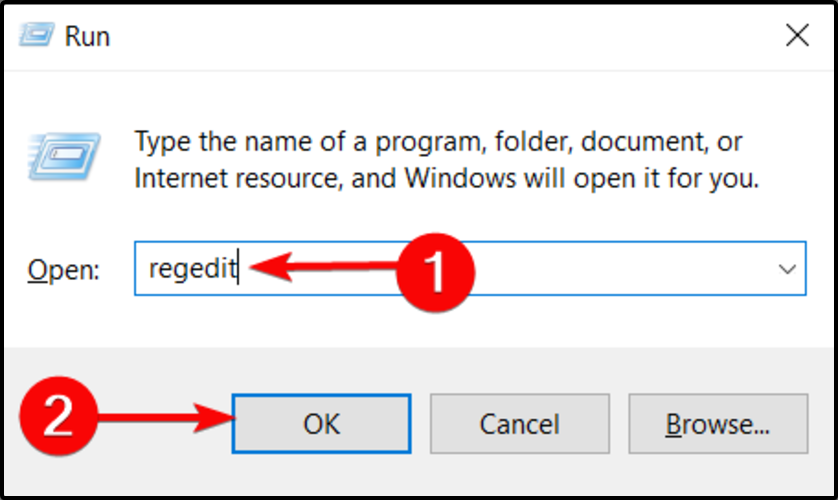
- Press Windows key + R to start Run.
- Type regedit and press Enter or click OK.

- Navigate to the following keys in the Registry Editor:
HKEY_LOCAL_MACHINE\SOFTWARE\Microsoft\PolicyManager\current\device\Update
HKEY_LOCAL_MACHINE\SOFTWARE\Microsoft\PolicyManager\default\Update
HKEY_LOCAL_MACHINE\SOFTWARE\Microsoft\WindowsUpdate\UX\Settings
HKEY_LOCAL_MACHINE\SOFTWARE\Policies\Microsoft\Windows\WindowsUpdate
- Edit the ExcludeWUDriversInQualityUpdate DWORD with any text editor like the Notepad and change its value from 0 to 1.
- Navigate to the following key:
HKEY_LOCAL_MACHINE\SOFTWARE\Microsoft\PolicyManager\default\Update\ExcludeWUDriversInQualityUpdate - Change the value DWORD from 0 to 1.
This is a slightly more complicated solution meant for more advanced users so proceed with caution.
Editing the registry will also block the inclusion and the installation of the drivers in the Windows 10 updates so go ahead and perform the steps above.
3. How to install optional drivers
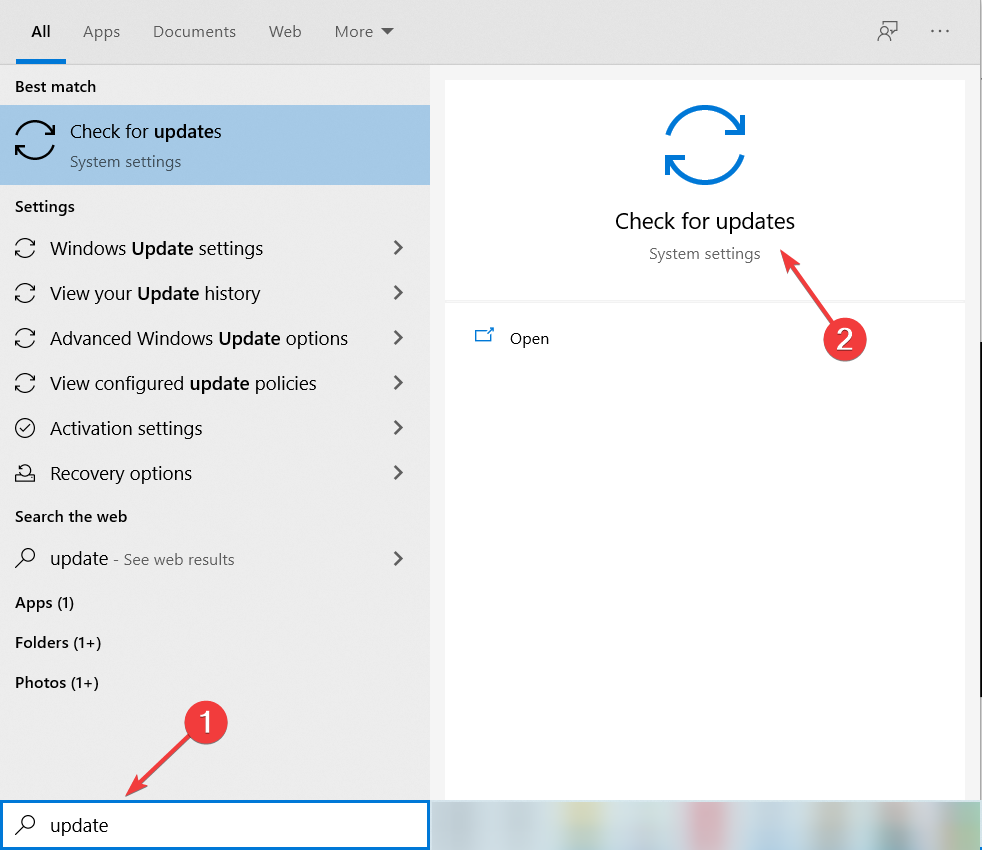
- Type updates in Windows search and click on Check for updates from the results.

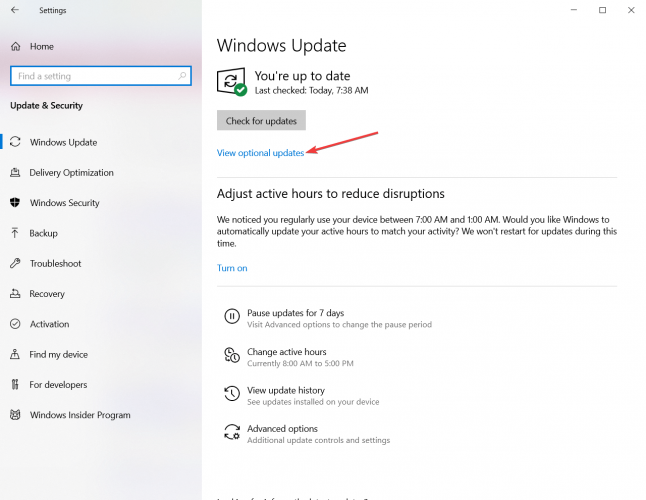
- Click on View optional updates.

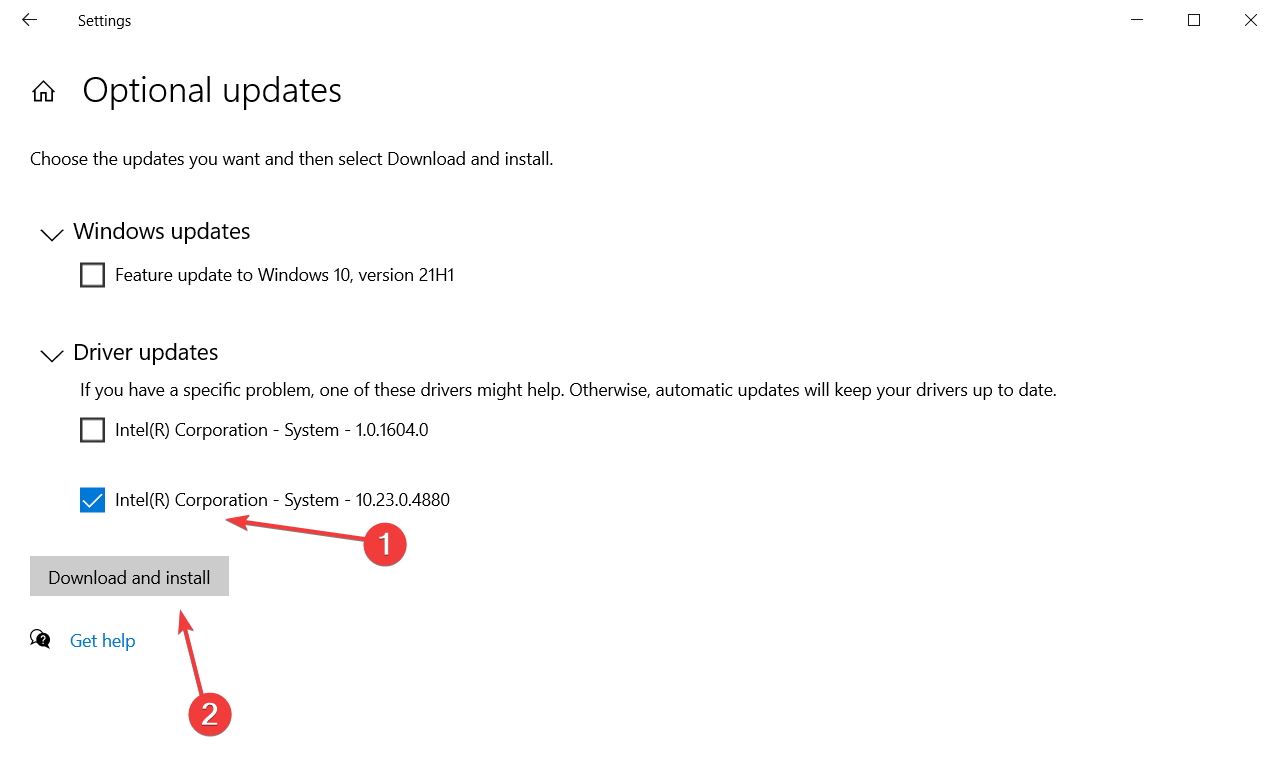
- Now click on Driver updates to expand the section.
- Select the drivers you want to update and hit the Download and install button from underneath.

- Wait for the drivers to get installed and restart your PC.
If you disabled the automatic update for the drivers within Windows 10 updates, you would still need to update them manually from time to time.
To install optional drivers issued by the manufacturers of your components, perform the easy steps above.
On the other hand, you can opt for an automatic tool that looks for the most suitable drivers for your PC and installs them with a single click.
You can prevent these problems by using an automatic tool that will search and install the correct drivers on your computer with just a few clicks. That's why we recommend you use Outbyte Driver Updater. Here's how to do it:
- Download and install the Outbyte Driver Updater app.
- Launch the software.
- Wait for the app to detect all incompatible drivers.

- Afterward, it will show you a list of the drivers found to select the ones to Update or Ignore.
- Click on Update & Apply Selected to download and install the newest versions.
- Restart your PC to ensure the applied changes.


Outbyte Driver Updater
Use this software and solve all driver-related issues from your PC.That’s it, we hope that our guide helped you disable the automatic inclusion of the drivers in the OS updates.
Should you decide to refresh them, check our full guide on how to update drivers in Windows 10.
If you have any other advice or suggestions, you can leave them in the comments section below.