How to Change the Mouse Scroll Direction in Windows 10
A comprehensive guide on adapting a mouse to your needs
![]() 3 min. read
3 min. read
![]() Updated on
Updated on
Share this article

Improve this guide
Read our disclosure page to find out how can you help Windows Report sustain the editorial team Read more
Key notes
- Mice and touchpads are essential input devices for your PC.
- Many users prefer to customize their mouse in different ways, such as changing their scroll direction.
- Windows 10 used to have a built-in option to reverse the mouse scroll's direction, but now you need to apply other methods to accomplish this.
Scrollbars are ubiquitous in all types of computers and by default, rolling the mouse wheel down scrolls down a page. But some users want to reverse the scroll direction in Windows 10.
Read on to find out what options you have to change the mouse scroll’s direction on your device.
Can I reverse the mouse scroll direction?
Windows 10 used to have a Settings option that you could use to configure the scrolling direction with.
However, an update removed the Reverse scrolling direction setting. So how can we now configure the mouse wheel’s scroll direction in Windows 10?
Well, there are two easy alternatives you can try out, as you will see from the guides below.
How do I change the mouse scroll direction in Windows 10?
1. Edit the Registry
Even if there’s no longer a Reverse scrolling direction option via Settings in Windows 10, you can still customize the mouse wheel’s scroll direction with a registry edit.
For that, you’ll need the mouse VID ID which is listed in Device Manager.
1. Press the Win + S keys at the same time on your keyboard to open the search box.
2. Type device manager in it and click on the first result to open the app.
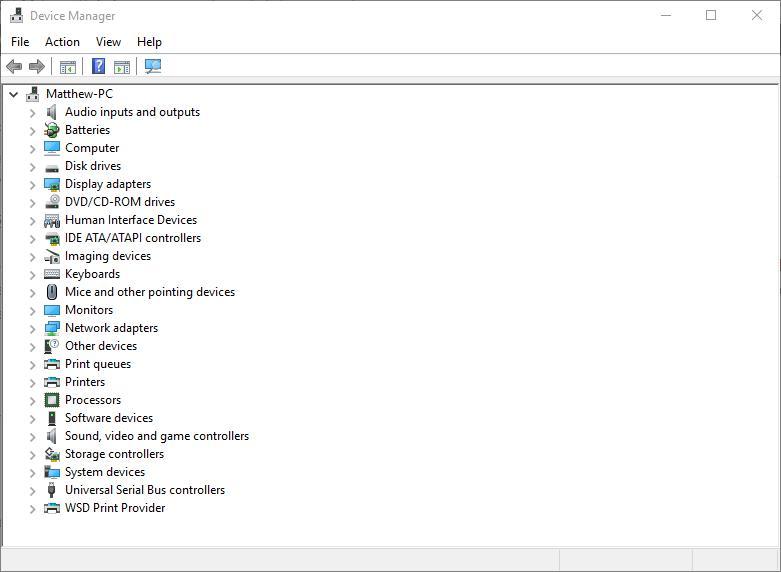
3. Select Mice and other pointing devices and double-click your mouse.
4. Click on the Details tab, which includes the drop-down menu shown directly below.

5. Select Device instance path from the drop-down menu.
6. Right-click the value in the Value box and select Copy.
7. Press OK and close the Device Manager window.
8. Open Notepad and paste the VID ID in Notepad.
9. Press the Win + R keys to open the Run dialog.
10. Enter regedit in Run’s text box to open the Registry Editor app.
11. Open this registry location: HKEY_LOCAL_MACHINESYSTEMCurrentControlSetEnumHID
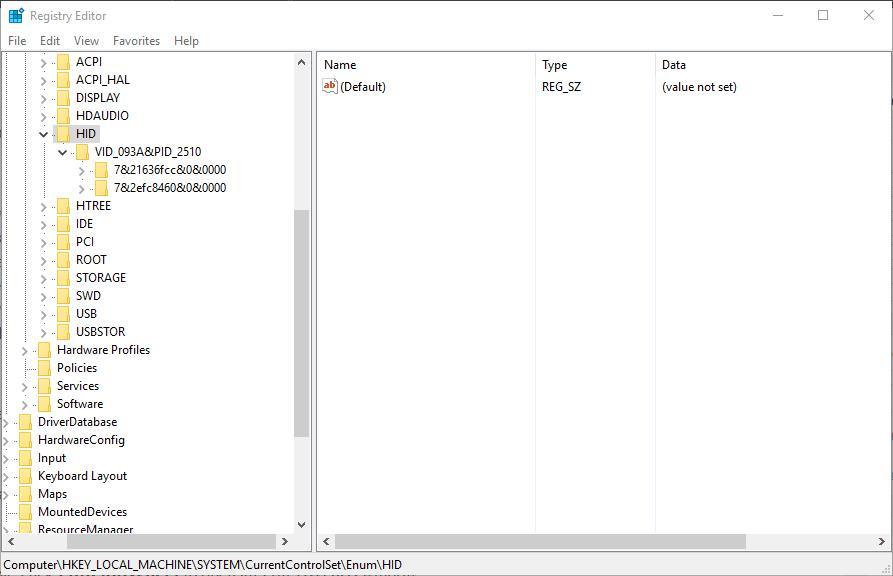
12. This is where the VID ID comes in handy. Click the key that matches the VID ID in Notepad.
13. Now you can select a Device Parameters key that has a FlipFlopWheel DWORD as shown below.
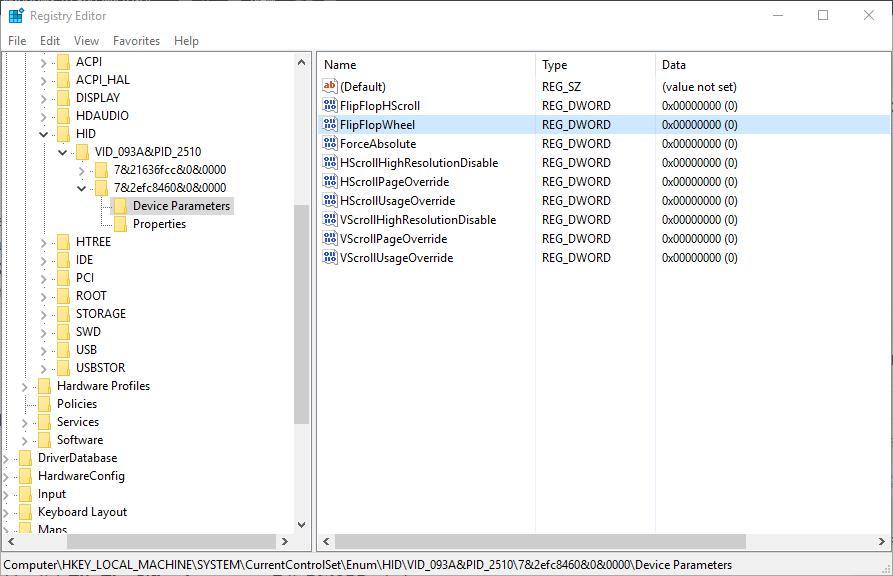
14. Next, double-click FlipFlopWheel to open an Edit DWORD window.
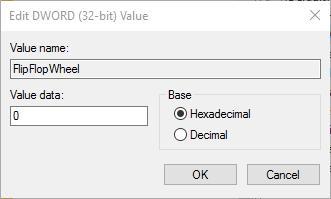
15. Enter 1 in the Value data text box and press OK.
16. Close the Registry Editor window (You’ll need to restart Windows for the changes to take effect).
17. Click the Start button and roll your mouse wheel up. That will scroll the Start menu’s bar slider down. Roll the mouse wheel down to scroll back up the menu.
18. To revert back to the default setting, select the FlipFlopWheel DWORD in Registry Editor window and enter 0 in the Value data box.
Did you know that you can improve your scrolling experience significantly with the smooth scrolling feature? Learn more from our dedicated article.
2. Set up an AutoHotkey Script
AutoHotkey is software that users can set up macro scripts with and with which they reverse the scroll direction.
This is freeware software you can add to Windows by pressing the Download button on the program’s website. Set up a reverse scroll direction script as follows:
- Press the Cortana button and enter Notepad in the search box. Select to open Notepad.
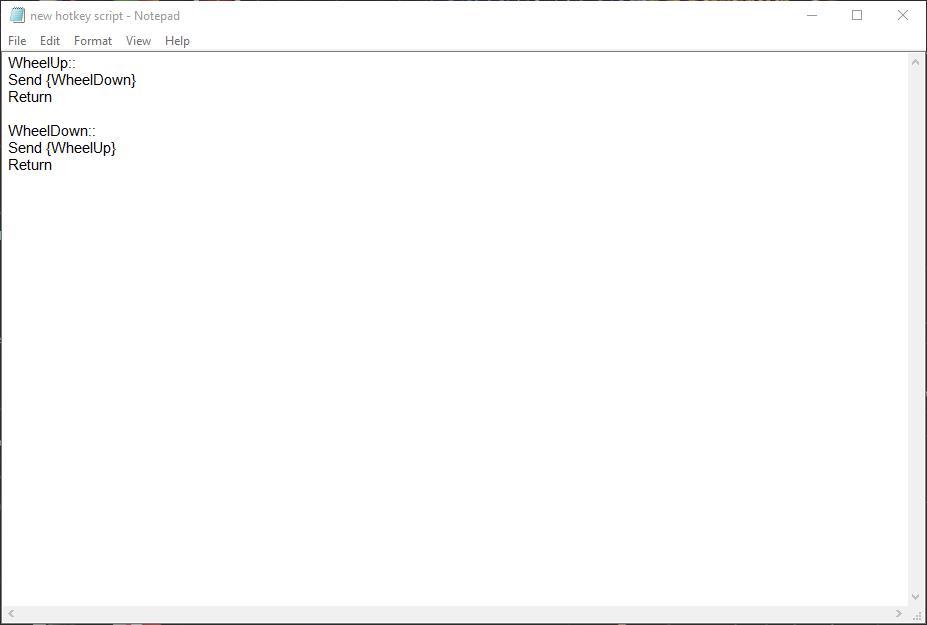
- Now you can enter the script in Notepad. Copy and Paste this script in Notepad:
WheelUp::
Send {WheelDown}
Return
WheelDown::
Send {WheelUp}
Return
- Click File > Save as to open the Save as window and select All Files from the Save as type in the drop-down menu.
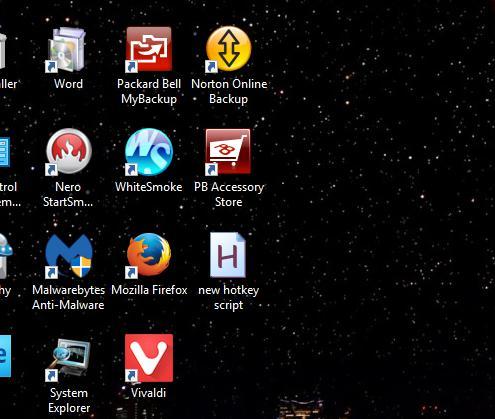
- Enter a file title for the script and make sure to include .ahk at the end of it. For example, you could save it as Scroll Direction Script.ahk.
- Select to save the script to Desktop and press the Save button. That should add an AutoHotkey script icon to the desktop as shown below.

- Close Notepad and double-click the AutoHotkey script shortcut on the desktop to run it.
- Click the Start button and roll the mouse wheel up to scroll down the menu.
- To close the script, right-click the taskbar and select Task Manager. Select AutoHotkey Unicode on the Processes tab and press its End task button.
These are two ways that you can reverse the mouse wheel’s scroll direction in Windows 10. Now, the scrollbar slider will move down when you roll the mouse wheel up and vice versa.
Let us know if you found this guide helpful and write down any questions you have in the comments section below.