Fix: Windows Upgrade Failed with 0x4005(16389) Error
Freeing up disk space proves to be the most suitable solution
5 min. read
Updated on
Read our disclosure page to find out how can you help Windows Report sustain the editorial team Read more
Key notes
- Many users have reported that they encountered the 0x4005(16389) error while performing an in-place upgrade to Windows 11.
- The error appears if one or more applications installed on your computer are not compatible with the new Windows, resulting in a failed upgrade process.
- SCCM may encounter this error when attempting to deploy or manage software, deploy new operating systems, or perform in-place upgrades on a client computer.
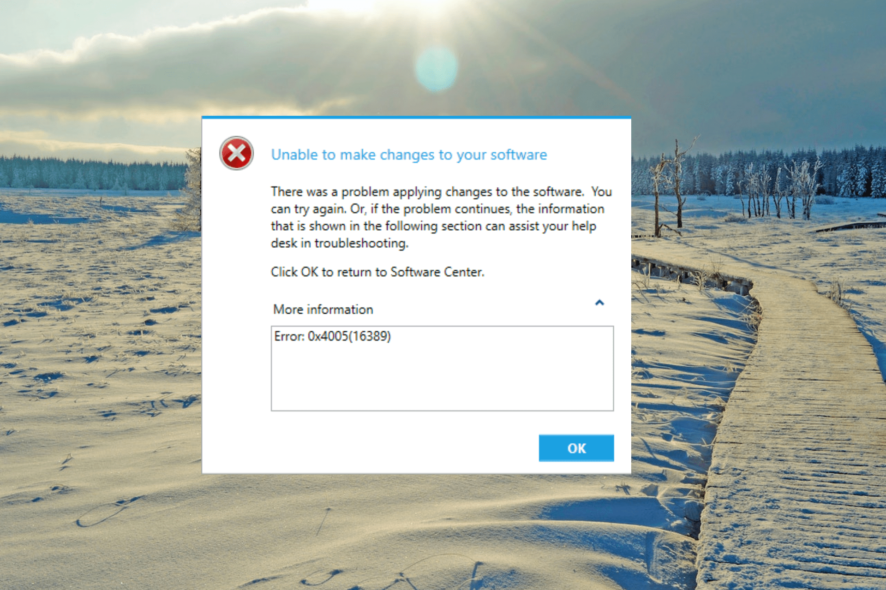
The error code 0x4005(16389) is a common Windows system error that can occur when upgrading Windows. It usually indicates that there was an issue during the upgrade process, such as a failure to install or update a specific system component or driver.
In this guide, we will discuss the possible causes of the 0x4005(16389) error and provide step-by-step instructions on how to fix it.
What causes 0x4005(16389) error?
The error code 0x4005(16389) can occur during a Windows upgrade process and is usually associated with the following common causes:
- Different Windows edition: If the Windows edition you are trying to upgrade to differs from the one currently installed on your computer.
- Third-party antivirus conflicts: Certain third-party software installed on your computer may conflict with the Windows upgrade process and cause the 0x4005 error.
- Insufficient storage space: If your computer’s hard drive does not have enough space to install the Windows upgrade files, the process may fail and result in the 0x4005 error.
- Corrupt system files: If the essential Windows system files are corrupt, it can lead to the 0x4005 error.
- Local Computer Description: If you set the computer description during the task sequence, the error code may occur if the script or command used to perform this action fails.
How do I fix the 0x4005(16389) error when upgrading Windows?
Before attempting more complex solutions, here are some straightforward steps to try:
- Restart your device: Restarting your computer can often resolve the issue at hand.
- Use the same Windows Edition to upgrade: If you attempt to upgrade to a different version of Windows than what’s on your computer, ensure that you upgrade to the same edition.
- Disable third-party antivirus programs: Antivirus programs can sometimes interfere with the upgrading process and prevent it from completing successfully. To avoid this issue, you should disable your antivirus program temporarily.
1. Free up disk space
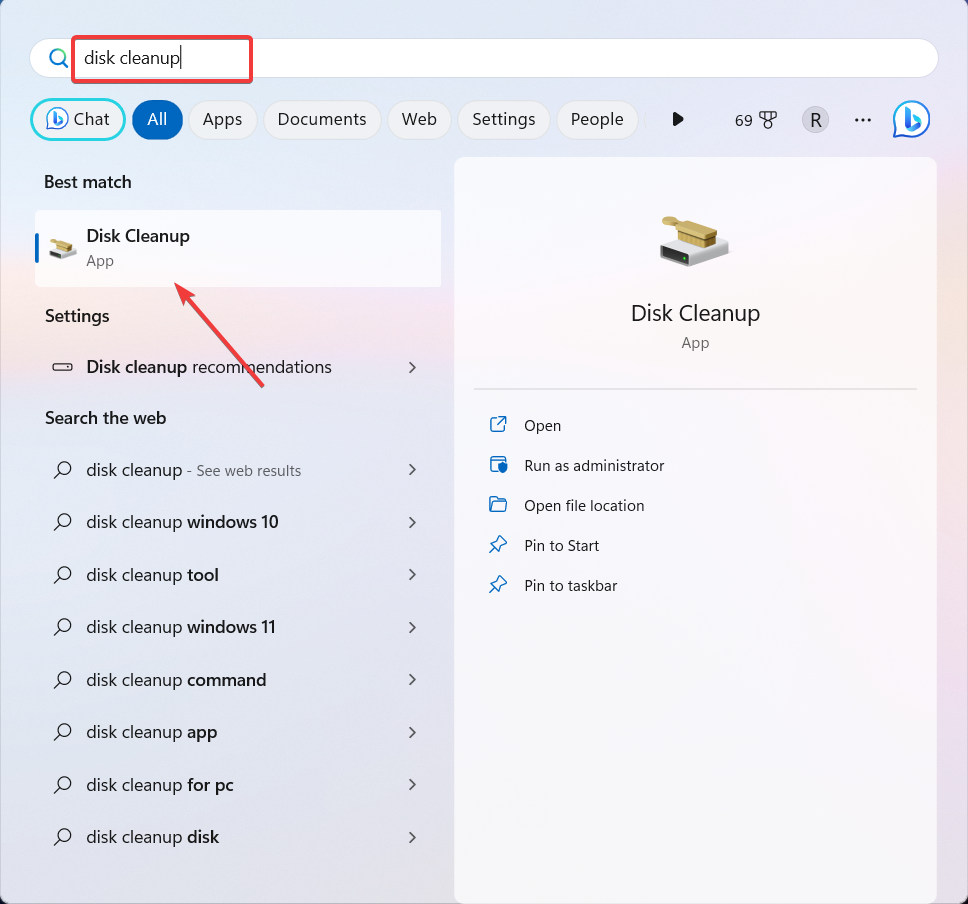
- Open the Start menu, type disk cleanup, and select the Disk Cleanup app from the search result.
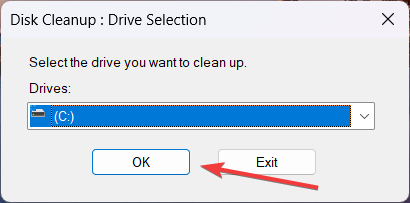
- Select the drive system drive (typically labeled C🙂 and click OK.
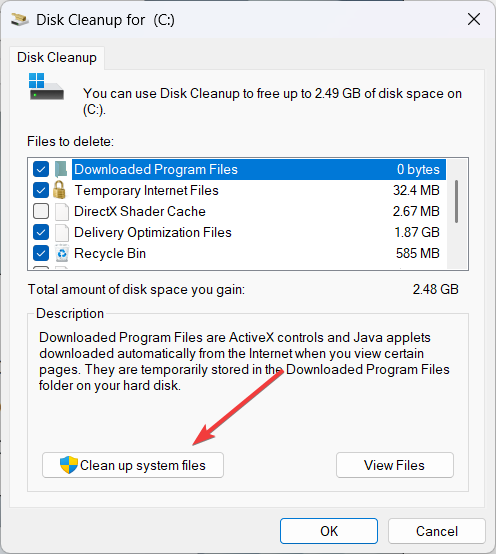
- Next, click the Clean up system files button.
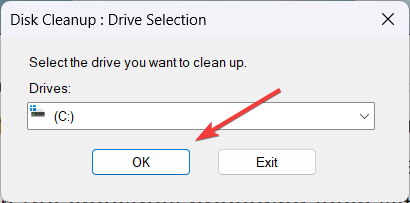
- Select the system drive again and click OK.
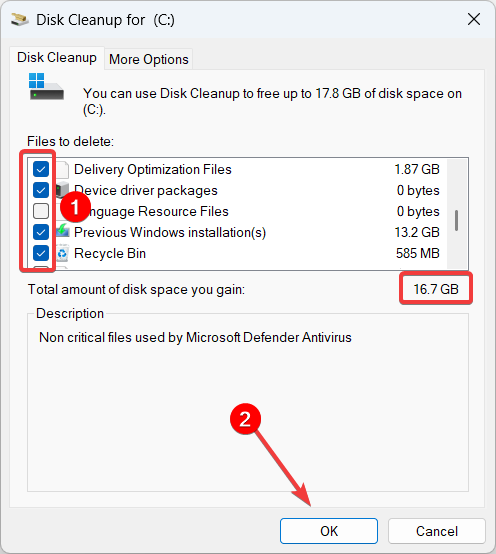
- Now, select the files you wish to delete, and click OK.
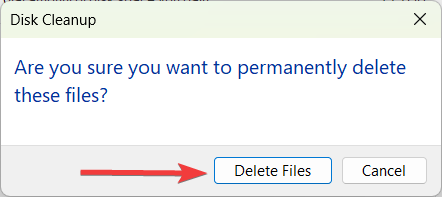
- Click Delete Files to confirm.
Insufficient disk space is a common issue that arises during Windows updates and upgrades, making it impossible to install them. According to Microsoft, you will need at least 20 GB of free space for upgrading to Windows 10 or 64 GB of free space for Windows 11.
You can also defragment the drive to free up some space and optimize the PC’s performance.
2. Extend the partition to create more space
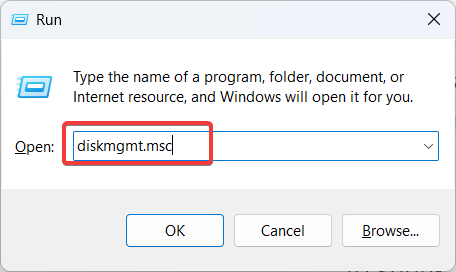
- Press the Windows + R to open the Run command, type diskmgmt.msc, and hit Enter.
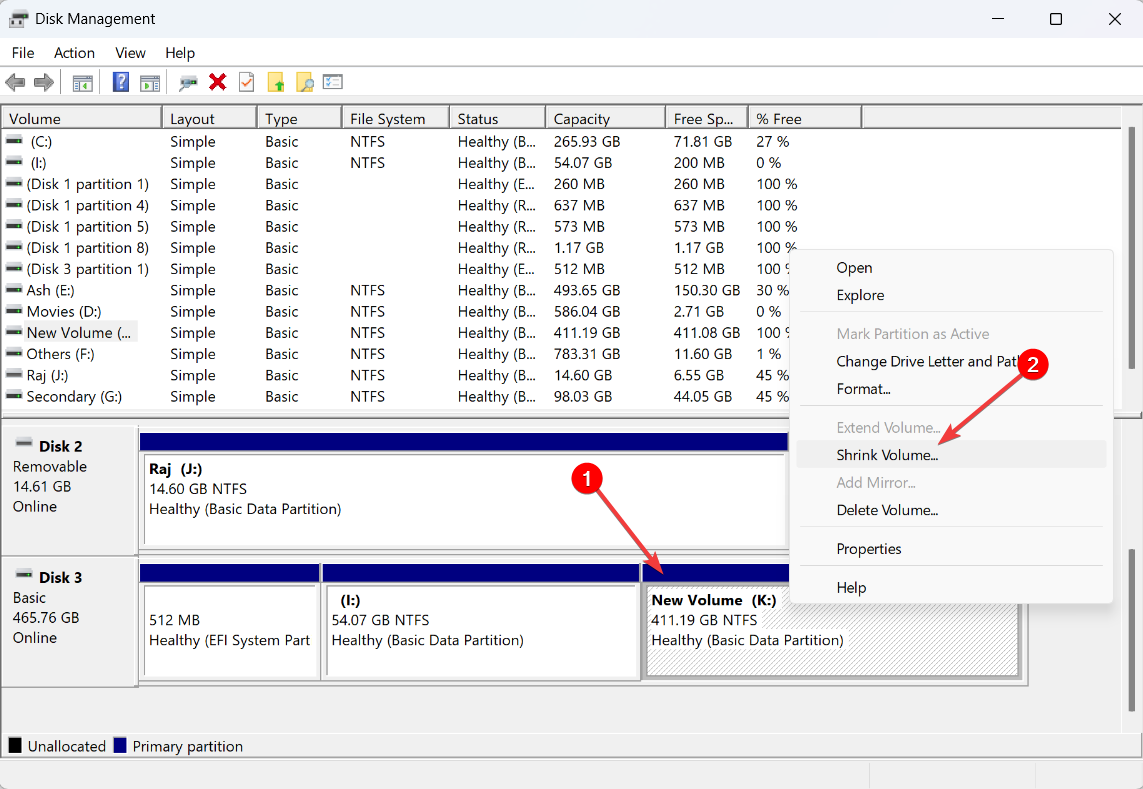
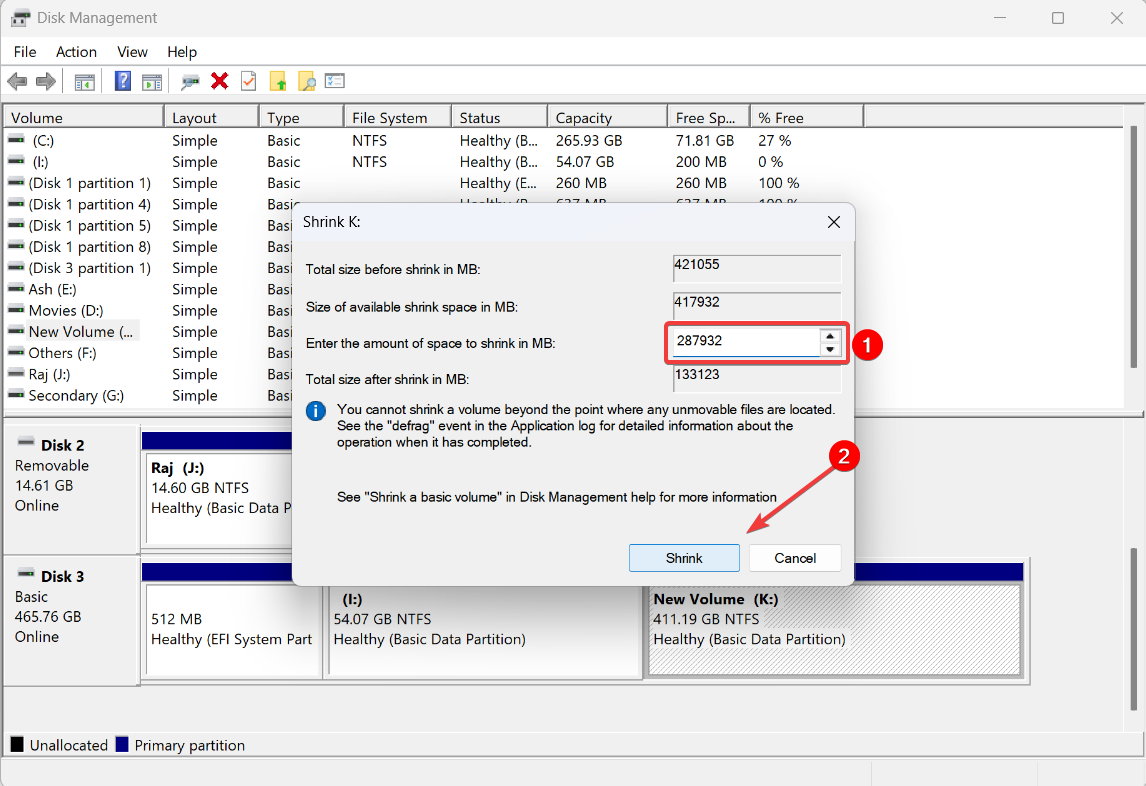
- If you want to shrink a volume, locate the drive or partition, right-click on it, and select Shrink Volume…
- Enter the amount of space you want to subtract from the drive in MB and click Shrink.
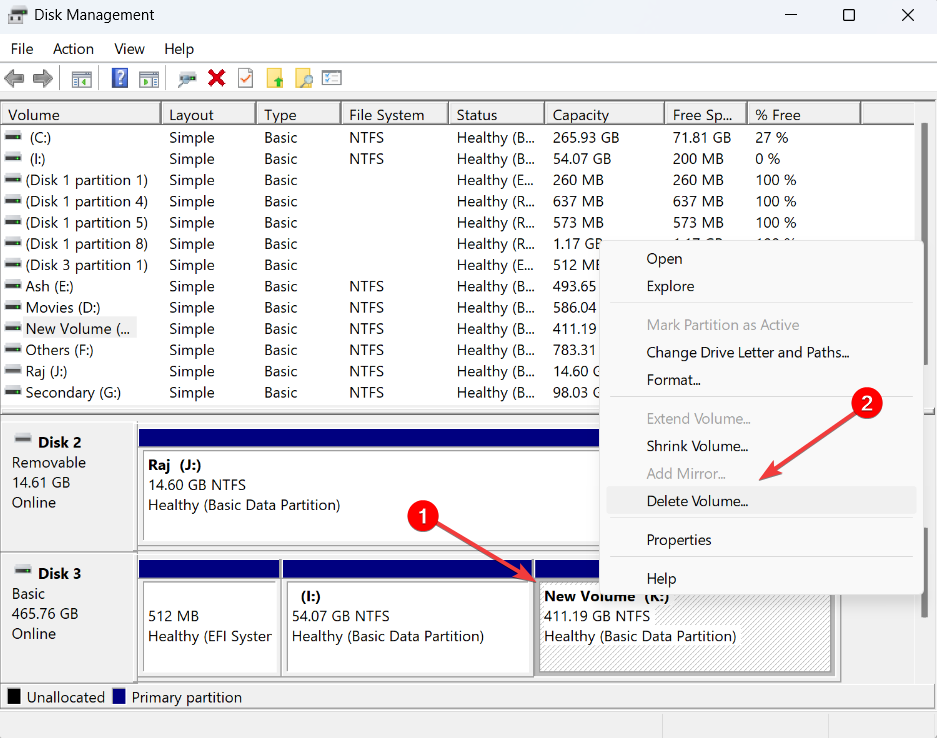
- In case you want to delete a volume, right-click on the unused drive/partition you want to delete and select Delete Volume...
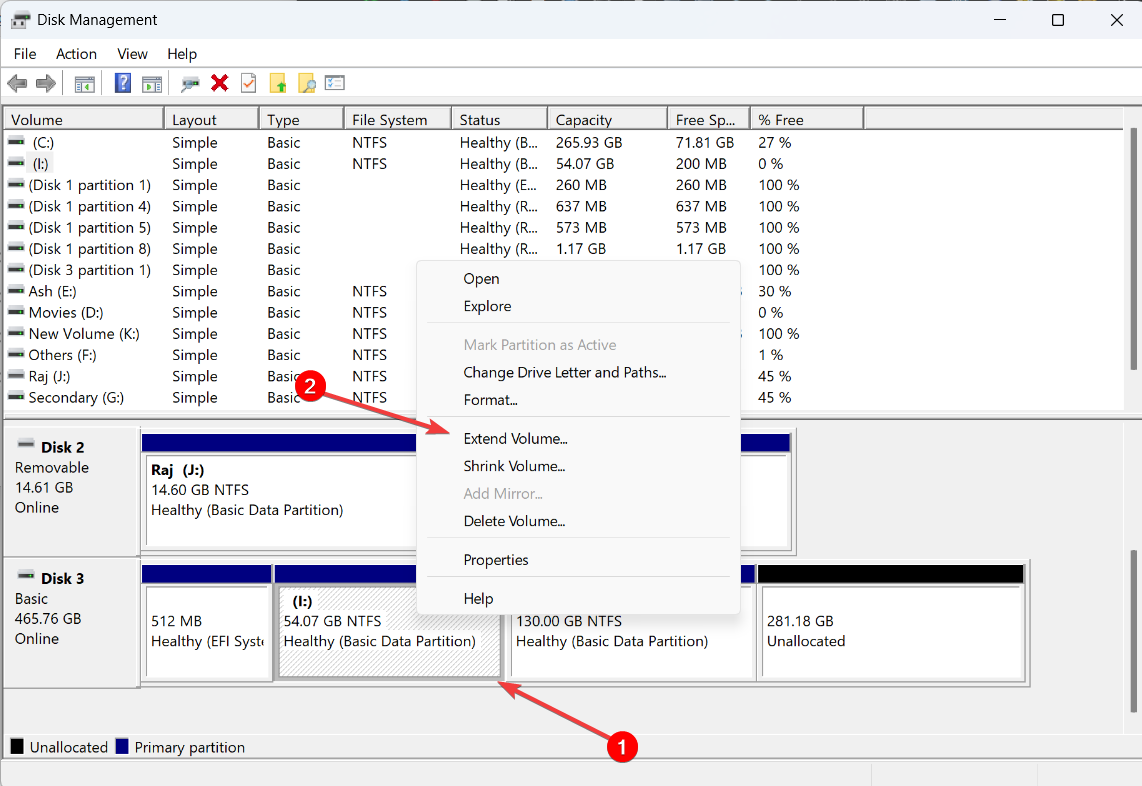
- Right-click on the drive/partition you want to extend and select Extend Volume…
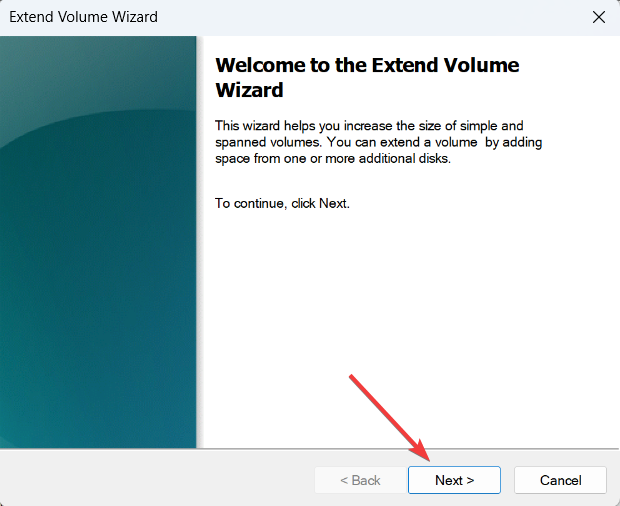
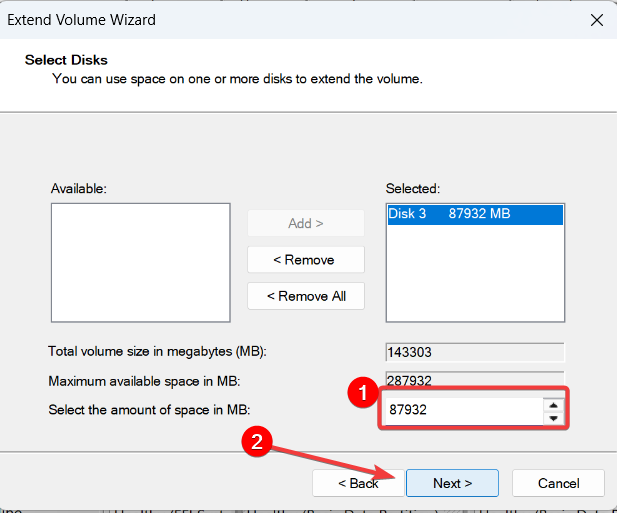
- In the Extend Volume Wizard window, click Next.
- Click Next to add all the unallocated space to the drive you want to extend or specify the volume size you want to add and then click Next.
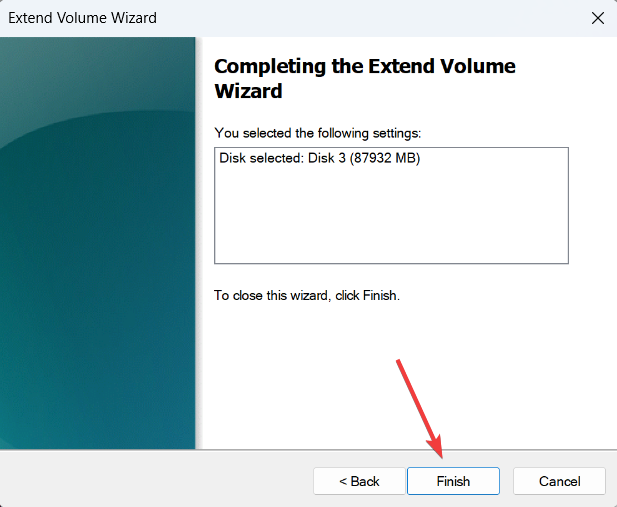
- Click Finish to extend the drive.
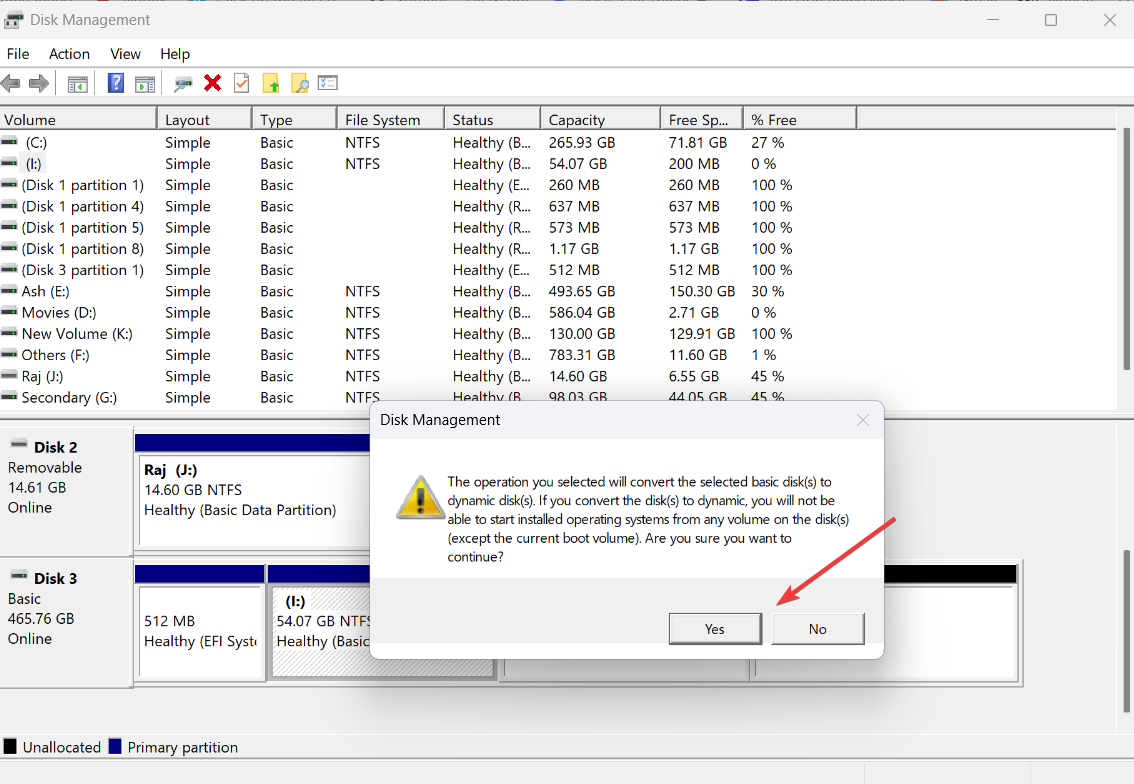
- If you see a warning prompt, click Yes to proceed.
 NOTE
NOTE
3. Change the local computer description command
 NOTE
NOTE
- Confirm if the error is related to a script or command failing during the task sequence, which is responsible for setting the local computer description.
- Open the task sequence in the System Center Configuration Manager (SCCM) console and locate the option for setting the computer description.
- Add a Run Command-Line to the task sequence and then run the following command:
cmd /c net config Server /SRVCOMMENT:"%OSDComputerDescription%" - Save the changes.
- Run the task sequence again, and the error should now be resolved.
If you encounter the 0x4005(16389) error while attempting to set the local computer description using a script or command during the task sequence, you can use this method to resolve the error and successfully complete the task sequence.
4. Clean install Windows
4.1 Create Windows installation media
- Insert a blank USB or blank DVD with at least 8 GB of space.
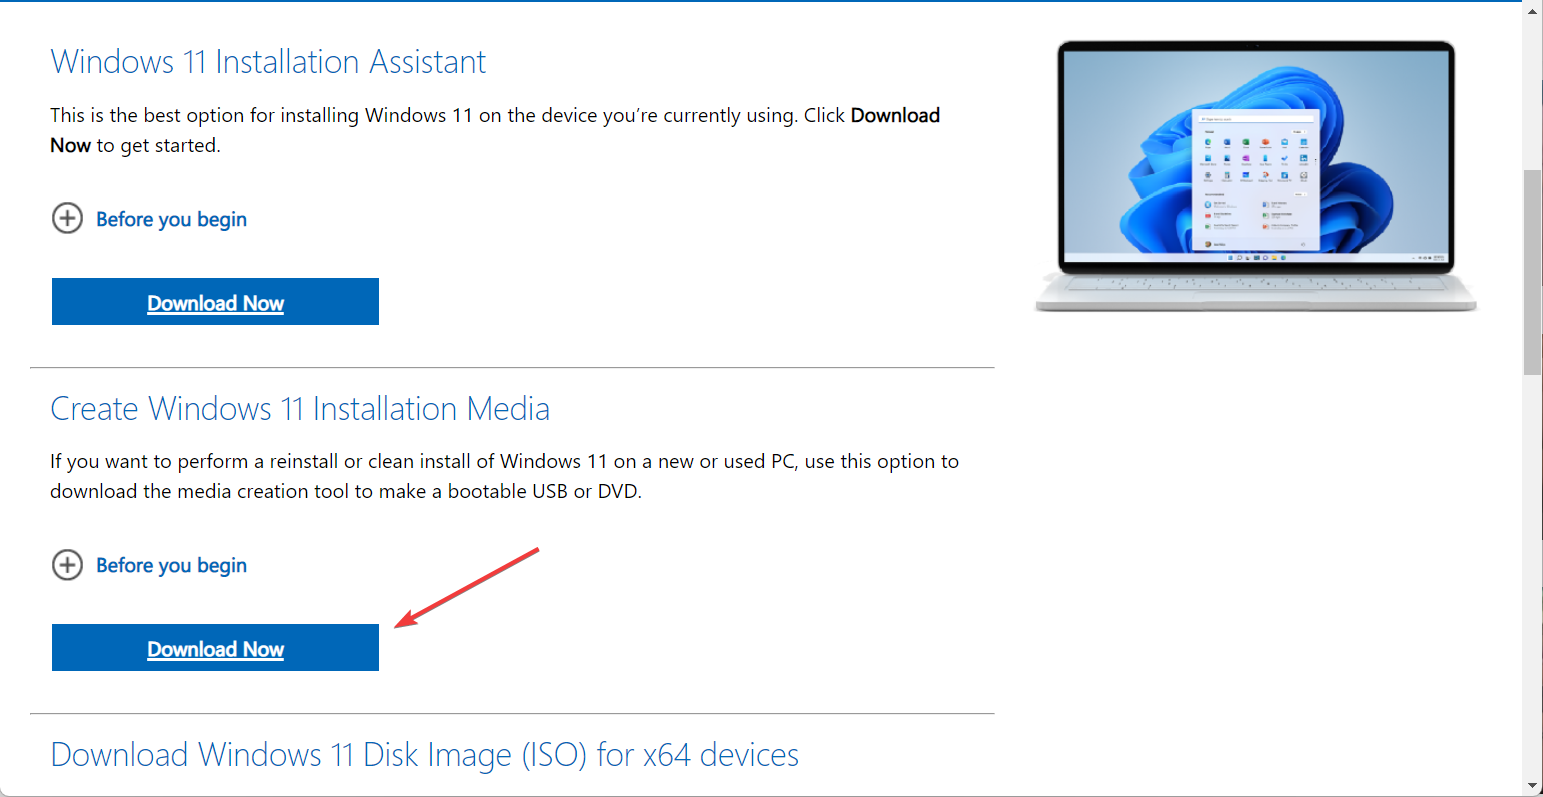
- Go to the Windows 11 download page on the official Microsoft website.
- Under Create Windows 11 Installation Media section and click Download Now.
- Once downloaded, run the mediacreationtool.exe file.
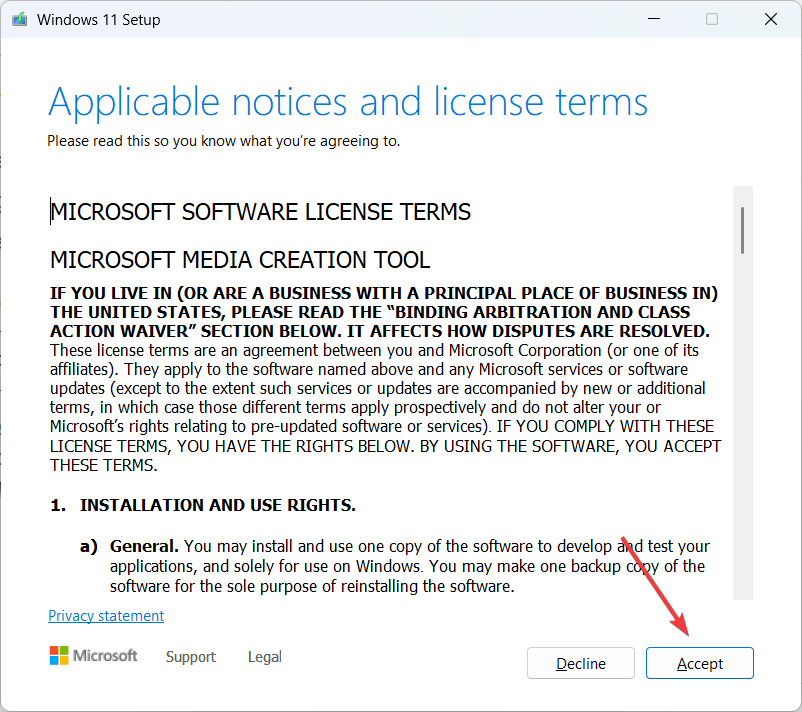
- Click Accept to continue.
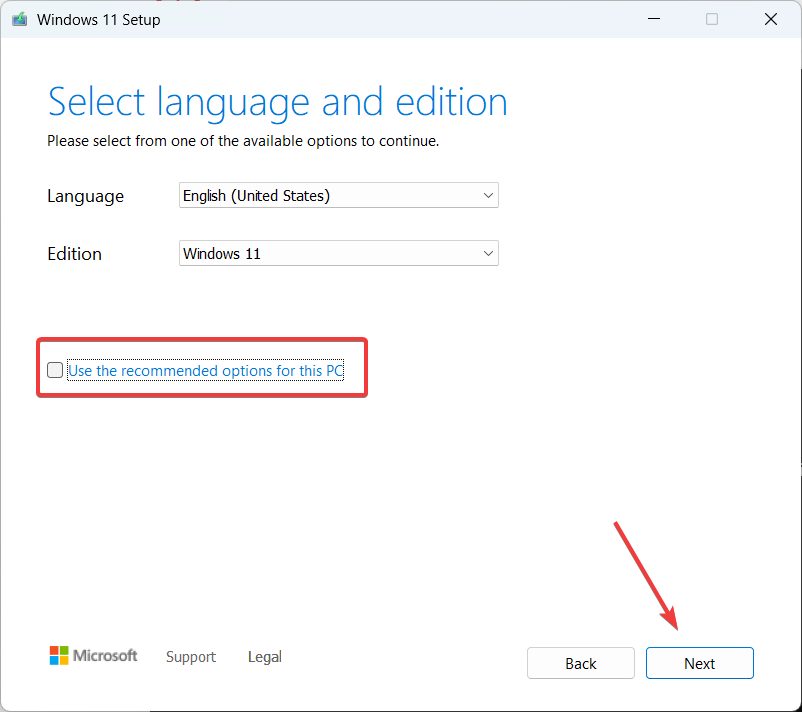
- To select a different language, untick the checkbox beside Use the recommended options for this PC. Then, click Next.
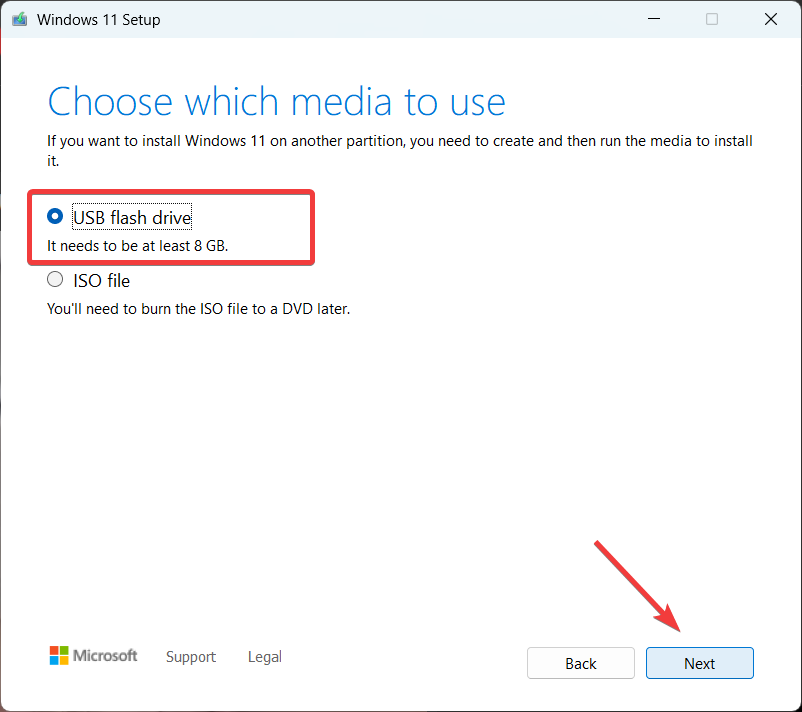
- Choose the USB flash drive option and click Next.
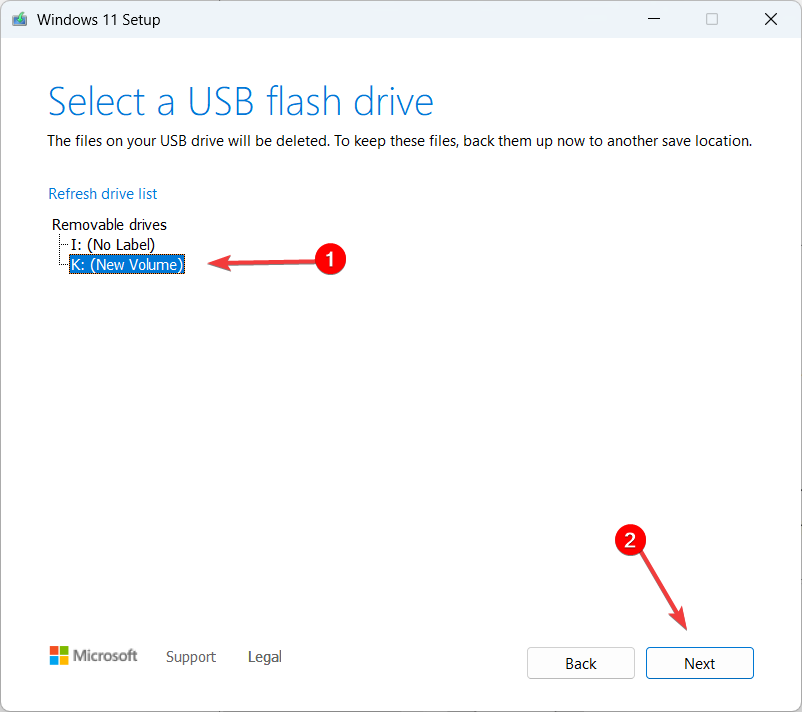
- Select the USB drive you want to use, and click Next.
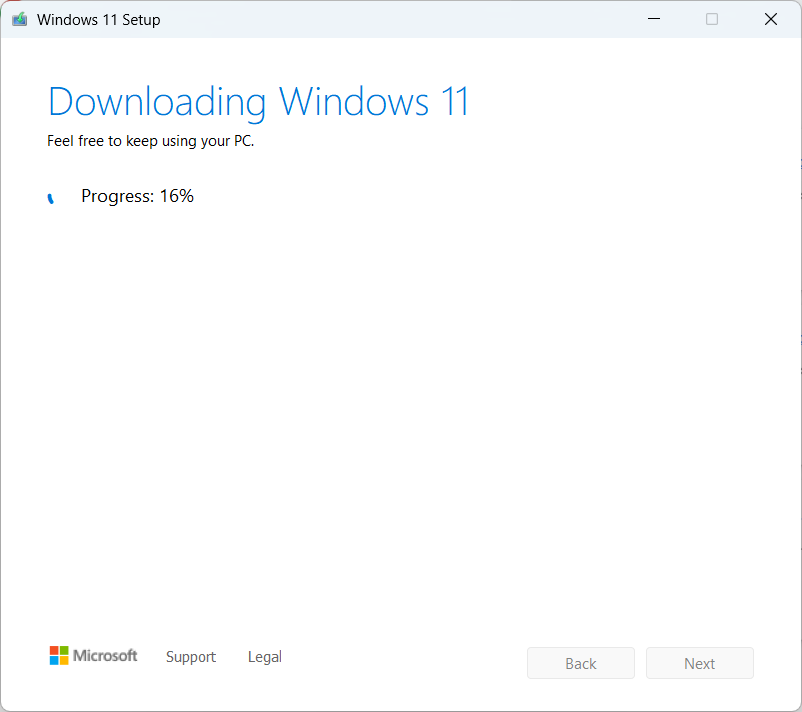
- Wait for the setup to download all the necessary files to the flash drive.
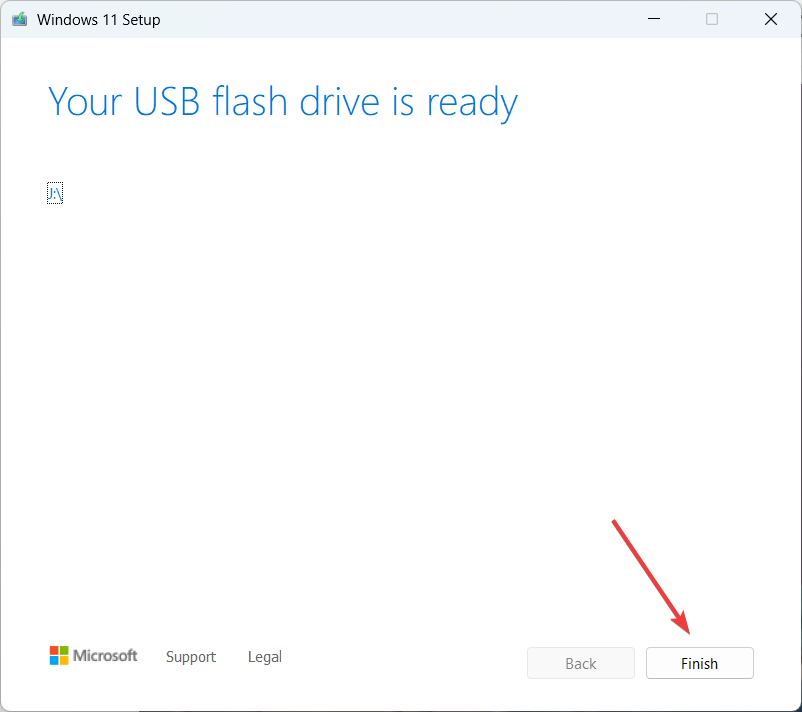
- When the download is complete, click Finish.
4.2 Install the Windows operating system
- Restart your computer and press Esc, F2, F10, or F12 to access the boot menu, and select the USB media to boot from.
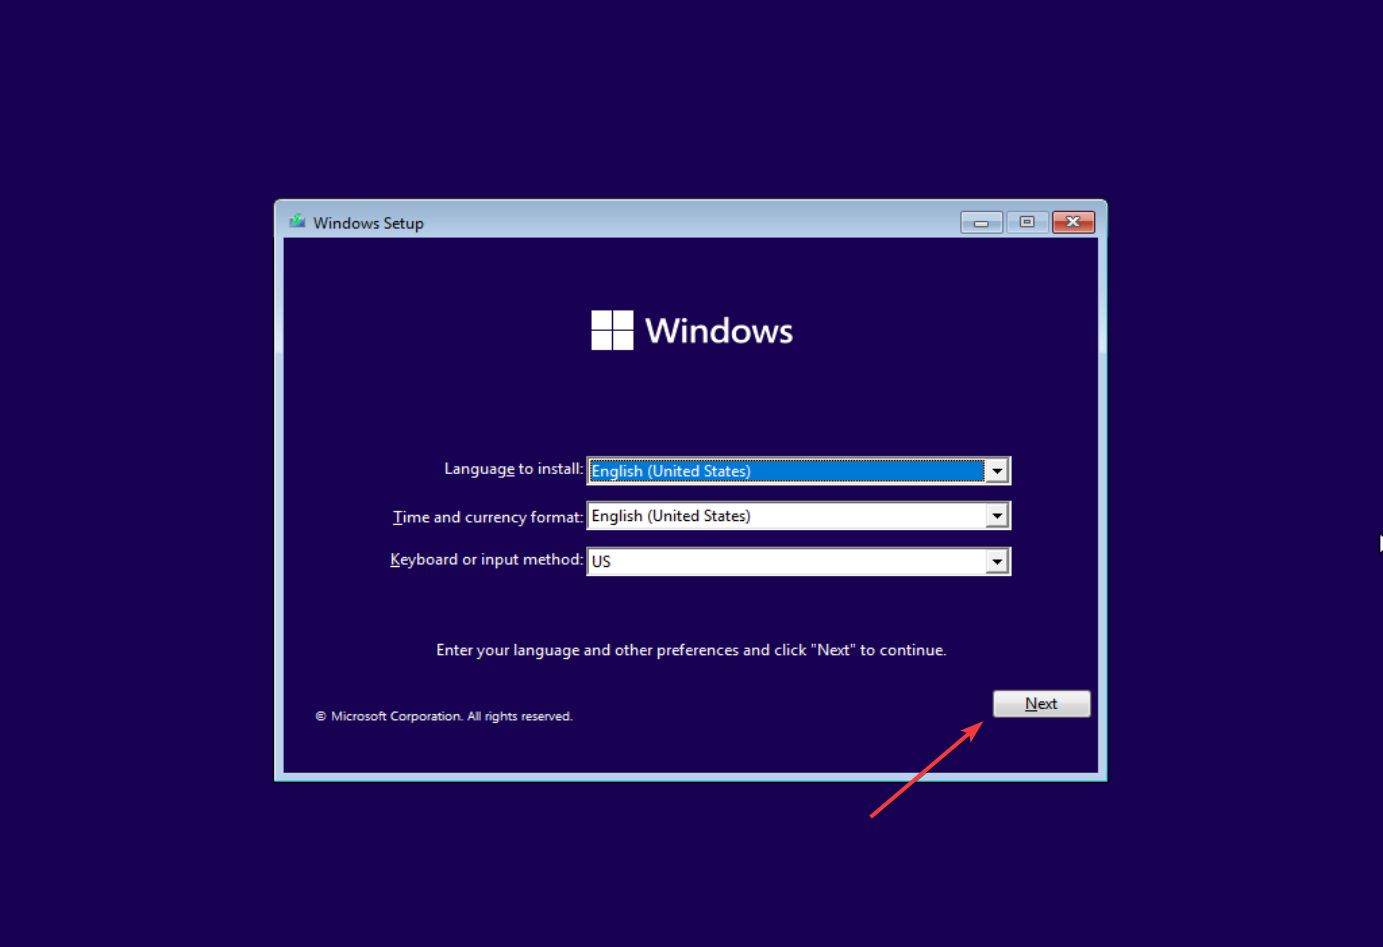
- Choose the language and input method, and then click Next.
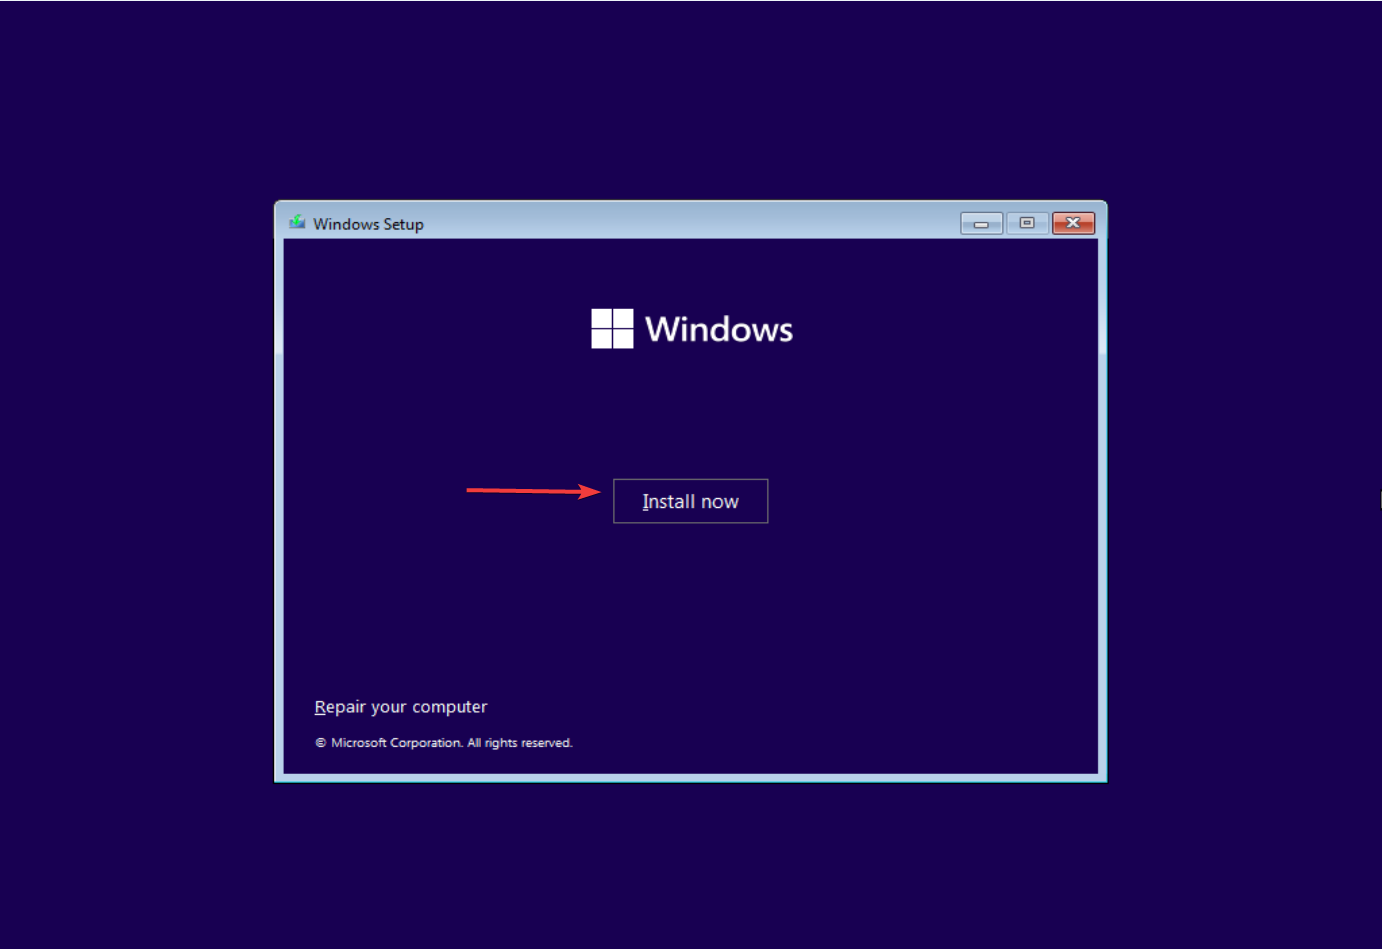
- Click Install now.
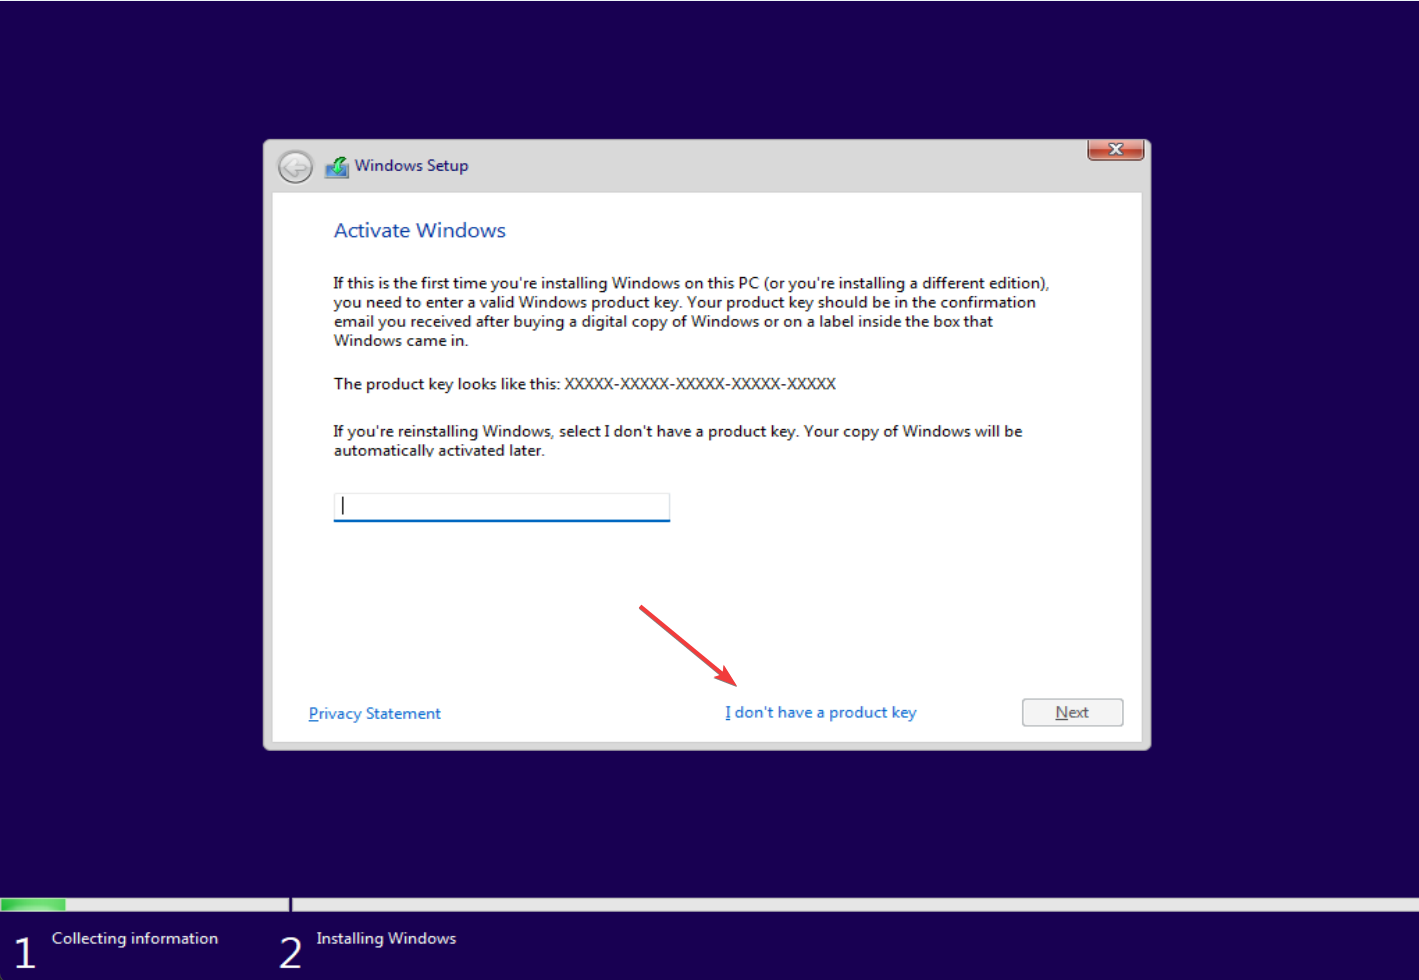
- Input your Windows product key and click Next or click I don’t have a product key.
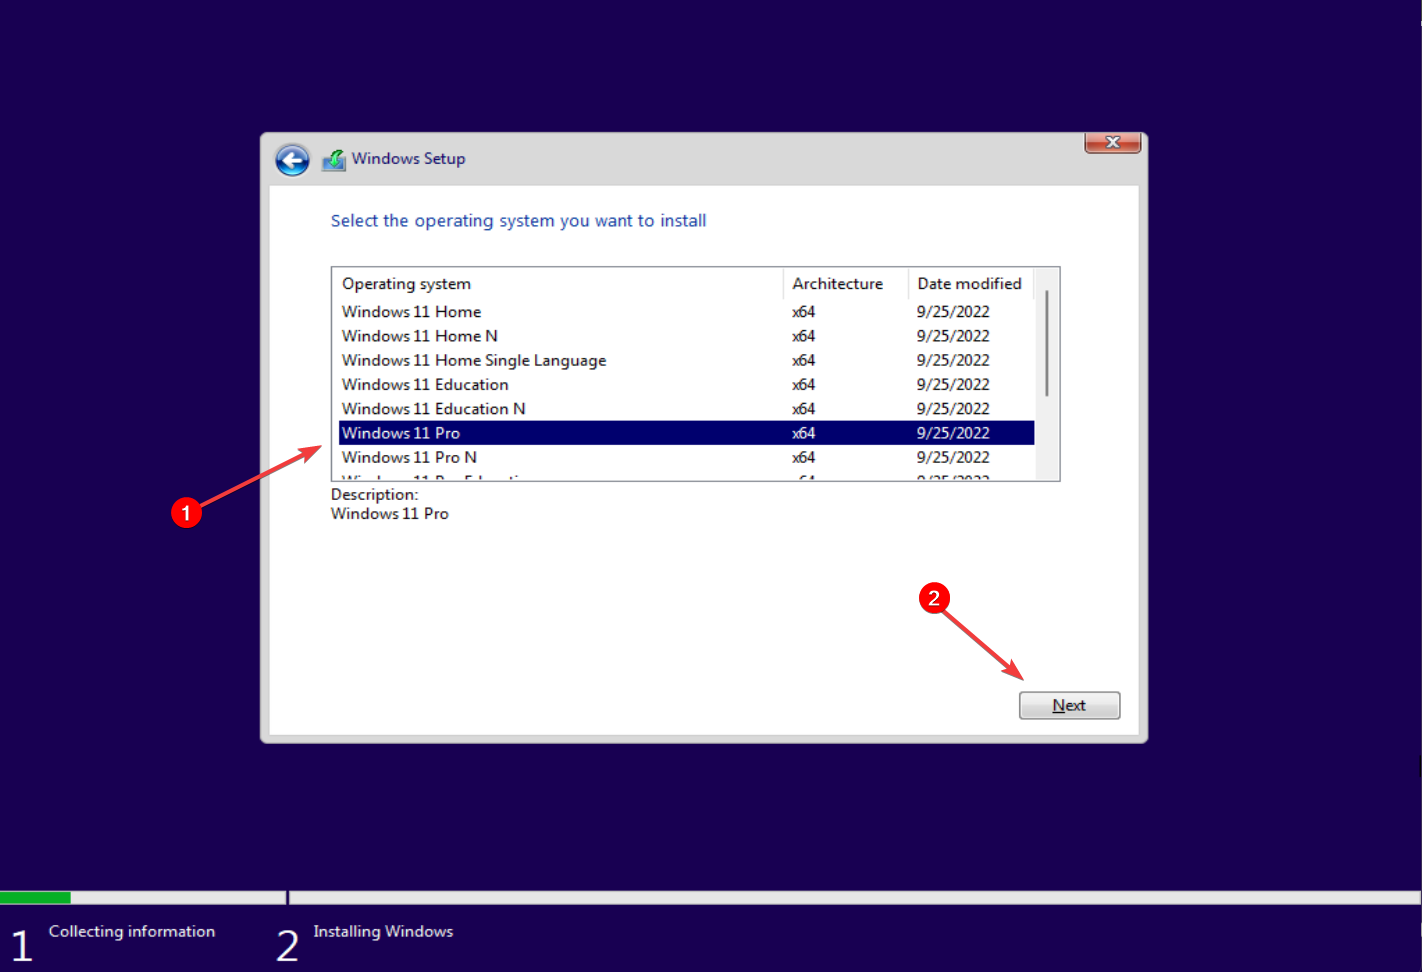
- Choose the Windows edition and click Next.
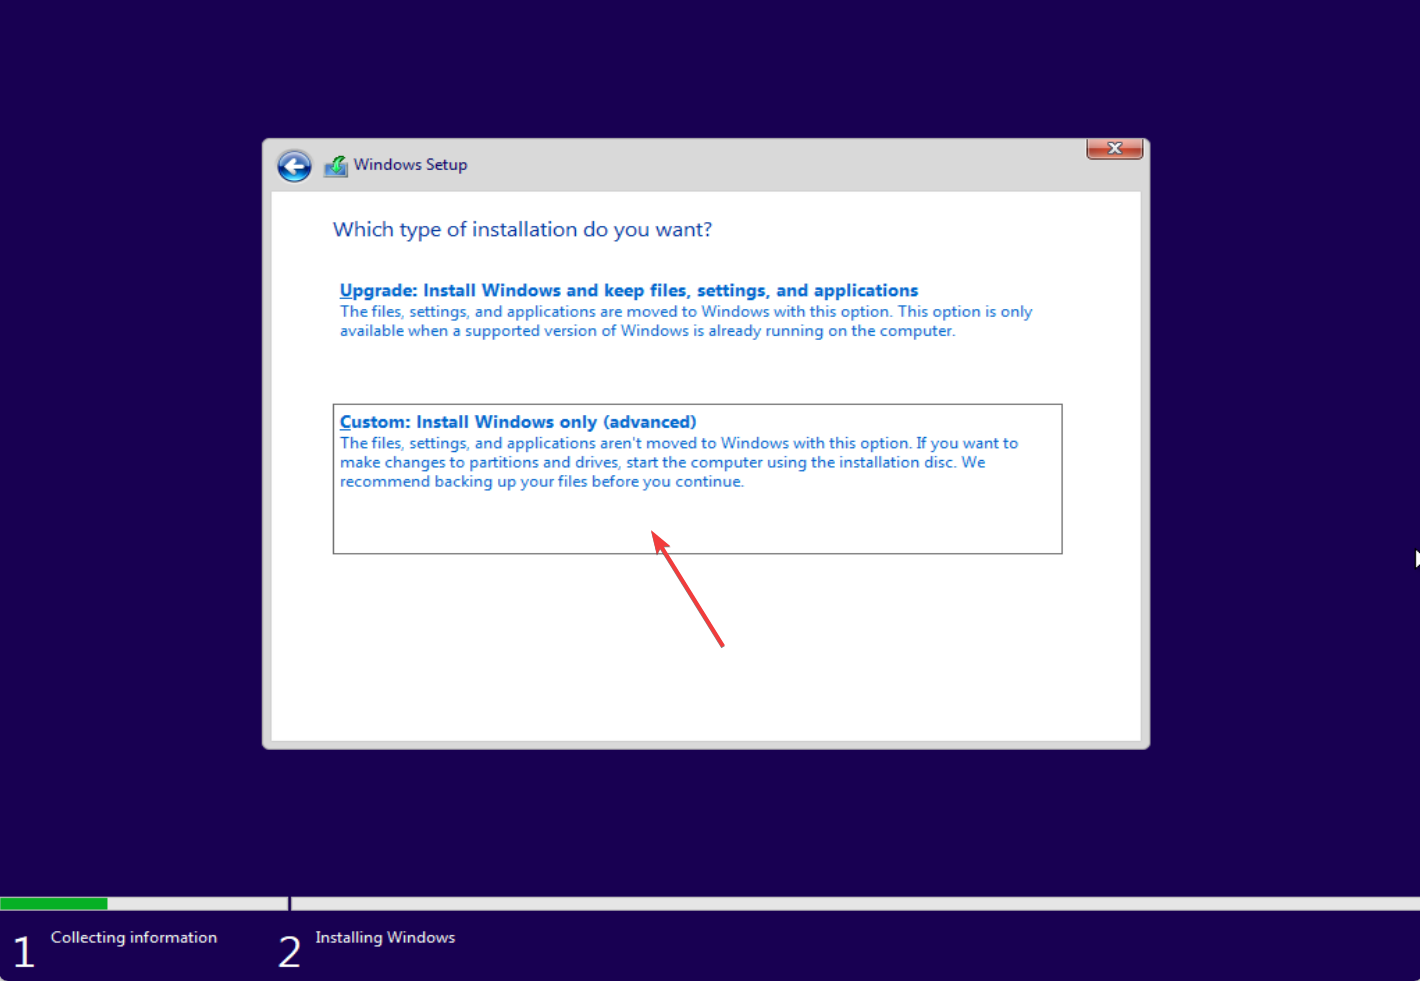
- Select the Custom: Install Windows only (advanced) option.
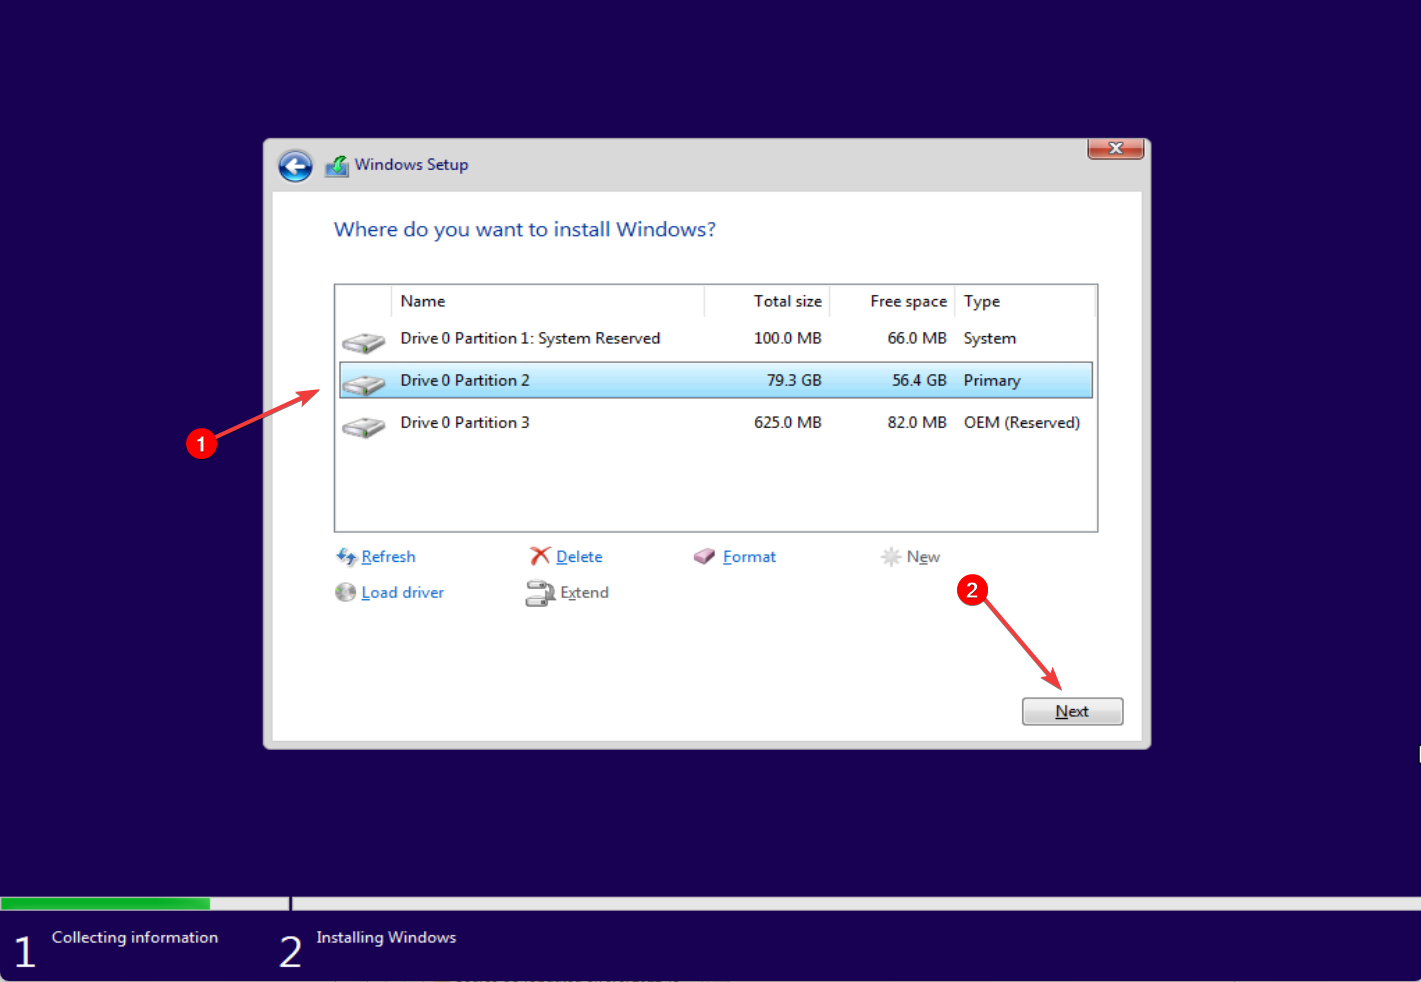
- Choose the partition where you want to install Windows and click Next.
- After the installation, follow the on-screen instructions to set up your computer.
We hope one of these solutions helps you fix the 0x4005(16389) error. After you’ve upgraded, learn how to the most of Windows 11 features.
Please let us know in the comment section if you have further questions or suggestions.

