0x80070000 Legacy API Shutdown: 5 Ways to Fix It
Check the Task Scheduler to ensure no task related to shutdown is set
4 min. read
Updated on
Read our disclosure page to find out how can you help Windows Report sustain the editorial team. Read more
Key notes
- This error code indicates a random or unplanned shutdown enforced by an app or other factor.
- You need to check Event Viewer to know more about the shutdown and the process or app causing it.
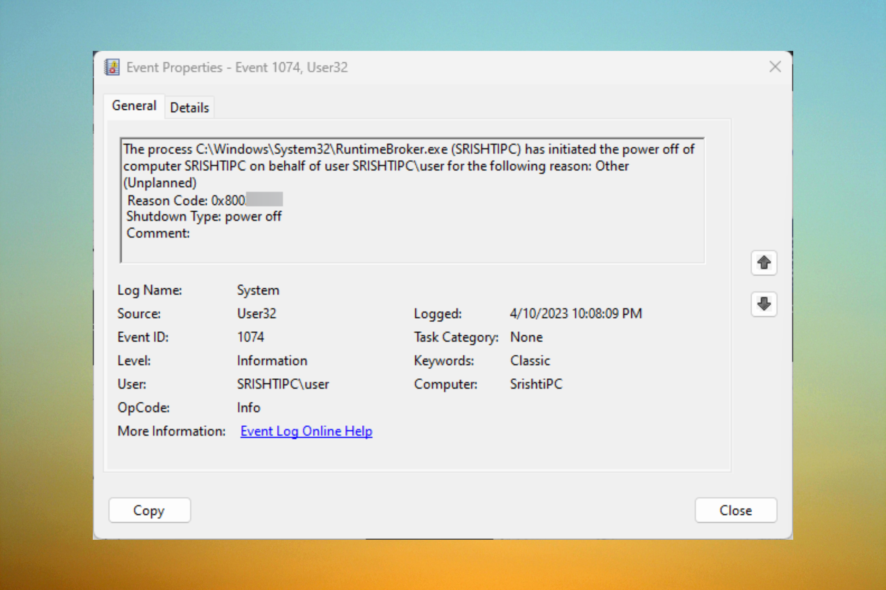
The error code 0x80070000 is a common issue that occurs in legacy applications indicating a shutdown error in the Application Programming Interface functionality. This error code could cause disruptions in the app’s normal behavior.
In this guide, we will discuss potential ways to deal with the issue.
What is 0x80070000 Legacy API shutdown?
The Legacy API shutdown indicates that some process has issued a shutdown request using the older of two API functions available to request a shutdown.
To get more information about the issue, you must check the Event logs to ensure which process is initiating the shutdown.
What causes the 0x80070000 Legacy API shutdown issue?
There could be various reasons for this error code to appear; some of the common ones are:
- Process requested shutdown – If a process issued a shutdown request using the older of the two API functions available to request a shutdown, you could see this message. You need to check the Event Viewer to understand more.
- Task is scheduled – Your device might randomly shut down if a task is scheduled to restart your system. Check the Task Scheduler and disable the task if necessary.
- Outdated app – If the legacy application is no longer supported or maintained by the developer, it may have known issues that can trigger the 0x80070000 error.
- Antivirus is causing the issue – You might see this message if your antivirus is set to restart after scanning your machine or making any changes.
Now that you know the causes let us check out how to fix the problem.
How can I fix the 0x80070000 legacy API shutdown error?
Before engaging in advanced troubleshooting steps, you should consider performing the following checks:
- Turn off your Wi-Fi or ethernet connection, temporarily disable your antivirus, and restart your PC. If the antivirus is causing the issue, reinstall it.
- Restart your computer in a safe mode to check what caused the issue.
- If Windows is restarting every hour, check for Windows activation.
- Make sure to install the latest Windows patches.
- Check for any recent app installation which could have caused the issue.
1. Check the Event Viewer
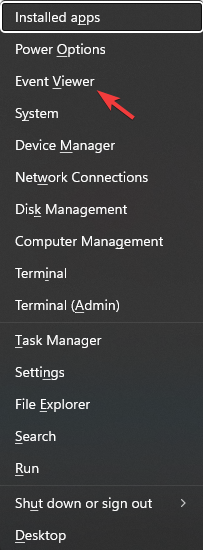
- Press Windows + X to open the context menu.
- Click Event Viewer.
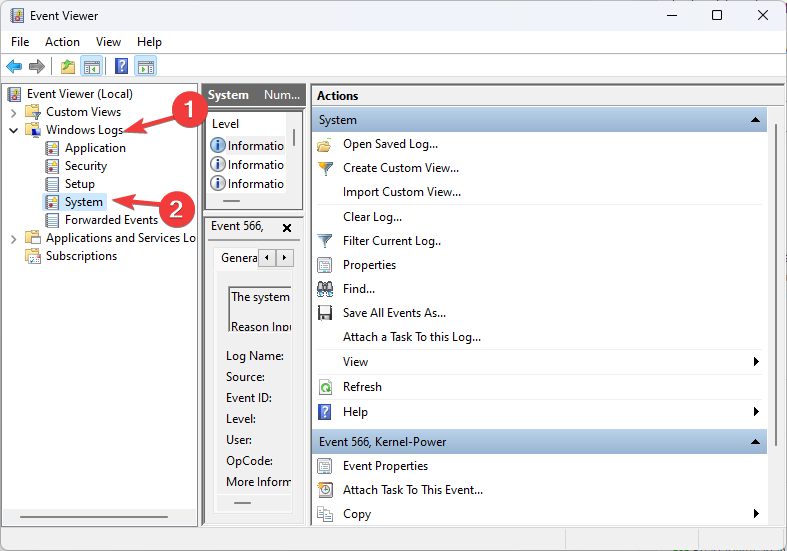
- Under Event Viewer (Local), locate Windows Logs.
- Click System.
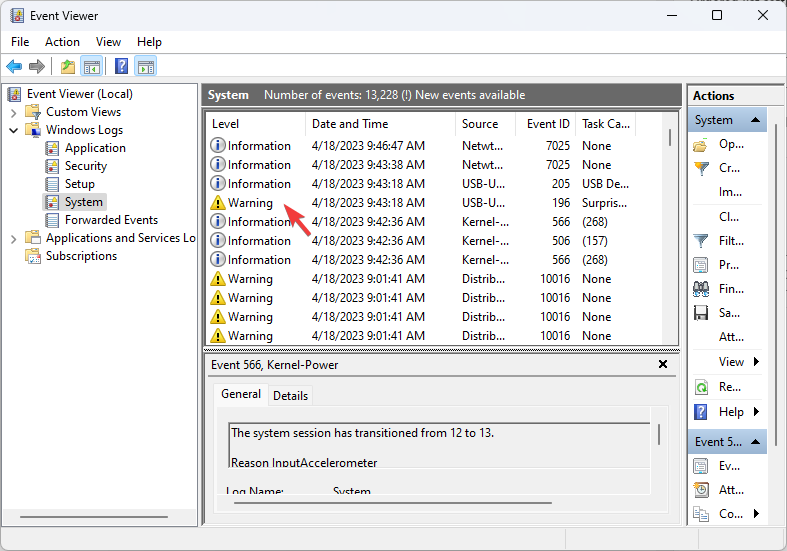
- Now from the right pane, locate the time and event when the restart happened to know the reason for the shutdown.
- If the reason behind the shutdown is an application installation or hardware replacement, undo the change to fix the issue.
2. Check the Task Scheduler
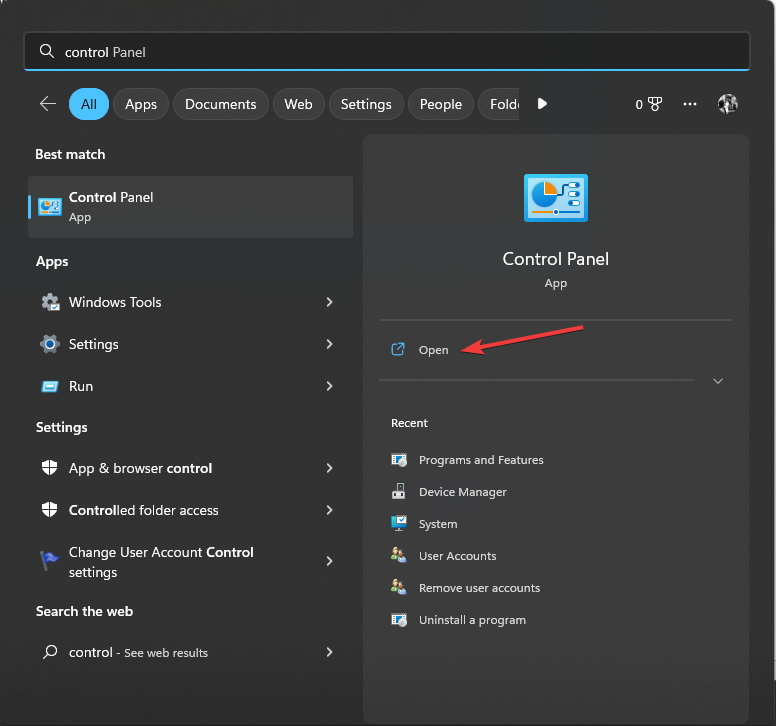
- Press the Windows key, type control panel, and click Open.
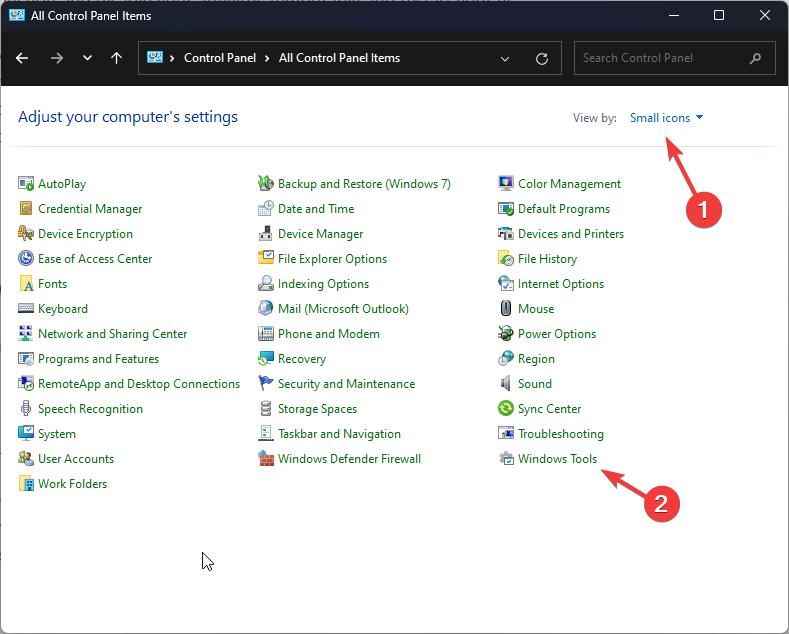
- Select View by as Small icons and click Windows Tools.
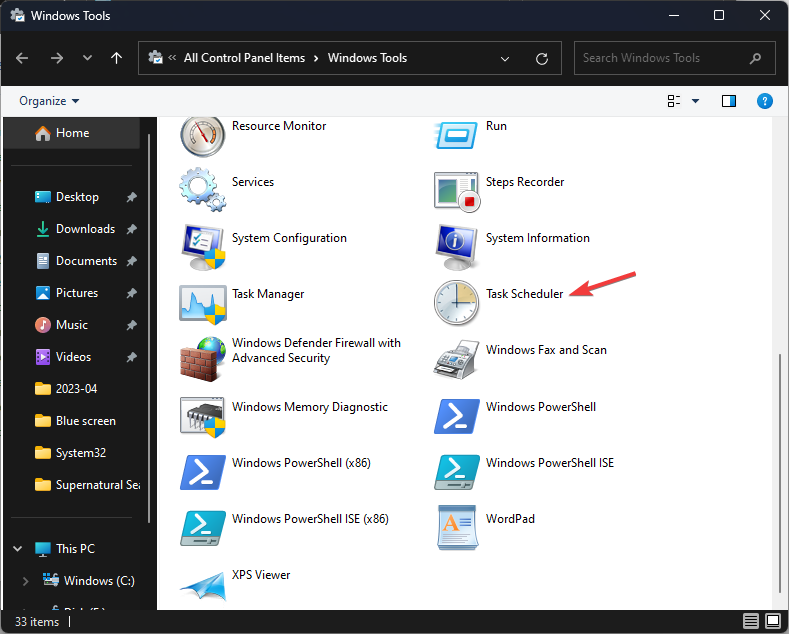
- Click Task Scheduler.
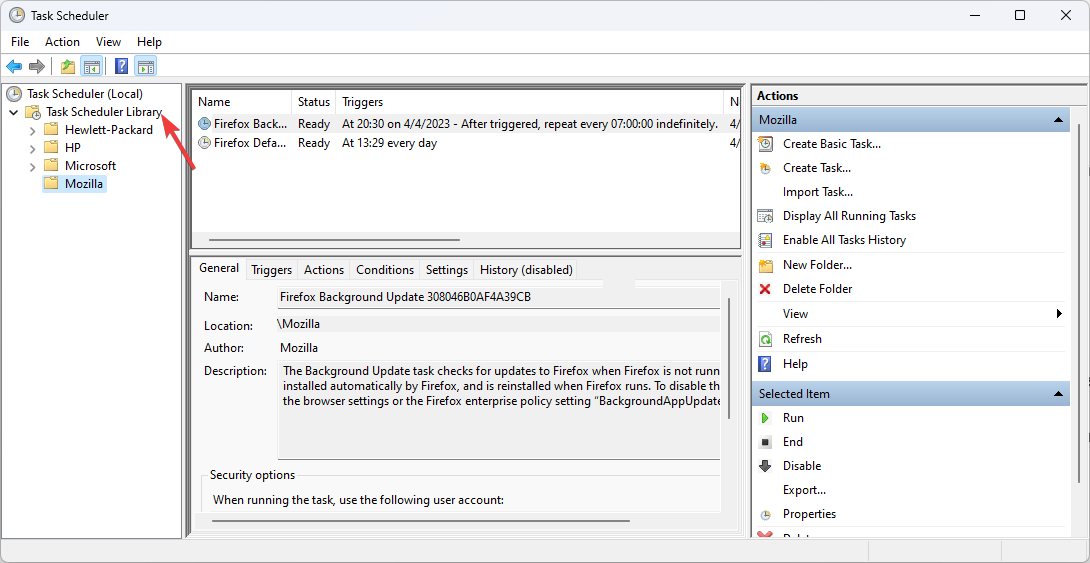
- Go to Task Scheduler Library, go to each entry, and check if there is a scheduled restart for any entry to understand the issue.
- Remove the scheduled task to avoid the random shutdown.
3. Disable the Windows Customer Experience Improvement Program
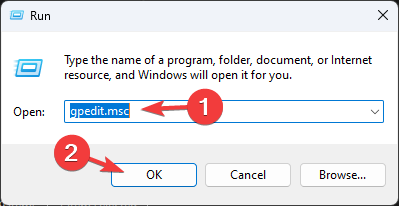
- Press Windows + R to open the Run console.
- Type gpedit.msc and click OK to open Group Policy Editor.
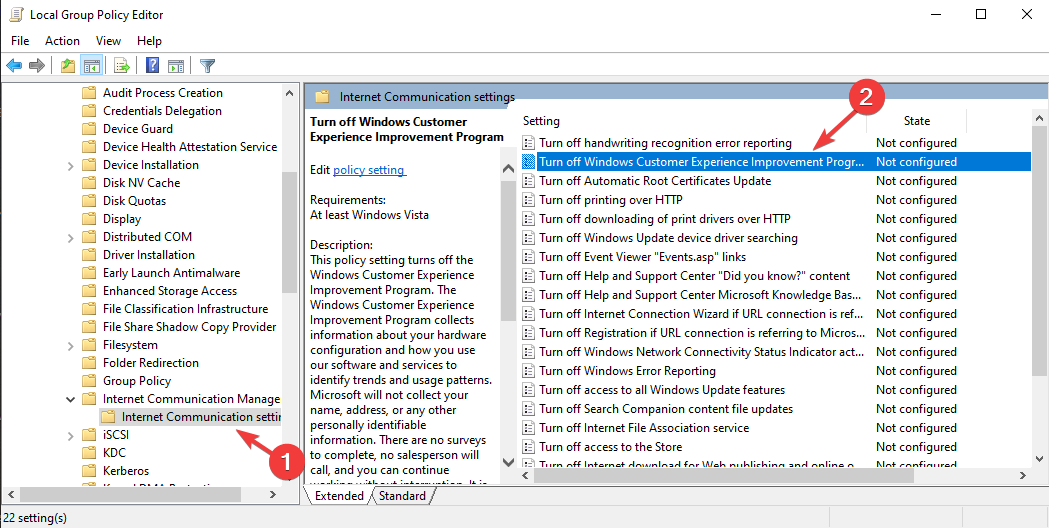
- Navigate to this path:
Computer configuration\Administrative Templates\ System\ Internet Communication Management\Internet Communication settings - Locate and double-click Turn off Windows Customer Experience Improvement Program from the right pane.
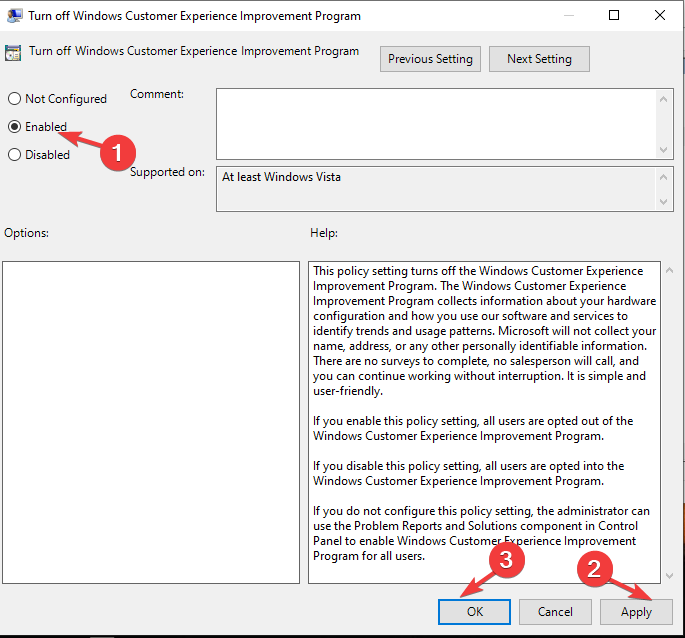
- Select the radio button for Enabled.
- Click Apply, then OK to confirm the changes.
- Restart your computer.
4. Turn off the legacy remote shutdown interface
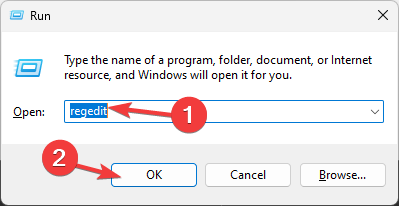
- Press Windows + R to open the Run dialog box.
- Type regedit and click OK to open Registry Editor.
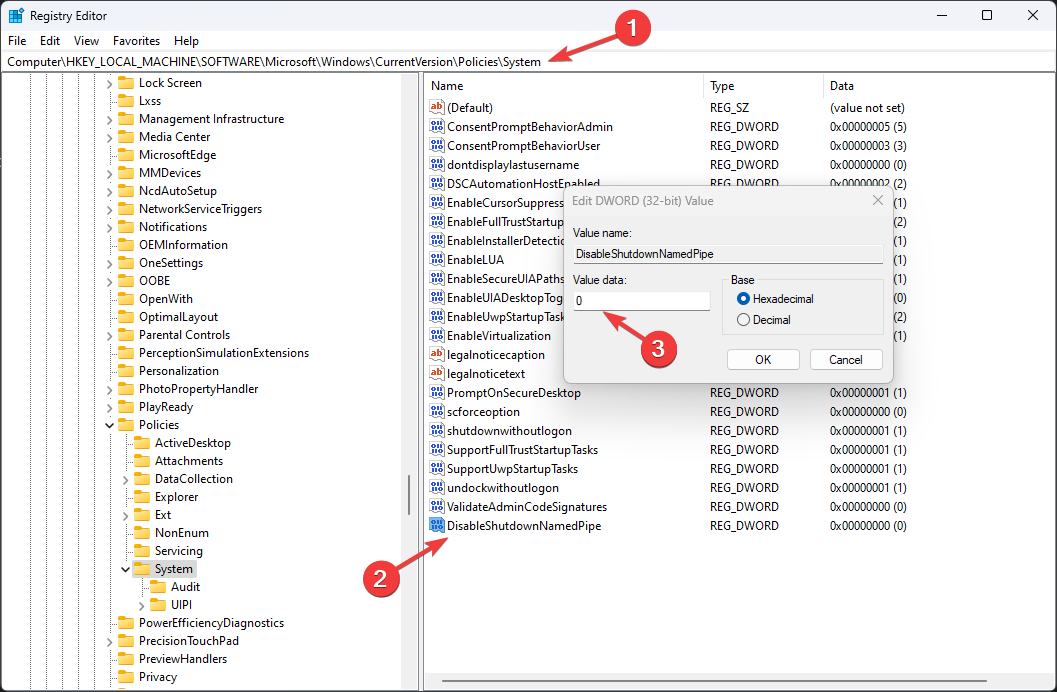
- Navigate to this path:
Computer\HKEY_LOCAL_MACHINE\SOFTWARE\Microsoft\Windows\CurrentVersion\Policies\System - Locate and double-click DisableShutdownNamedPipe to modify it. Change the Value data to 0 and click OK.
- Reboot your PC to save the changes.
5. Disable the Automatically restart option
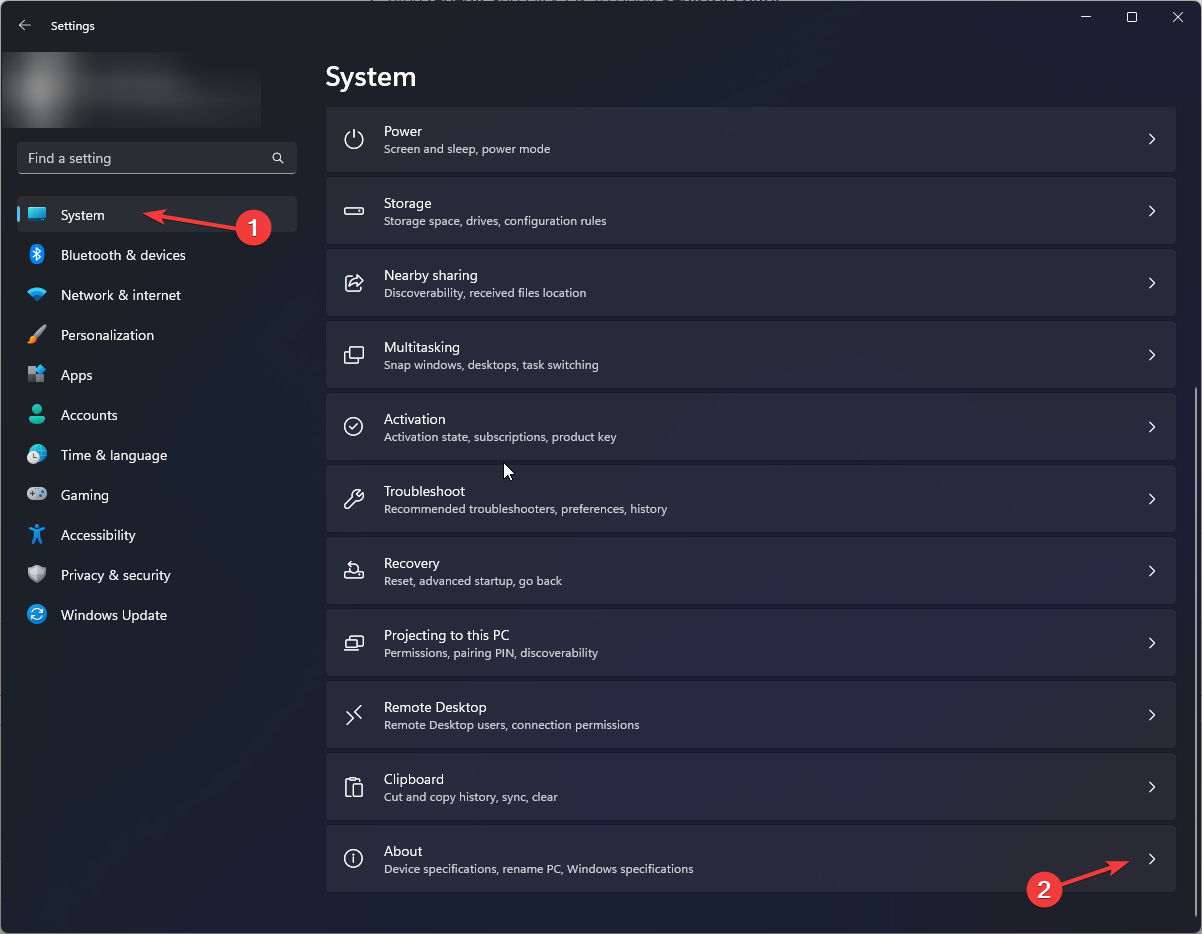
- Press Windows + I to open the Settings app.
- Go to System, then click About.
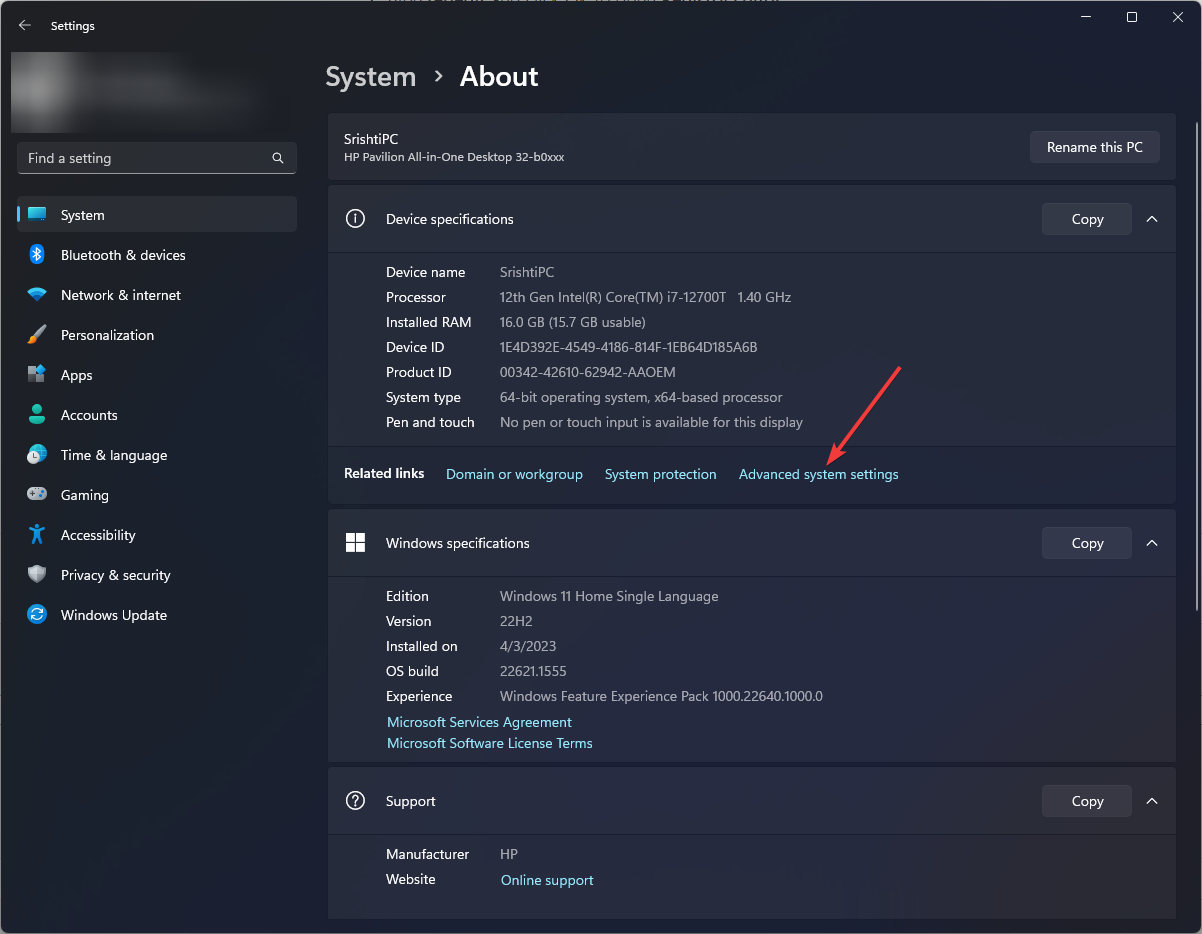
- Click Advanced system settings.
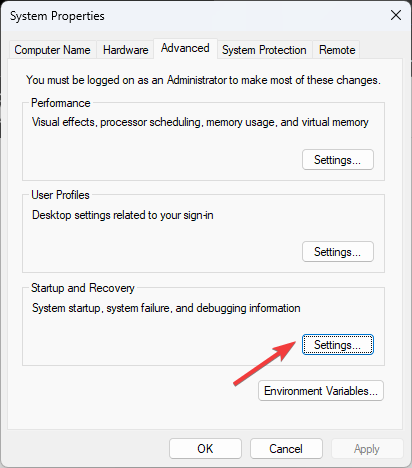
- Locate Startup and Recovery, and click Settings.
- Remove the checkmark next to Automatically restart and click OK.
- Click Apply and then OK.
On the contrary, if you want to know how to set a shutdown timer on Windows 11, you can check out this guide.
So, these are a few ways to check and fix the 0x80070000 Legacy API shutdown on your computer. If you have any questions or suggestions, feel free to mention them in the comments section below.



User forum
2 messages