Windows 11 Randomly or Automatically Shuts Down [Fix]
Random shutdowns may be triggered by malfunctioning hardware

Just like when Windows 11 keeps restarting, Windows 11 randomly shuts down is frustrating for anyone who can’t live a day without their PC.
If you’ve been looking for a solution for these auto shutdowns on Windows 11, you’ve just landed on the right page.
Why is my computer shutting down randomly in Windows 11?
Your computer could shut down randomly without you hitting the power button for various reasons that include but are not limited to the following:
- Overheating – Your computer is programmed to power off when its temperature rises to a certain level to protect hardware and software components.
- Malfunctioning sleep mode – In Windows 11, the Sleep Mode may become problematic and result in unexpected shutdowns rather than the expected sleep.
- Overclocking – Your computer’s components might be unable to handle the additional power requirements if it has been overclocked. Hence, randomly shutting down.
- Faulty drivers – Random PC shutdowns can also be caused by outdated or defective drivers.
- Hardware problem – Your computer can shut off due to failing hardware components.
Whatever causes your Windows 11 PC to shut down abruptly, the solution to fix it is here.
How can I fix a random shutdown on Windows 11?
To stop Windows 11 from random shutdowns, start with these basic troubleshooting steps:
- Ensure your cables are connected correctly, or switch to a different power source. That should fix it if they are the root of the problem.
- Updating Windows to the latest version could be all you need if the problem is due to some bugs
- Use your PC in a well-ventilated room. Avoid direct sunlight or anything that could heat your PC. If your computer fans are dirty, cleaning it can be the solution.
- Use your antivirus to scan and remove viruses from your computer. You can also use Microsoft Windows Defender to banish unwelcome guests from your computer.
If none of these preliminary solutions stops Windows 11 from shutting down abruptly, try the following advanced troubleshooting methods.
1. Run the Power troubleshooter
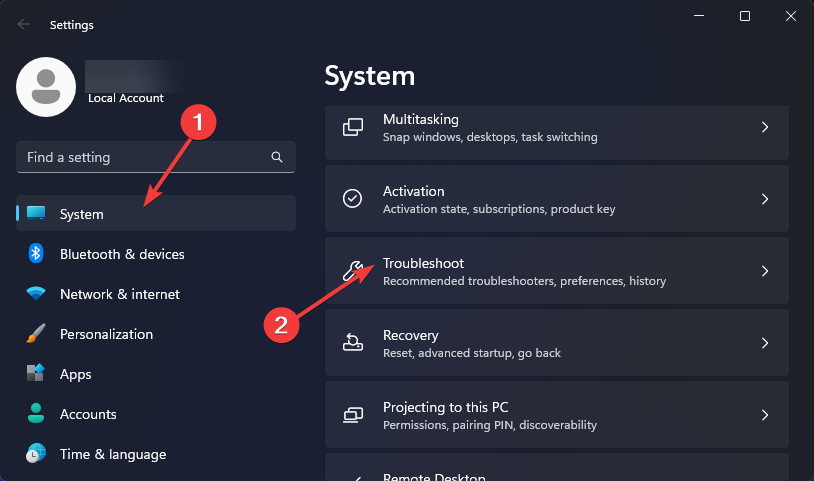
- Press the Windows + I on your keyboard to open Settings, select the System tile, and scroll down to choose Troubleshoot on the right pane.
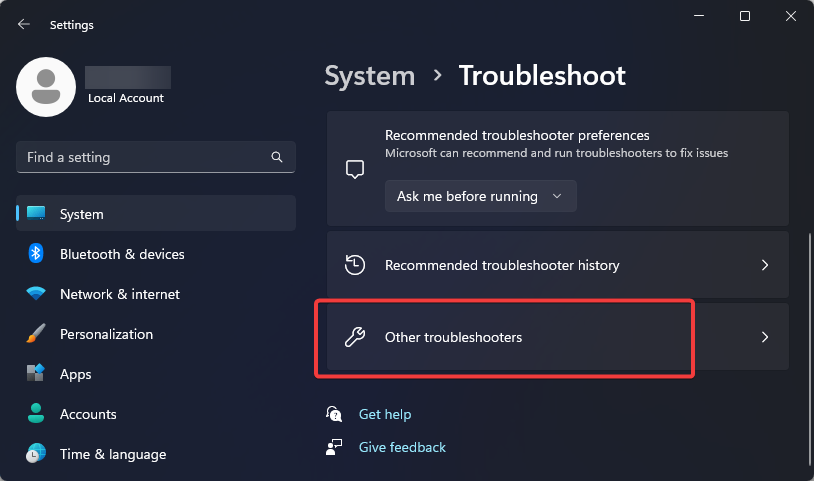
- Next, select Other troubleshooters.

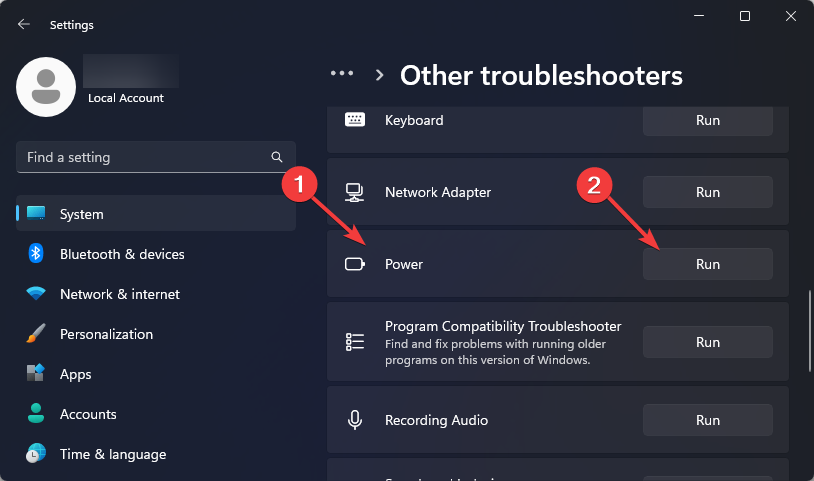
- Scroll down to locate Power and click on the Run button to start the troubleshooting.

- Wait for Windows to detect the issue, then follow the on-screen instruction to apply the fixes.
- Restart your PC.

2. Disable fast startup
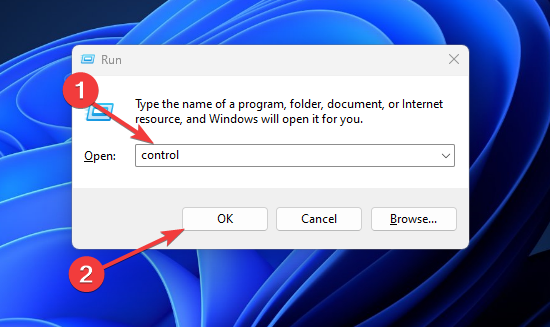
- Press Windows + R on your keyboard to open the Run dialog, type control into the command box, and click the OK button.

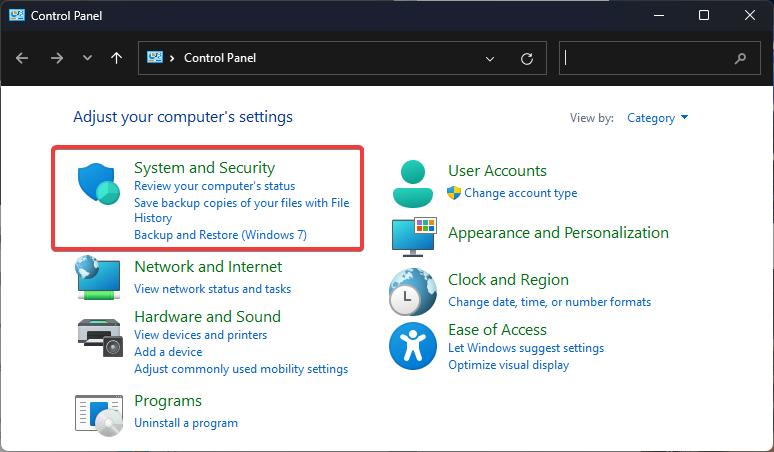
- Go to System and Security.

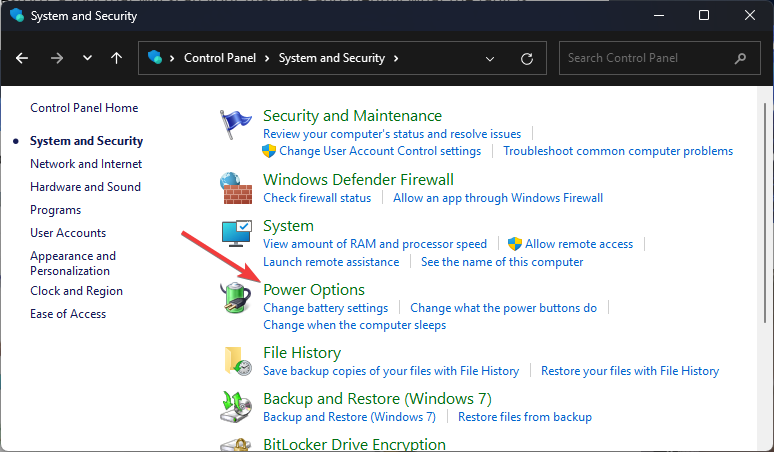
- Next, select Power Options.

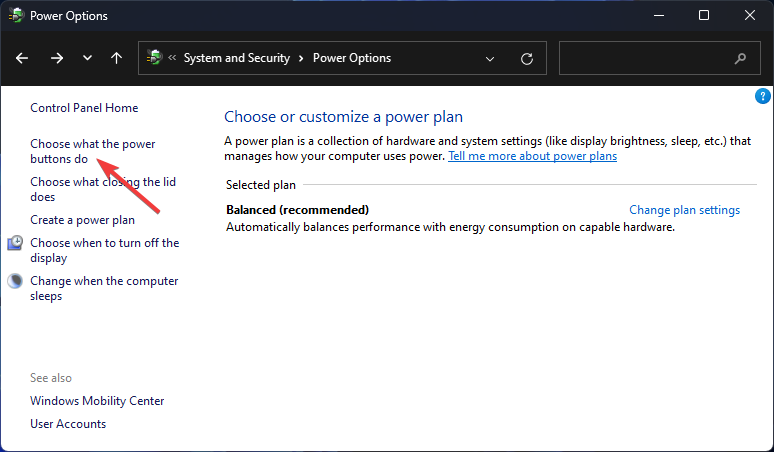
- Click on Choose what the power buttons do on the left sidebar.

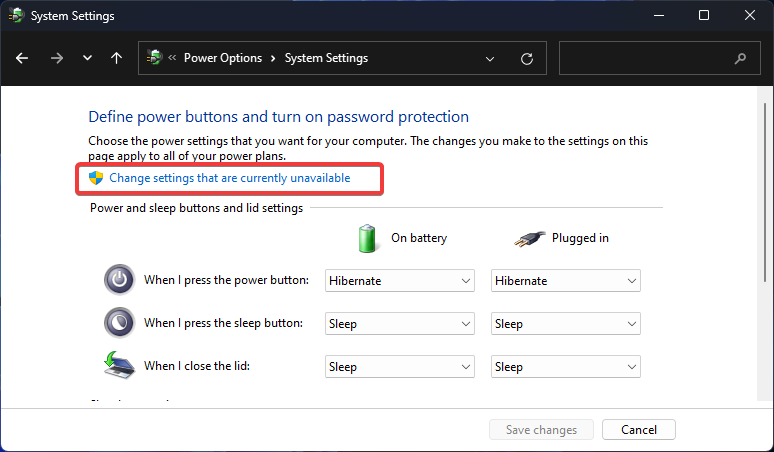
- Next, click on Change settings that are currently unavailable.

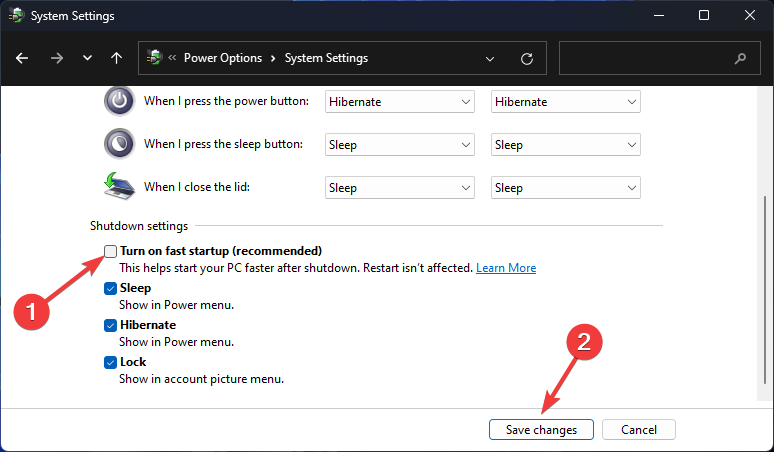
- Uncheck the box next to Turn on fast startup (recommended) and click on the Save changes button.

- Restart your PC and check if your PC no longer shuts down randomly.
3. Change advanced power settings
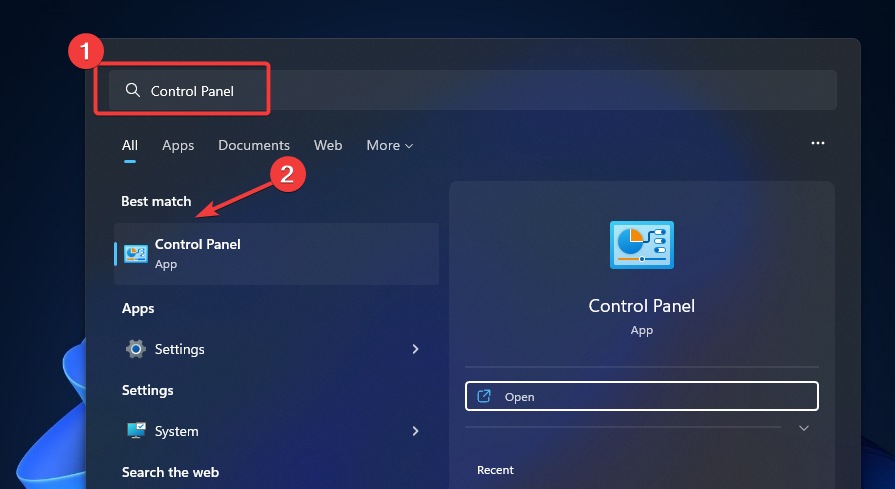
- Click on the Windows icon on your taskbar, enter Control Panel into the Search box, and select the Best match result.

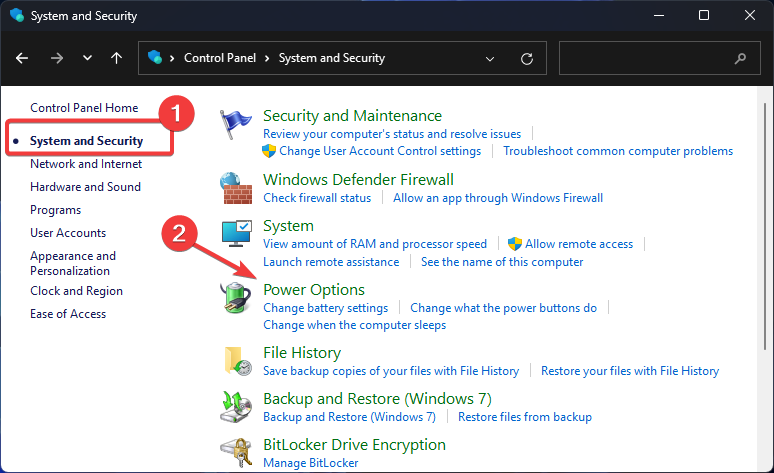
- Select System and Security on the left pane, and click on Power Options.

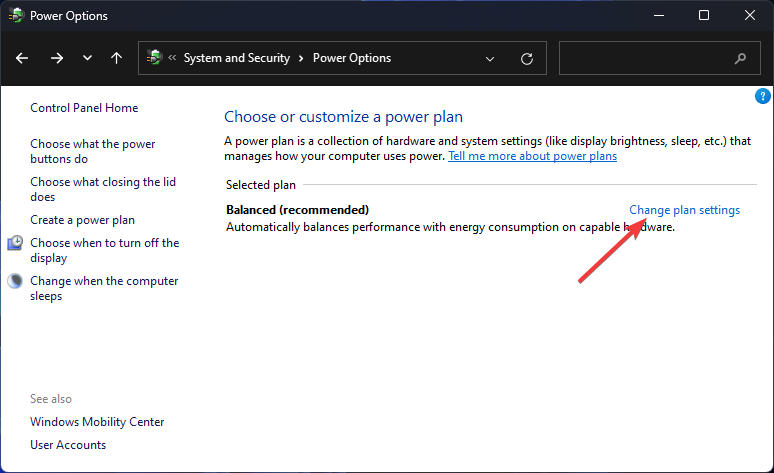
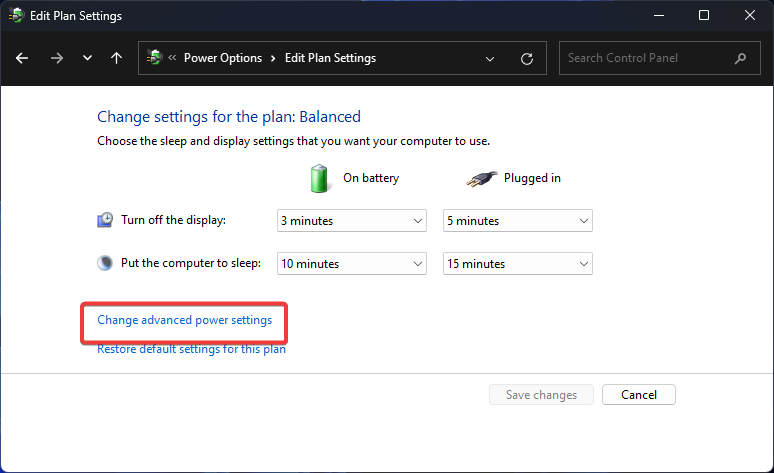
- Next, click on Change plan settings.

- Next, click on Change advanced power settings.

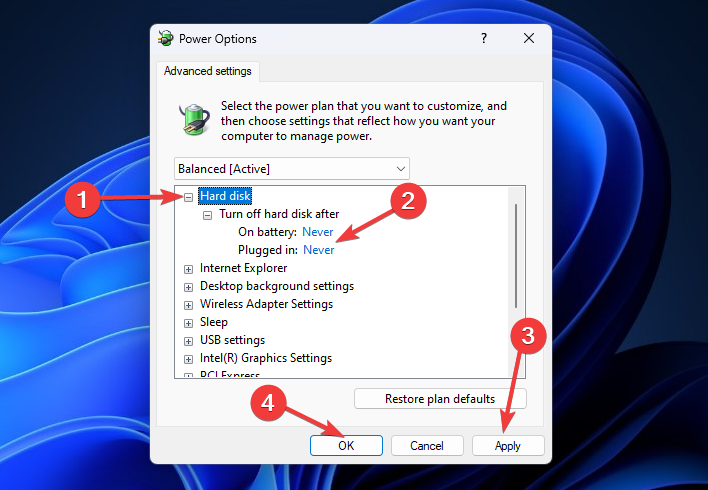
- On the pop-up window, double-click to expand Hard disk, then set the On battery and Plugged in options under Turn off hard disk after to Never. Click the Apply then OK button to save your changes.

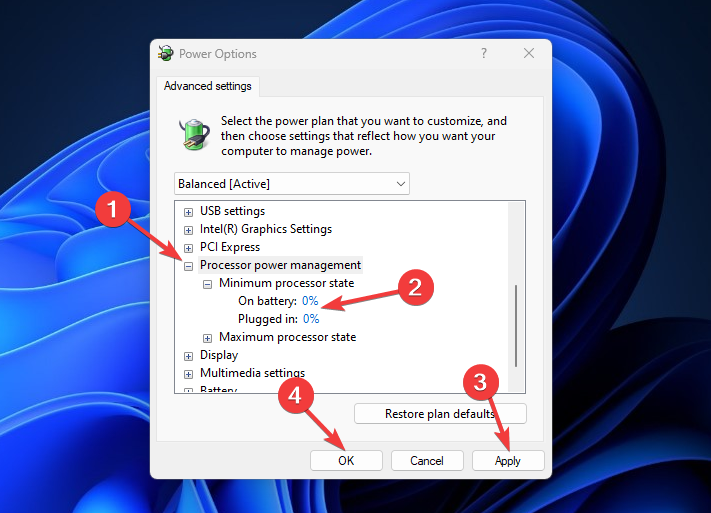
- On the same pop-up window, navigate to Processor power management, double-click to expand it, and select Minimum processor state. Change the value of the On battery and Plugged in options to 0%. Click the Apply then OK button to save your changes.

Note that this solution is only for laptop users but is very effective in getting rid of the Windows 11 auto shutdown problem.
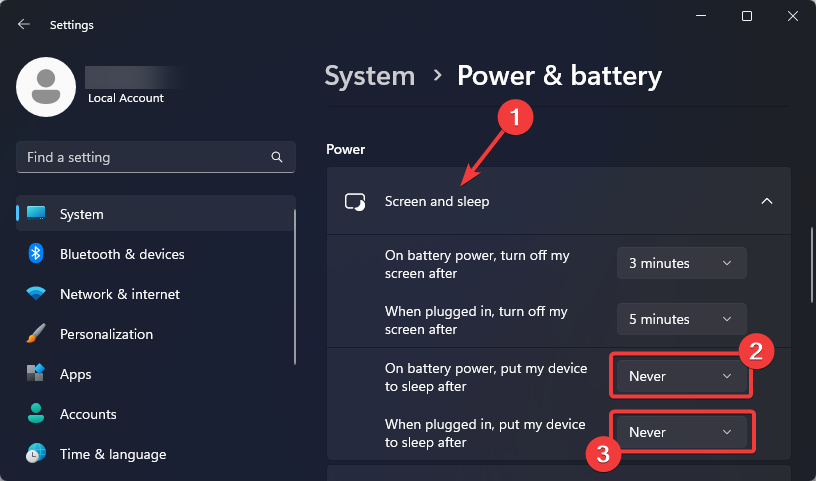
4. Turn off sleep mode
- Press Windows + I keys on your keyboard to open Settings.
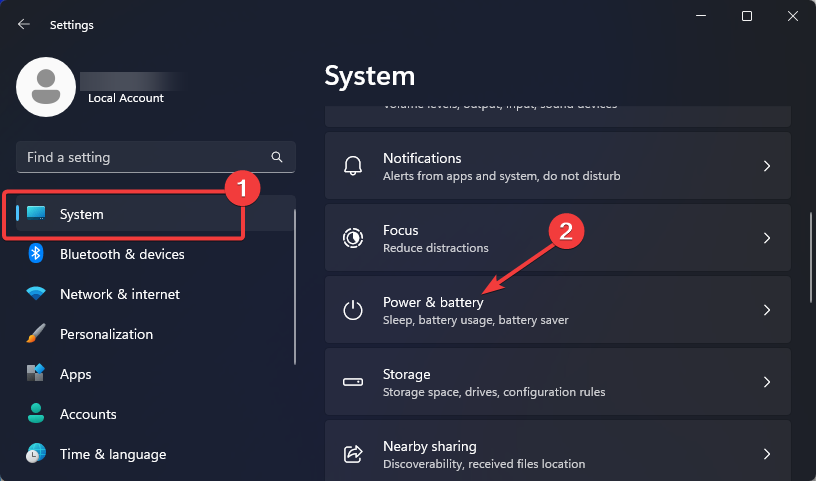
- Go to the System tile on the left pane, then scroll down to select Power & battery on the right.

- Under Screen and sleep, set On battery power, put my device to sleep after and When plugged in, put my device to sleep after options to Never.

Some Windows 11 users complained of power settings not being available under Screen and sleep. If this is your case, follow this guide to quickly fix missing power settings on your Windows 11 PC.
If the PC shuts down randomly, but it’s not overheating, you may be just entering sleep mode.
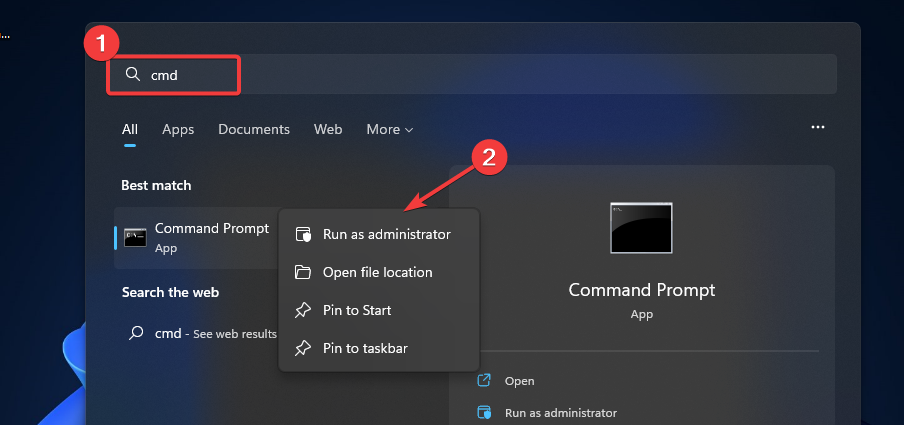
5. Run the SFC and DISM commands
- Press the Windows icon on your taskbar, type cmd into the Search box, right-click on the Best match result and select the Run as administrator option.

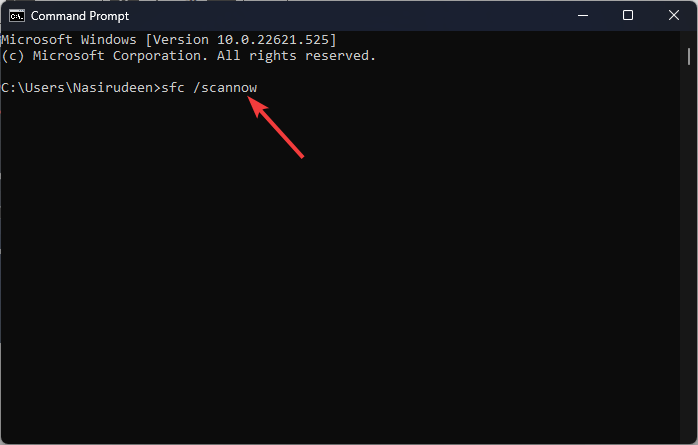
- Type in the following command and hit Enter:
sfc /scannow
- Wait for the process to complete, then paste this next command and press Enter:
DISM /Online /Cleanup-Image /RestoreHealth
- Wait for the entire process to be complete and restart your computer.
Check this post for more information on how to use the DSIM command to fix Windows. The guide is for Windows 10, but the steps are the same on Windows 11.
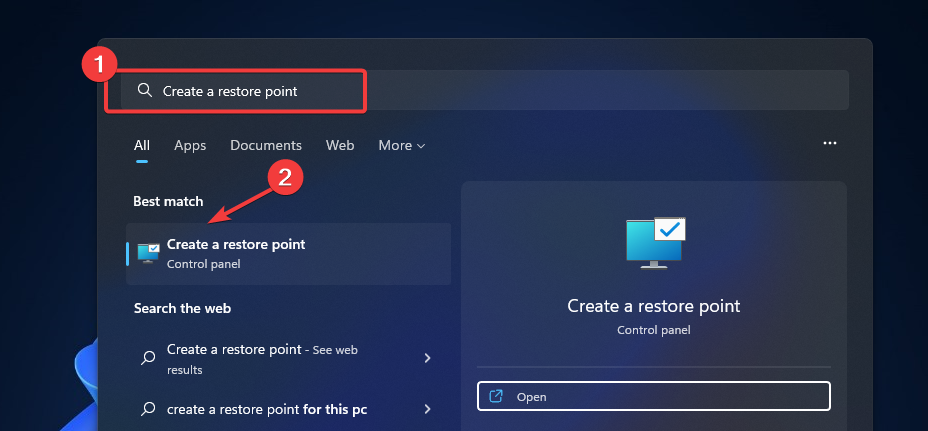
6. Perform a System Restore
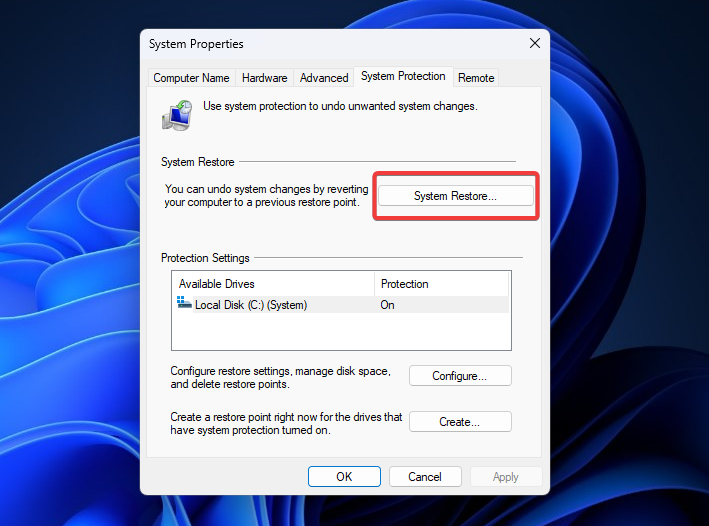
- Click on the Windows icon on your taskbar, type Create a restore point into the Search box and select the Best match result.

- On the System Properties window, click on the System Restore… button.

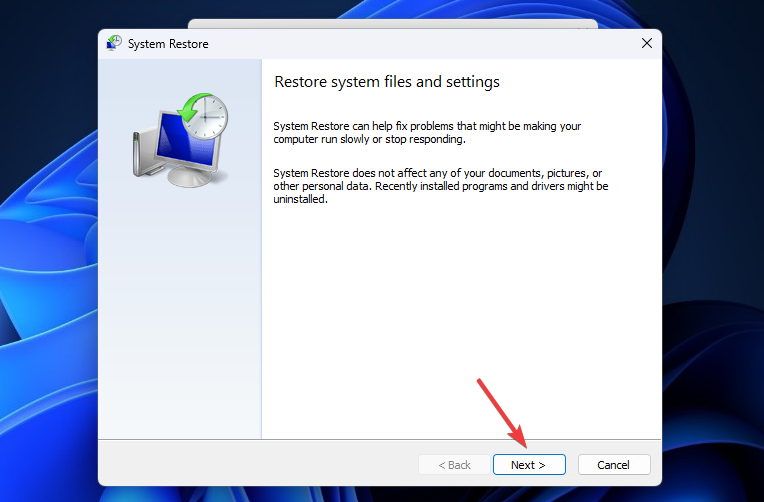
- Click the Next button.

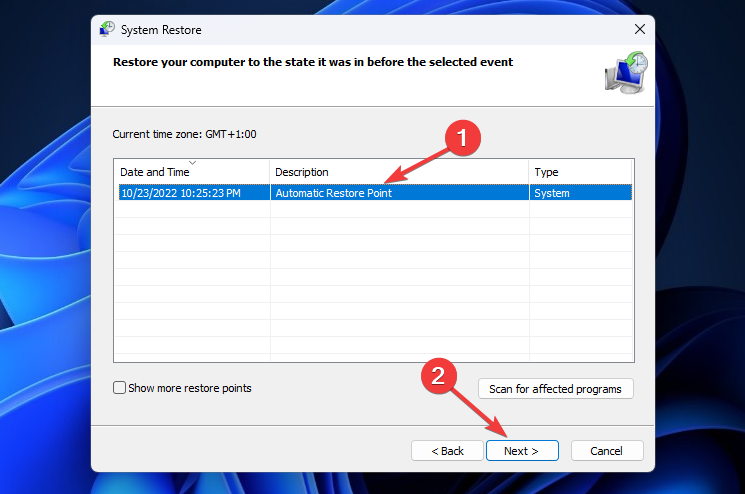
- Select the available restore point and click the Next button.

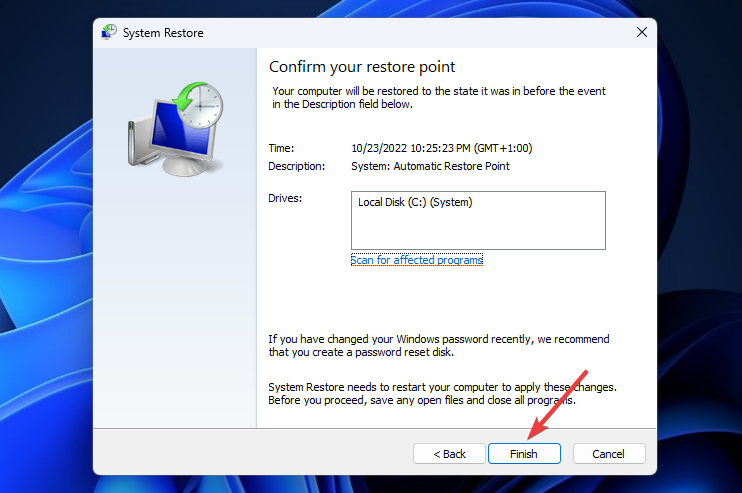
- Click the Finish button to confirm your restore point.

- System Restore will automatically restart your computer to effect the changes. Wait for the process to complete then check if the problem has been fixed.
If the problem persists after using all the above solutions, resetting Windows 11, manually or automatically is the next resort.
Another worth-knowing method that can repair your PC and fix shutting-down issues is a PC optimization tool designed for system restore operation.
7. Reset PC to factory settings
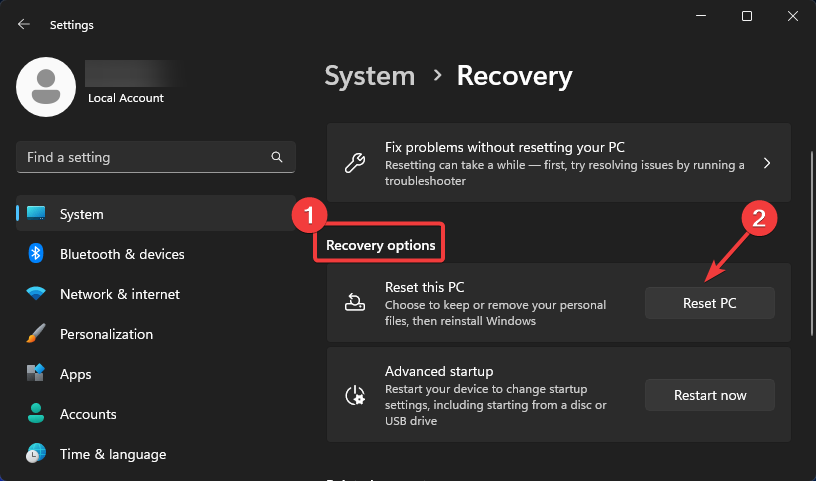
- Press Windows + I on your keyboard to open Settings, select the System tile, and scroll down to choose Recovery on the right pane.

- Under Recovery options, click the Reset PC button next to Reset this PC.

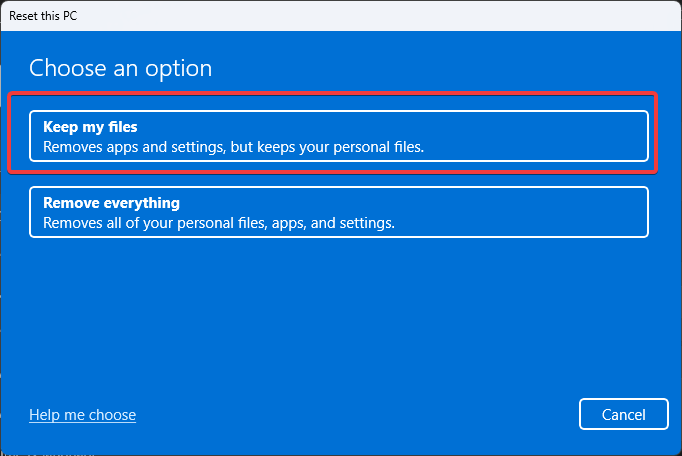
- Next, choose Keep my files to reset all system settings default without removing any personal file.

- Follow the on-screen instruction to complete the process.

Sometimes, the reset PC feature might not work on Windows 11. If you encounter this, follow the linked guide to fix it.
Can unexpected shutdown damage your computer?
A sudden shutdown can damage the PC’s hardware and software, though the effects on the latter are more profound. The damage is minor for hardware unless the computer is repeatedly shut down the same way over an extended period. The hard drive is usually the worst affected component and you might get the windows failed to load properly message..
But when it comes to software, an unexpected shutdown can wreak havoc. It’s one of the primary reasons behind corrupt system files, which leads to a range of other issues, sometimes even a Blue Screen of Death. Also, you lose unsaved data due to an unexpected shutdown.
Where can I find shutdown logs?
- Press Windows + S to open Search, type Event Viewer in the text field, and click on the relevant search result.

- Expand Windows Logs from the navigation pane, and then select System under it.

- You can now view all the shutdown logs on the right.

You can check the error logs to ascertain the shutdown history of the PC and identify any issues encountered during the process. Here are a few Event IDs you should be aware of for a better understanding of the shutdown logs:
- Event ID 6006: Indicates a proper shutdown. So there’s nothing to be concerned about.
- Event ID 6008: Indicates an improper shutdown. So, you should verify what caused it and take the necessary steps to prevent future occurrences.
- Event ID 1074: Indicates a built-in or third-party application initiated the shutdown. It could just as well be Windows Update, but you may verify that same.
- Event ID 41: Indicates that the PC underwent a reboot without shutting down properly.
That’s about it. Hopefully, you can stop random shutdowns on your Windows 11 device with one of these solutions.
Sometimes, the shutdown box pops up randomly on Windows 11 due to system glitches. Follow the linked guide to fix it. We also have a new guide on Windows 11 shutdown but user stays logged in, so don’t miss it.
After you solve this annoying problem, you might want to look at the best Windows 11 productivity apps to boost your PC performance.
Reach out in the comments section below for any questions or suggestions.
Read our disclosure page to find out how can you help Windows Report sustain the editorial team. Read more


Improve this guide


User forum
0 messages