DLLRegisterserver Failed with Error 0x80070715 [Fix]
Explore the expert-recommended fixes to resolve the issue
![]() 4 min. read
4 min. read
![]() Updated on
Updated on
Share this article

Improve this guide
Read our disclosure page to find out how can you help Windows Report sustain the editorial team Read more
Key notes
- This error usually occurs if you use an outdated Windows version or a corrupted Windows Security app.
- In this guide, we will explain the available methods to fix the error.
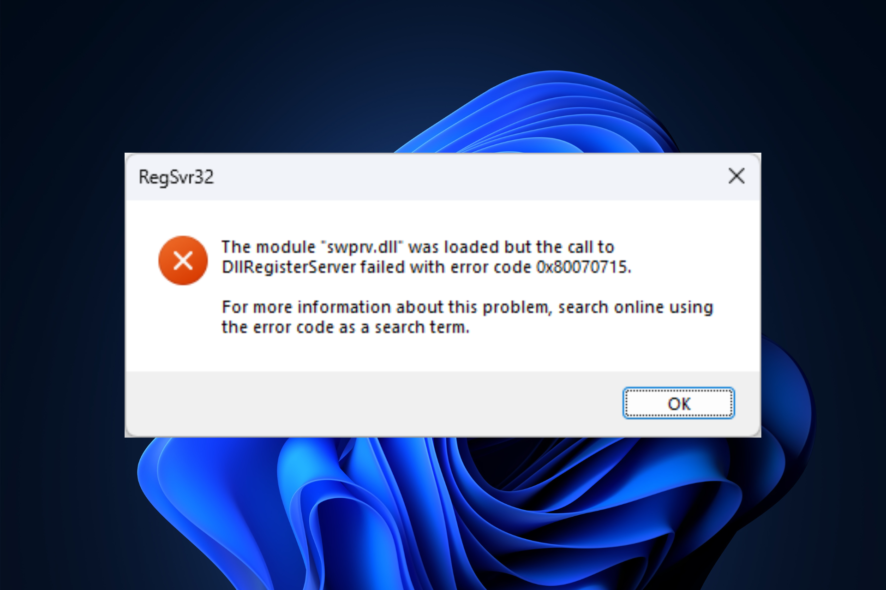
The DLLRegisterserver failed with error 0x80070715 occurs if you try to open Windows Security or perform any other task which involves DLLRegisterserver.
This indicates either the Windows Security app is corrupted or Windows updates are pending.
This guide will discuss some tested methods to fix the error after talking about the causes. Let’s get started!
What causes the DLLRegisterserver failed with the error 0x80070715 issue?
There could be several reasons for the error; some of the common ones are mentioned here:
- Pending Windows Updates – If you have an outdated version of Windows on your computer, you can encounter this error. You need to install all the pending updates.
- Disabled Volume Shadow Copy service – If you got the error while running commands on Command Prompt, the reason could be disabled Volume Shadow Copy service.
- Disabled Windows Update service – If you get this error when Windows security tries to add a new virus signature, it could be due to a stopped Windows Update service.
- Corrupted Windows Security app – If the error message comes up when you launch the Windows Security app or initiate a scan using the Security app, then your security app might be damaged. You need to reset the app.
What can I do if DLLRegisterserver failed with the error 0x80070715?
Before engaging in advanced troubleshooting steps, you should consider performing the following checks:
- Reboot your computer.
- Create a restore point.
1. Install Windows Updates
- Press Windows + I to open the Settings app.
- Go to Windows Update and click Check for updates.
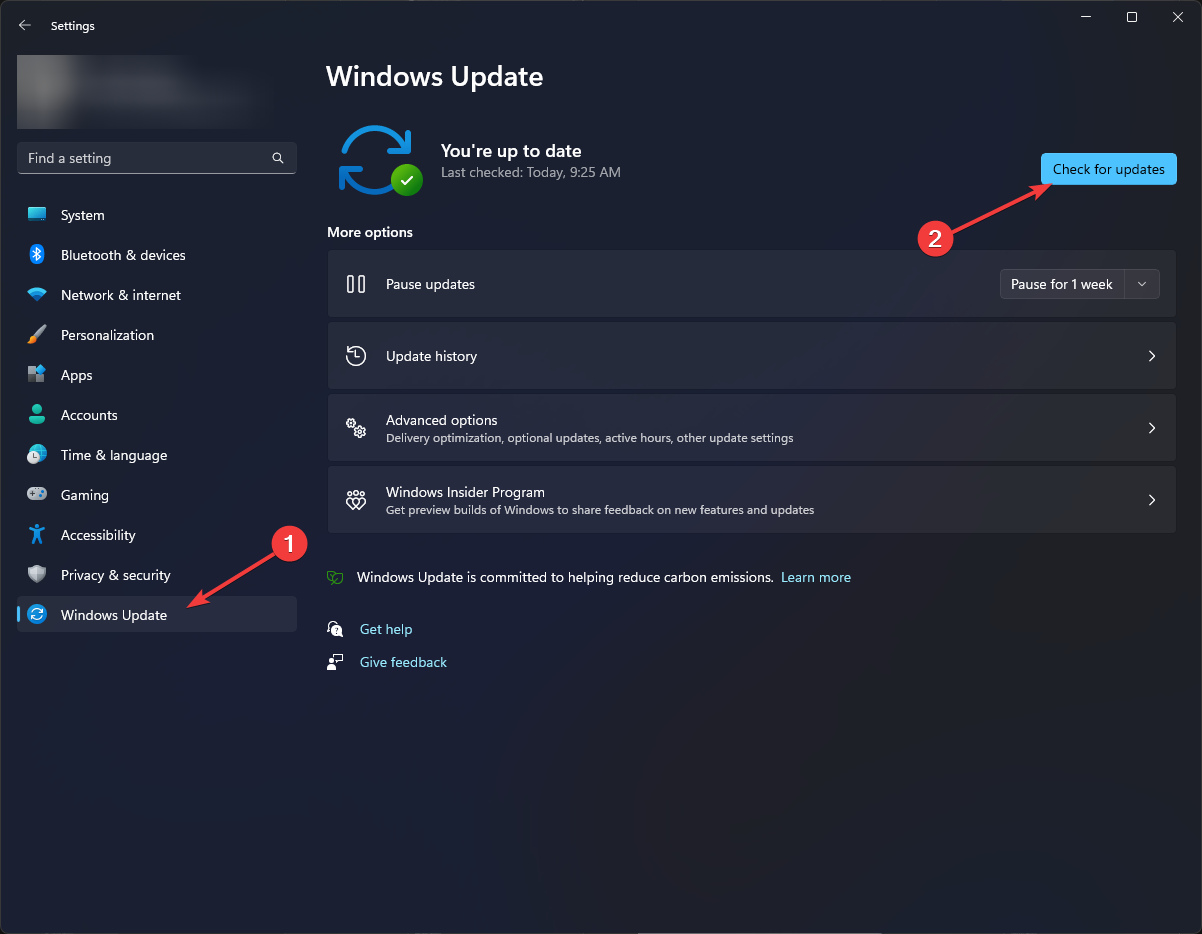
- If there is an update available, click Download and Install.
- Once the update is installed, restart your computer when prompted.
2. Enable Windows Update service
- Press Windows + R to open the Run window.
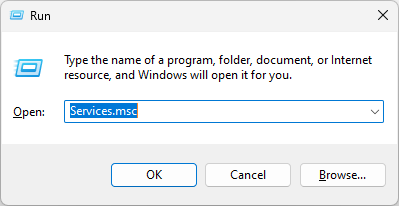
- Type services.msc and press Enter to open Services.
- Locate and double-click Windows Update to open Properties.
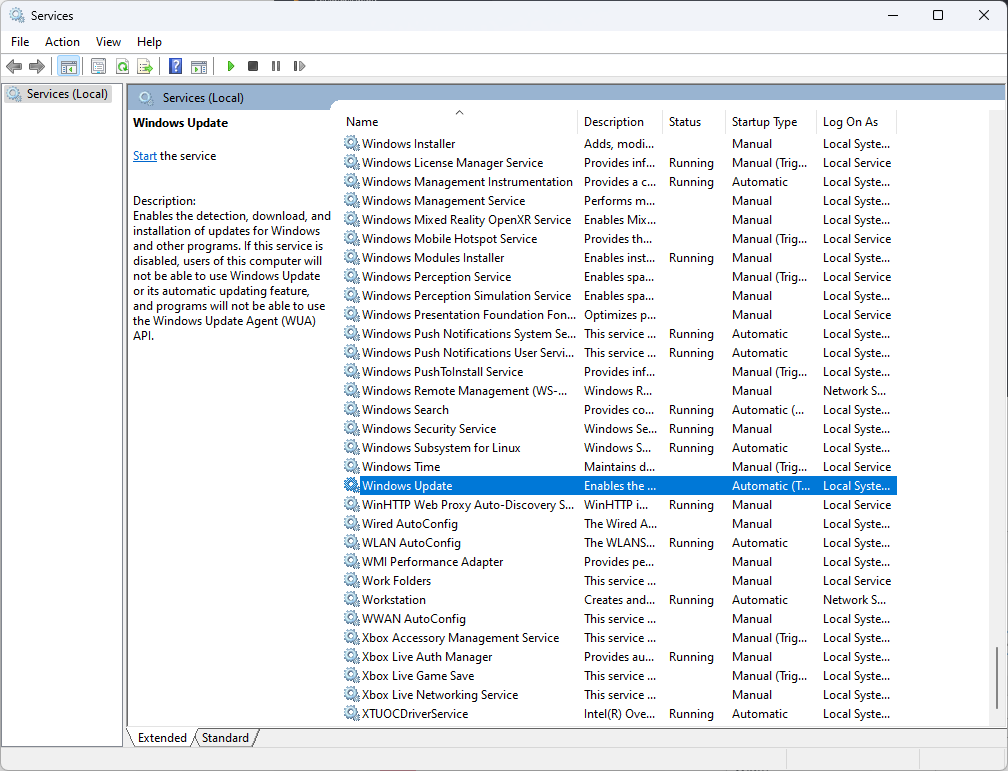
- On the General tab, select the Startup type as Automatic from the dropdown.
- Under Services status, click the Start button to force start the service.
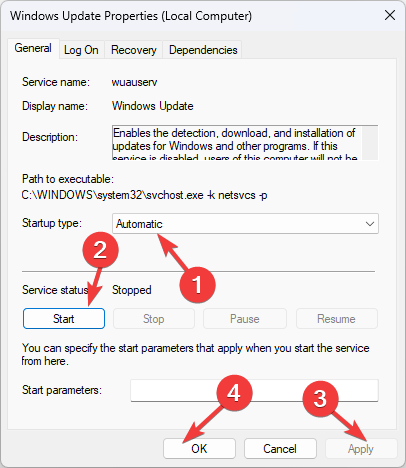
- Now click Apply and OK to confirm the changes.
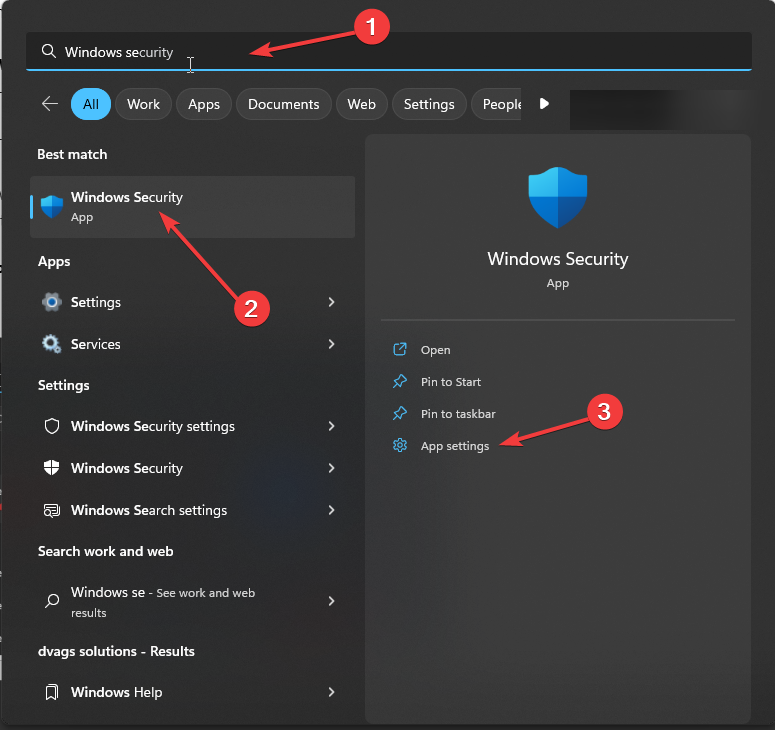
3. Reset the Windows Security app
3.1 Use the Startup
- Press the Windows key, type Windows Security, and click App settings.
- On the next window, scroll and, find the Reset header, click the Reset button.
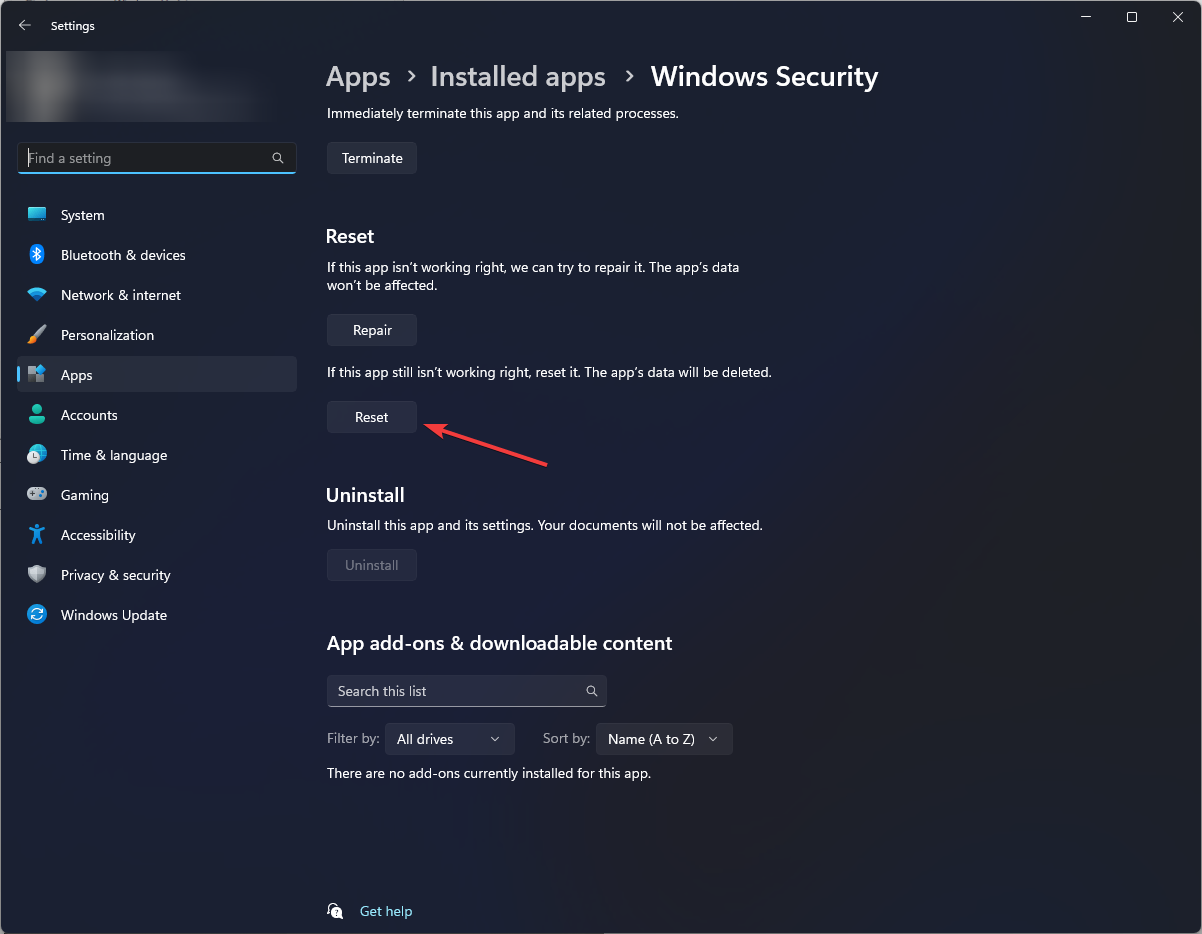
- Select Reset again to confirm the choice.
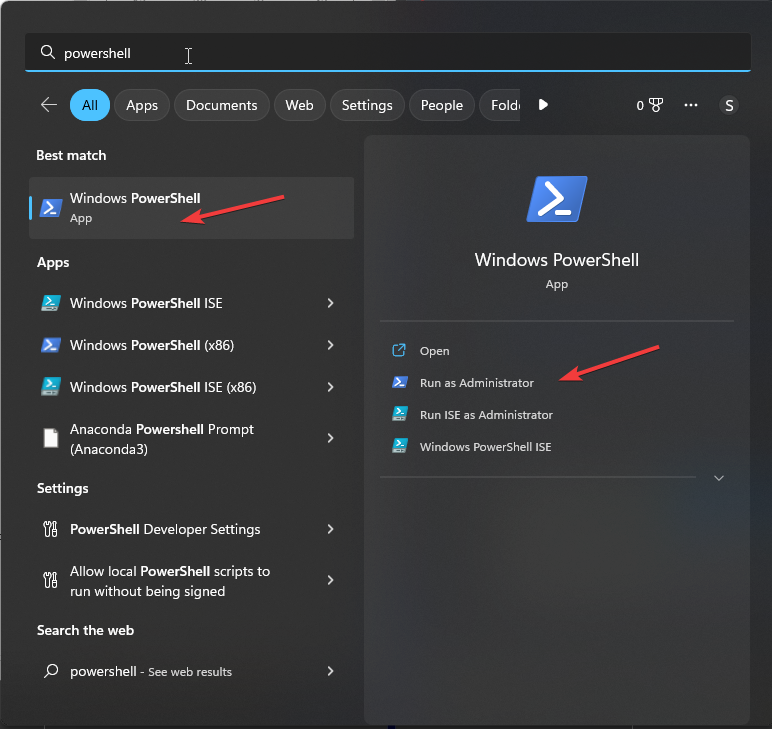
3.2 Use the Windows PowerShell
- Press the Windows key, type PowerShell, and click Run as administrator.
- Type the following command and press Enter:
Get-AppxPackage *Microsoft.Windows.SecHealthUI* | Reset-AppxPackage
- Once the process is complete, restart your computer.
3.3 Use the Command Prompt
- Press the Windows key, type Command Prompt, and click Run as administrator.
- Copy and paste the following command to reset Command Prompt, and press Enter:
PowerShell -ExecutionPolicy Unrestricted -Command "& {$manifest = (Get-AppxPackage *Microsoft.Windows.SecHealthUI*).InstallLocation + '\AppxManifest.xml' ; Add-AppxPackage -DisableDevelopmentMode -Register $manifest}"
4. Enable Volume Shadow Copy service
- Press Windows + R to open the Run window.
- Type services.msc and press Enter to open Services.
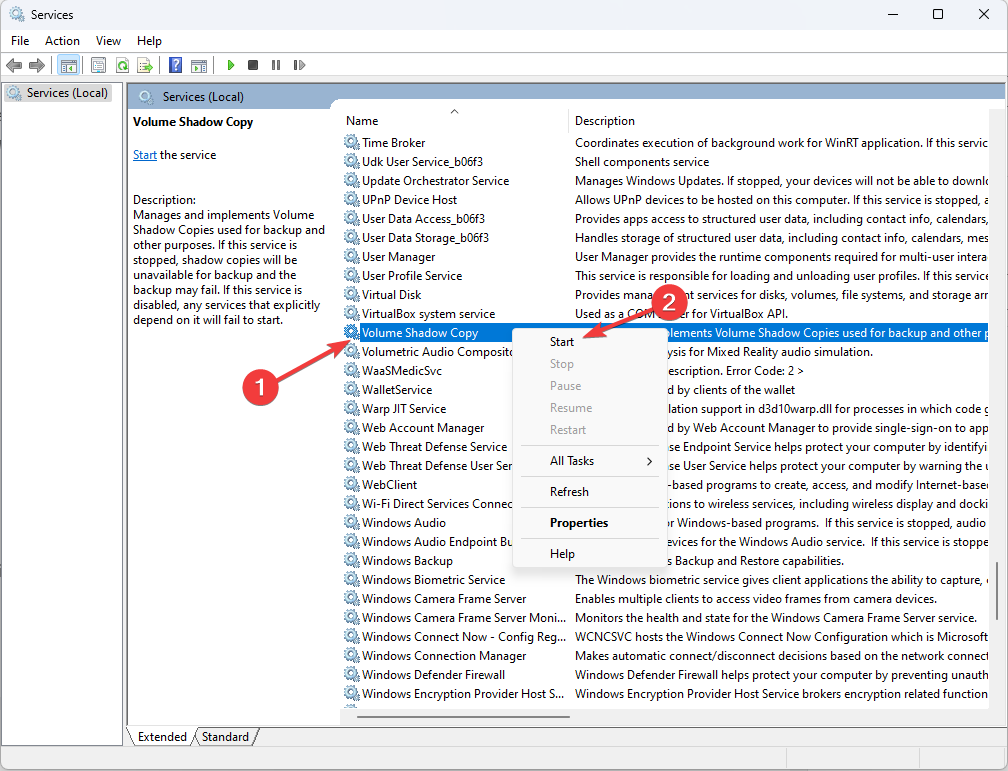
- Locate and right-click the Volume Shadow Copy service and select Start to initiate the service.
5. Reregister DLL files
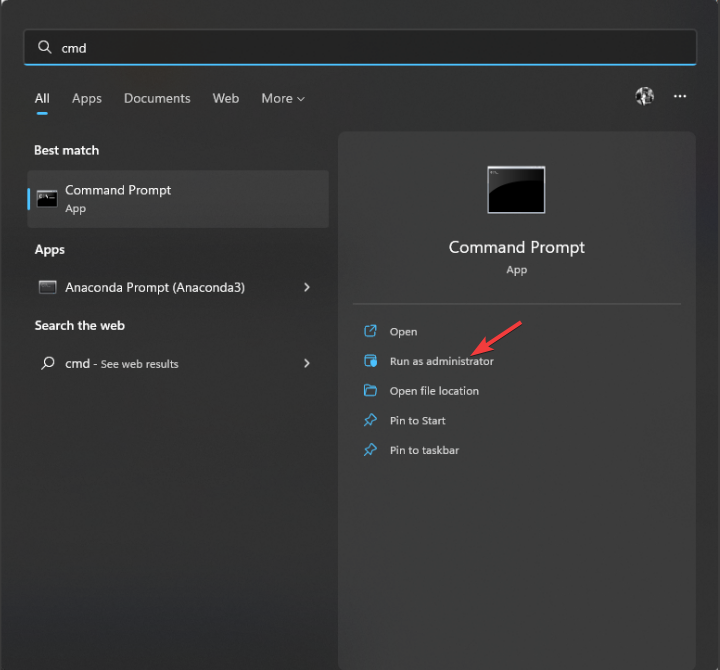
- Press the Windows key, type Command Prompt, and click Run as administrator.
- Type the following commands one by one and press Enter after every command:
net stop vssnet stop swprvregsvr32 ole32.dllregsvr32 vss_ps.dllvssvc /registerregsvr32 /I swprv.dll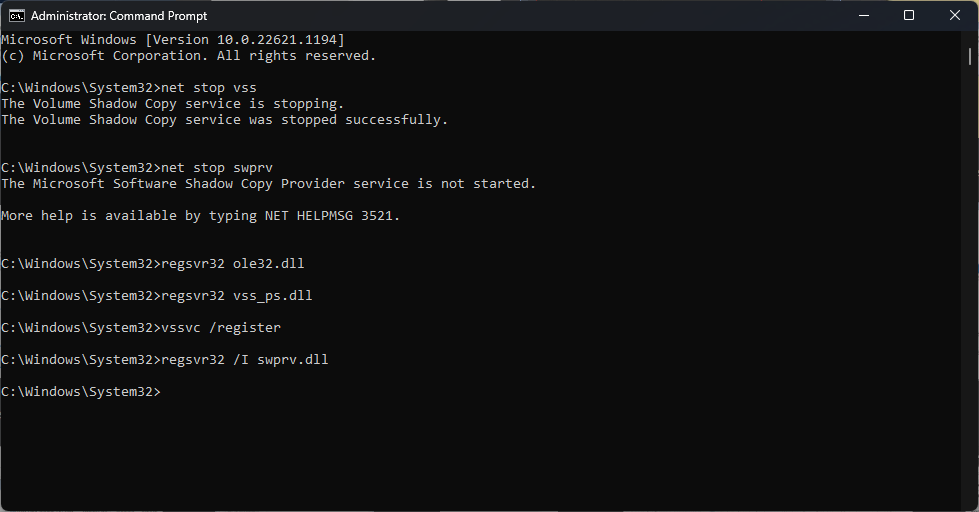
- Restart your computer and check if the issue persists.
6. Reset your computer
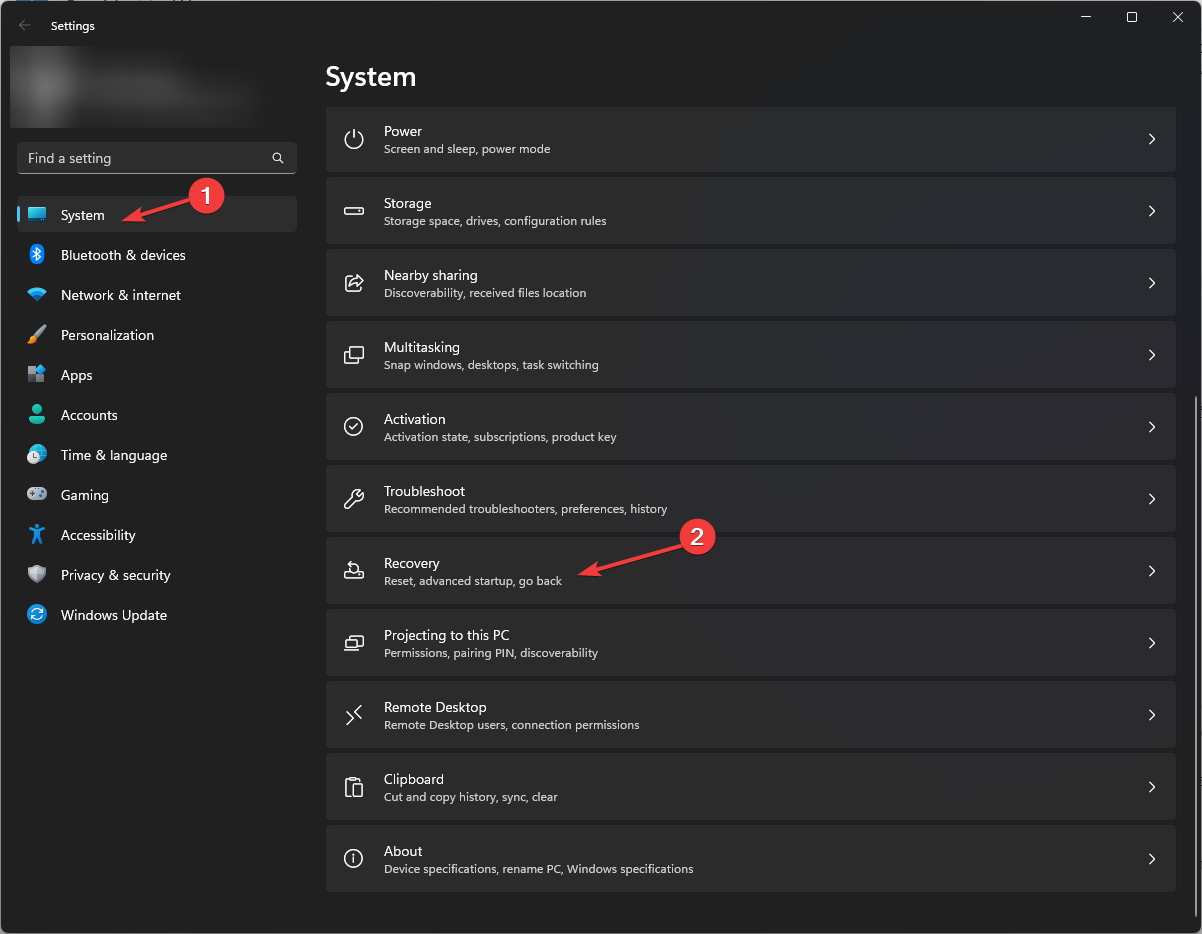
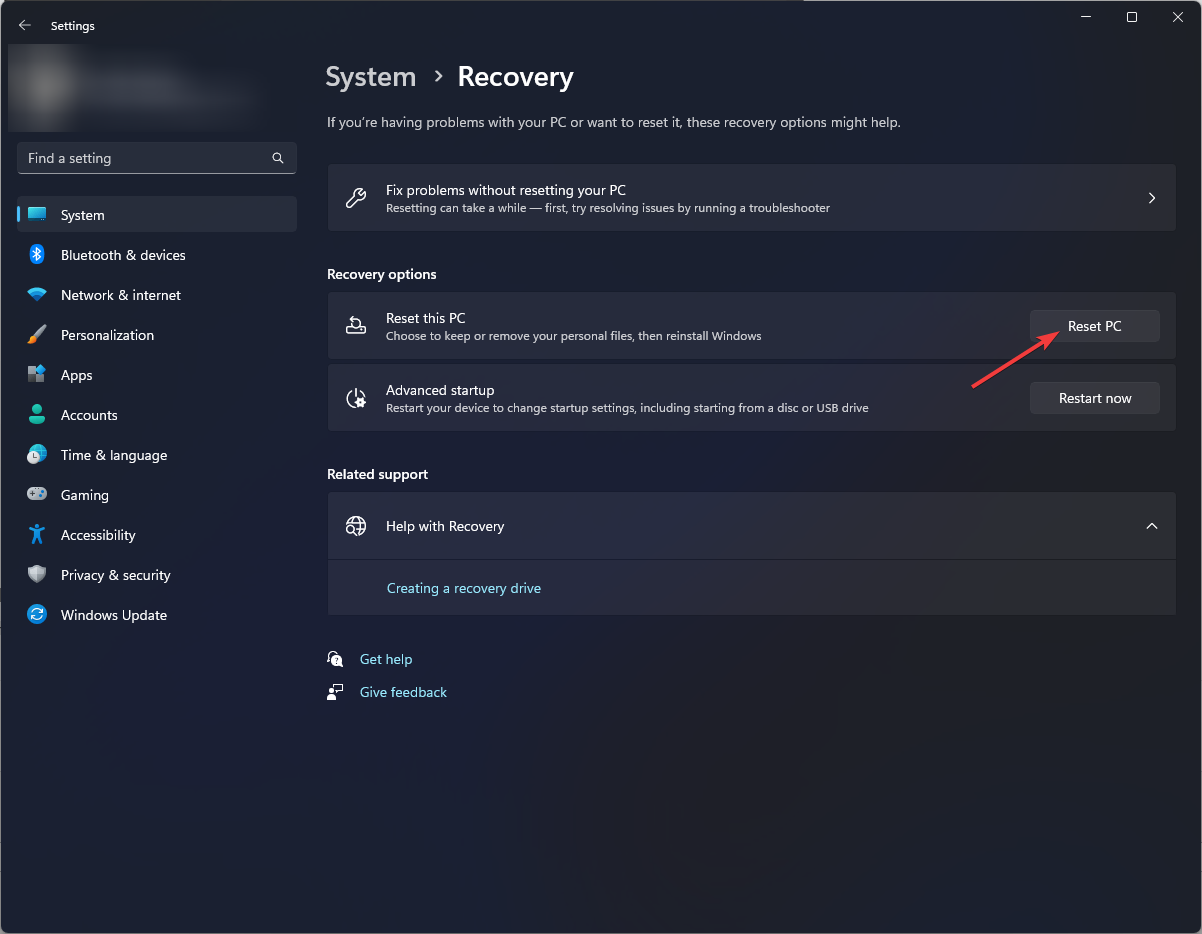
- Press Windows + I to open the Settings app.
- Go to System, then click Recovery.
- Next, click Reset PC.
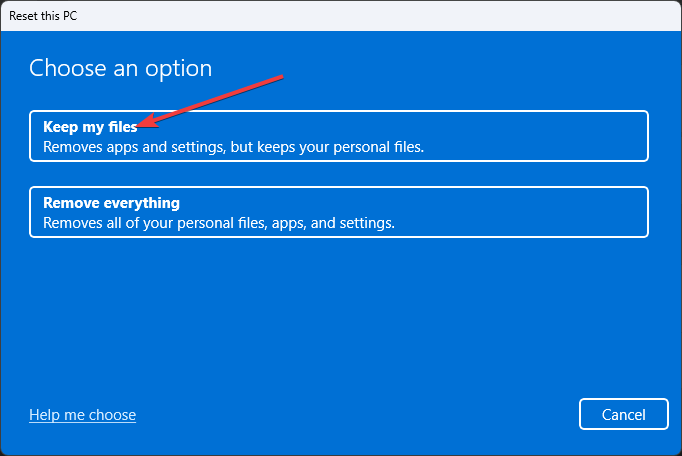
- On Choose an option screen, click Keep my files.
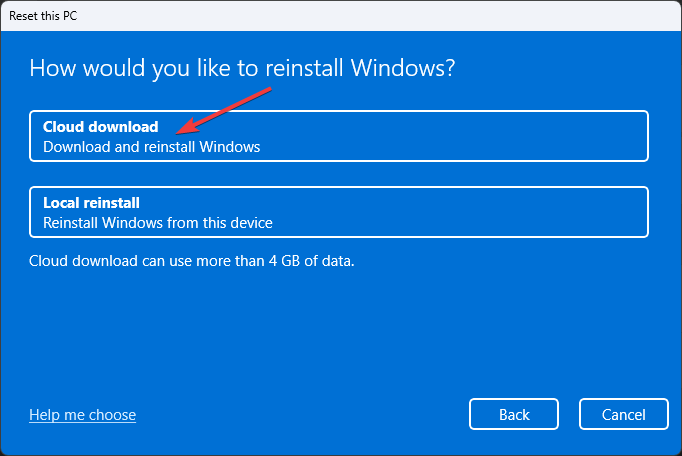
- On How would you like to reinstall Windows screen, choose Cloud download.
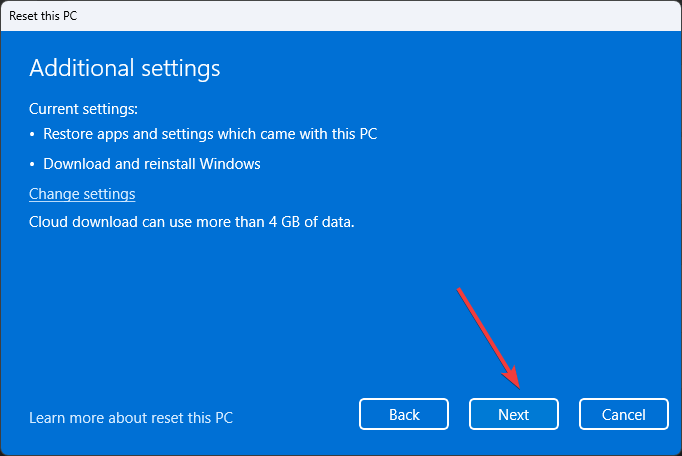
- Now on Additional settings, click Next.
- On Choose settings page, confirm the choices and click Next.
- You will get a list of apps to be removed; click Reset to start the process.
- Once complete, all the system-related issues will be removed.
So, these are the methods you need to follow to fix DLLRegisterserver failed with error 0x80070715. Try them and let us know what worked for you in the comments below.