0x80072F0D Error Code: How to Fix It On Windows 10 & 11
First, check your internet connection
6 min. read
Updated on
Read our disclosure page to find out how can you help Windows Report sustain the editorial team. Read more
Key notes
- The 0x80072f0d error code occurs if the internet connection is weak, there is an invalid SSL certificate, or there are proxy server issues.
- To fix it, restart your router, turn off the proxy server, update Root certificates, or reset Windows Update components.
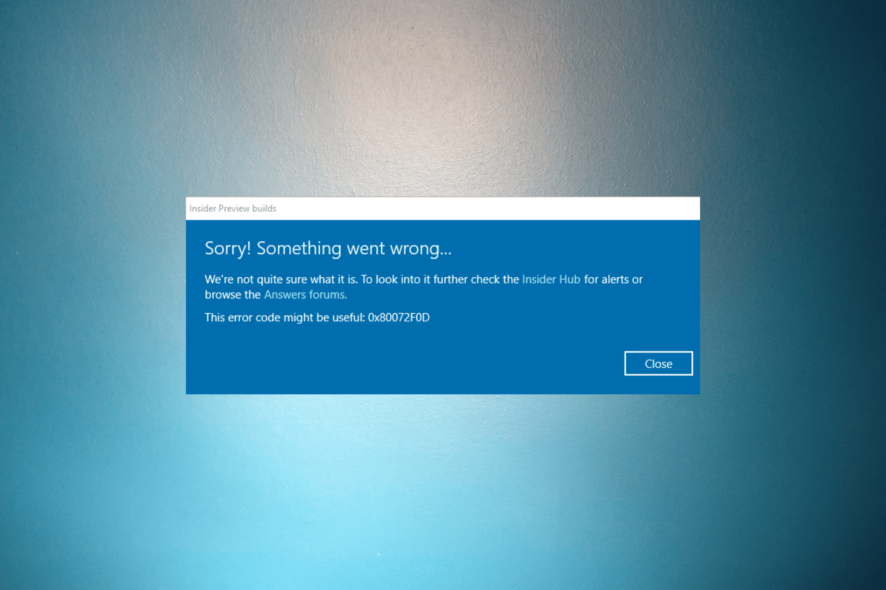
If you have encountered a 0x80072f0d error code while trying to update your Windows or open Microsoft Store and other Windows apps, this guide can help!
We will explore the practical methods to fix the issue right after discussing the common causes of the problem.
What causes the 0x80072F0D error on Windows 10/11?
There could be various reasons for this Windows Update error to occur; some of the common ones are mentioned here:
- Expired or invalid SSL certificate – The error may occur if the SSL certificate used by the application or service has expired or is not recognized as valid. Check the date or time on your PC.
- Proxy server issues – If you use a proxy server to connect to the internet, misconfigured proxy settings can interfere with the SSL certificate validation process, leading to the error.
- Firewall or antivirus software – The error could occur if your antivirus software blocks the necessary connections for SSL certification validation. Turn off the antivirus temporarily and try again.
- Network connectivity issues – If there are network connectivity problems, such as unstable or intermittent internet connection, it can result in failed SSL certificate validation and trigger the error.
So, now you know the causes of the problems, let us check out the solutions.
How can I fix the 0x80072F0D error on Windows 11?
Before engaging in advanced troubleshooting steps, you should consider performing the following checks:
- Restart your router and your PC.
- Disable the antivirus temporarily.
- Remove all external storage devices and drives.
- Make sure that your device has enough space.
- Check the internet connection and consult your ISP.
- Manually adjust Date & Time settings.
Once you are through these checks, move to the solutions mentioned below.
1. Run the Windows Update troubleshooter
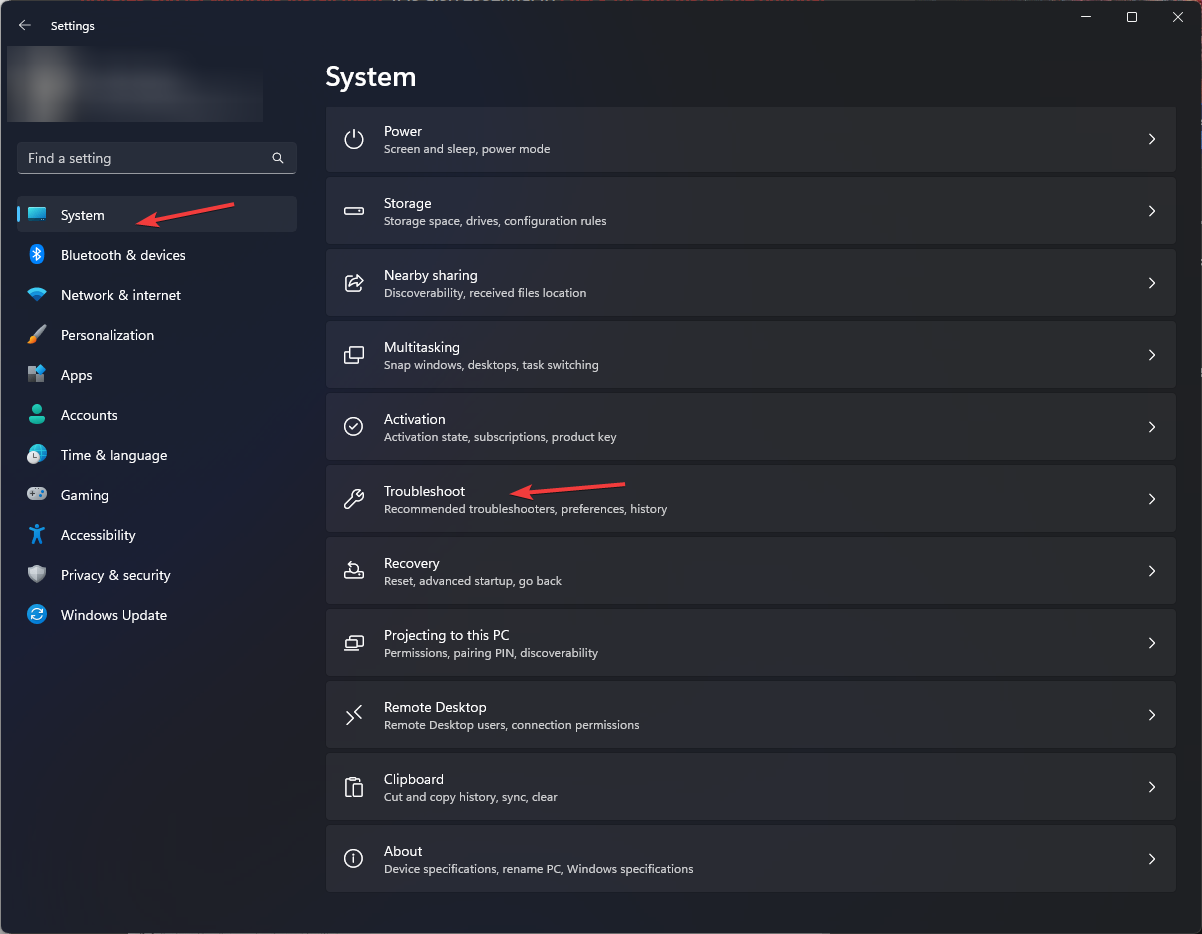
- Press Windows + I to open the Settings app.
- Go to System, then click Troubleshoot.
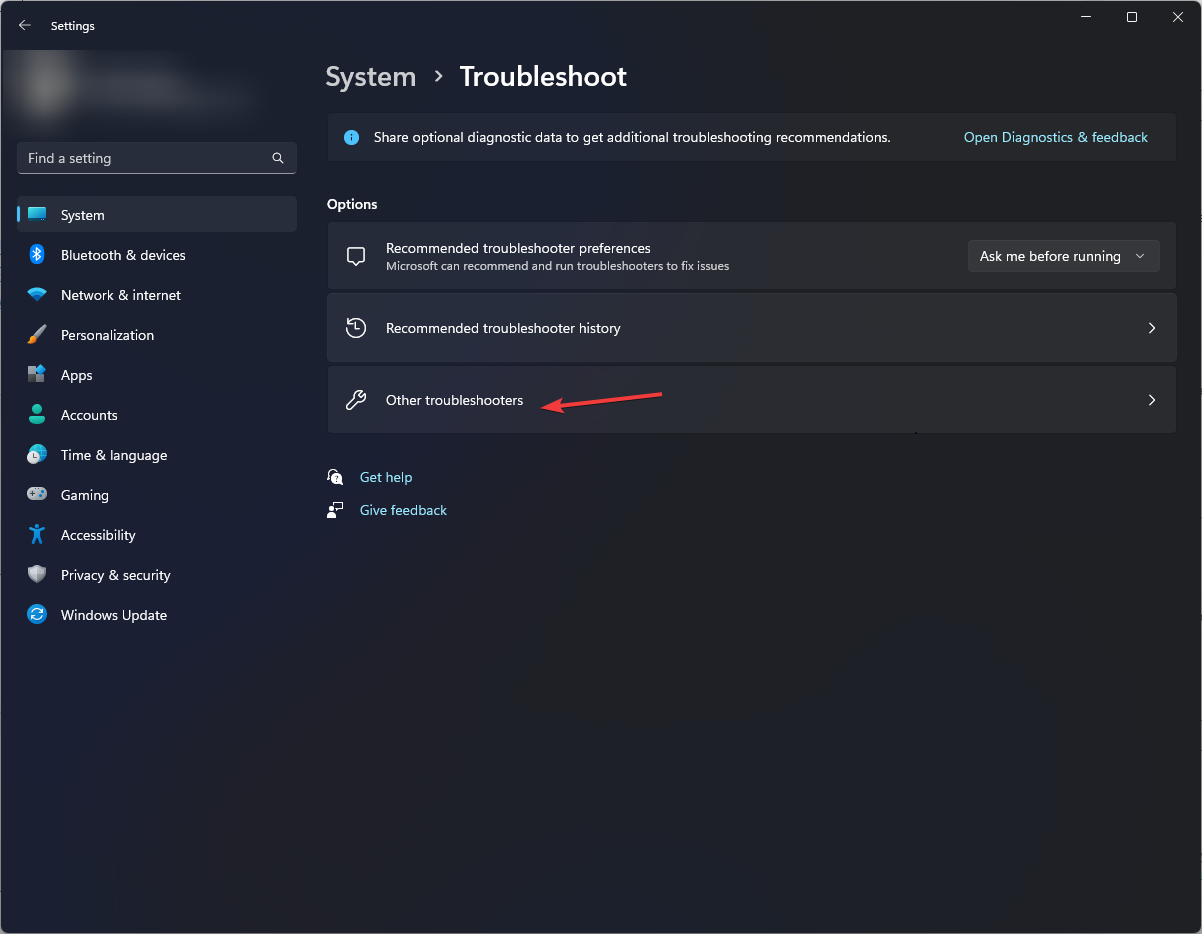
- Click Other troubleshooters.
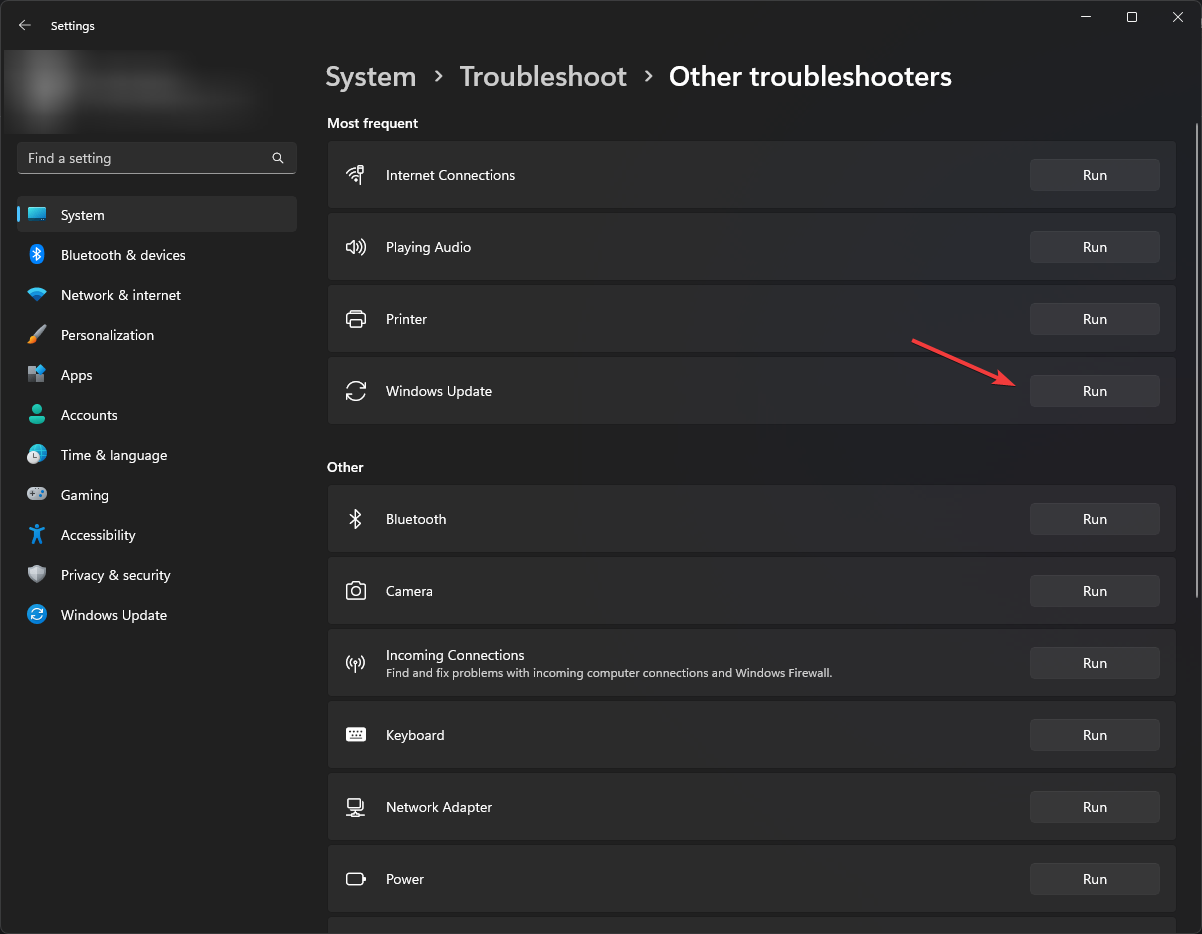
- Locate Windows Update and click Run.
- Follow the on-screen instructions to complete the process.
2. Update root certificates
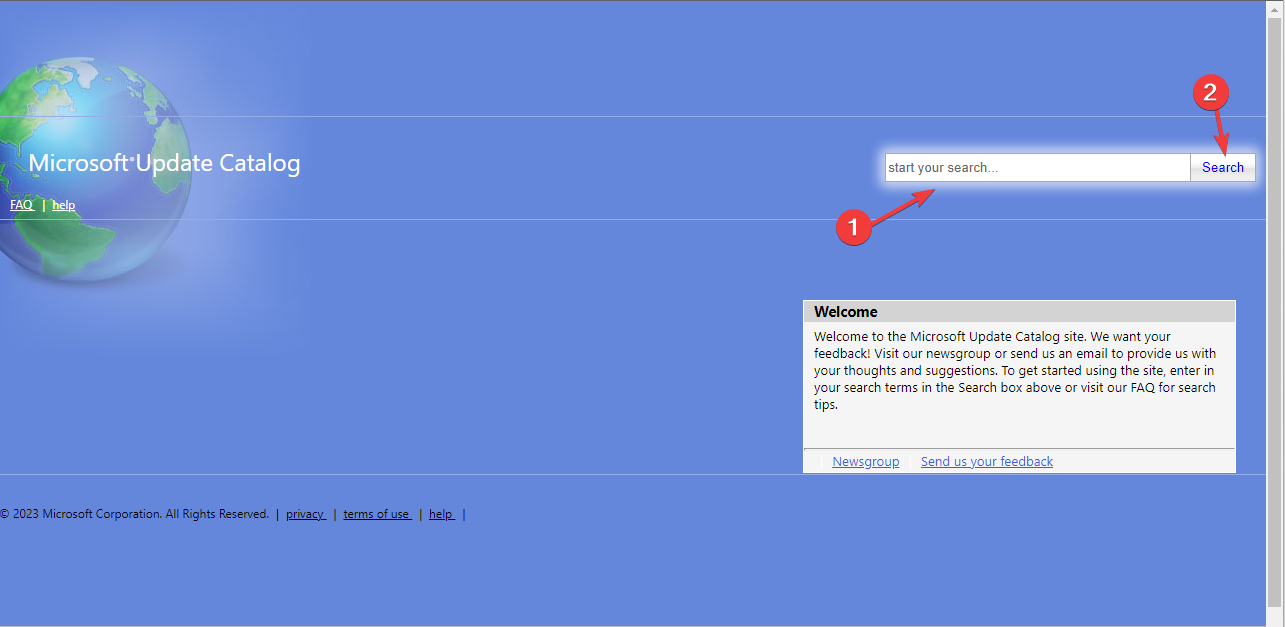
- Visit the Microsoft Update Catalog website.
- Type root certificates, select the latest update suitable for your operating system, and click Search.
- Download the update and run the installer.
- Follow the on-screen instructions to install the root certificates.
- Restart your computer and check if the error is resolved.
3. Disable the proxy server
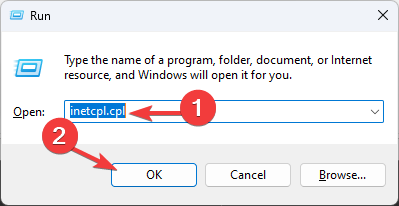
- Press Windows + R to open the Run dialog box.
- Type inetcpl.cpl and click OK to open the Internet Properties.
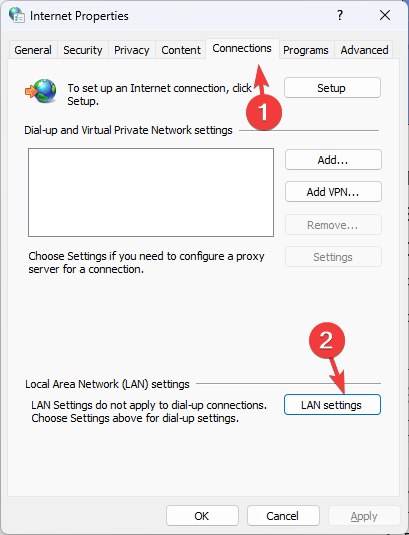
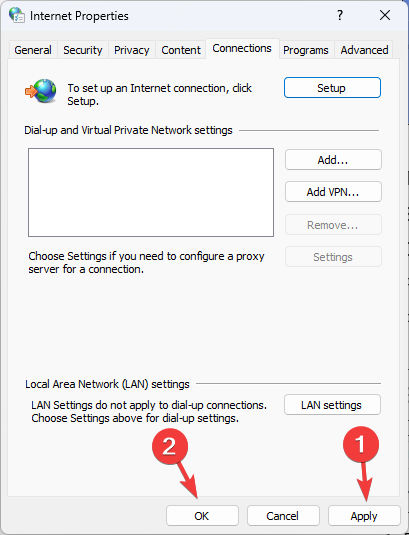
- Go to the Connections tab, and click the LAN settings button.
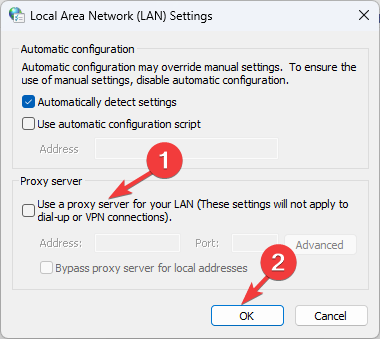
- In the Local Area Network (LAN) Settings window, locate the Proxy server, remove a checkmark next to Use a proxy server for your LAN, and click OK.
- Click Apply, then OK to confirm the changes.
- Restart your computer to check if the issue persists.
4. Perform a Clean Boot
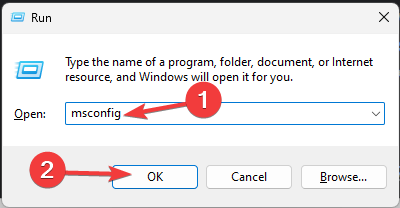
- Press Windows + R to open the Run dialog box.
- Type msconfig and click OK to open the System Configuration window.
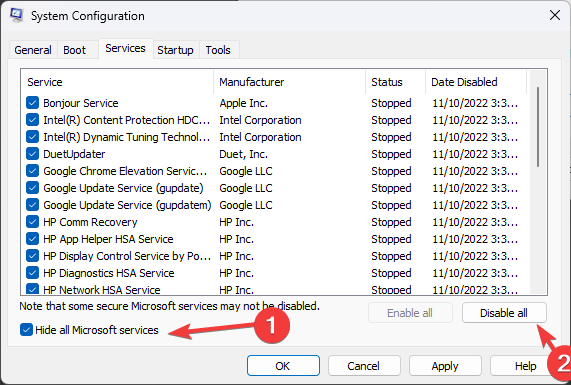
- In the System Configuration window, go to the Services tab.
- Remove the checkmark next to Hide all Microsoft services, then click the Disable all button.
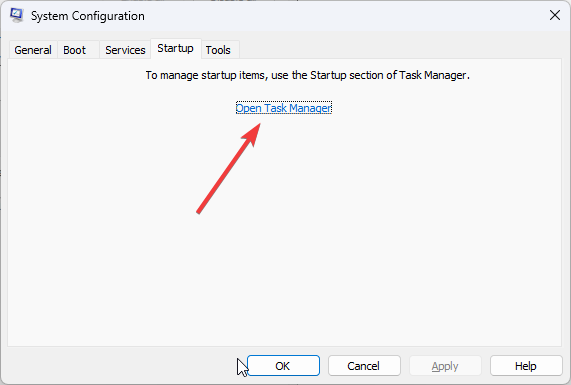
- Go to the Startup tab and click on the Open Task Manager link.
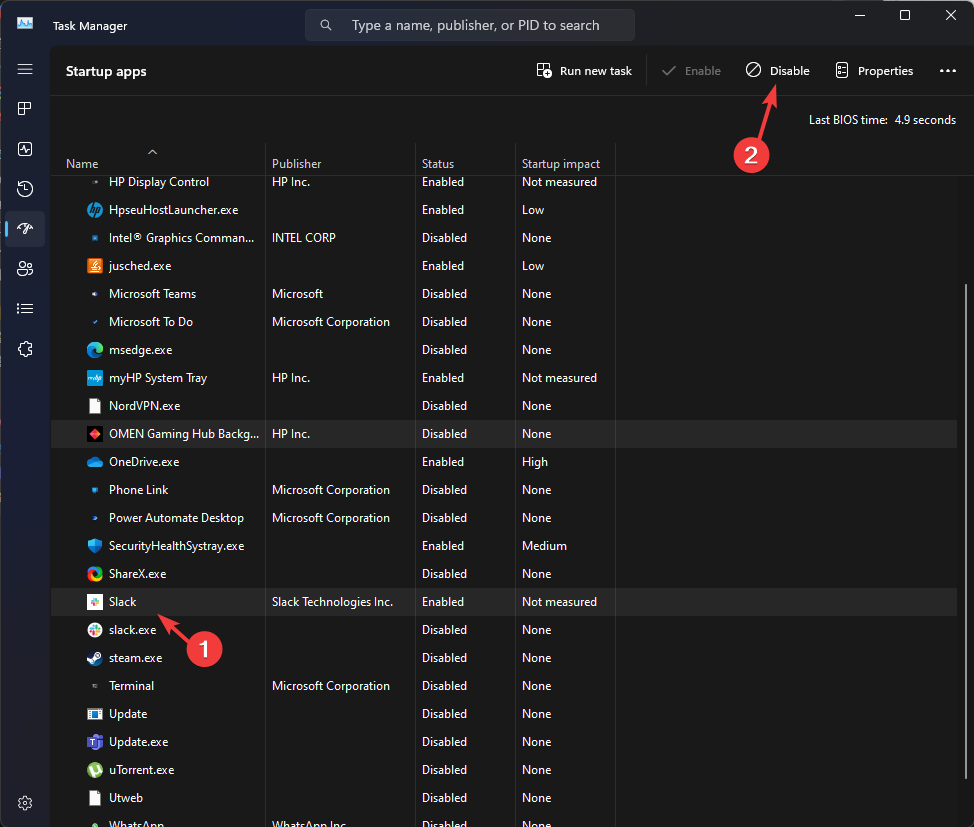
- In the Task Manager, select the enabled startup programs and click Disable.
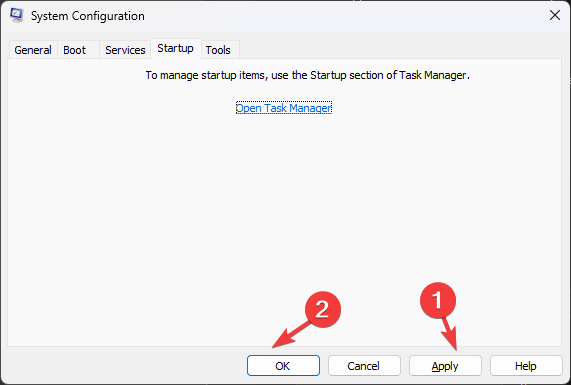
- Close the Task Manager and go back to the System Configuration window. Now click Apply, then OK to save the changes.
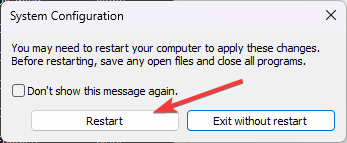
- Click Restart to reboot your PC.
After the restart, check if the error persists. If not, it indicates a software conflict. You can selectively enable services and startup programs to identify the conflicting software.
5. Reset the Windows Update components
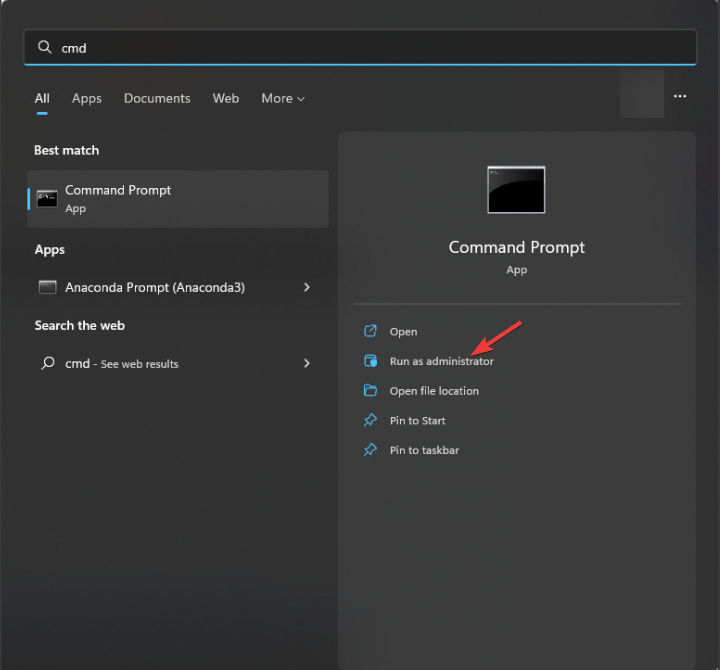
- Press the Windows key, type cmd, and click Run as administrator.
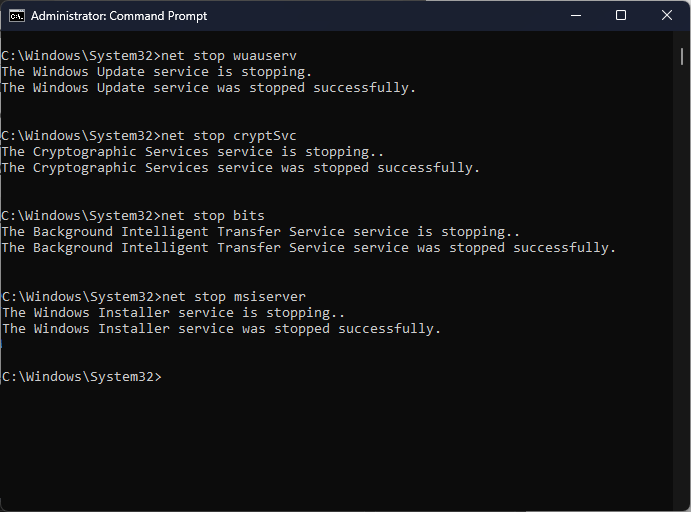
- Type the following commands to stop Windows Update, BITS & Cryptographic services, and press Enter after every command:
net stop bits
net stop wuauserv
net stop appidsvc
net stop cryptsvc
- To delete the qmgr*.dat files, copy & paste the following command and hit Enter:
Del "%ALLUSERSPROFILE%\Application Data\Microsoft\Network\Downloader\qmgr*.dat" - To clear the Windows Update cache to allow Windows 11 to re-download the updates, type the following commands one by one and press Enter after every command:
rmdir %systemroot%\SoftwareDistribution /S /Q
rmdir %systemroot%\system32\catroot2 /S /Q
- Copy & paste the following commands to reset the BITS and Windows Update service to the default security descriptor and hit Enter:
sc.exe sdset bits D:(A;;CCLCSWRPWPDTLOCRRC;;;SY)(A;;CCDCLCSWRPWPDTLOCRSDRCWDWO;;;BA)(A;;CCLCSWLOCRRC;;;AU)(A;;CCLCSWRPWPDTLOCRRC;;;PU)
sc.exe sdset wuauserv D:(A;;CCLCSWRPWPDTLOCRRC;;;SY)(A;;CCDCLCSWRPWPDTLOCRSDRCWDWO;;;BA)(A;;CCLCSWLOCRRC;;;AU)(A;;CCLCSWRPWPDTLOCRRC;;;PU)
- Type the following command and press Enter:
cd /d %windir%\system32 - To re-register the BITS files & the Windows Update-related dll files, copy & paste the following commands one after the other and hit Enter after every command:
regsvr32.exe /s atl.dll
regsvr32.exe /s urlmon.dll
regsvr32.exe /s mshtml.dll
regsvr32.exe /s shdocvw.dll
regsvr32.exe /s browseui.dll
regsvr32.exe /s jscript.dll
regsvr32.exe /s vbscript.dll
regsvr32.exe /s scrrun.dll
regsvr32.exe /s msxml.dll
regsvr32.exe /s msxml3.dll
regsvr32.exe /s msxml6.dll
regsvr32.exe /s actxprxy.dll
regsvr32.exe /s softpub.dll
regsvr32.exe /s wintrust.dll
regsvr32.exe /s dssenh.dll
regsvr32.exe /s rsaenh.dll
regsvr32.exe /s gpkcsp.dll
regsvr32.exe /s sccbase.dll
regsvr32.exe /s slbcsp.dll
regsvr32.exe /s cryptdlg.dll
regsvr32.exe /s oleaut32.dll
regsvr32.exe /s ole32.dll
regsvr32.exe /s shell32.dll
regsvr32.exe /s initpki.dll
regsvr32.exe /s wuapi.dll
regsvr32.exe /s wuaueng.dll
regsvr32.exe /s wuaueng1.dll
regsvr32.exe /s wucltui.dll
regsvr32.exe /s wups.dll
regsvr32.exe /s wups2.dll
regsvr32.exe /s wuweb.dll
regsvr32.exe /s qmgr.dll
regsvr32.exe /s qmgrprxy.dll
regsvr32.exe /s wucltux.dll
regsvr32.exe /s muweb.dll
regsvr32.exe /s wuwebv.dll
- Type the following command to reset Winsock and press Enter:
netsh winsock reset
netsh winsock reset proxy
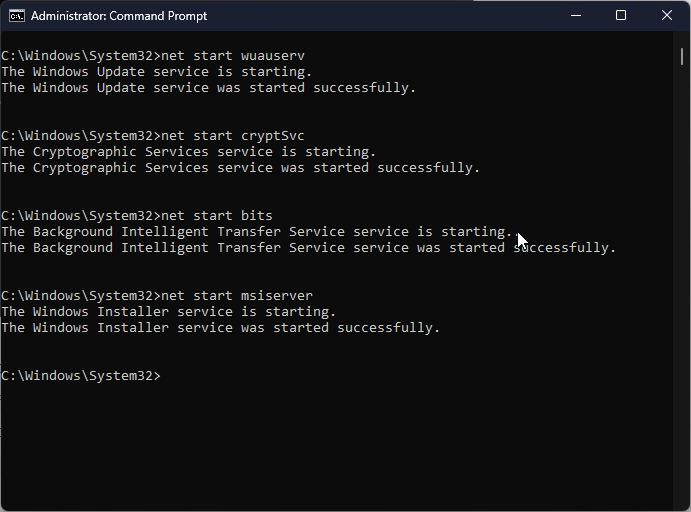
- Copy & paste the following commands to start Windows Update, BITS & Cryptographic services, and press Enter after every command:
net start bits
net start wuauserv
net start appidsvc
net start cryptsvc
- Reboot your PC to confirm the changes.
How can I fix the 0x80072F0D error on Windows 10?
To fix this error on Windows 10, you can follow the methods mentioned above for Windows 11.
As a last resort, you can reset your PC using this informative guide to resolve this problem on your Windows computer.
So, these are methods that you can use to fix the 0x80072F0D error on Windows 11/10. If you have questions or suggestions, please mention them in the comments section below.



User forum
0 messages