How to Add & Set Up Your Printer by IP Address in Windows 11
Adding the IP address details often makes a difference
3 min. read
Updated on
Read our disclosure page to find out how can you help Windows Report sustain the editorial team. Read more
Key notes
- If your printer has network printing capabilities, you can add it as a network printer in Windows 11.
- The Add Printer wizard includes all the setup options for adding a printer by IP address.
- Configure Windows 11 printer sharing by enabling network discovery and setting a printer to share.
Printers have unique IP address numbers for connecting to networks. Users can set up wireless printers with those IP addresses for network printing.
Windows 11 has a WSD (Windows Service Demand) port for connecting printers, which can be unreliable. Some users may prefer to set up printers with IP addresses in Windows 11.
Can you add a printer by IP address?
Setting up a printer in Windows 11 with its IP address is relatively straightforward. Here, we’ll look at how to add a printer by IP address on Windows 11 PCs.
You can set up a printer by IP address with Windows 11’s Add Printer wizard as outlined in the instructions below.
That wizard includes an option for adding printers with TCP/IP protocols, so read on to find out more.
What is my IP address?
Many printers have small LCD screens on which you can find their IP address details. Look through the network setup section in your printer’s display screen to find the IP address.
If your printer doesn’t have a display screen, try printing its configuration page, which includes the IP address.
You can often print such pages by holding the printer’s power buttons for a few seconds. Read the instructions in the manual to find out how to print the test page.
How do I add a printer by IP in Windows 11?
1. Press the Windows + I key combination to open Settings.
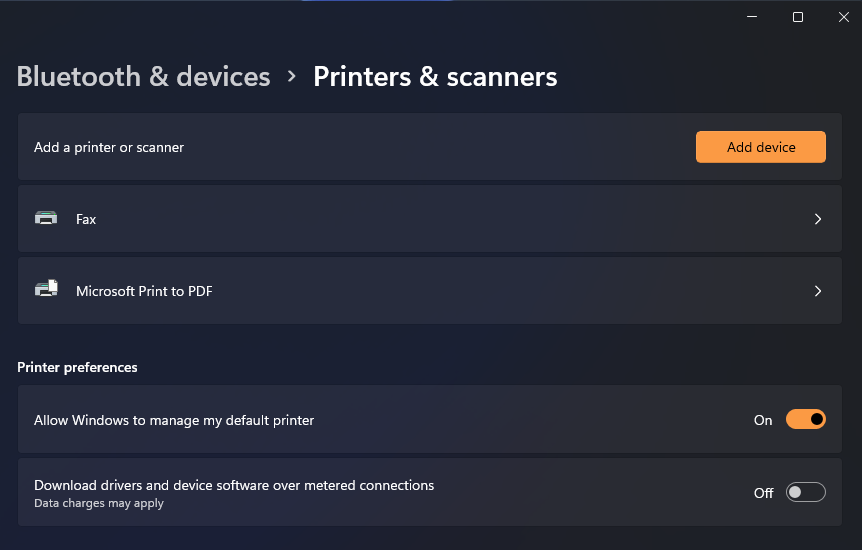
2. Select Bluetooth & devices and choose Printers & scanners.
3. Click the Add device button.
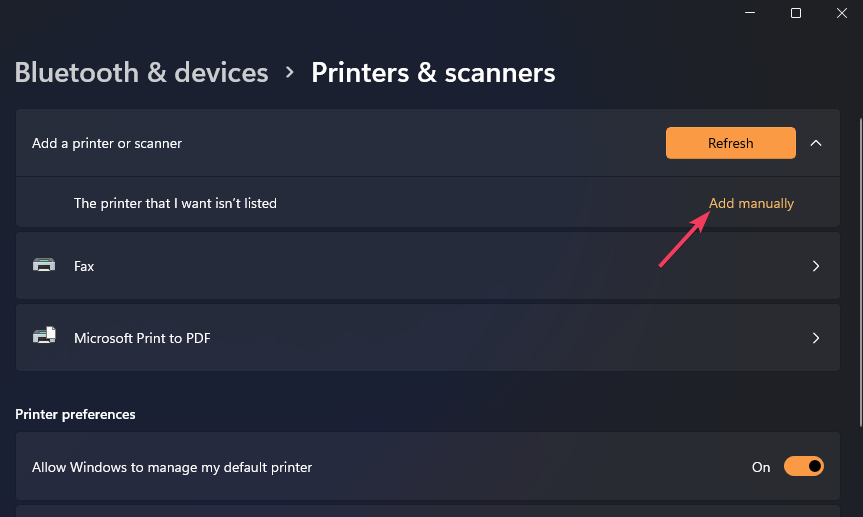
4. Then click the Add manually link to bring up the wizard.
5. Select the Add a printer using an IP address or hostname option and click Next to view IP settings.
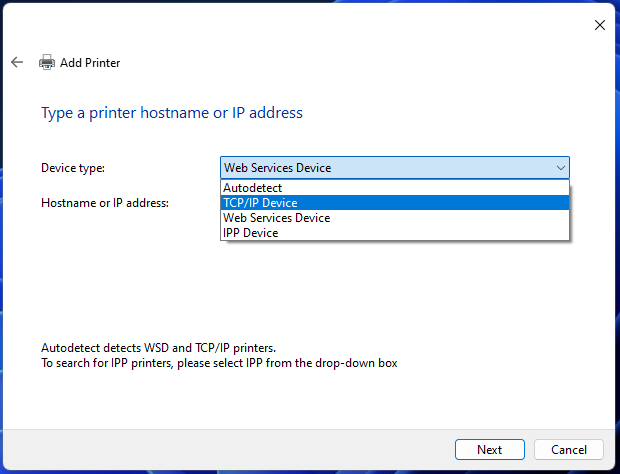
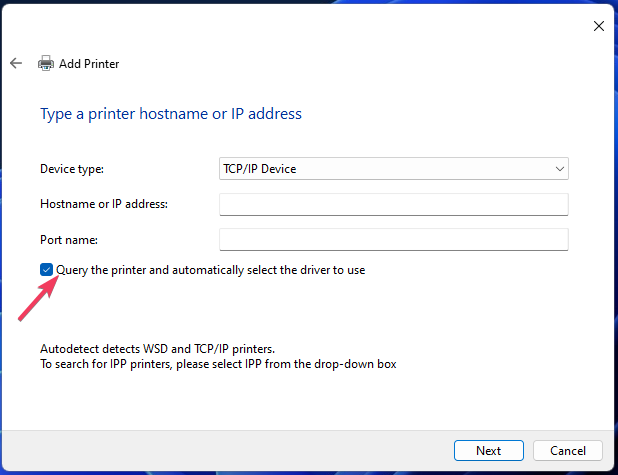
6. Click the TCP/IP Device option on the Device type drop-down menu.
7. Input your printer’s IP address within the Hostname or IP address box.
8. Enter the same IP address in the Port name field.
9. Make sure the Query the printer checkbox is selected.
10. Click Next for Windows to locate the printer.
11. Then you’ll see a message informing you that you’ve added the printer. You can change the printer’s name in the text box or leave it as it is.
12. Press Next to view printer sharing options.
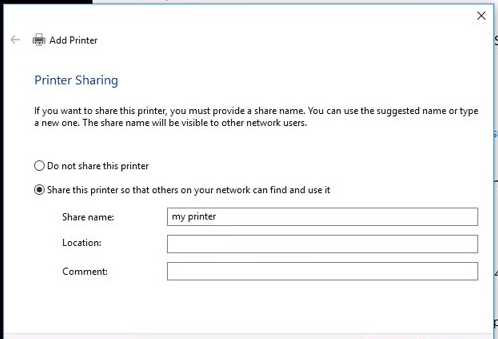
13. If you want the printer shared with other devices on your network, select the Share this printer option. If not, click the Do not share radio button.
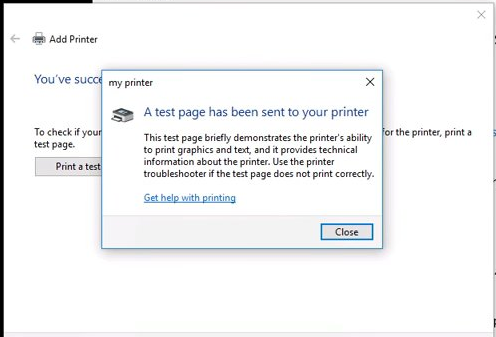
14. Select Next again to reach a Print test page button, which you can click if you wish.
15. Press the Add Printer wizard’s Finish button to complete the setup.
You can add a printer by IP address via Printers & scanners settings, with the Add Printer wizard. This option is recommended if your printer is not automatically detected.
After you add your printer, you can customize its name and other settings. Moreover, you can press the Windows Update button in the wizard to select your printer’s brand and model for driver installation.
How can I set up a printer on a network?
To share a printer on a home network, Windows 11’s network discovery and printer sharing features need to be enabled. This is how you can set up a network printer for sharing:
1. Enable network discovery
- Press Run’s Windows + R key combo and input this text in the Open box:
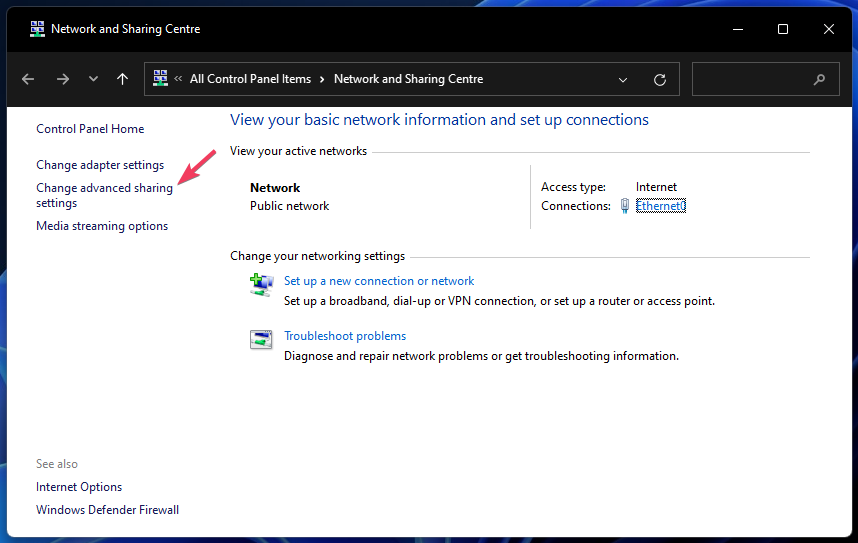
control.exe /name Microsoft.NetworkAndSharingCenter - Click OK to open the Network and Sharing Center.
- Select the Change advanced sharing settings navigation option.
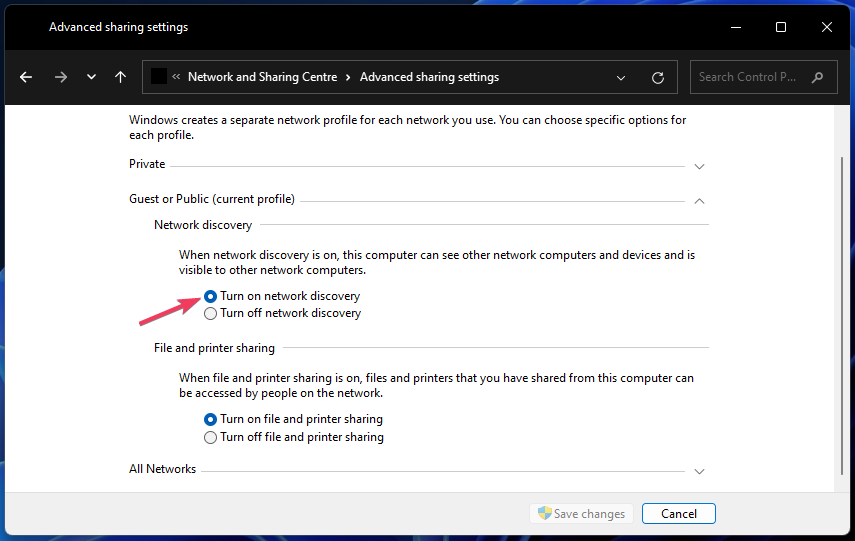
- Then select the Turn on network discovery radio button if that option is disabled.
- Click the Turn on file and printer sharing option.
- Press the Save changes button.
2. Select a printer to share
- When you’ve enabled network discovery and printer sharing, type printers and scanners in the Start menu’s search box. Select Printers and scanners to open the Settings page.
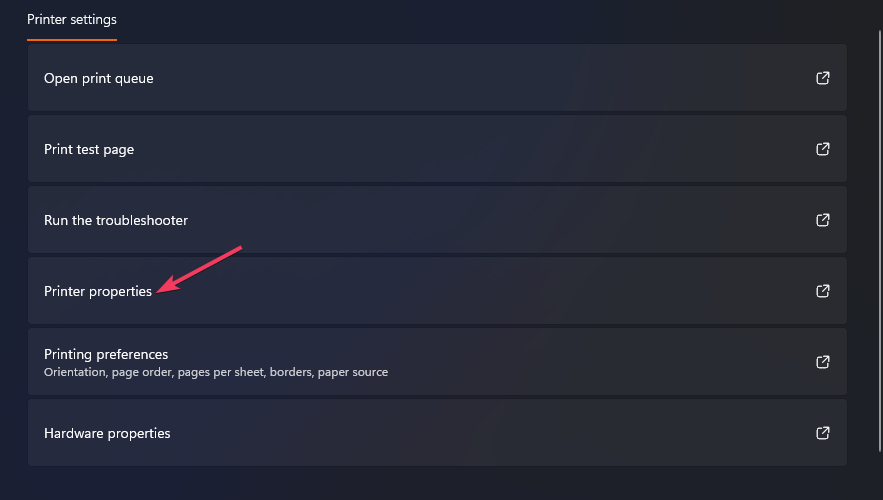
- Select a printer to share.
- Click the Printer properties option.
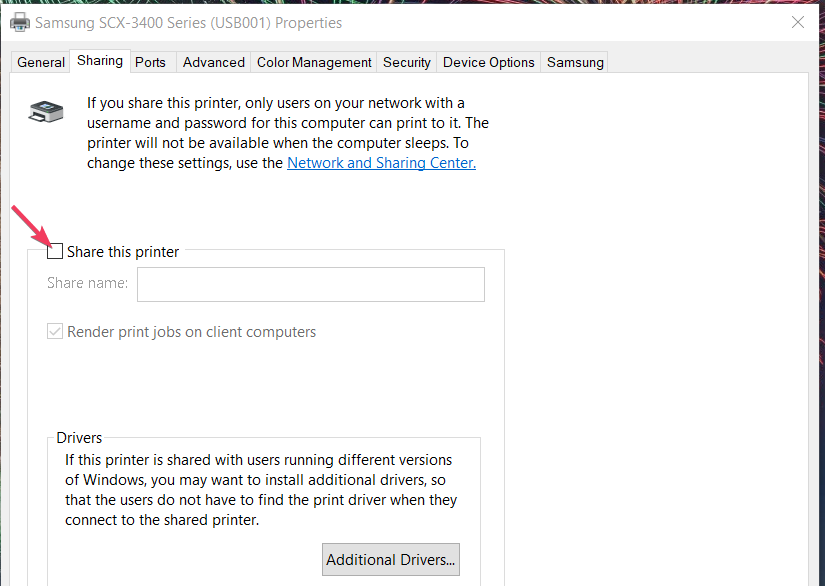
- Select the Share this printer checkbox on the Sharing tab.
- Press Apply to share the printer.
After adding a printer with an IP address, you can start printing from any device on your network. Further, to improve your workflow, you can go ahead and rename your printer for easier identification.
Note that the guidelines here apply to Windows 10 since that has the same Add Printer wizard. So, you can add printers by IP addresses and share them in Windows 10 much the same.



User forum
0 messages