Windows Network Discovery not Showing all Computers
Make sure that the Network Discovery feature is turned on
3 min. read
Updated on
Read our disclosure page to find out how can you help Windows Report sustain the editorial team. Read more
Key notes
- Network Discovery is a network setting that lets you set the communication between connected devices and systems on your network.
- If a computer is not discoverable in a network, the first step is to enable network discovery.
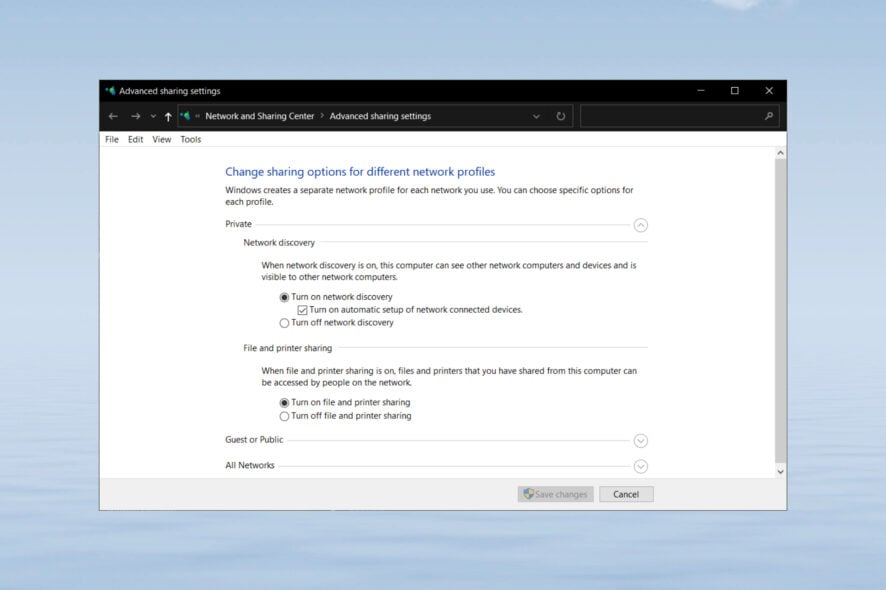
In the Windows operating system, Network Discovery is a network setting that lets you set the communication between connected devices and systems on your network – so you decide whether or not this is allowed.
When enabled, it becomes easier to share files and printers and connect through a private network. In this article, we will show you how to fix Network Discovery if it’s not showing all the computers.
Why can’t I see all the computers in Network Discovery?
If your computer cannot view other devices on your network, it could be caused by a few issues listed below:
- Network Discovery is turned off – This feature must be activated if you want to see another computer on the network.
- Incorrect network profile – If the computer doesn’t set up the necessary network profile, you will stumble across this issue in Network Discovery.
- The computer is not active – If you are looking for a computer that is not turned on or not accessible, you won’t be able to see it within the network.
To resolve the problem, try the solutions listed below.
What can I do if Network Discovery is turned off in Windows 10?
1. Enable Network discovery
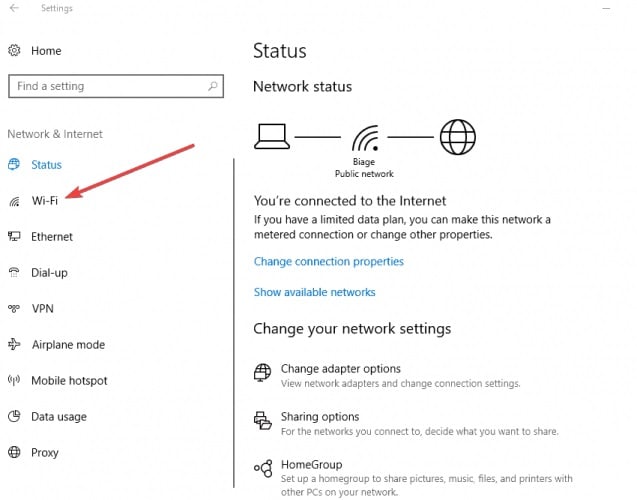
- Click Start and select Settings
- Click Network and Internet.
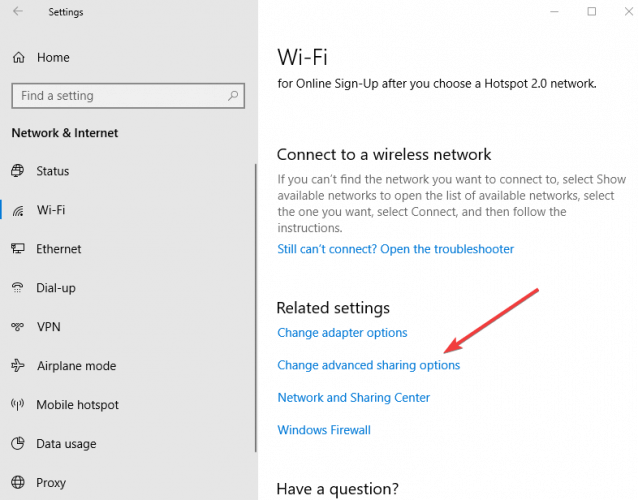
- Click Wi-Fi or Ethernet from the left panel, depending on the connection you’re using.
- Find the Change Advanced Sharing option.
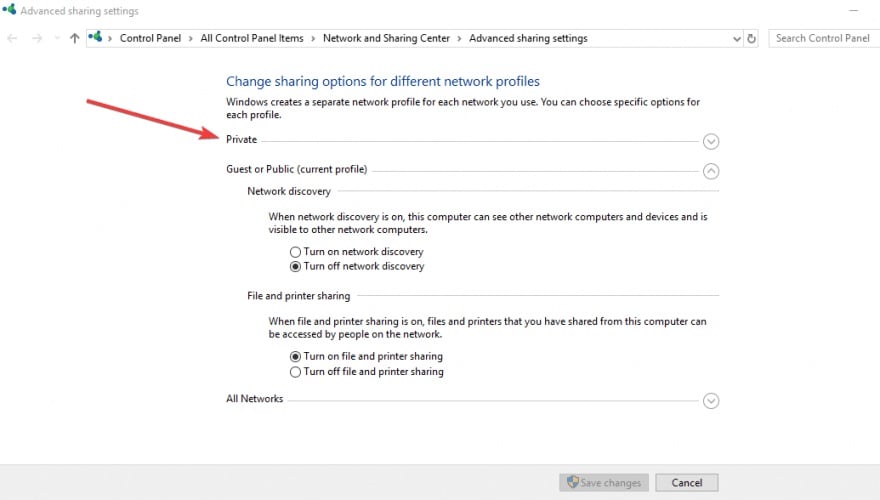
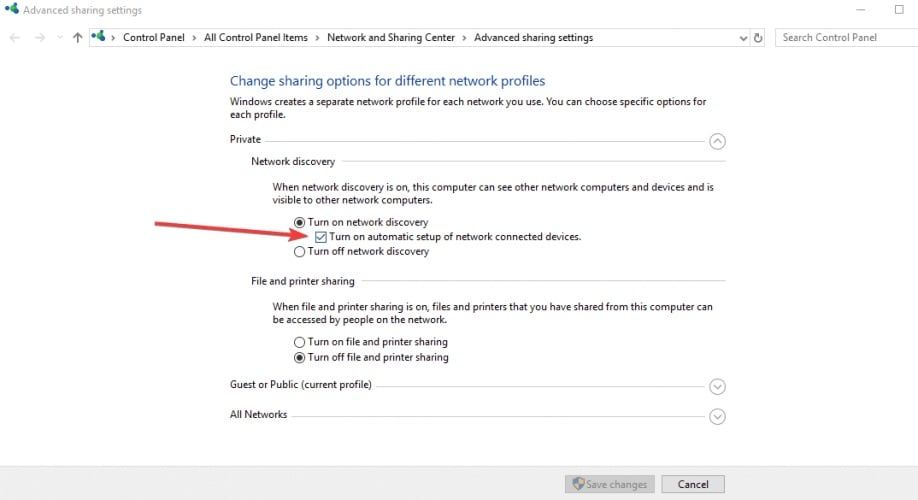
- Click to expand Private (Current Profile) network.
- Go to Network Discovery section and select Turn on network discovery.
- Check the Turn on automatic setup of network connected devices box.
- Click Save Changes and exit the window.
2. Activate the dependency services
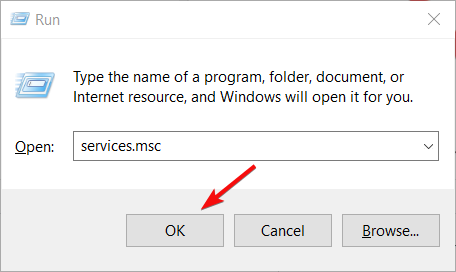
- Press the Windows + R key combination to start the Run console.
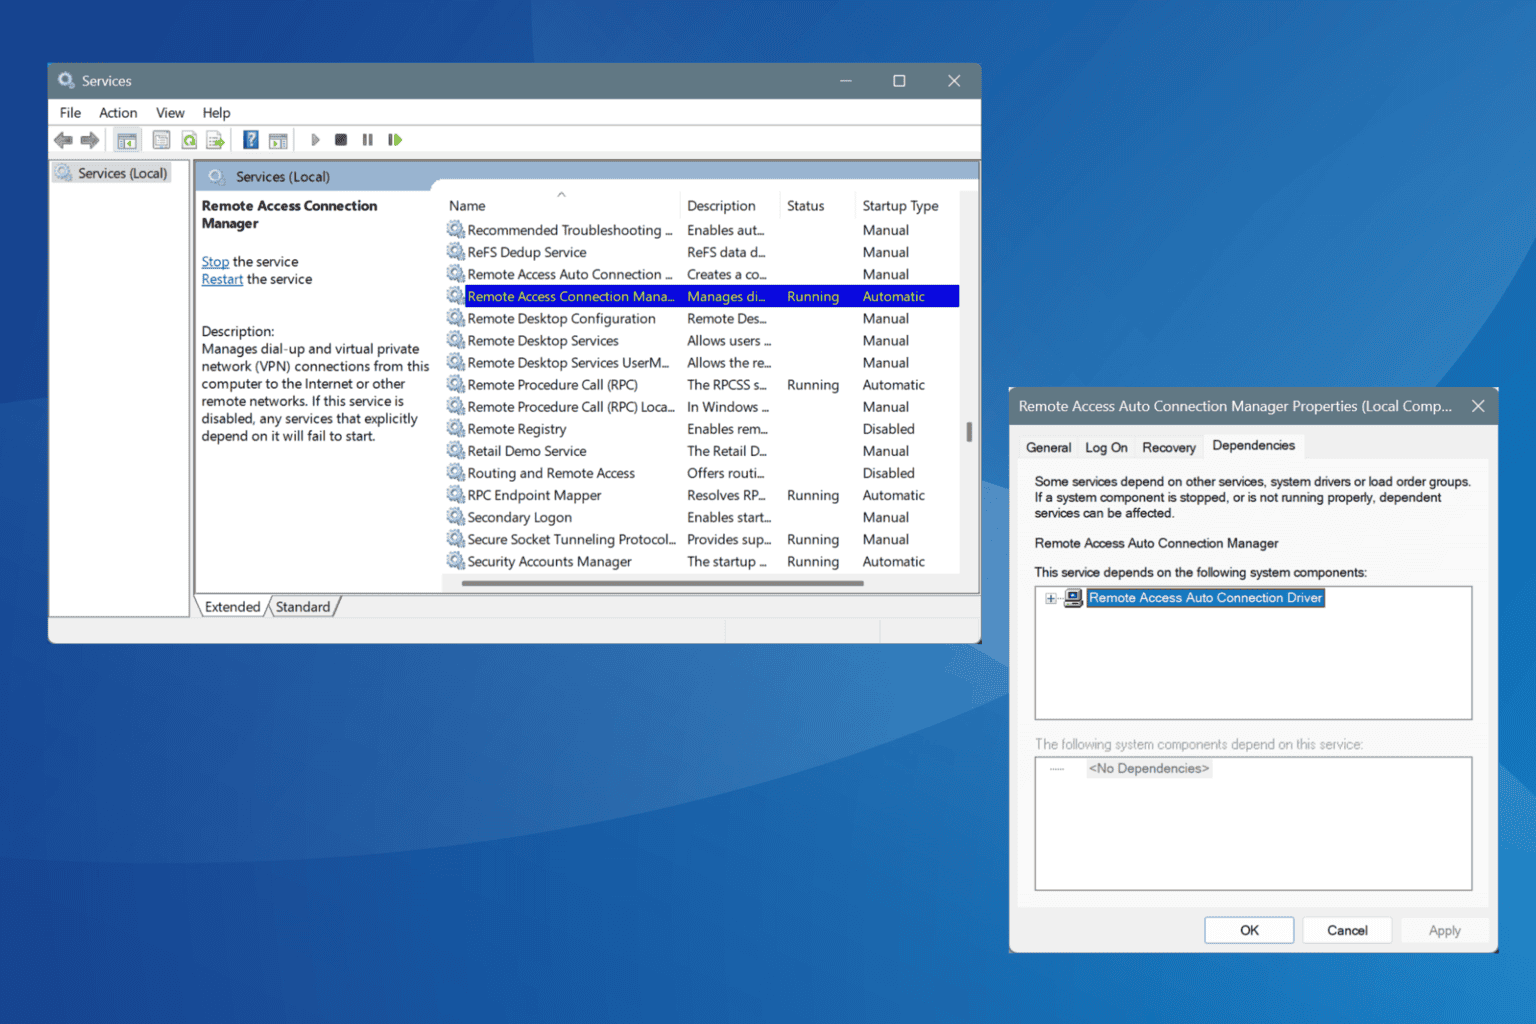
- Type services.msc and press Enter to open Services Manager.
- Check if each of the four services is started, and set them to automatic
Check that dependency services such as DNS Client, Function Discovery Resource Publication, SSDP Discovery, and UPnP Device Host are started.
3. Configure the firewall settings
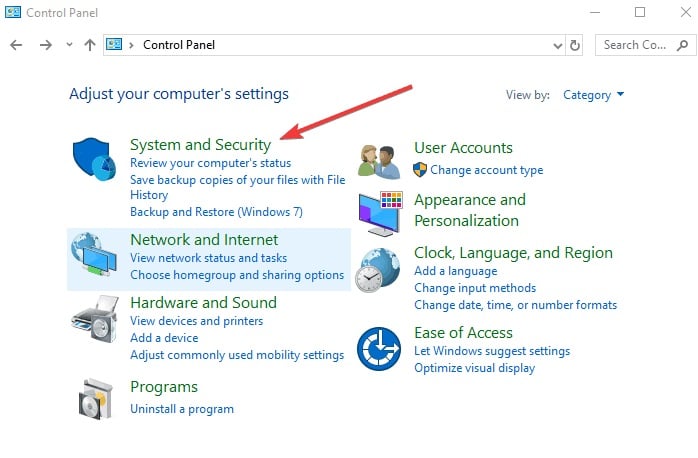
- Click Start, type control panel, and select Control Panel from the results.
- Select System and Security.
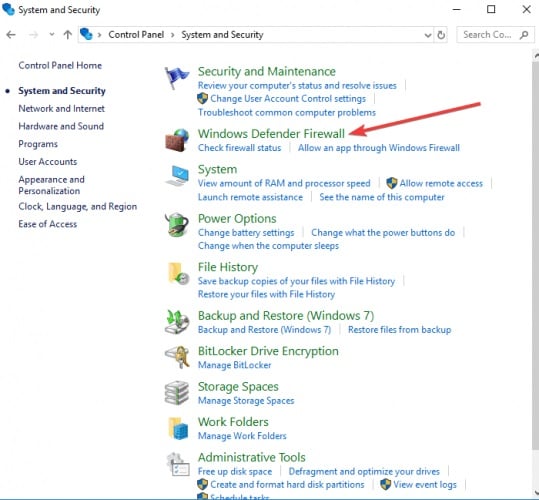
- Click Windows Firewall.
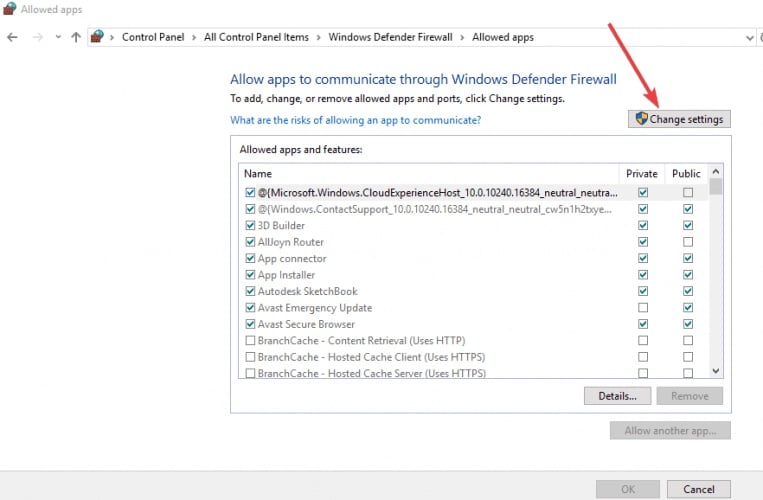
- Click Allow an app or feature through Windows Firewall on the left panel (or Allow a program or feature through Windows Firewall).
- Click Change settings and give required admin permissions if requested to.
- Click Network Discovery then OK.
- Configure any other firewalls on your Windows 10 computer to allow Network Discovery.
- Turn on Network Discovery from the Network and Sharing Center.
You can’t open Control Panel? Take a look at this step-by-step guide to find a solution.
4. Use Command Prompt to turn Network Discovery on
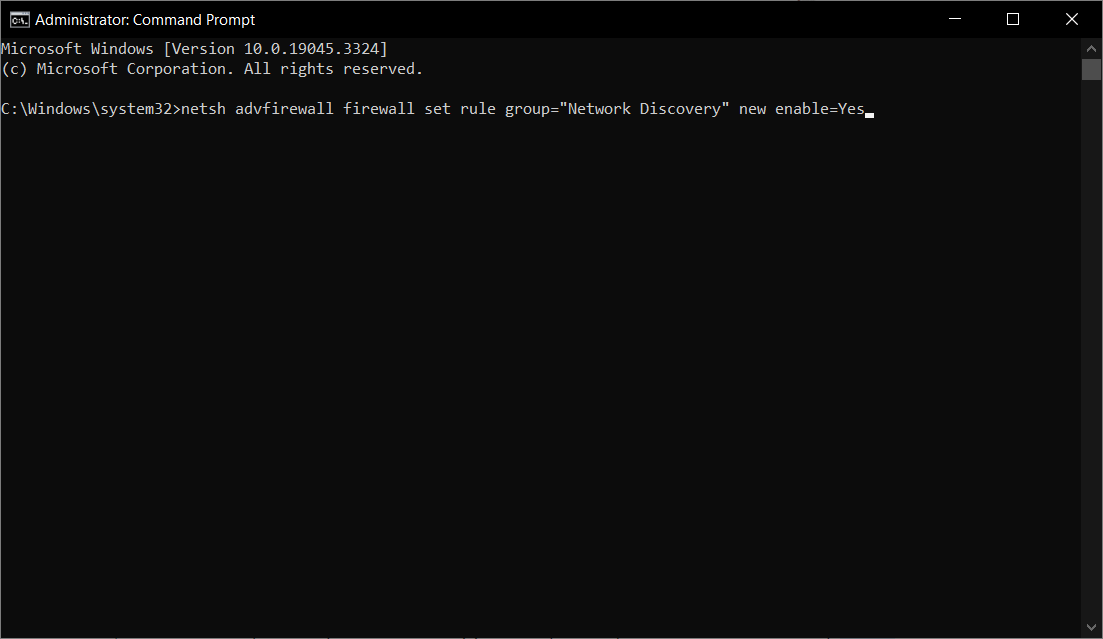
- Click Start and type cmd in the search bar and open Command Prompt as an administrator.
- In the elevated command prompt, type the following command and press Enter to run it:
netsh advfirewall firewall set rule group="Network Discovery" new enable=Yes - To turn off Network Discovery for all your network profiles, go back to the elevated command prompt, type the following command, and press Enter:
netsh advfirewall firewall set rule group="Network Discovery" new enable=No
Did any of these solutions help? Let us know in the comments section below.
Also, leave any other questions or suggestions, and we will surely check them out.



User forum
2 messages