Fix: File Explorer Preview Pane Not Working on Windows 11
Check out how our experts fixed things in no time
3 min. read
Updated on
Read our disclosure page to find out how can you help Windows Report sustain the editorial team. Read more
Key notes
- The File Explorer preview pane not working in Windows 11 can be due to corrupted system files or misconfigured Explorer settings.
- Your primary approach should be eliminating or replacing corrupt system files to fix things.
- Many users got things up and running by restoring defaults, so try that as well.
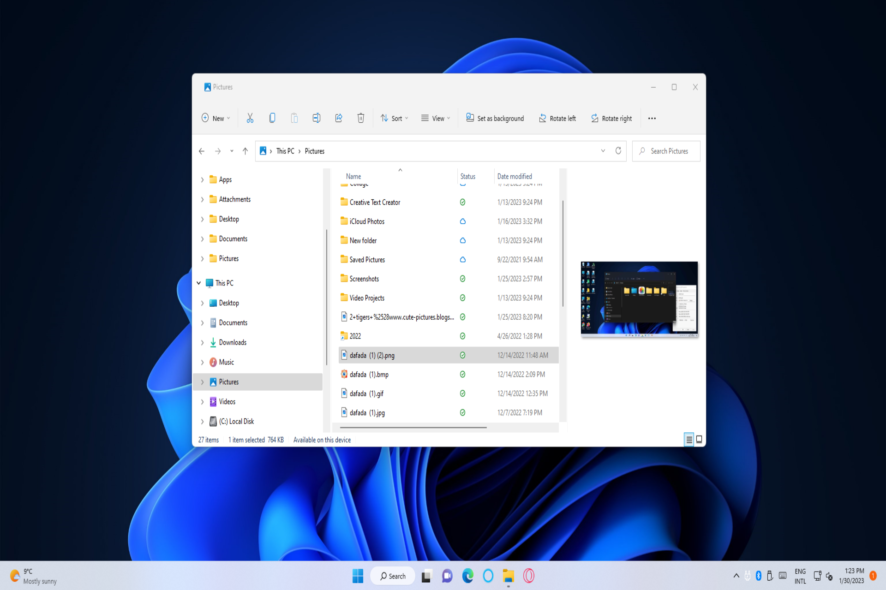
File Explorer’s preview pane usually displays expanded thumbnail previews of selected files in a sidebar. However, many users reported that the Preview Pane in File Explorer is not working on Windows 11.
If the File Explorer preview pane is not working, it shows a No preview available or File not found message. So, let’s find out how you can fix things in no time.
How can I enable the File Explorer preview pane?
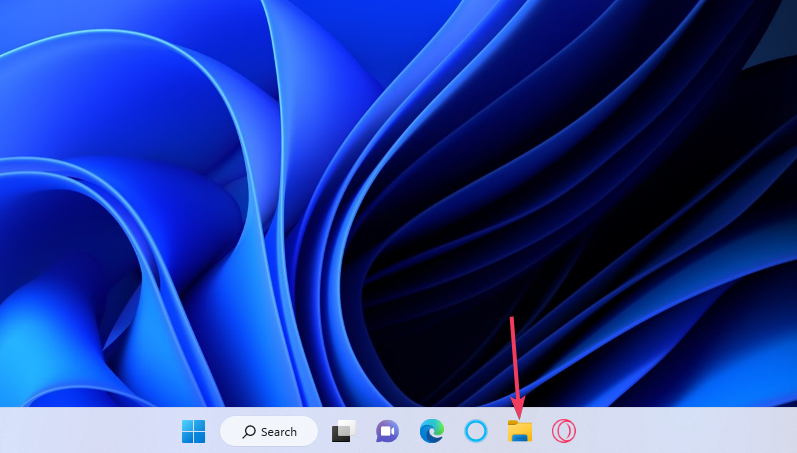
- Open File Explorer from the taskbar.
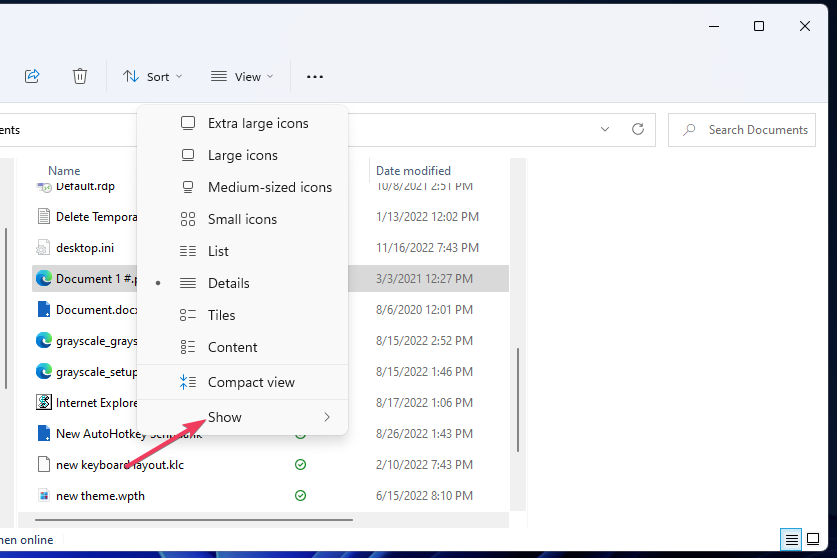
- Click View on the command bar, and select the Show submenu.
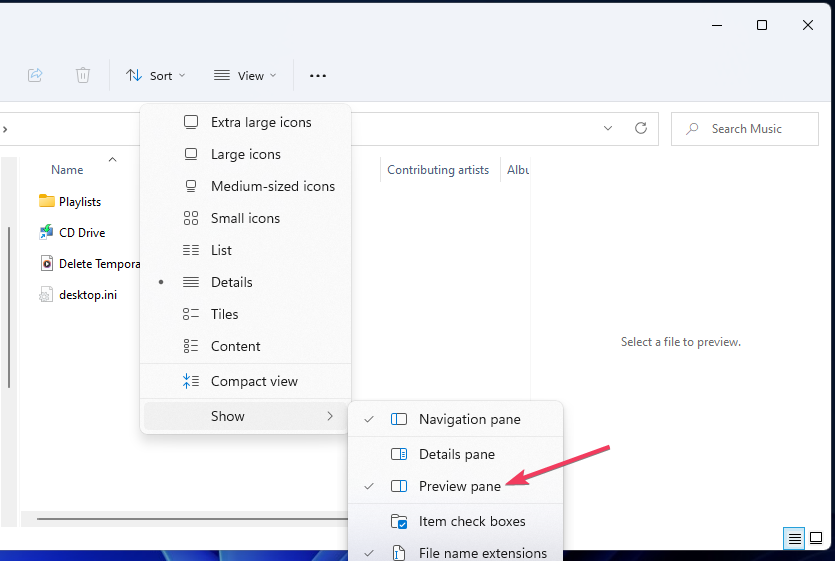
- Make sure that Preview pane is enabled here.
It might not be enabled if you don’t see the preview pane when a file is selected. So, first, check that before you proceed with the troubleshooting.
However, users need to fix the preview pane when it’s not displaying any previews for common document and image formats. If your preview pane isn’t showing previews, apply these resolutions.
How can I fix File Explorer’s preview pane not working in Windows 11?
Before we start making changes to solve the problem, try these quick fixes:
- Restart the computer and check if the preview pane is now working.
- Repair the corrupt system files on the PC since these could affect the optimal functioning of the OS. To do that, run the DISM tool and SFC scan.
If these didn’t work, the solutions listed next would.
1. Make sure preview handlers are enabled
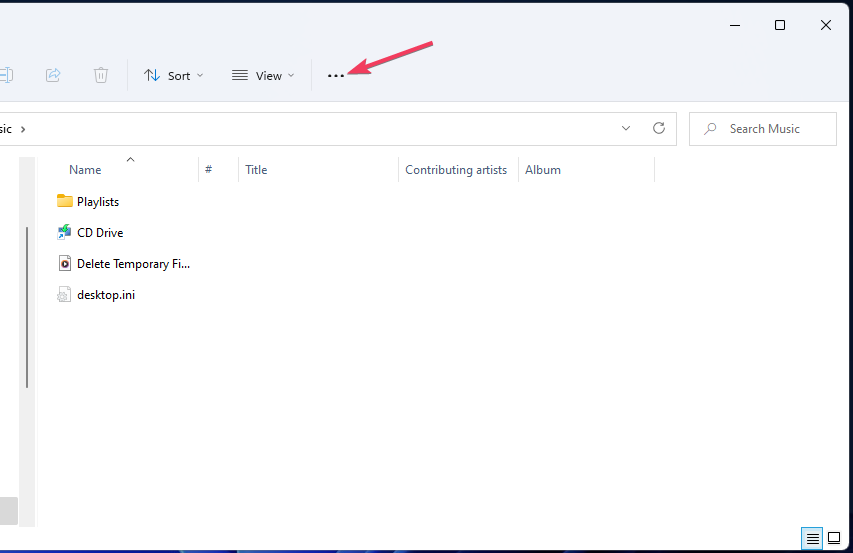
- Press Windows + E to open File Explorer, and click the See more button.
- Select Options to view a File Explorer Options window.
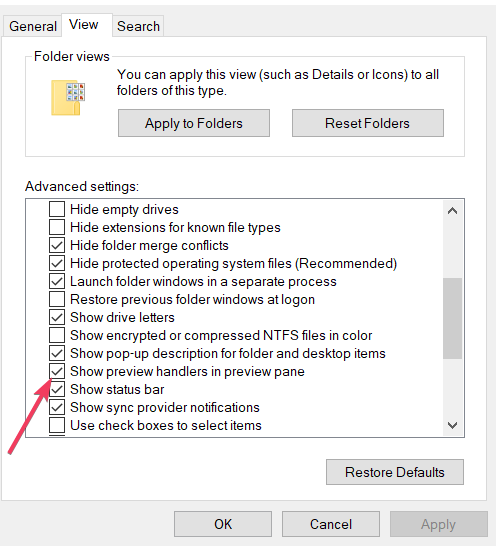
- Click View to access Advanced settings, and check the Show preview handlers option.
- Next, uncheck the Always show icons, never thumbnails setting there.
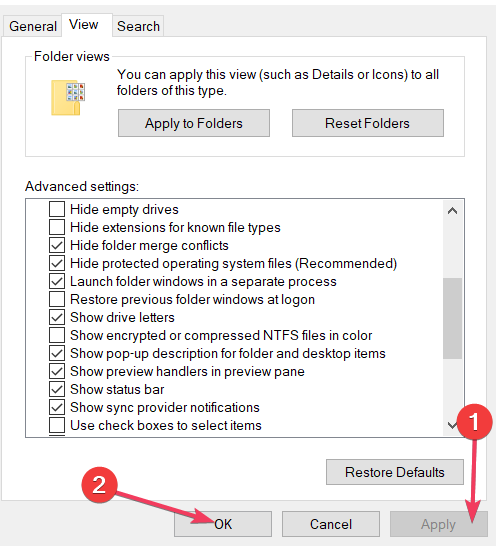
- Once done, click Apply and then OK to save the new settings.
Check if the preview pane in File Explorer on Windows 11 now starts working. In case the problem persists, head to the next solution.
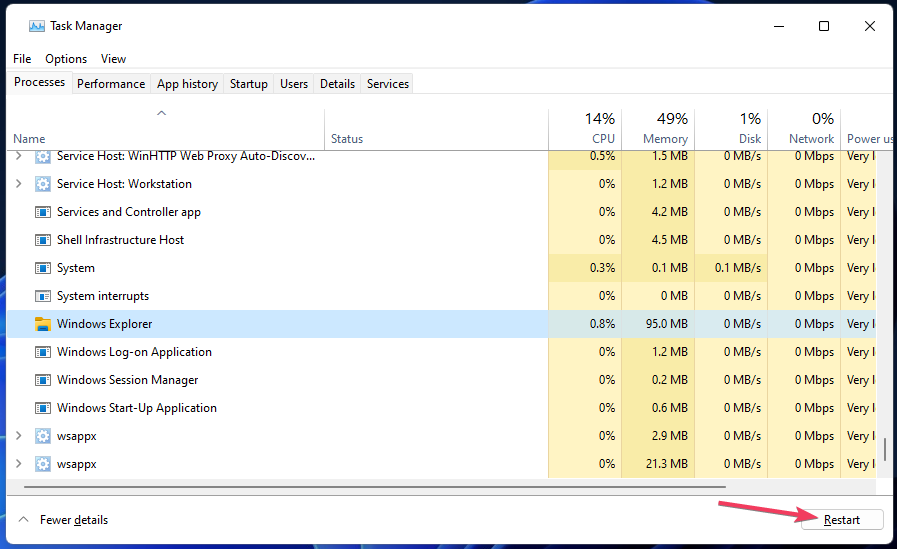
2. Restart the Windows Explorer process
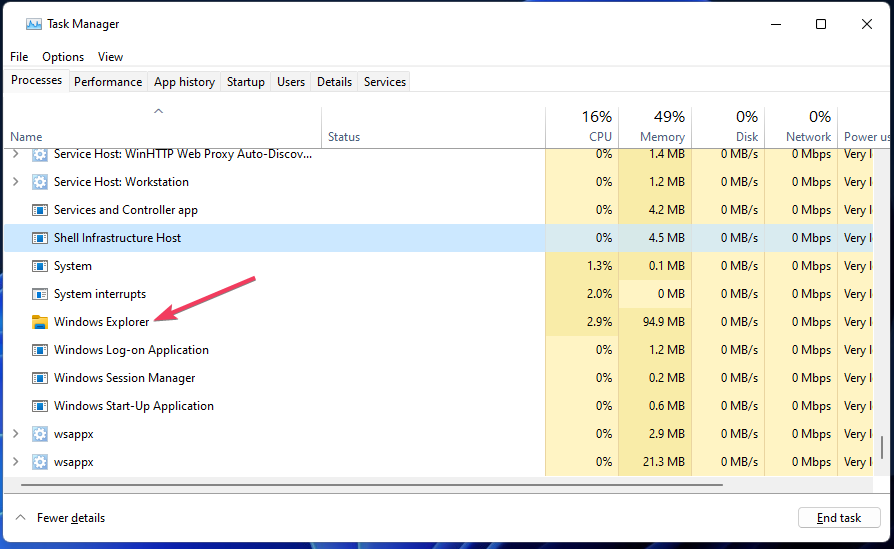
- Press Ctrl + Shift + Esc to open the Task Manager.
- Scroll down, locate the Windows Explorer process, and select it.
- Finally, click the Restart option near the bottom-right.
3. Restore default File Explorer settings
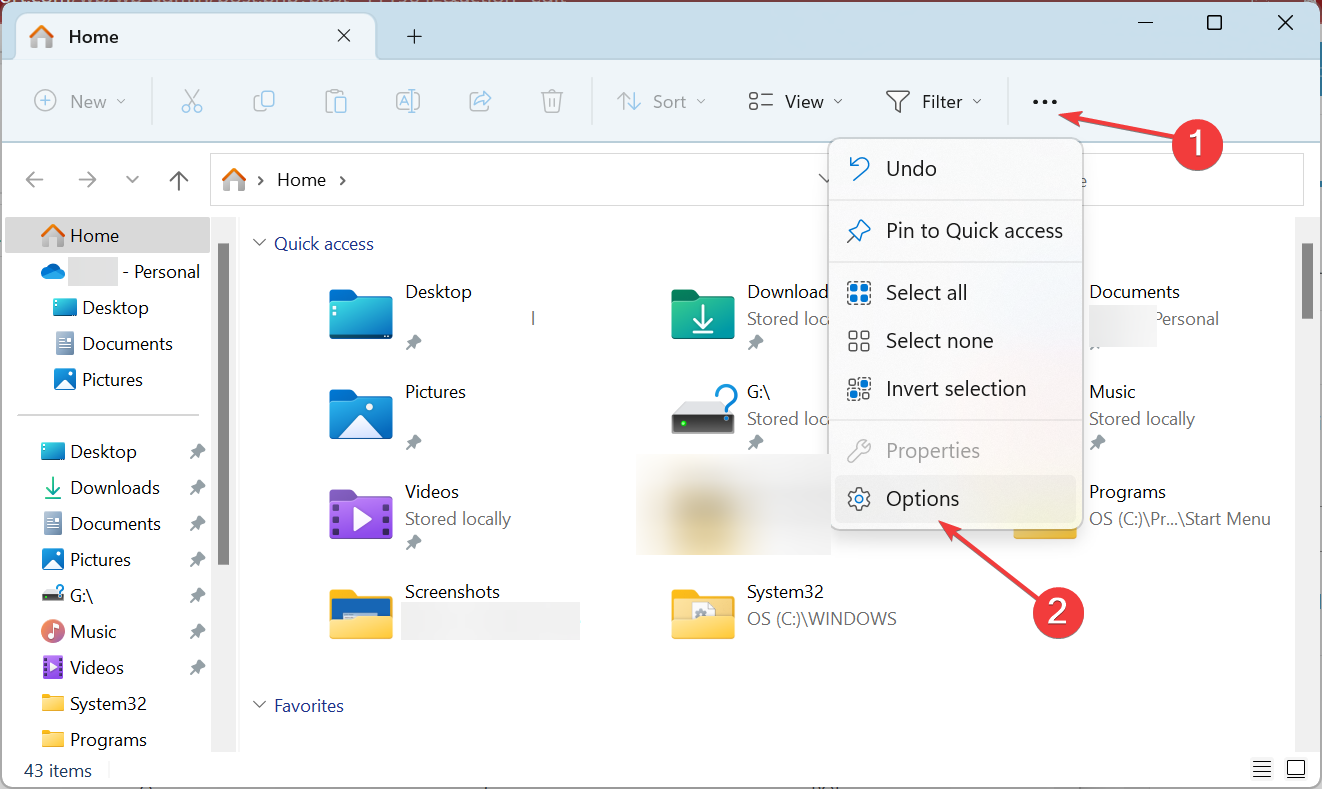
- Press Windows + E to open File Explorer, click on the ellipsis, and choose Options from the flyout menu.
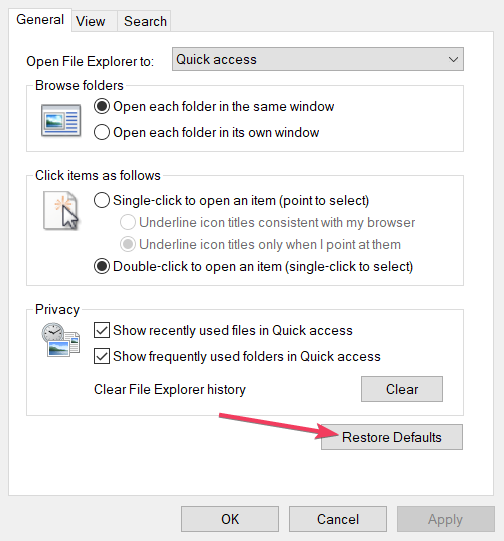
- Click Restore Defaults on the General tab.
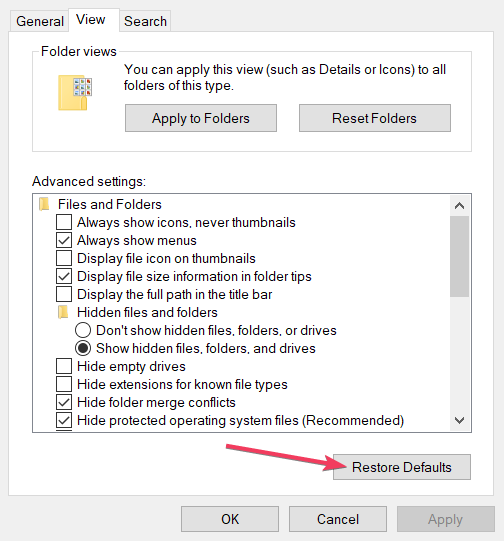
- Then switch to the View tab, and click the Restore Defaults option there.
- Select Apply to save changed settings, and click OK to exit.
Once done, verify whether the Preview Pane in File Explorer is still not working in Windows 11. Though that should not be the case for most, move to the last solution if it is.
4. Remove # symbols from file names
 NOTE
NOTE
- Open the folder that contains any files with the hash (#) symbol in their names.
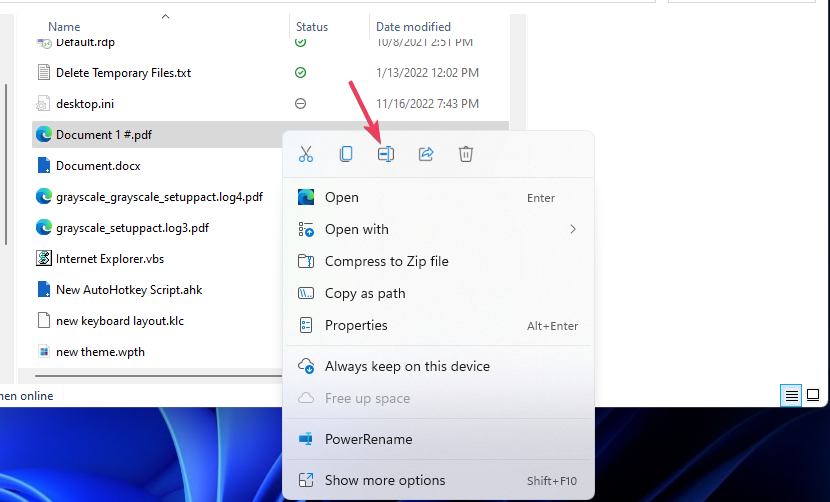
- Right-click on such files and select Rename.
- Delete all # symbols from the file’s names.
- Similarly, remove # from every file’s name here.
File Explorer’s preview pane probably isn’t its most essential feature. However, it’s still a convenient feature showing you what files look like when it works correctly. Still, it may be a resource hog, so you can disable your thumbnail previews to speed up your PC.
Once you have managed to fix things, do not forget to check the best ways to make Windows 11 faster.
Tell us which fix worked, and share any queries in the comments below.


User forum
0 messages