How to Add & Use The Zoom Plugin for Outlook
Check out the simple ways to install Zoom add-in
3 min. read
Updated on
Read our disclosure page to find out how can you help Windows Report sustain the editorial team. Read more
Key notes
- Scheduling and joining Zoom meetings becomes more manageable if you add its plugin for Outlook.
- This guide will discuss the steps to add a plugin and use it to schedule and join meetings.
If you use Zoom for attending meetings and your day is planned according to Outlook and its calendar, it is a wise option to add Zoom to your Outlook as an add-in.
The Zoom for Outlook plugin enables you to manage and schedule meetings within your Outlook web or desktop app. This guide will discuss how we can install and use it on desktop, mobile, or web apps. Let’s start!
How can I add the Zoom plugin for Outlook?
1. Use Office 365 Admin Portal
1.1 Install the add-in from the Integrated apps option
- Visit the Office 365 Admin Portal.
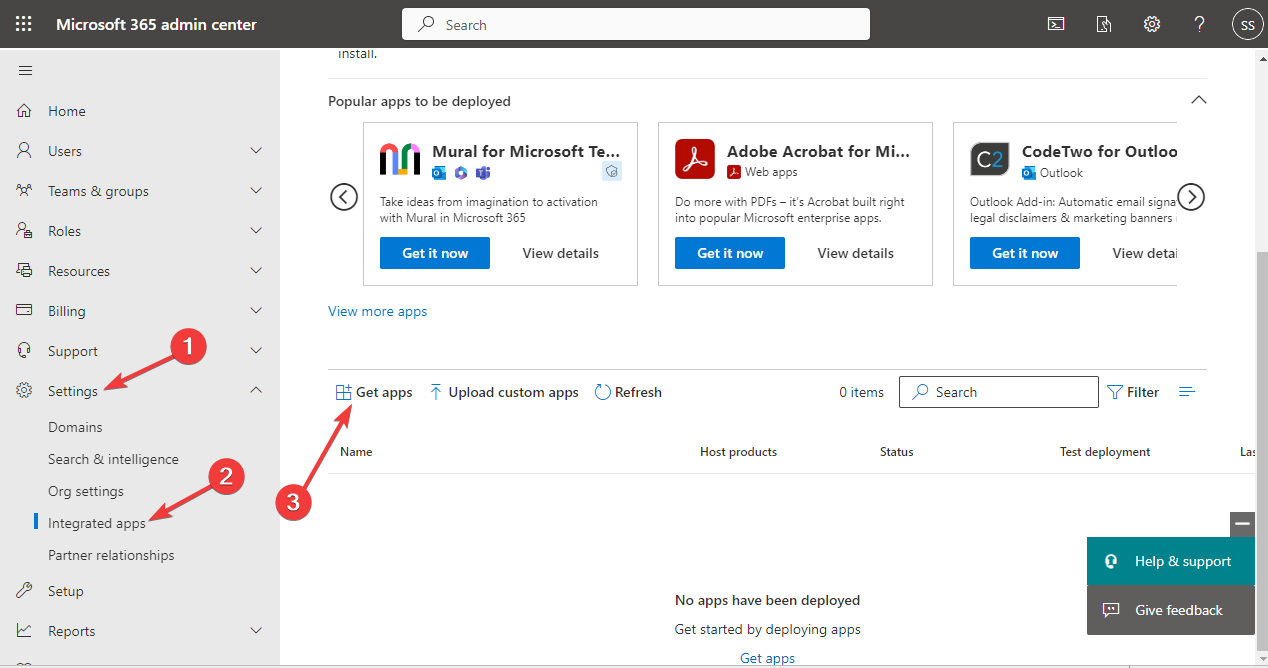
- From the left pane, select Settings, then Integrated apps.
- Click the Get apps option.
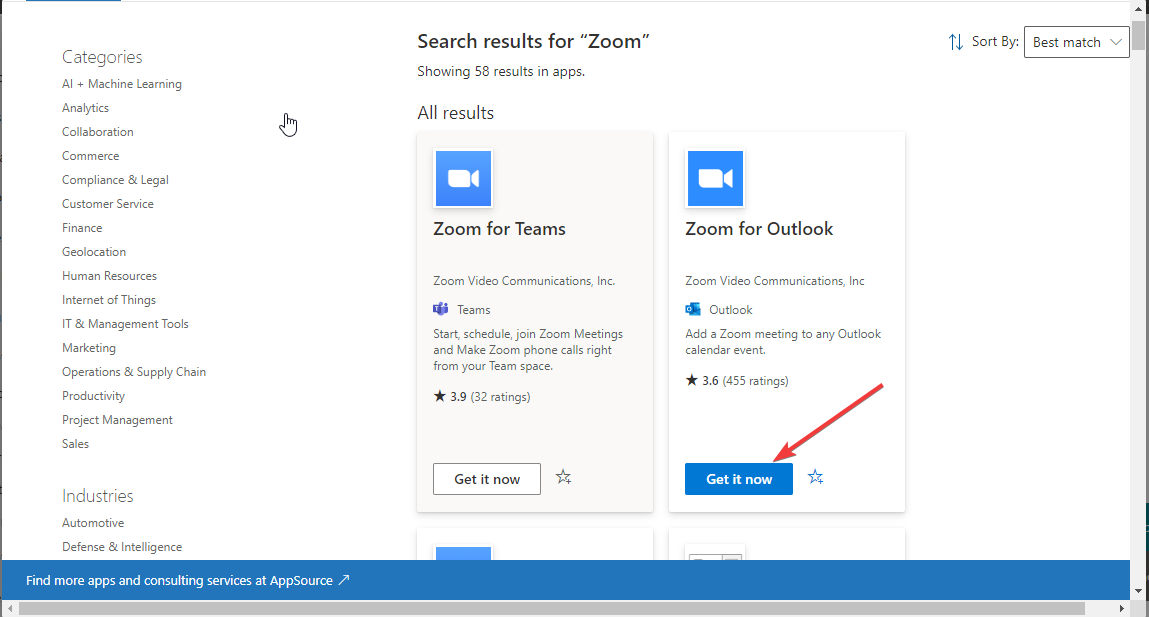
- In the search bar, type Zoom and select Zoom for Outlook from the results.
- Click Get it now on the next page.
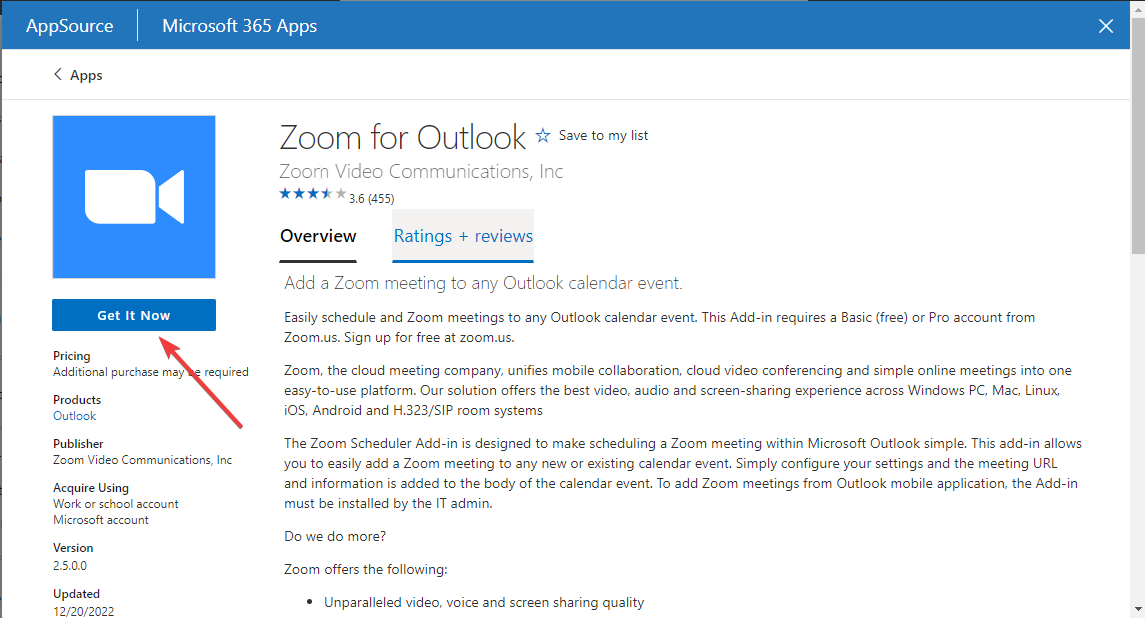
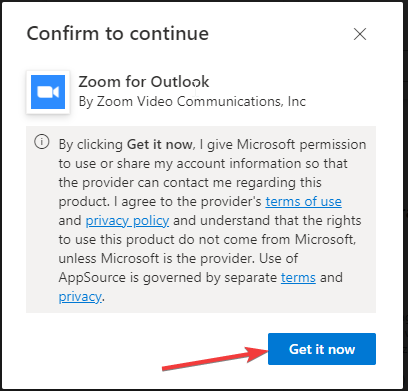
- On Confirm to continue page, click Get it now.
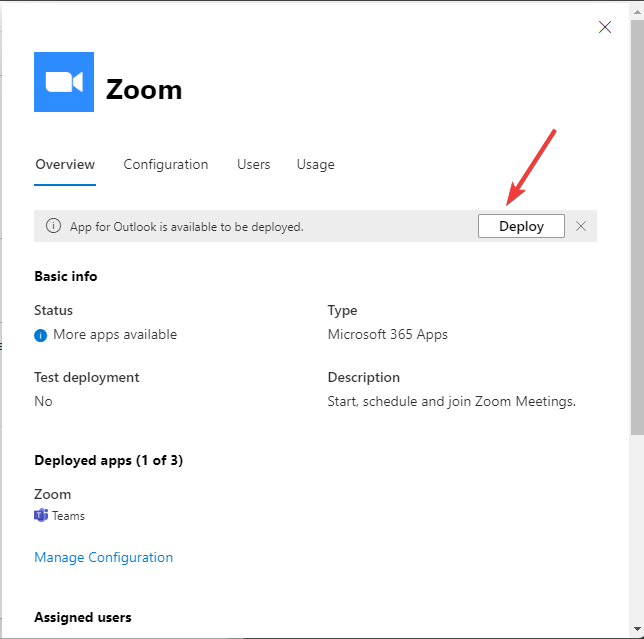
- Now on the admin portal, you can see Zoom, click Deploy.
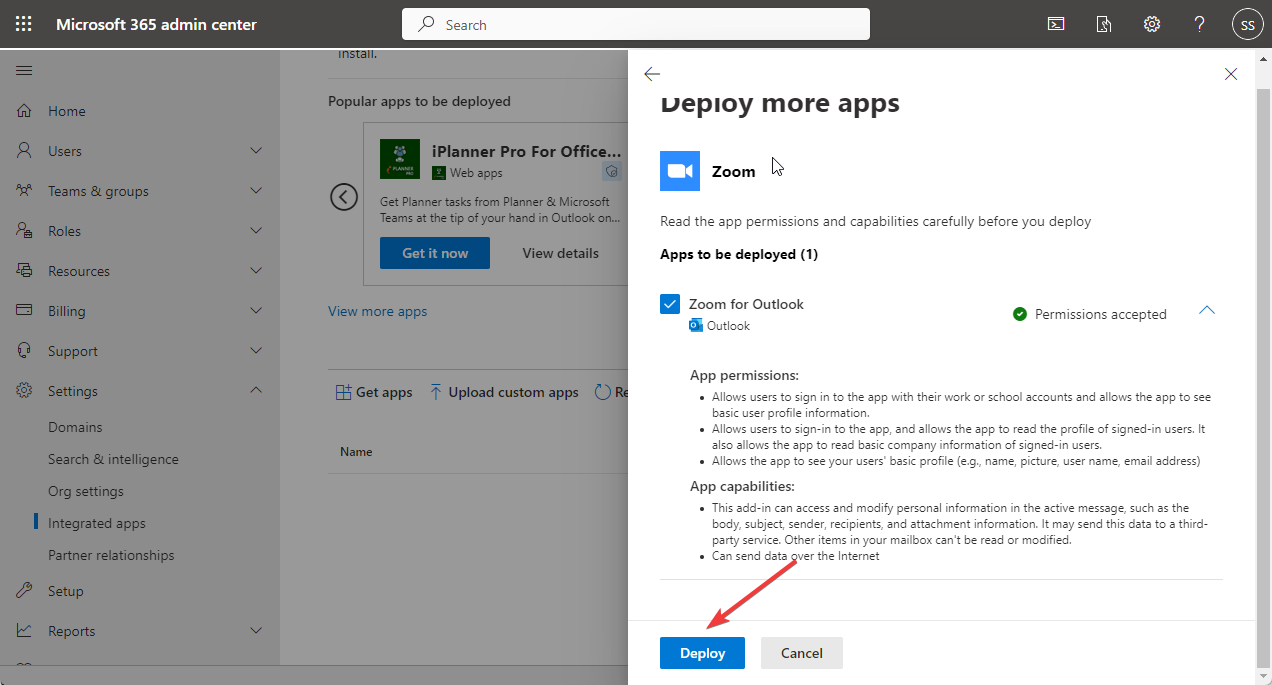
- Under Apps to be deployed, select Accept Permissions.
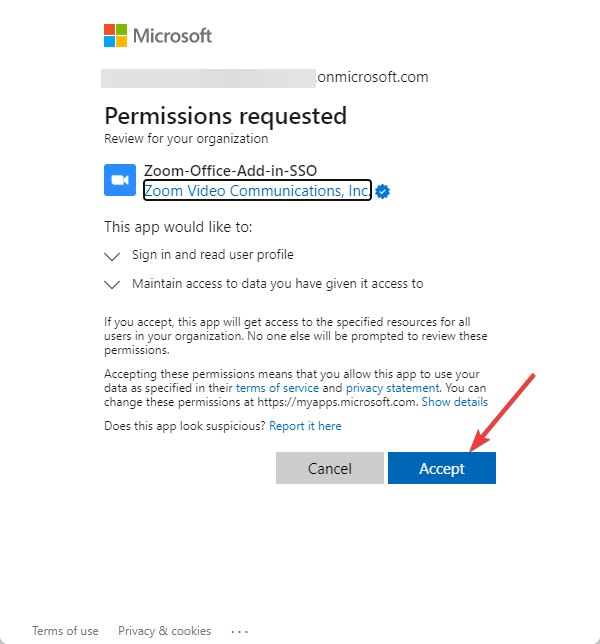
- You will be asked to choose your Microsoft admin account; select that and click Accept.
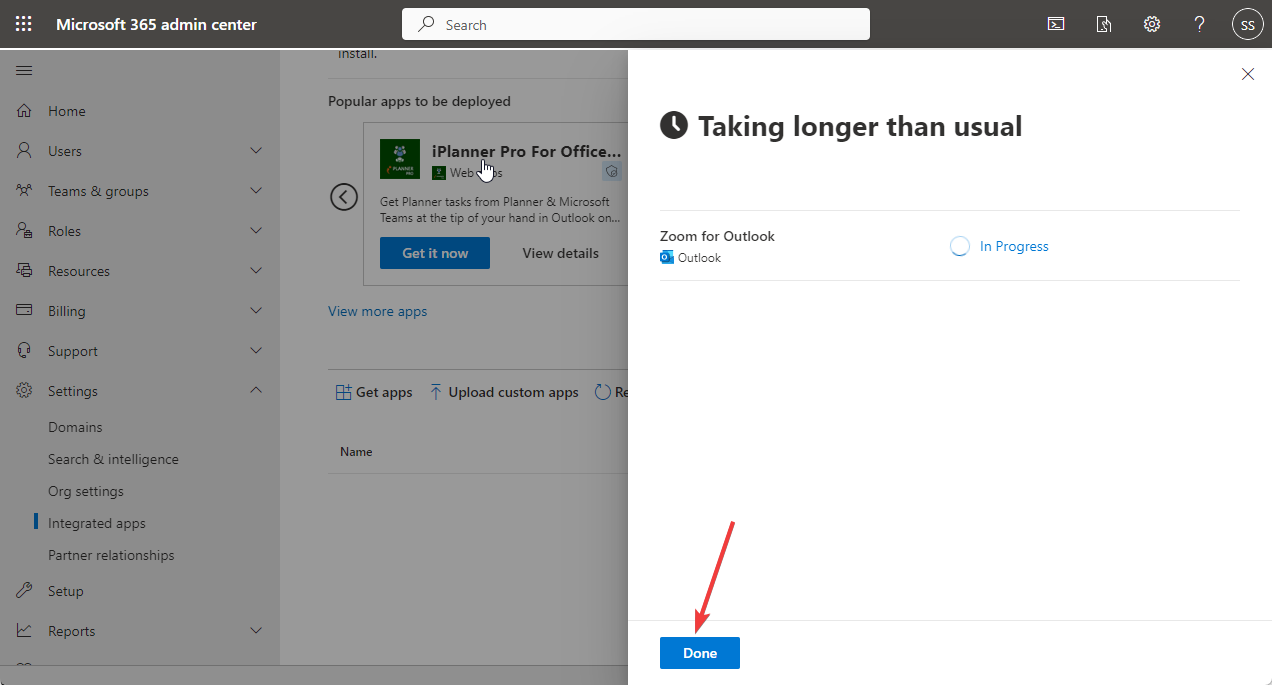
- Click Deploy.
- Click Done.
1.2 Edit deployment settings
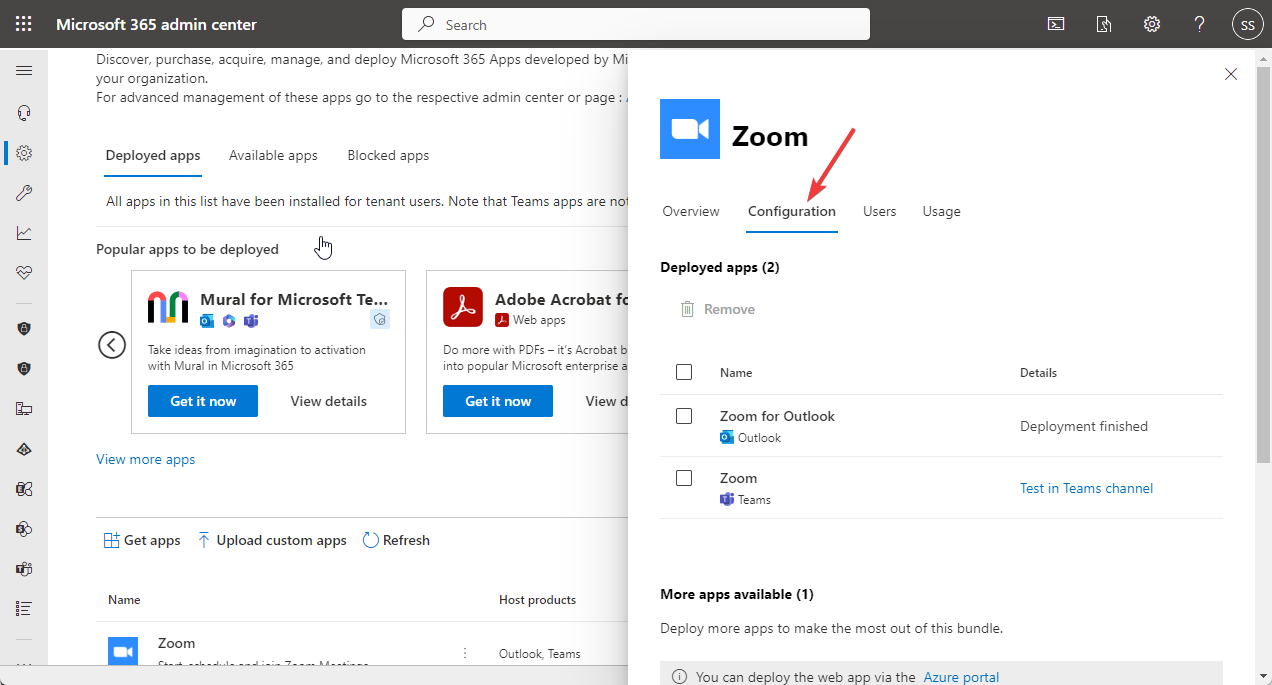
- From the Integrated apps list, double-click Zoom to open details.
- Go to Configuration.
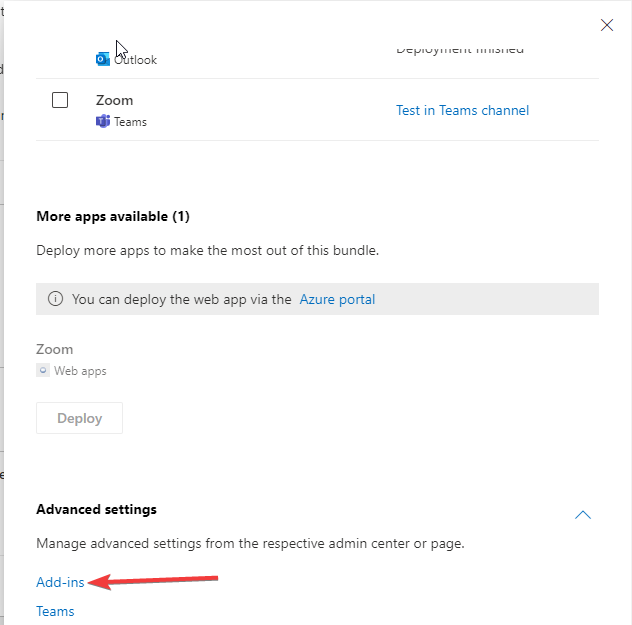
- Click Add-ins under Advanced Settings.
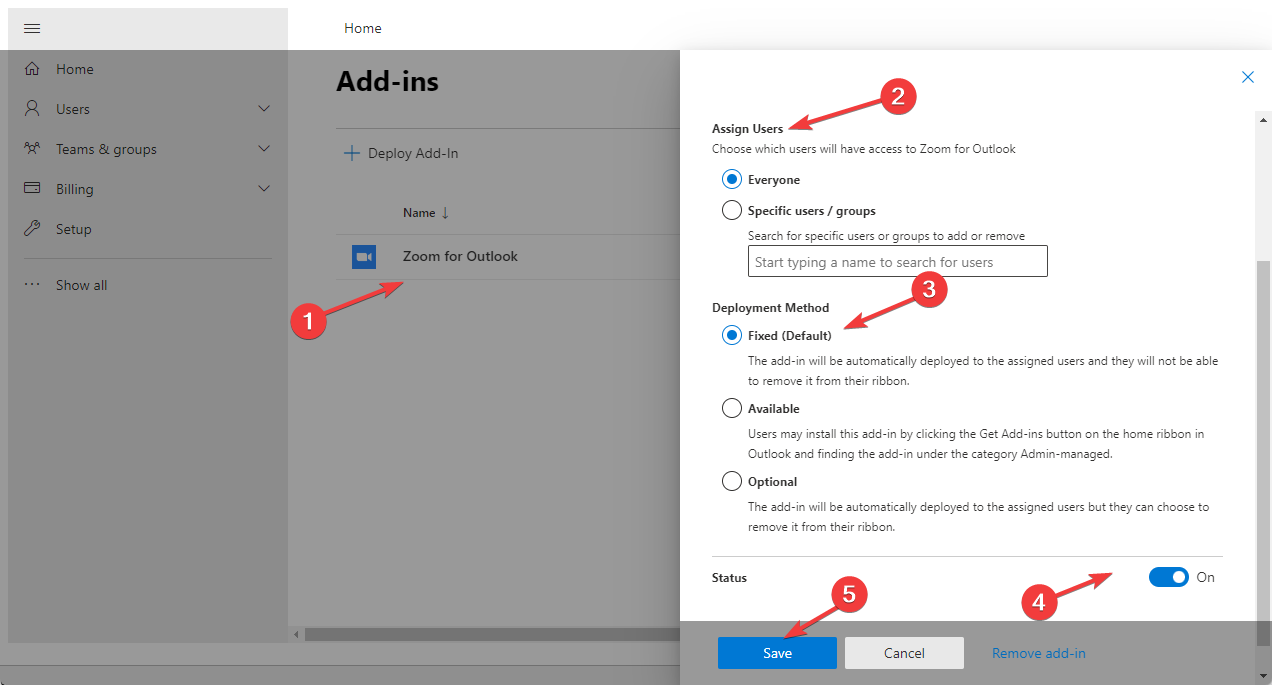
- Select Zoom for Outlook.
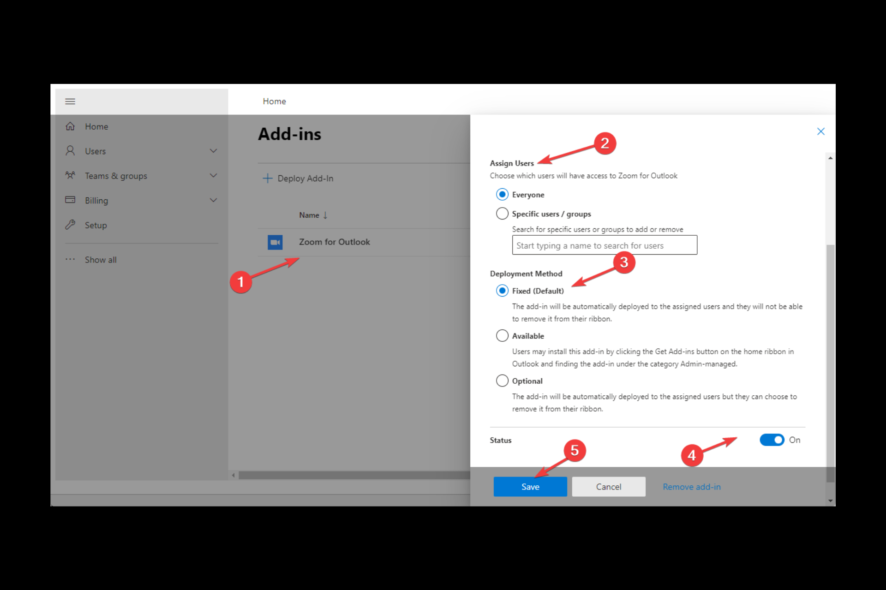
- On Edit Zoom for Outlook page, for Assign Users, select Everyone or Specific users/groups; for Deployment Method, select Fixed, Available or Optional.
- For Status, toggle on the switch and click Save to confirm the changes.
2. On the Outlook Web app
- Launch Microsoft Store.
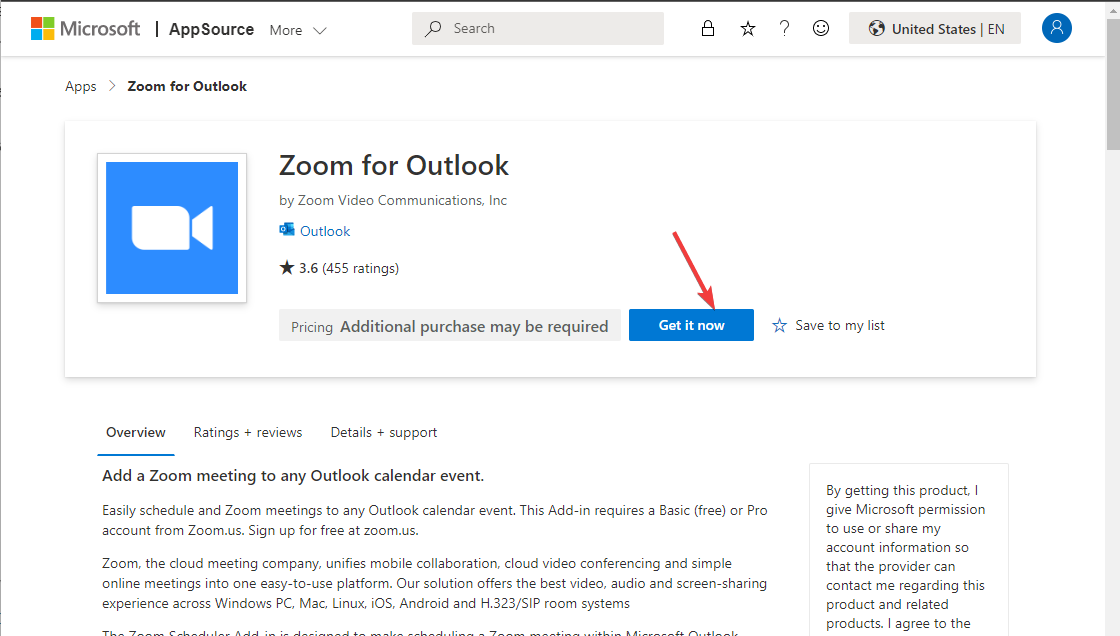
- Search for Zoom for Outlook and select the appropriate result.
- Click Get it now.
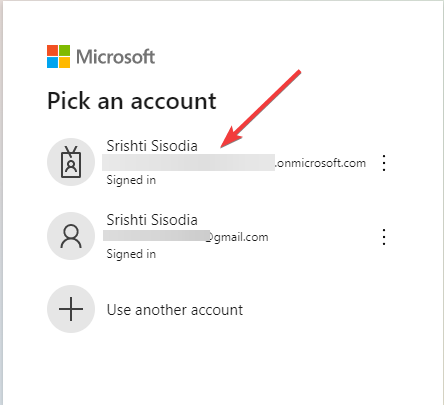
- Select the account that you want to use.
- Follow the onscreen prompts to complete the process.
3. On Older version of Outlook (2013, 2016)
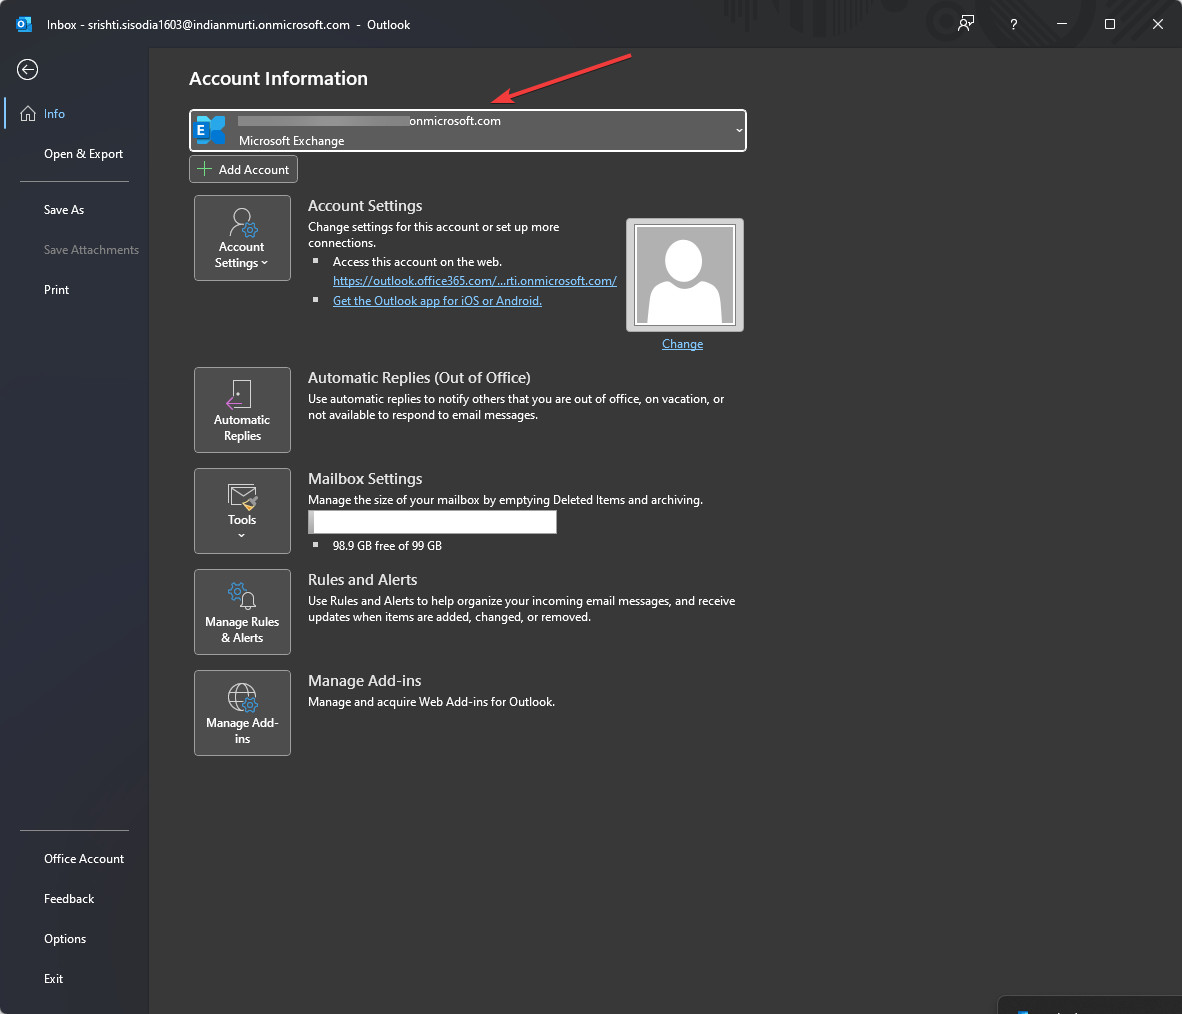
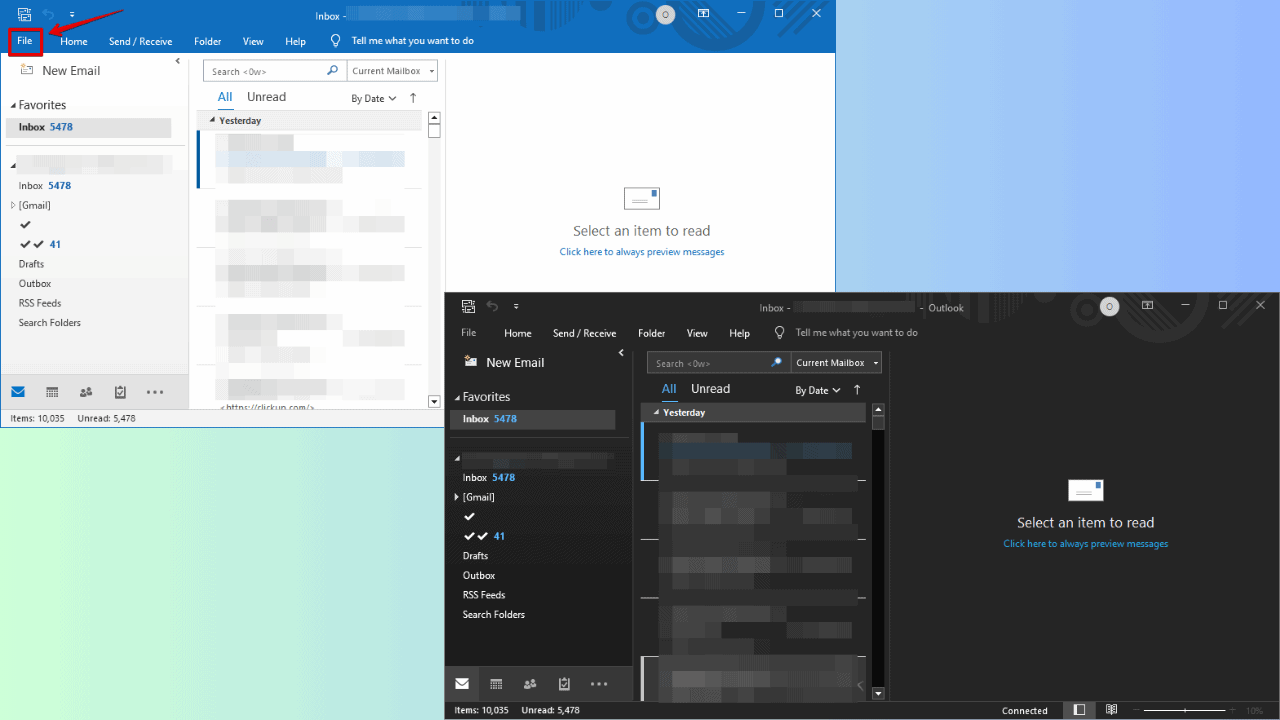
- You must add a Microsoft Exchange account to Outlook to install Zoom for Outlook on your desktop app. To check that, go to File, then Account Information. However, you can use Zoom for Outlook on the web app if you have an IMAP account.
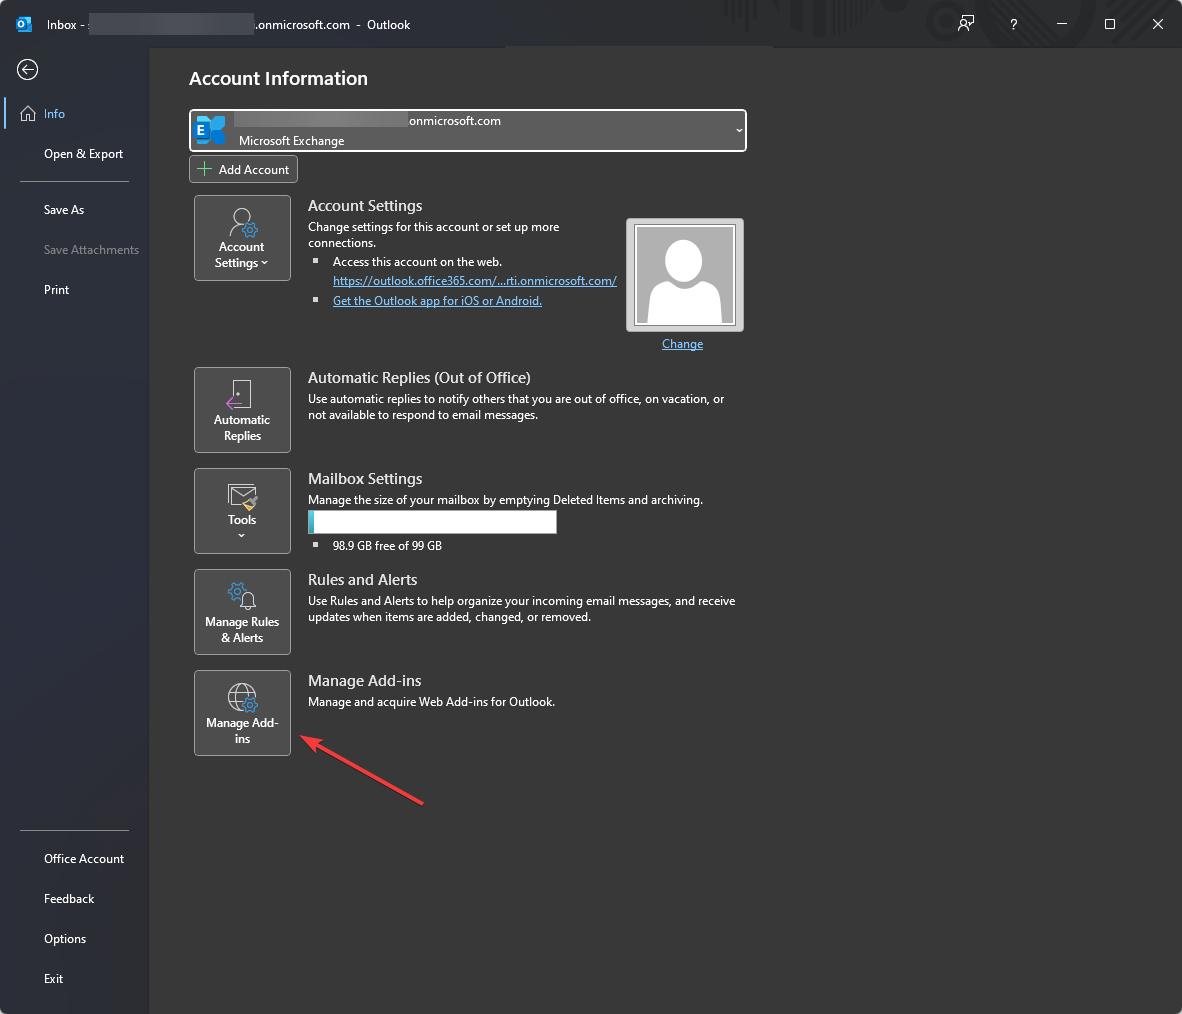
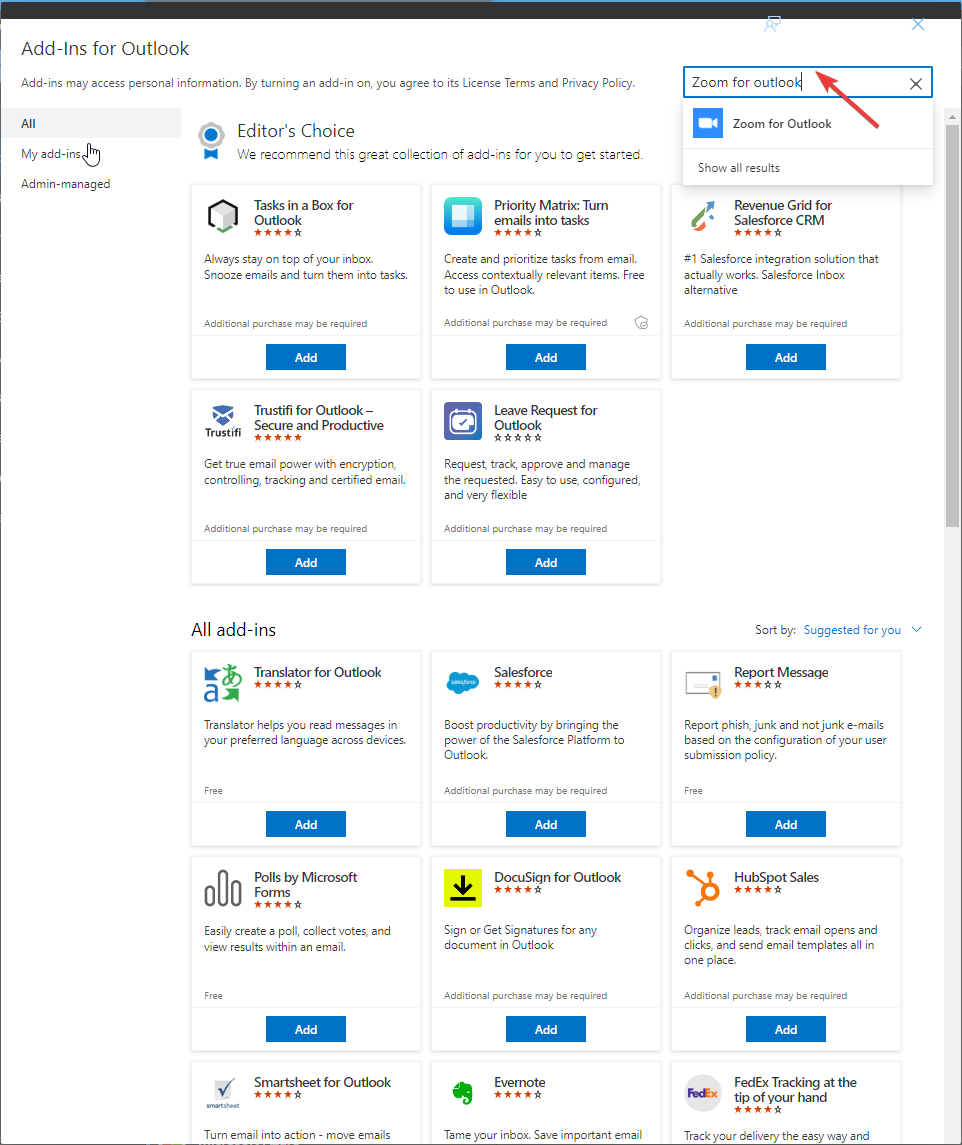
- Once done, go to File, then under Account Information, select Manage Add-ins.
- From the Add-Ins for Outlook option, type Zoom for Outlook and select the appropriate option.
- Click Add.
- Follow the instructions to add it to the desktop app.
4. On the mobile app
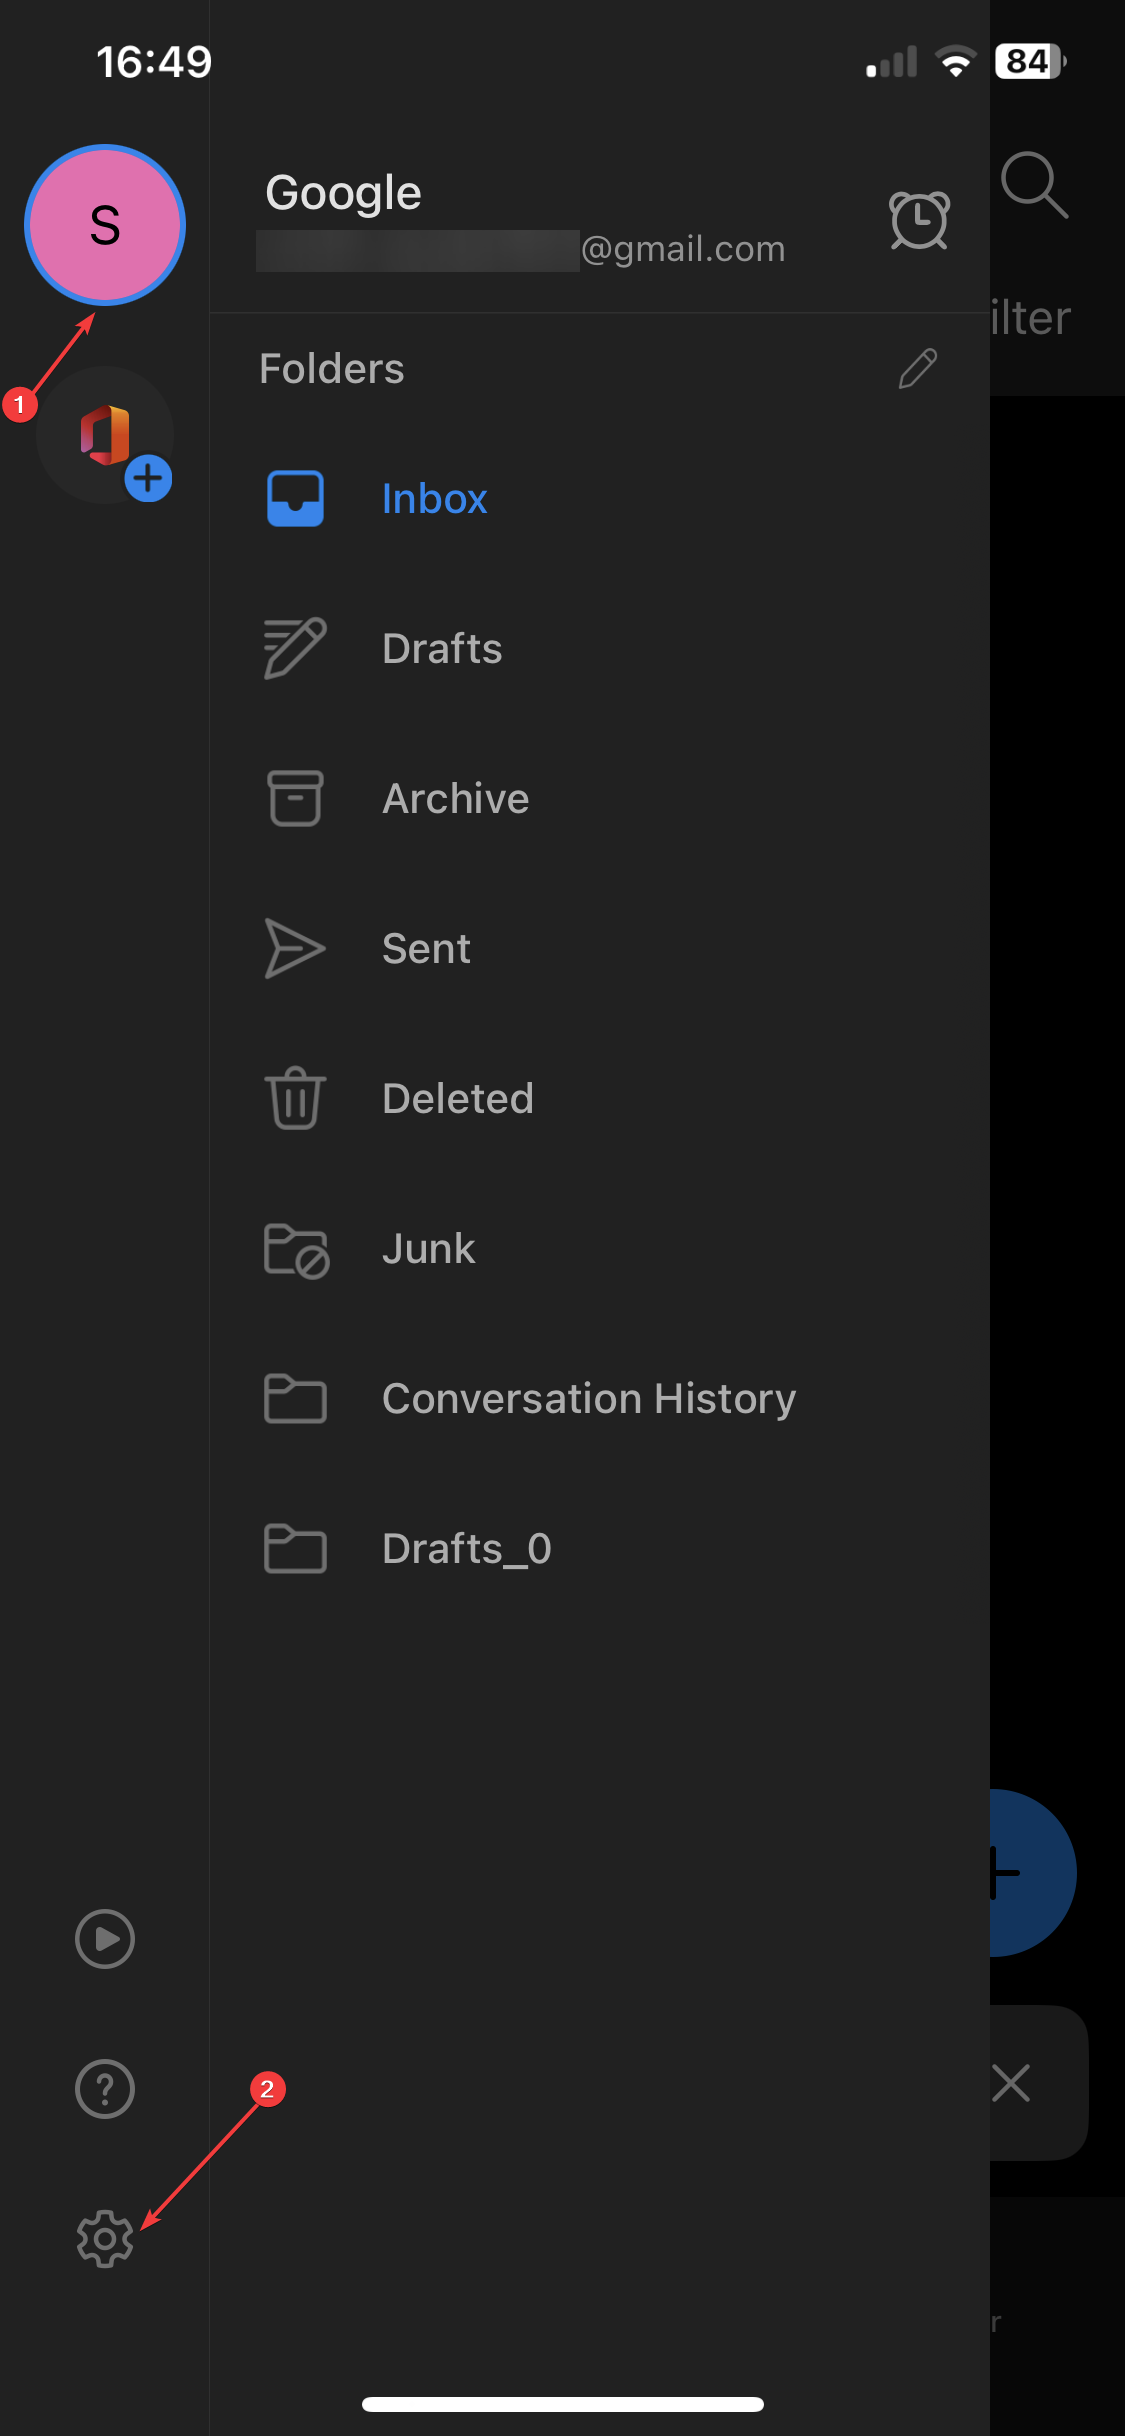
- Launch the Outlook app on your Android or iOS.
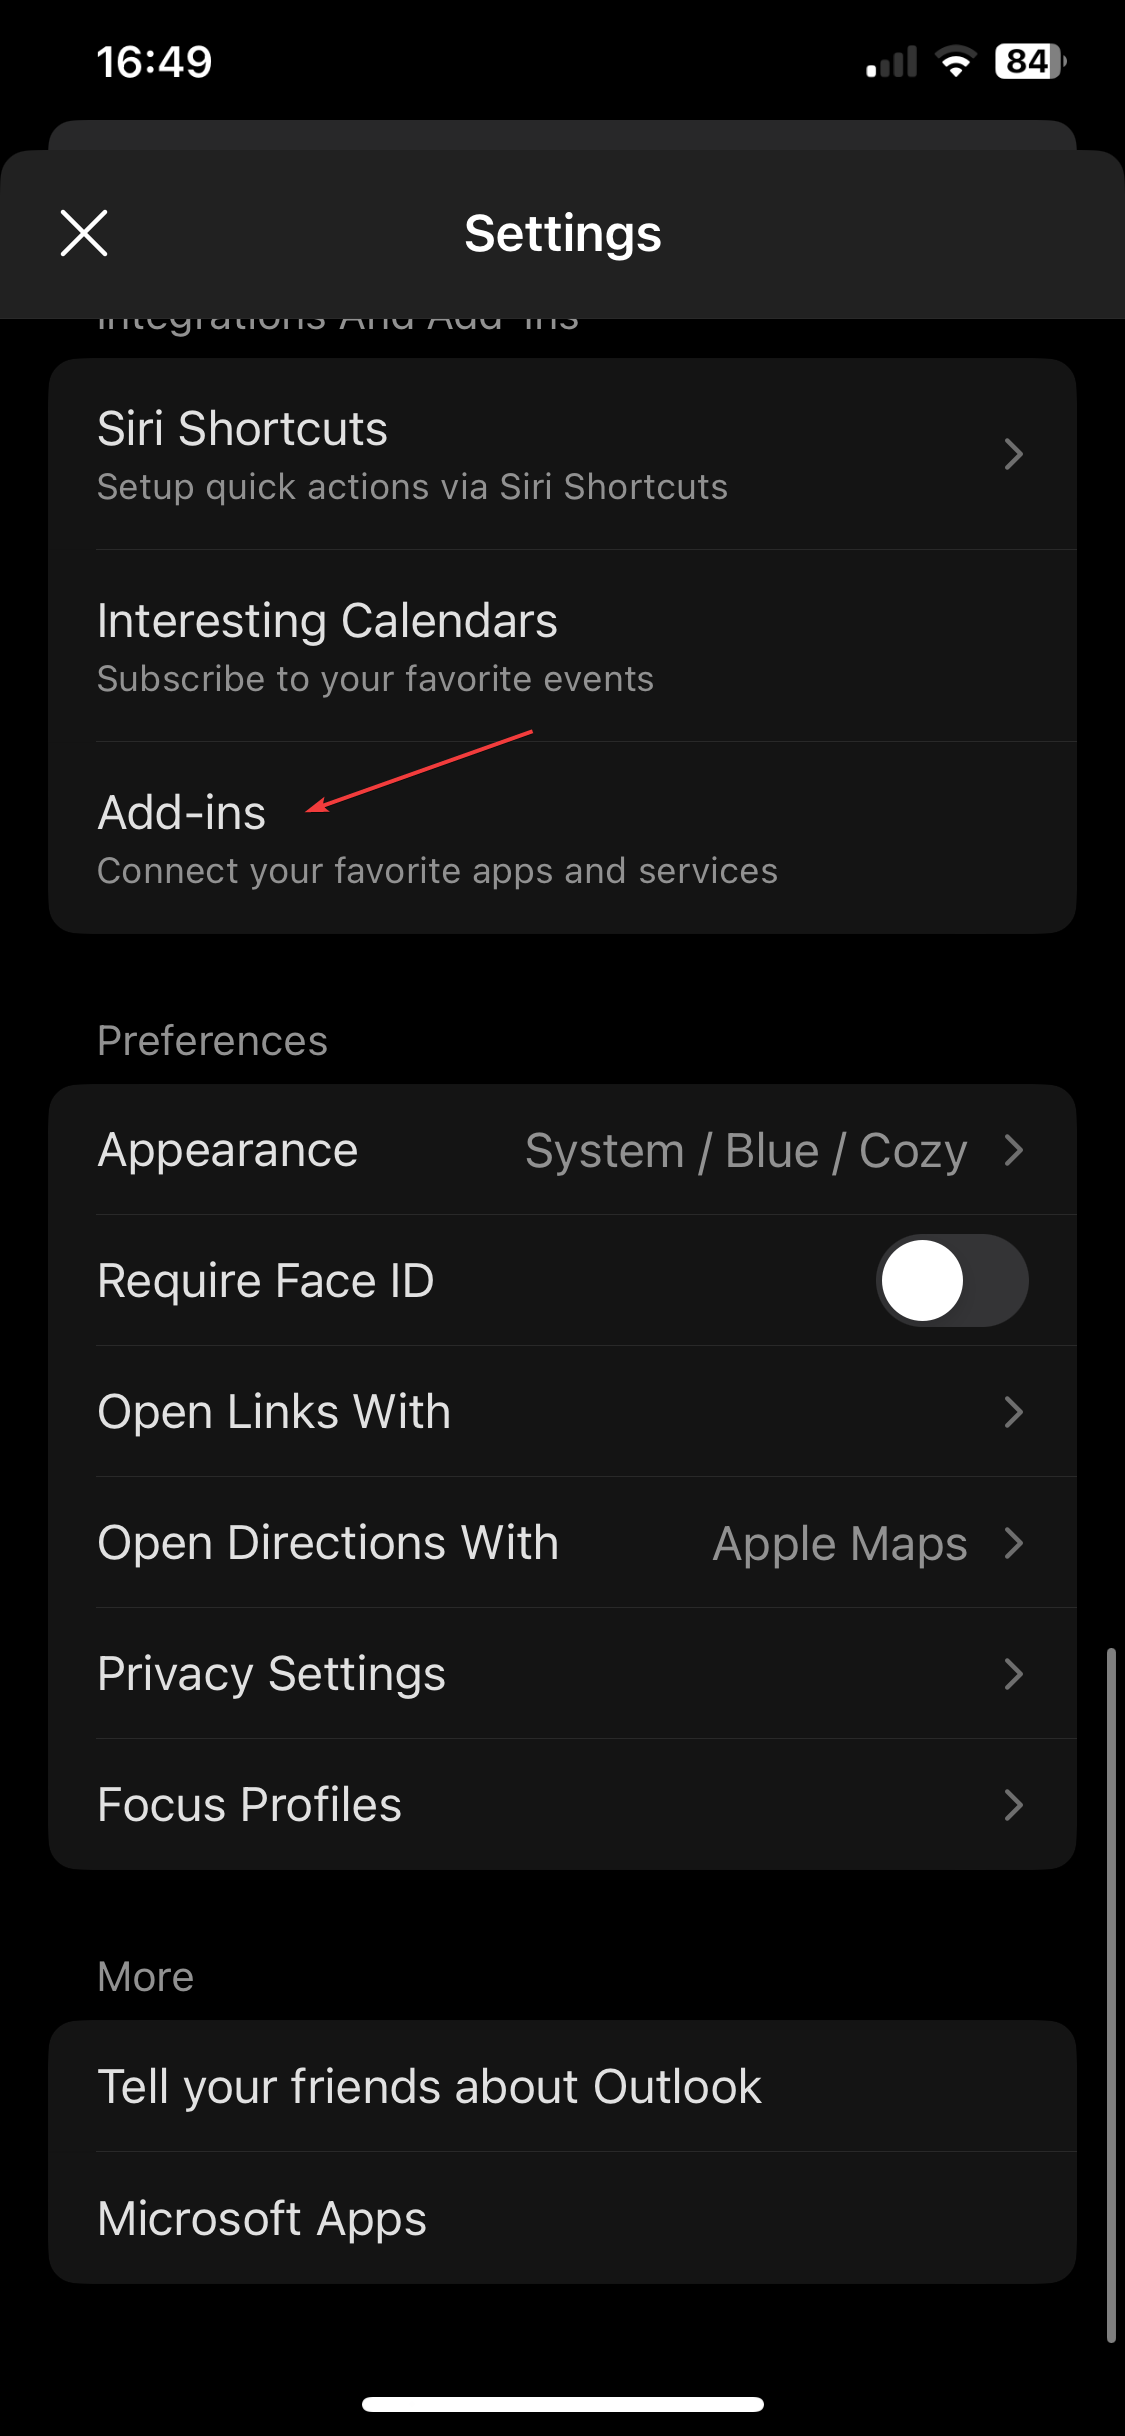
- Tap on your profile icon. Click Settings.
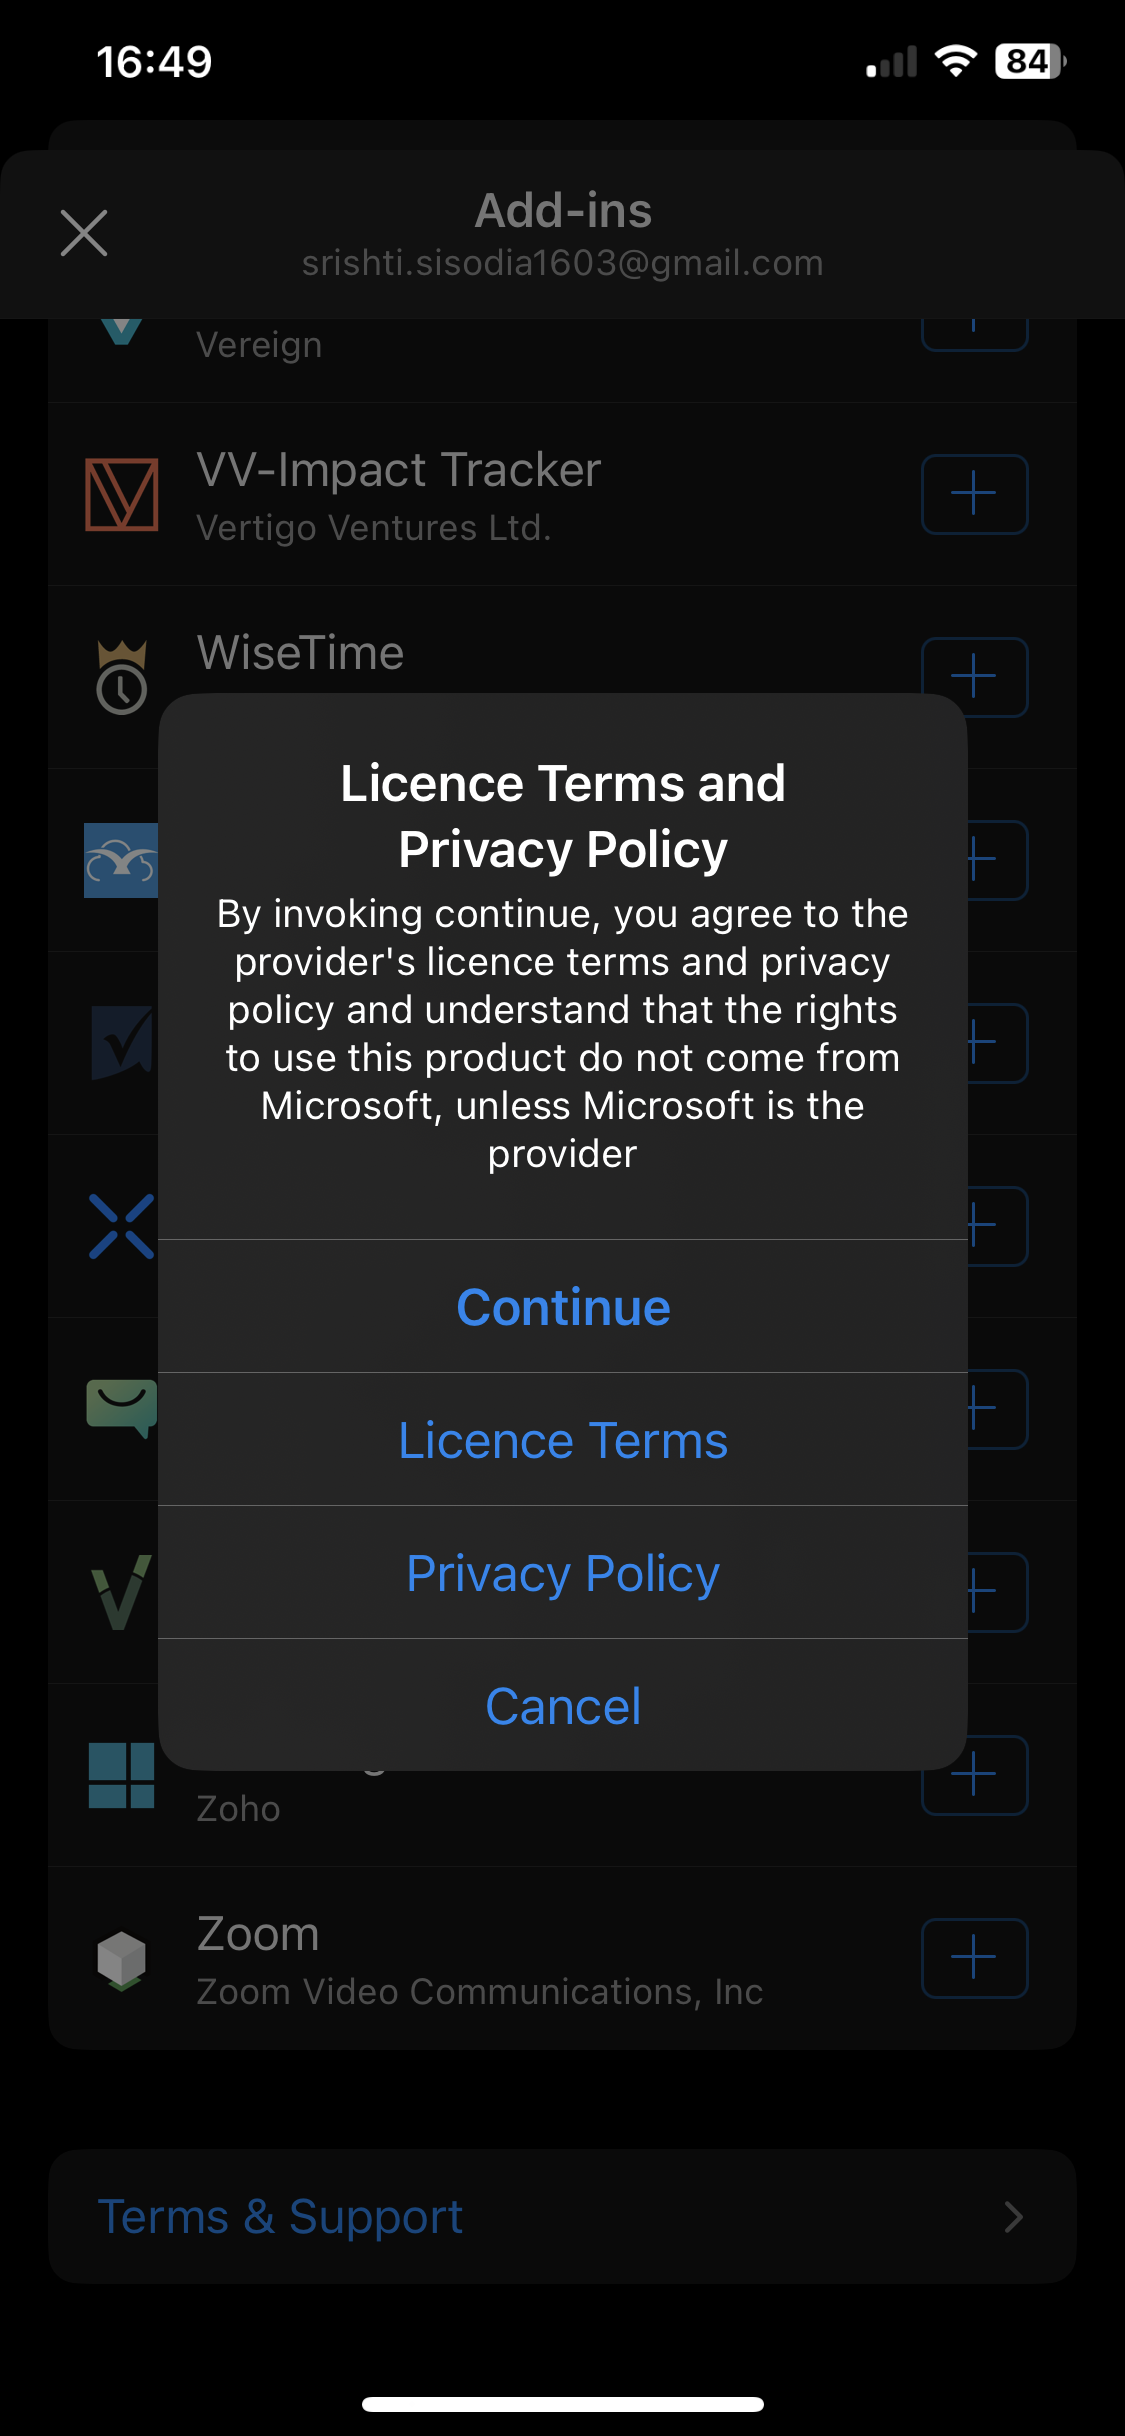
- Scroll and tap Add-ins.
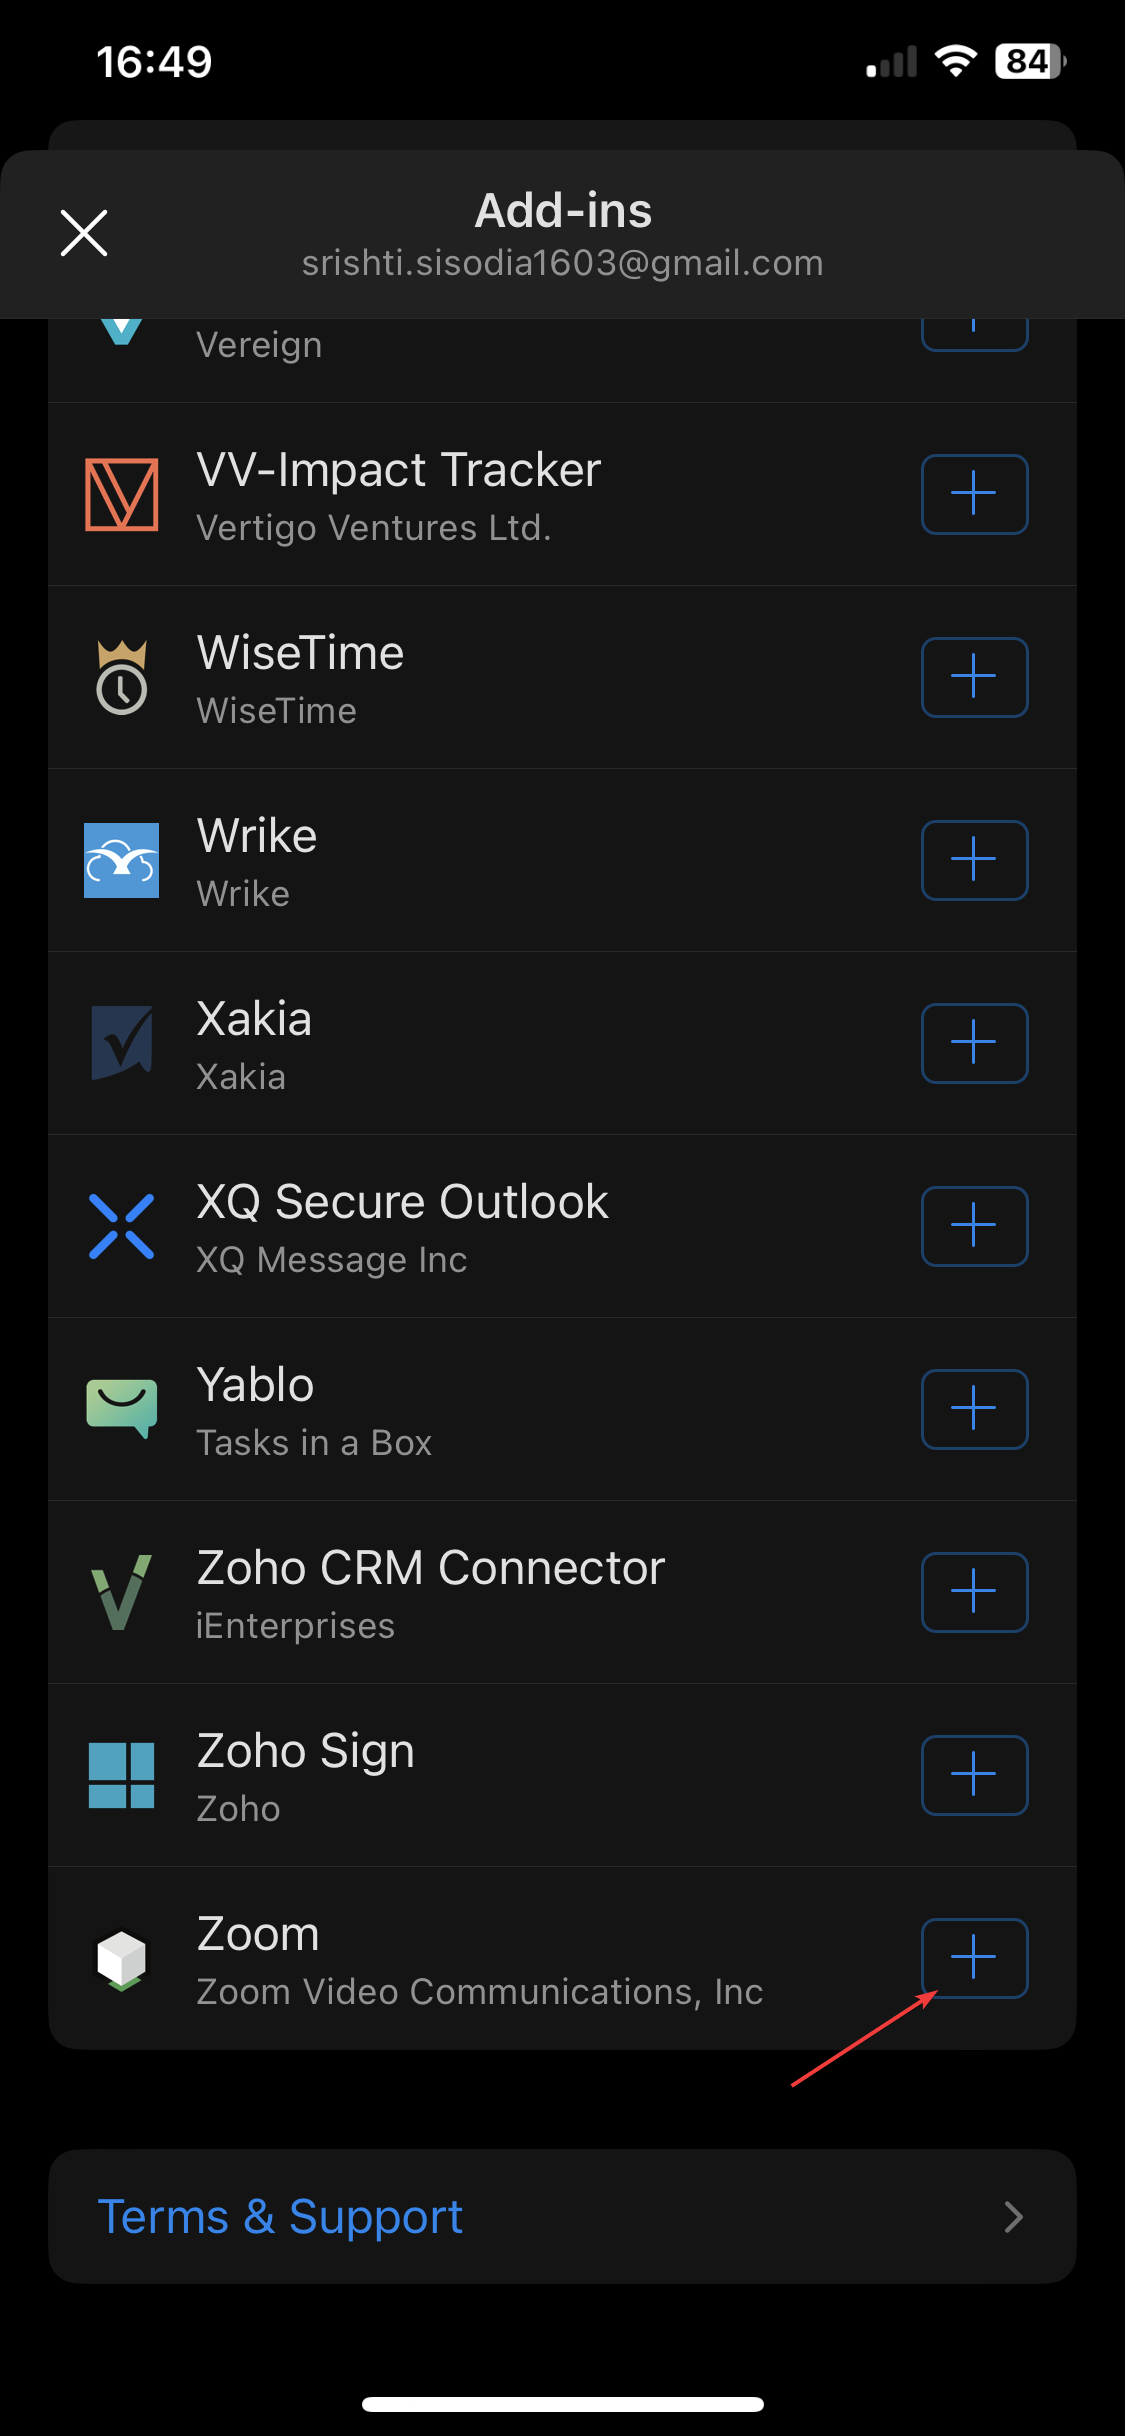
- Locate Zoom and tap the + icon to add it.
- Click Continue.
How can I use the Zoom plugin for Outlook to schedule meetings?
1. On the Outlook web app (OWA)
- Open Outlook on your preferred browser and log in.
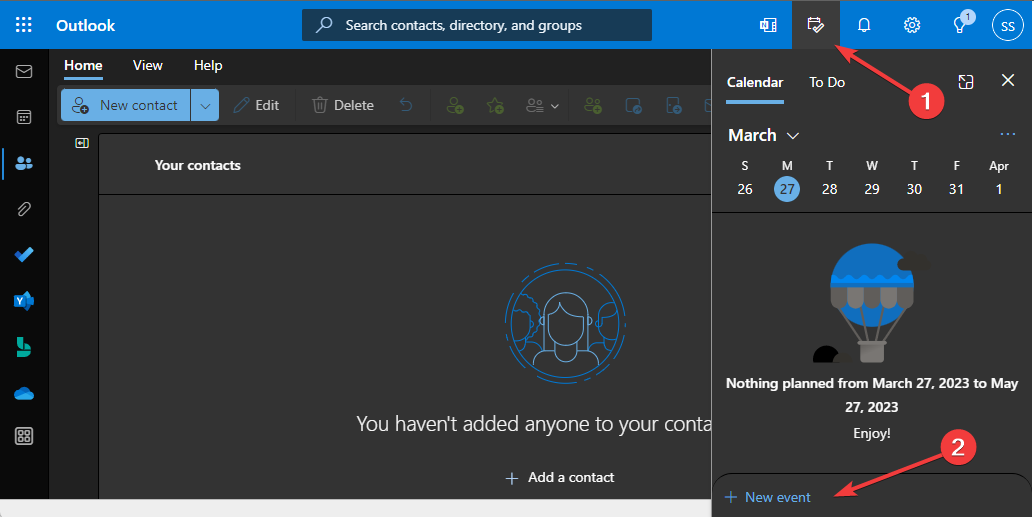
- Click the Calendar icon, then click New event.
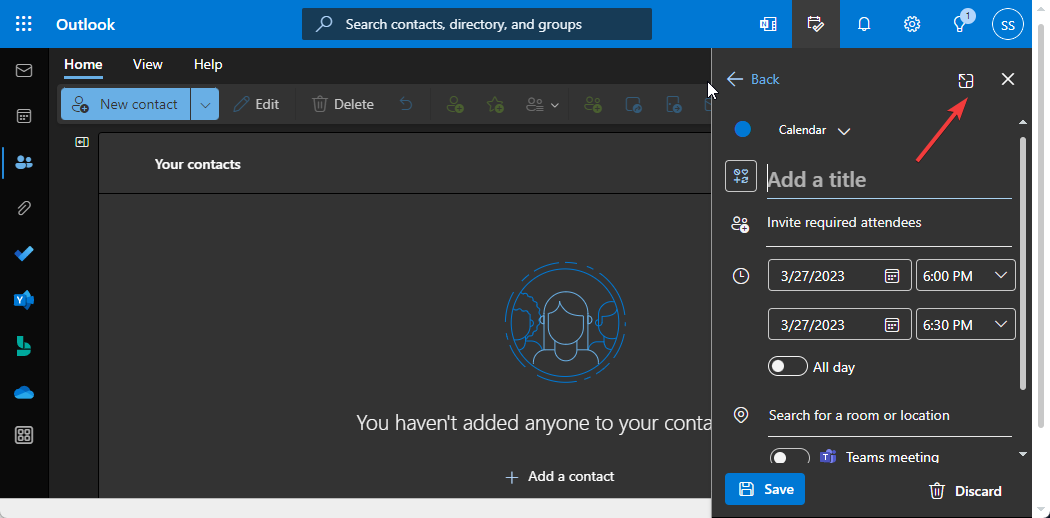
- Click Open in the new window icon.
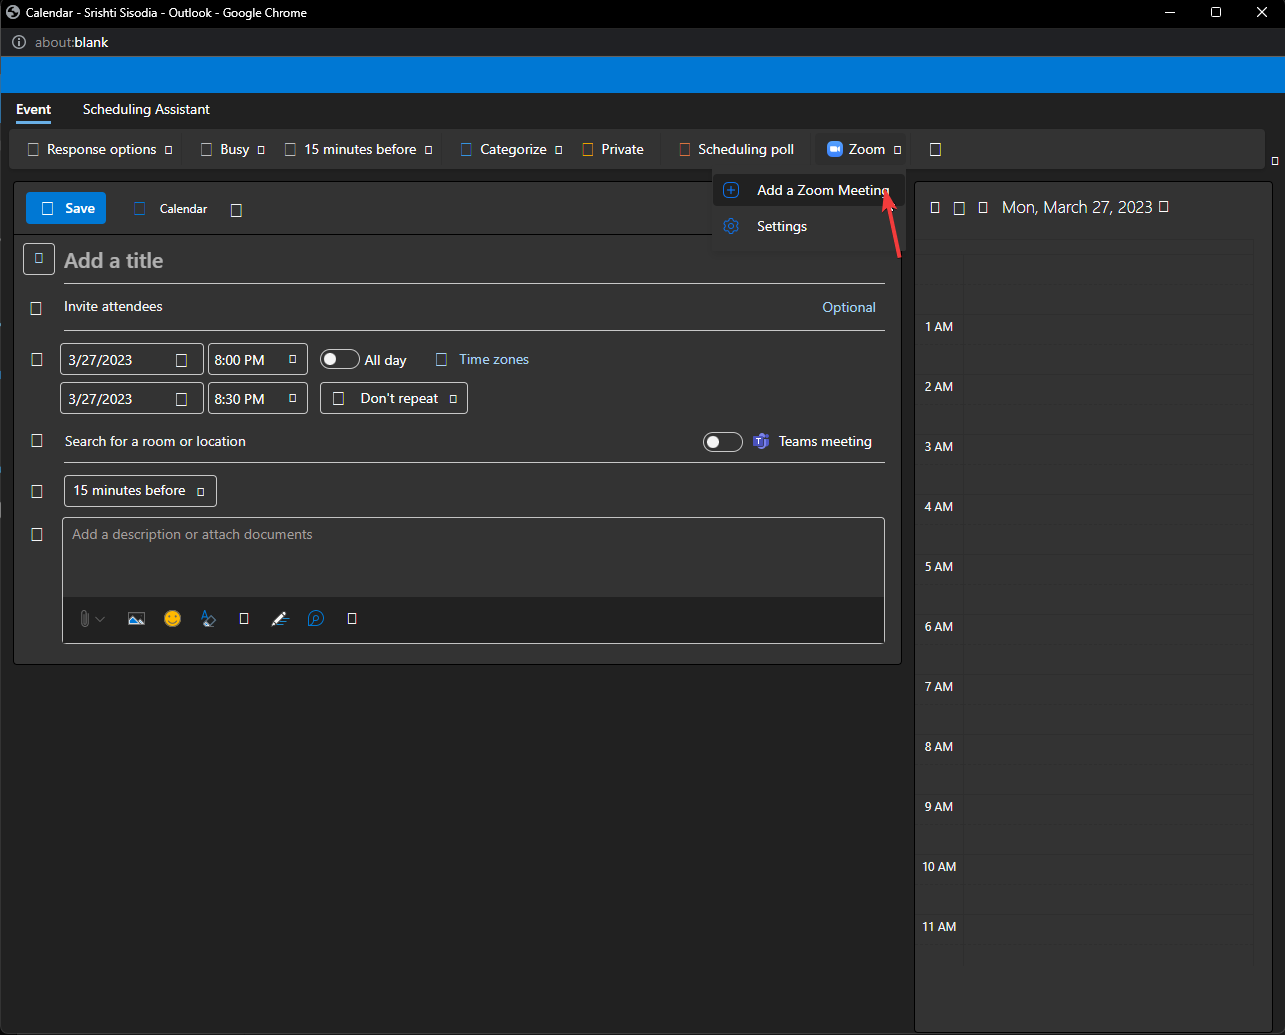
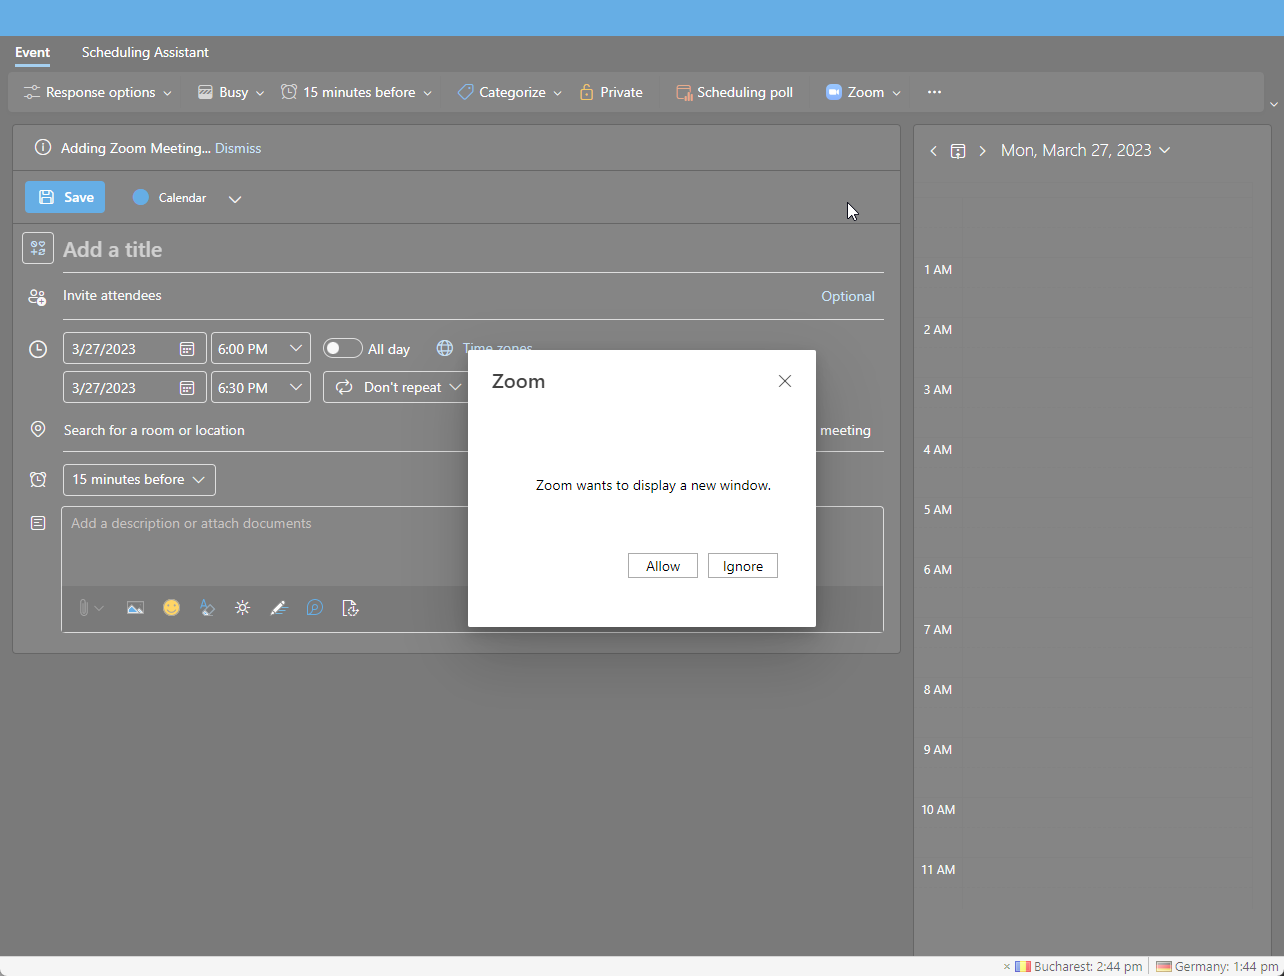
- Enter the meeting details and click Zoom. From the drop-down, select Add Zoom meeting.
- On the pop window, select Allow.
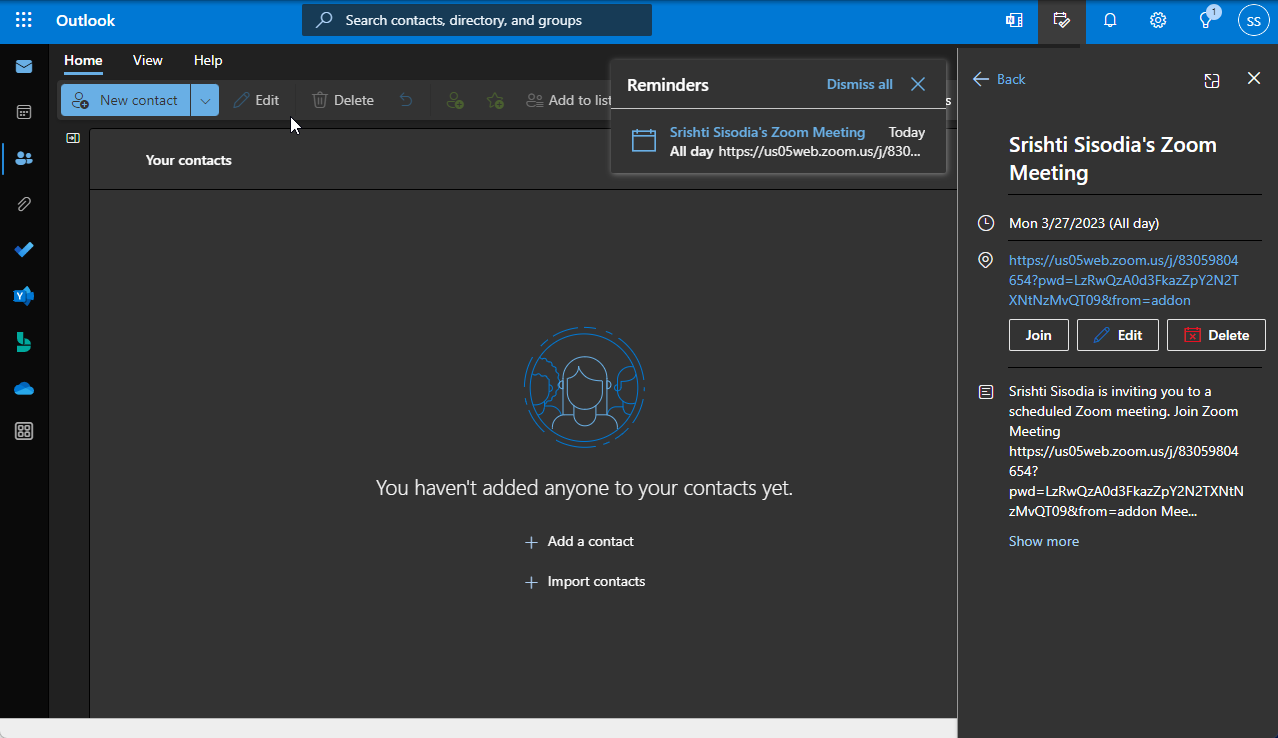
- Sign in to your Zoom account and click Save.
- To edit, join or delete the meeting, click Calendar event, select the meeting, and choose an appropriate option.
2. On the Outlook desktop app
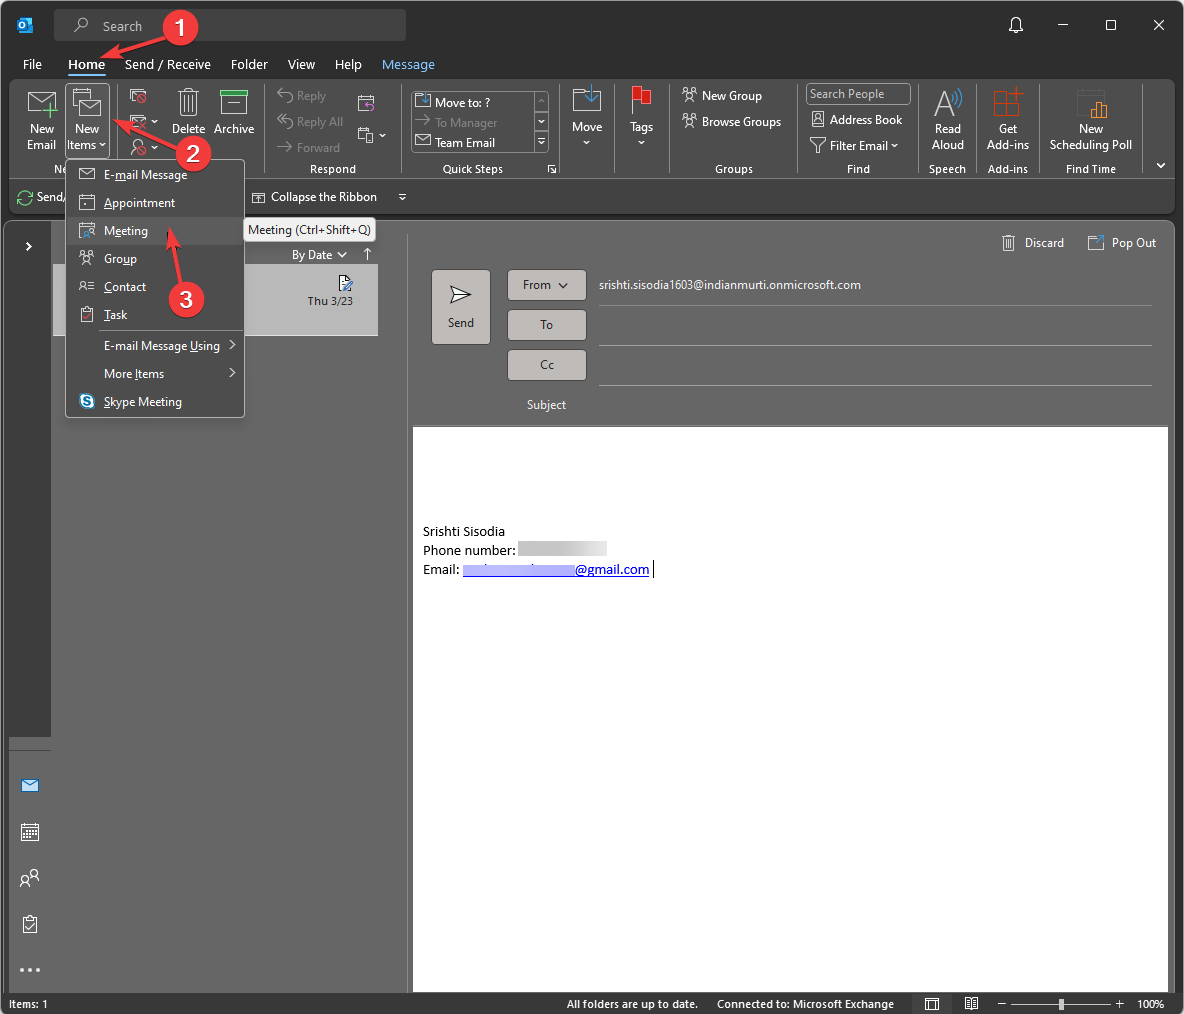
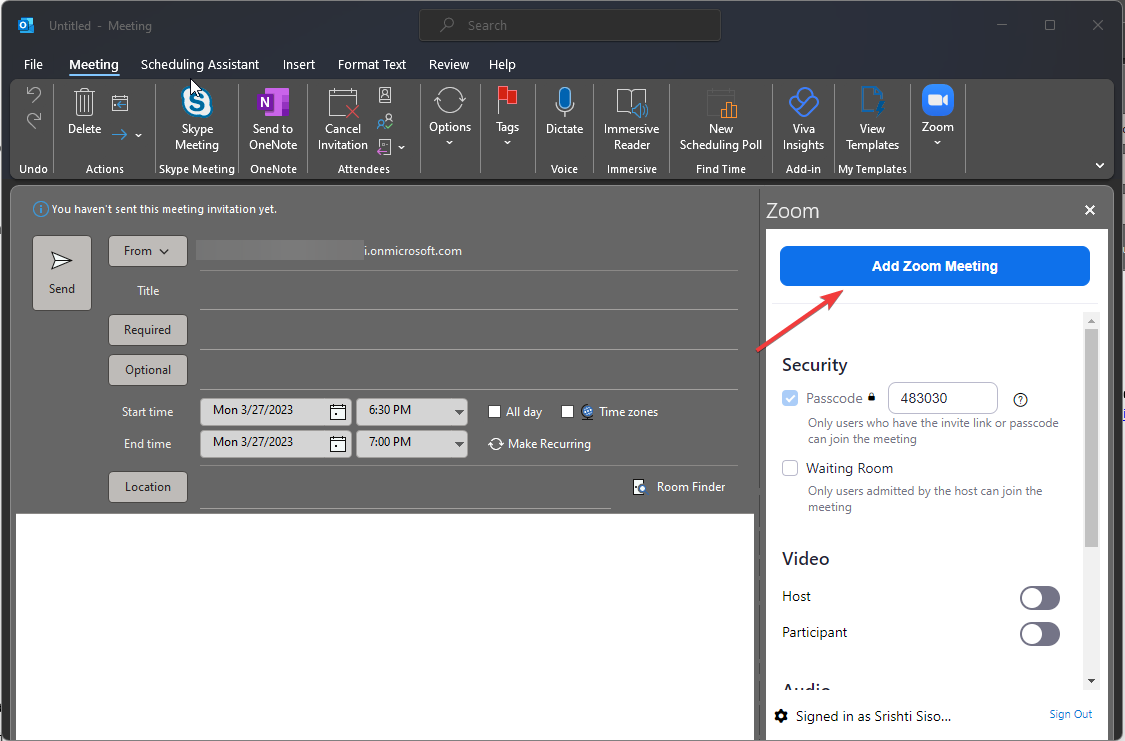
- Launch the Outlook desktop app. Go to the Home tab, click New items, then select Meeting.
- Enter details like title, timings, and attendees’ email addresses.
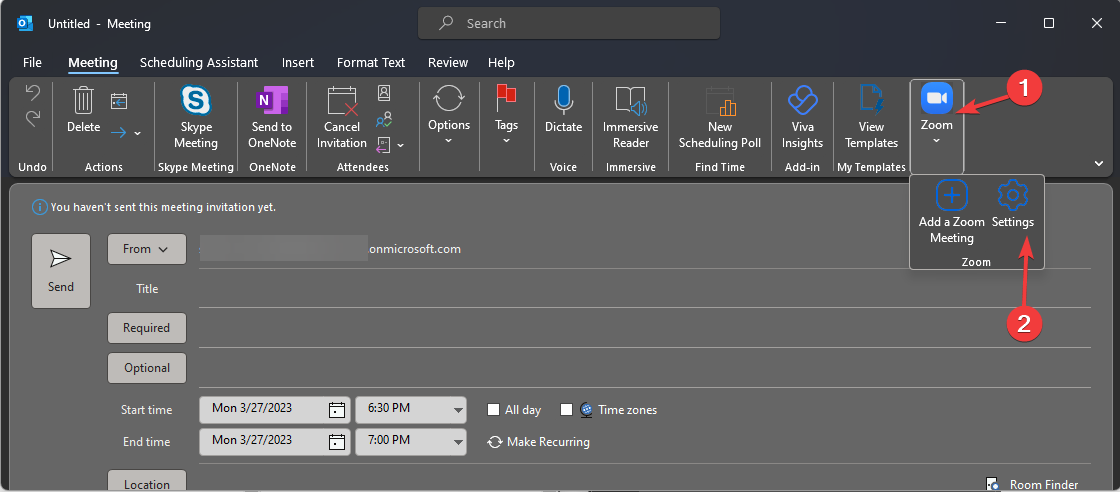
- Go to Zoom and click Settings.
- You will be prompted to sign in; once done, click Add Zoom Meeting.
So, this is how you can install the Zoom plugin for Outlook on your web, desktop, and mobile apps. Now scheduling and joining a meeting on Zoom will become quick and hassle-free. Try it and tell us about your experience in the comments section below.
You can read this if you are experiencing connection issues while using Zoom.



User forum
0 messages