0XA00F425C Camera App Error: 6 Ways to Fix It
First, restart the PC and the Camera app
4 min. read
Updated on
Read our disclosure page to find out how can you help Windows Report sustain the editorial team. Read more
Key notes
- The 0xa00f425c camera app error could occur due to outdated camera driver, software conflicts, or corrupted system files.
- To fix it, you can restart your camera app or computer, update the camera driver or run the troubleshooter.
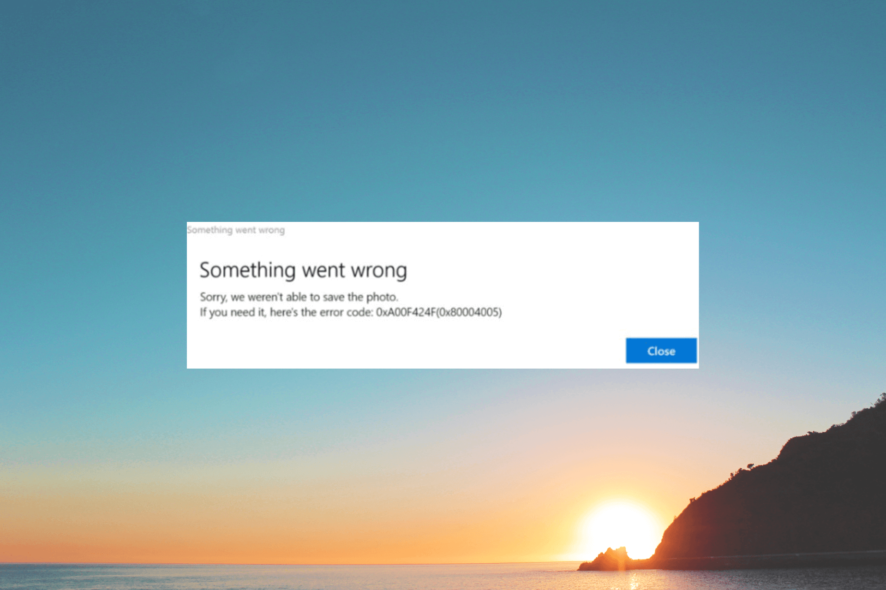
Whether you’re experiencing issues with your webcam, encountering error messages, or facing camera app crashes with the error code 0xA00F425C, this guide can help!
We will discuss the step-by-step instructions to troubleshoot and resolve the error, ensuring your Camera app functions smoothly.
What causes the Camera app error 0xa00f425c?
There could be various reasons for this Camera app error on your Windows computer; some of the common ones are mentioned here:
- Outdated or incompatible camera drivers – If the drivers responsible for your webcam are obsolete, missing, or incompatible with your computer, it can lead to this error. Update the driver.
- Software conflicts – Conflicts between the Camera app & other software on your PC may interfere with the proper functioning of the camera app, leading to this issue. Uninstall unwanted apps.
- Corrupted system files – System file corruption can disrupt the regular operation of the Camera app, leading to errors. Try repairing the files using an SFC scan.
- Privacy settings – If the Camera app is not granted the necessary permissions or if the privacy settings are misconfigured, it can lead to an error.
Now that you know the causes of the issue, let us dive into the solutions to fix it.
How can I fix the Camera app error 0xa00f425c?
Before engaging in advanced troubleshooting steps, you should consider performing the following checks:
- Try restarting the computer.
- Restart your Camera app.
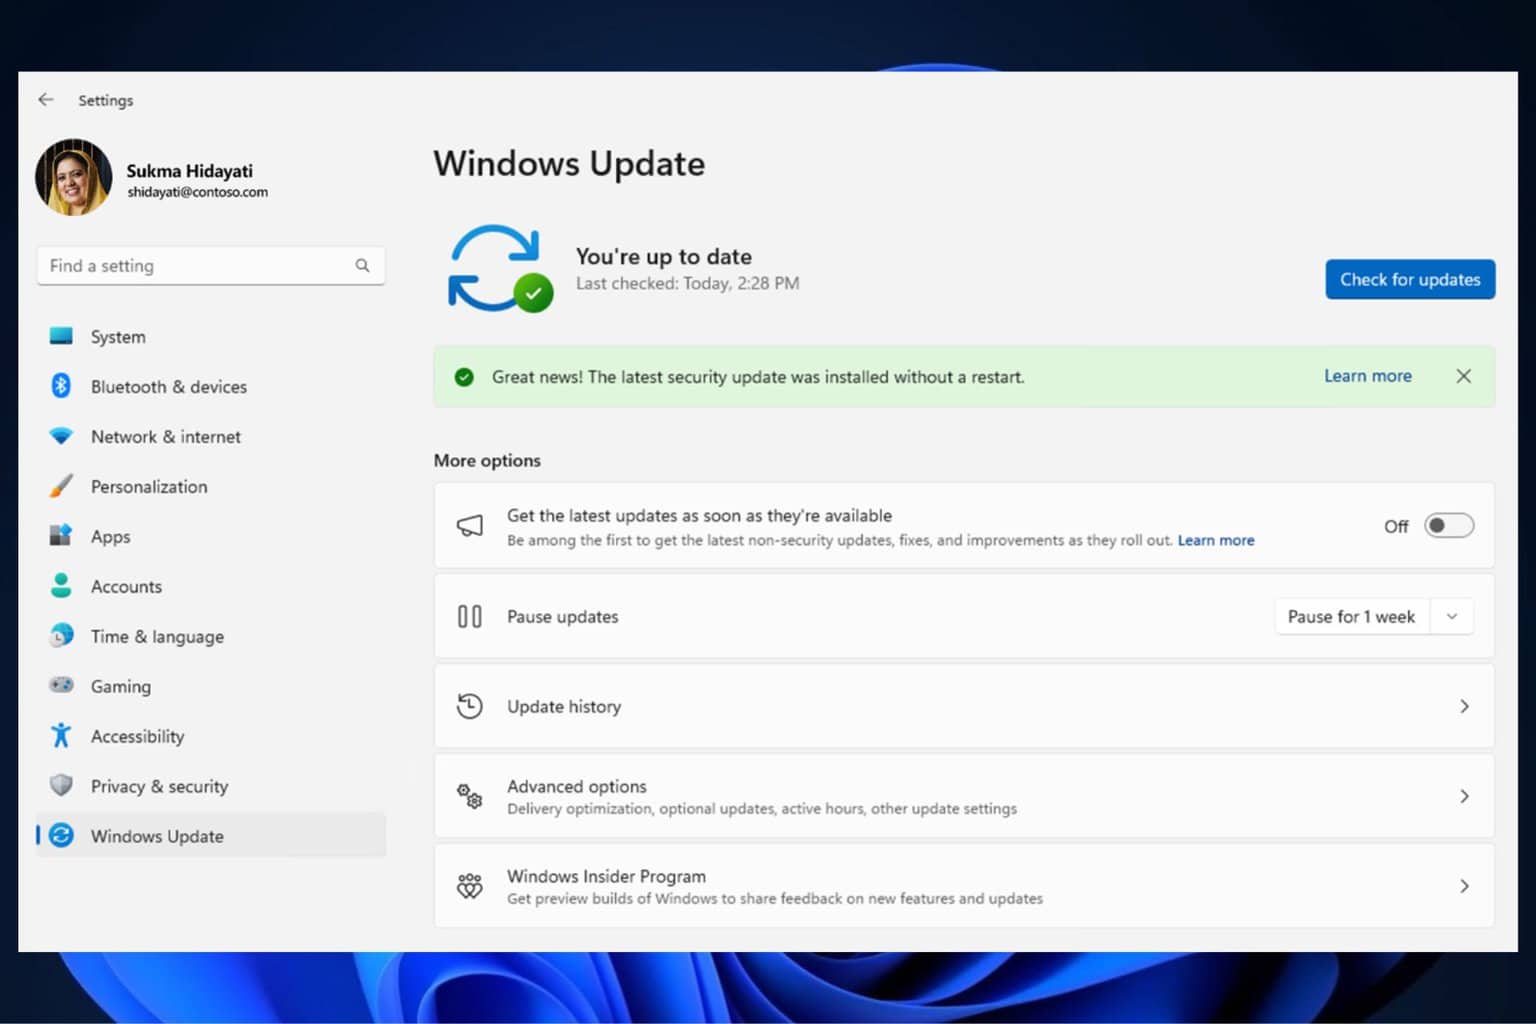
- Ensure your Windows is up to date.
Once you have checked, let us move to the detailed methods to eliminate the issue.
1. Run the Camera troubleshooter
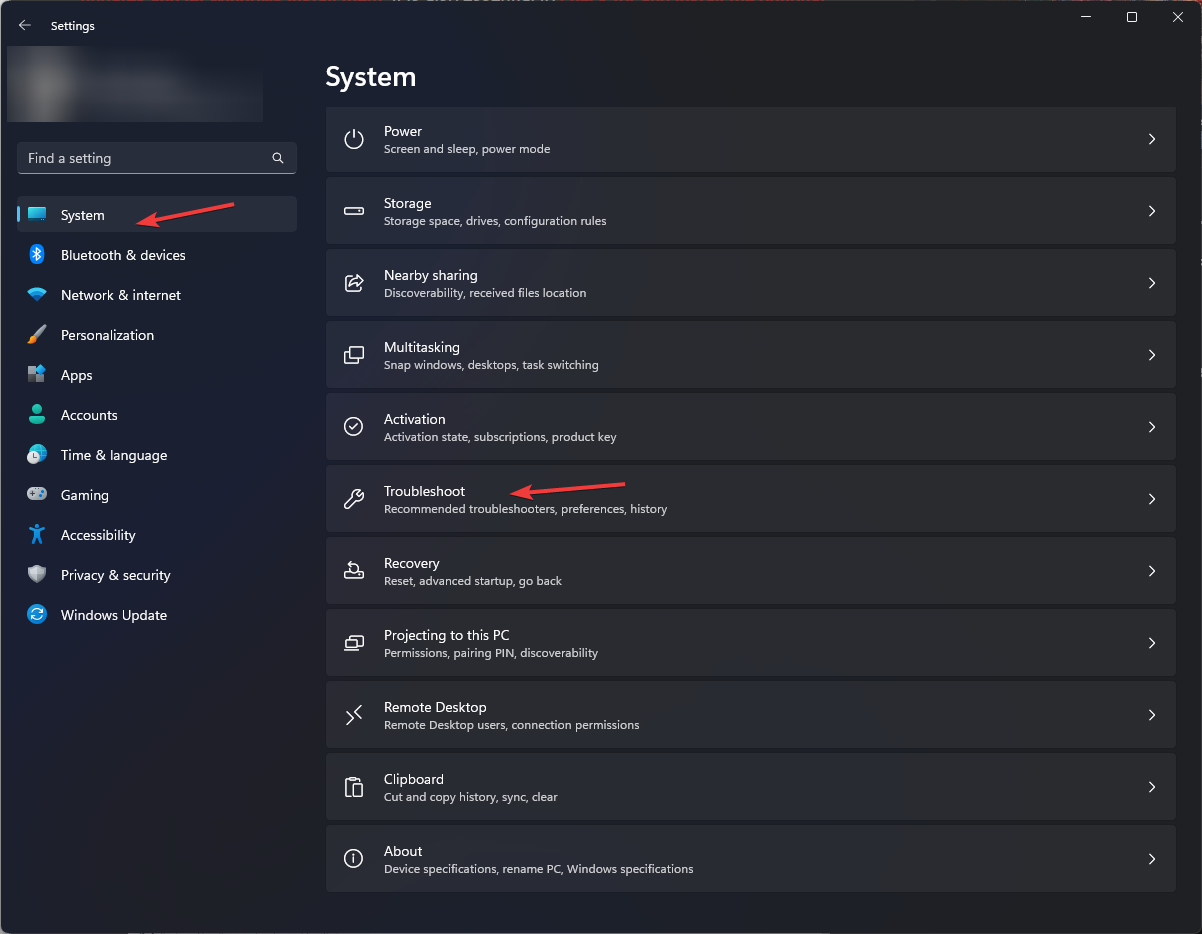
- Press Windows + I to open the Settings app.
- Go to System, then click Troubleshoot.
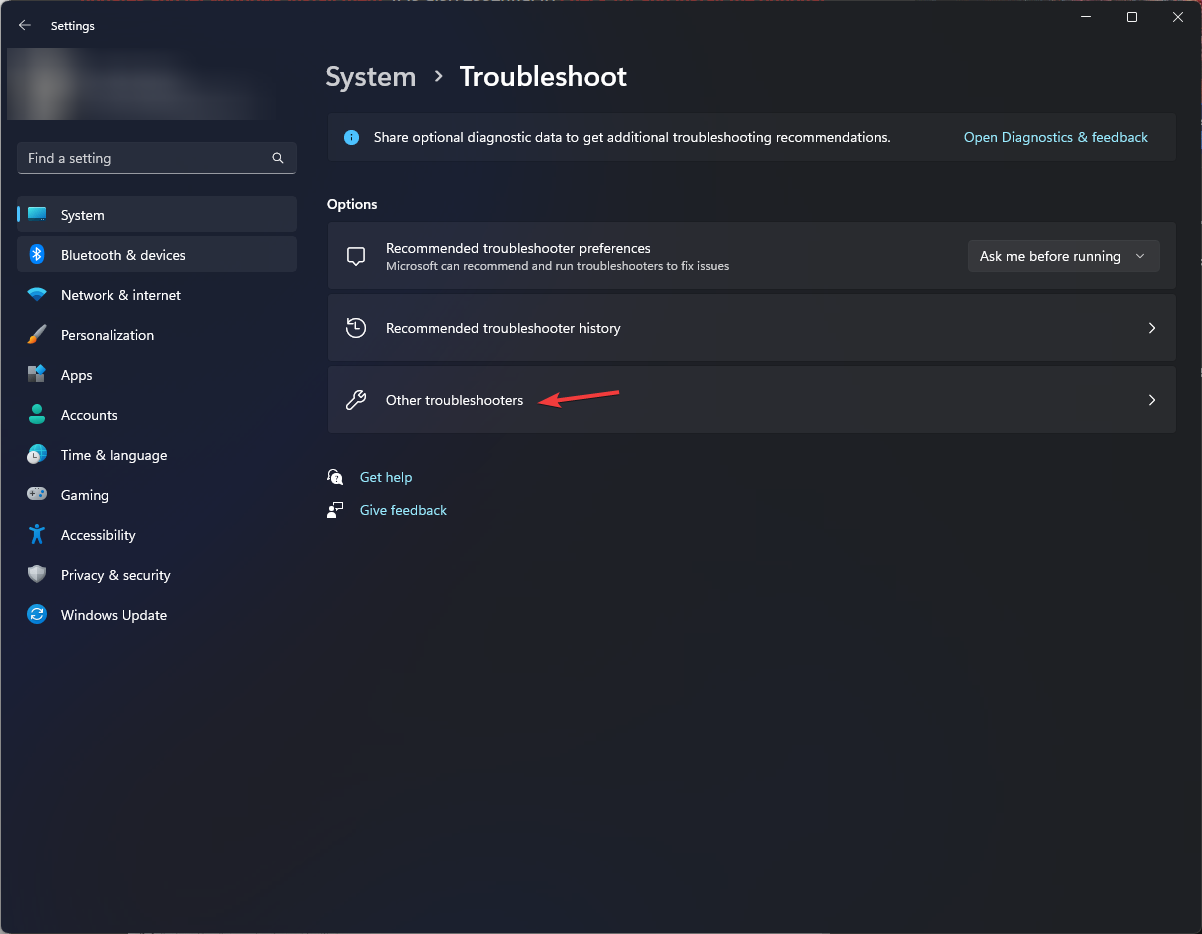
- Click Other troubleshooters.
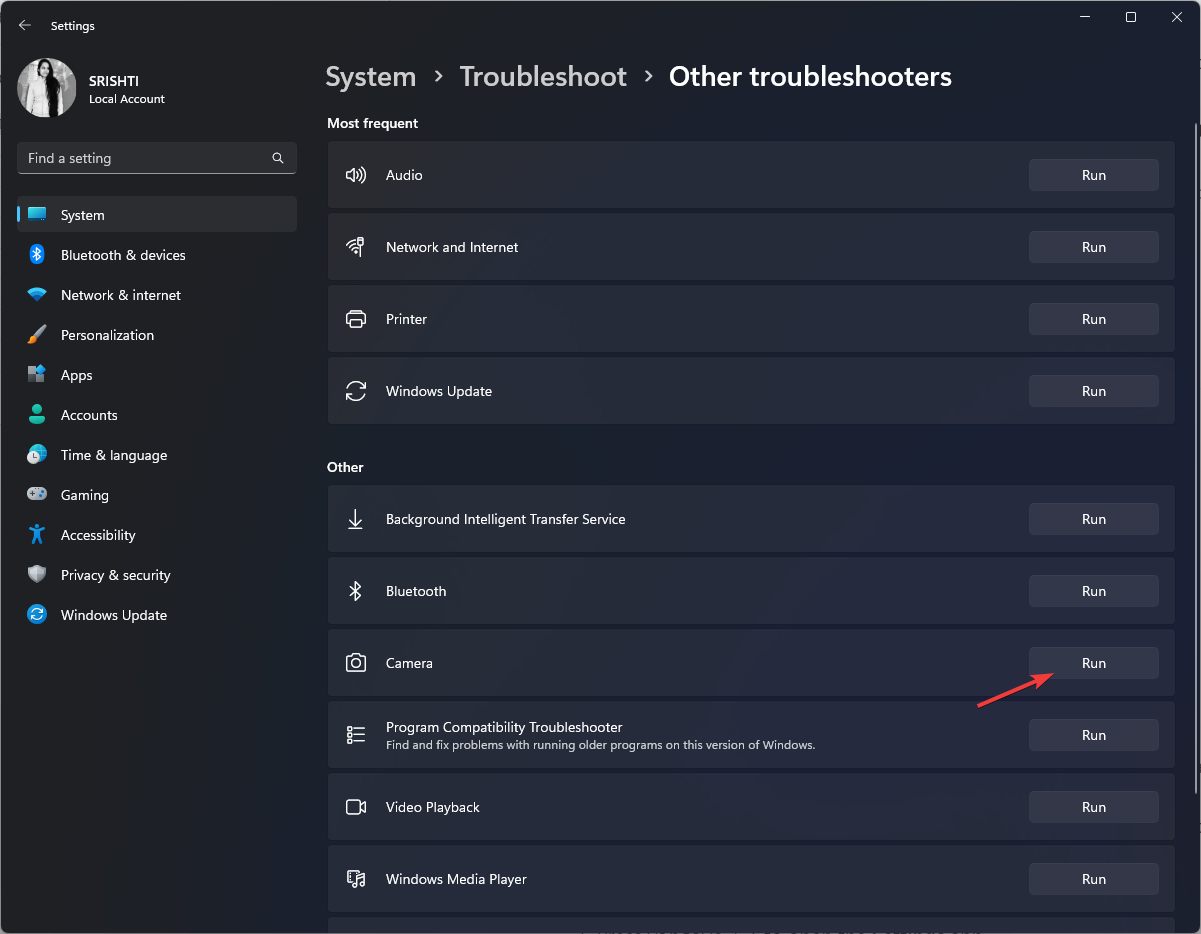
- Under Other, locate Camera and click Run.
- Follow the onscreen instructions to complete the process.
2. Recreate the Camera Roll folder (if missing)
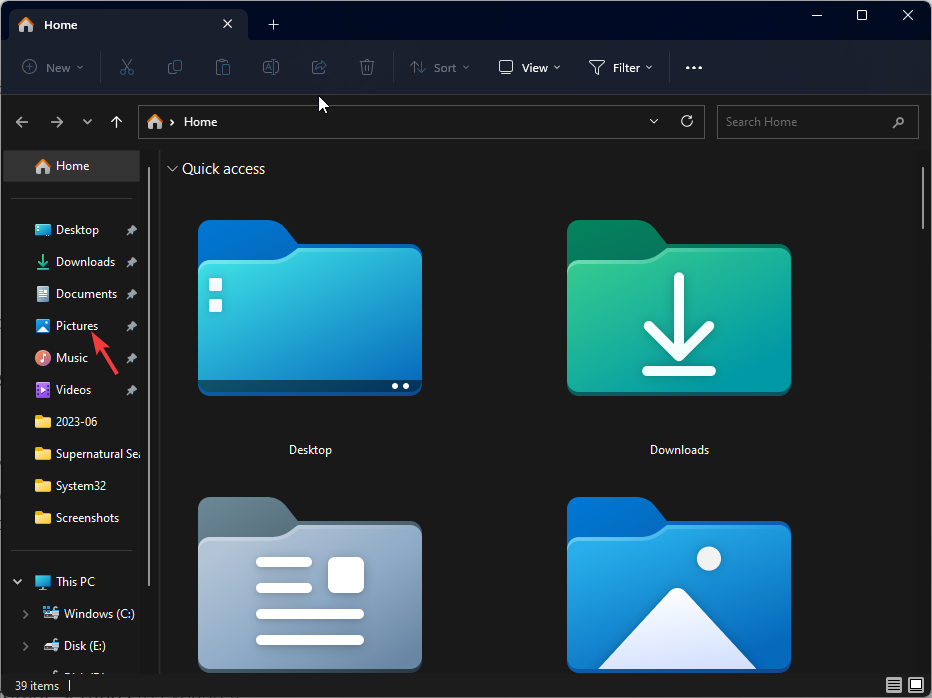
- Press Windows + E to open File Explorer.
- Locate the Pictures folder from the Quick Access column in the left pane.
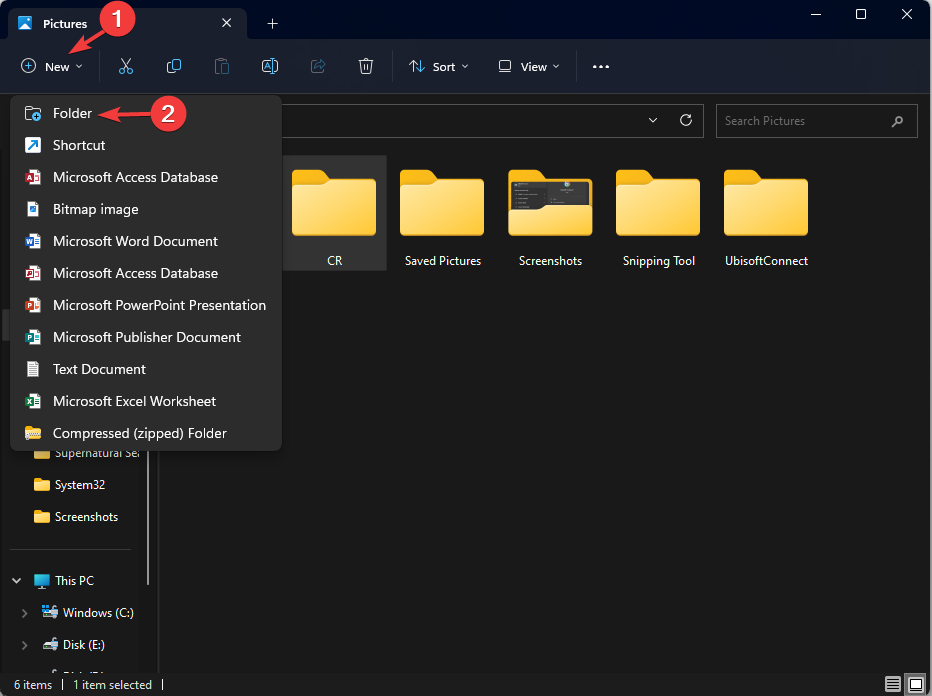
- Select New, then choose Folder to create a new folder.
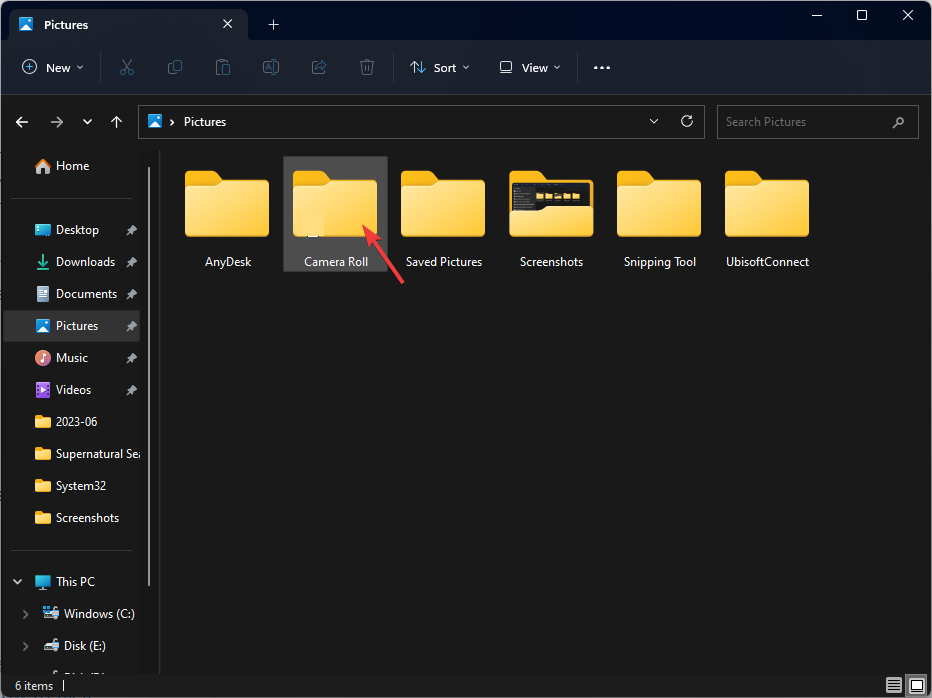
- Name the folder Camera Roll and launch the camera app to check if the issue is resolved.
3. Update the webcam driver
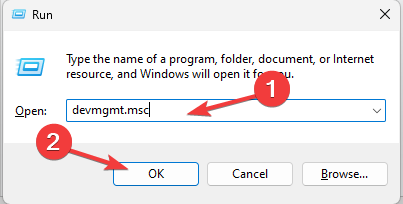
- Press Windows + R to open the Run window.
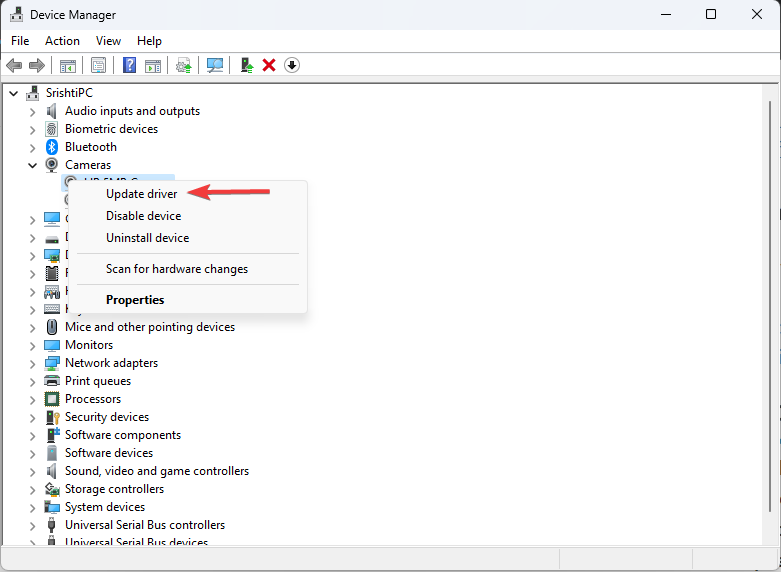
- Type devmgmt.msc and click OK to open the Device Manager.
- Locate and click Cameras to expand.
- Right-click the camera driver and select Update driver.
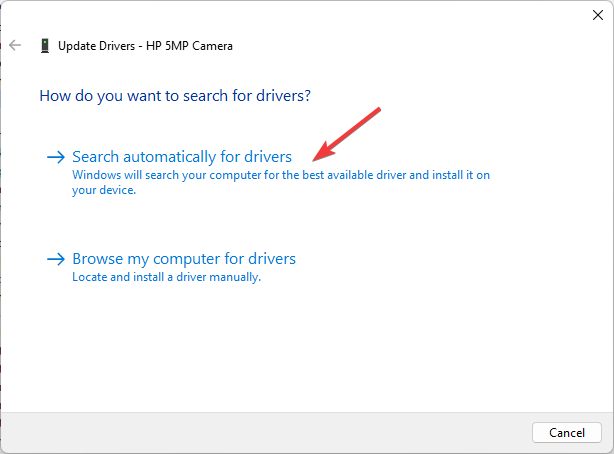
- Click Search automatically for drivers.
- Follow the onscreen instructions to complete the process. Restart your computer to let the changes take effect.
- Download and install the Outbyte Driver Updater app.
- Launch the software and wait for the app to detect all incompatible drivers.
- Now, it will show you a list of all outdated drivers to select the ones to Update or Ignore.
- Click on Update & Apply Selected to download and install the latest versions.
- Restart your PC to ensure the applied changes.

Outbyte Driver Updater
Maintain your device healthy by letting OutByte Driver Updater find the latest driver options.4. Change the location to save media
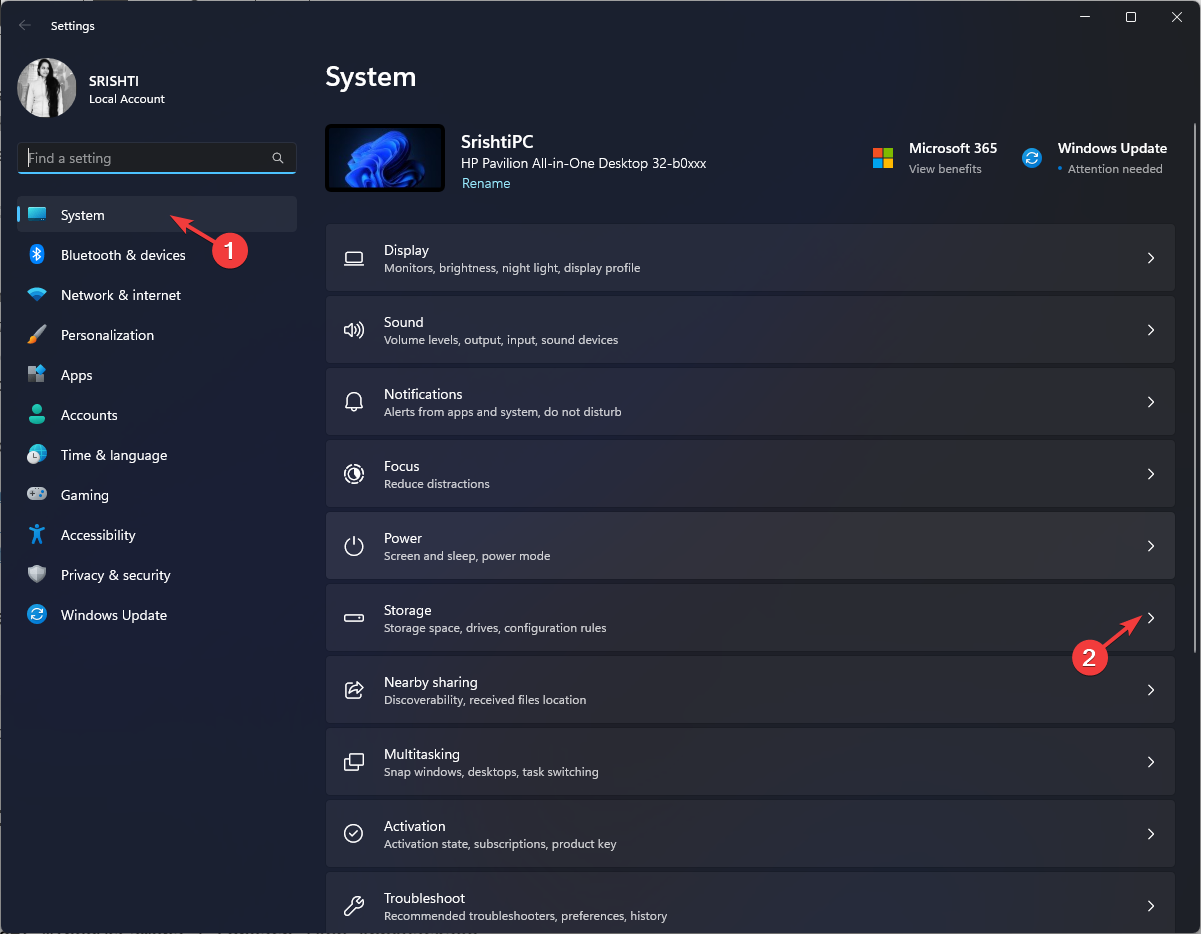
- Press Windows + I to open the Settings app.
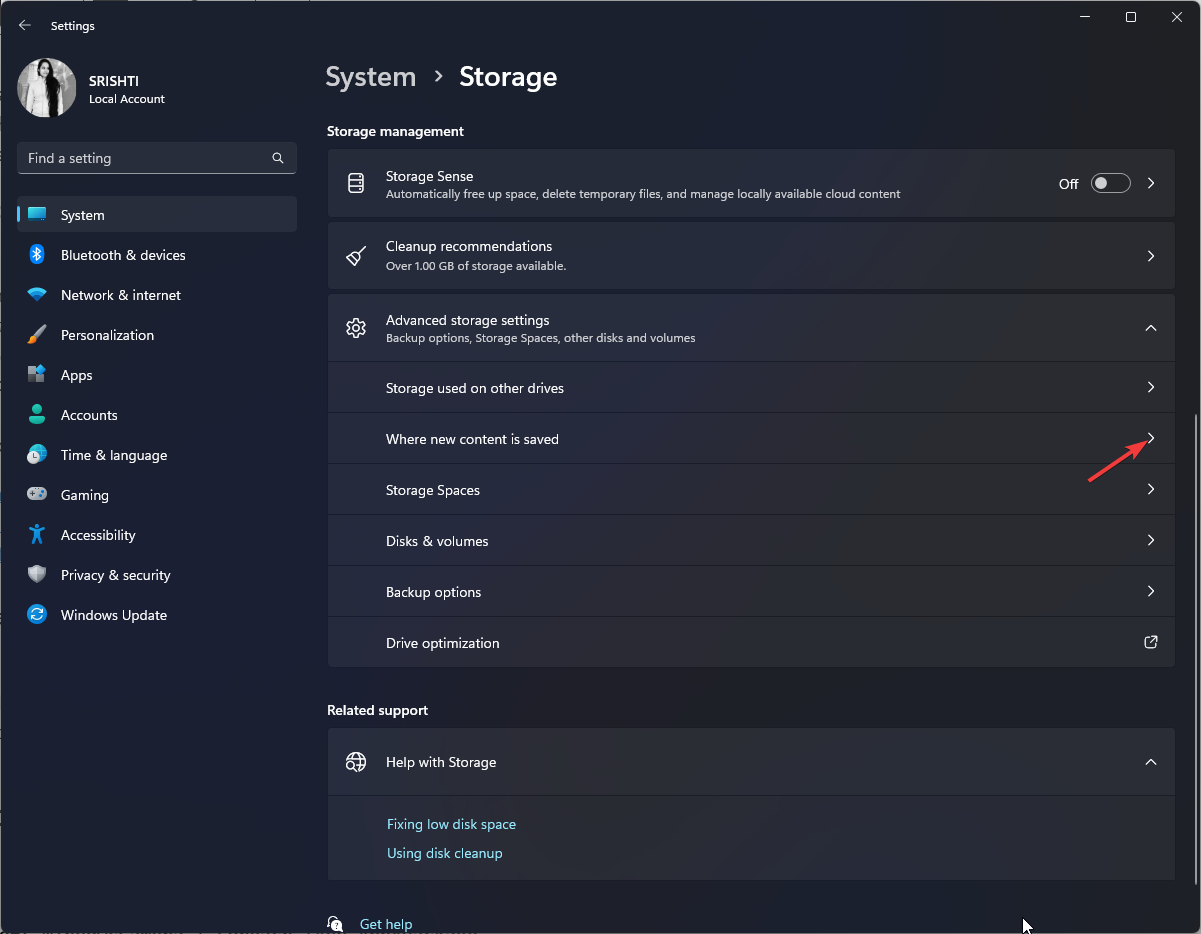
- Go to System, then click Storage.
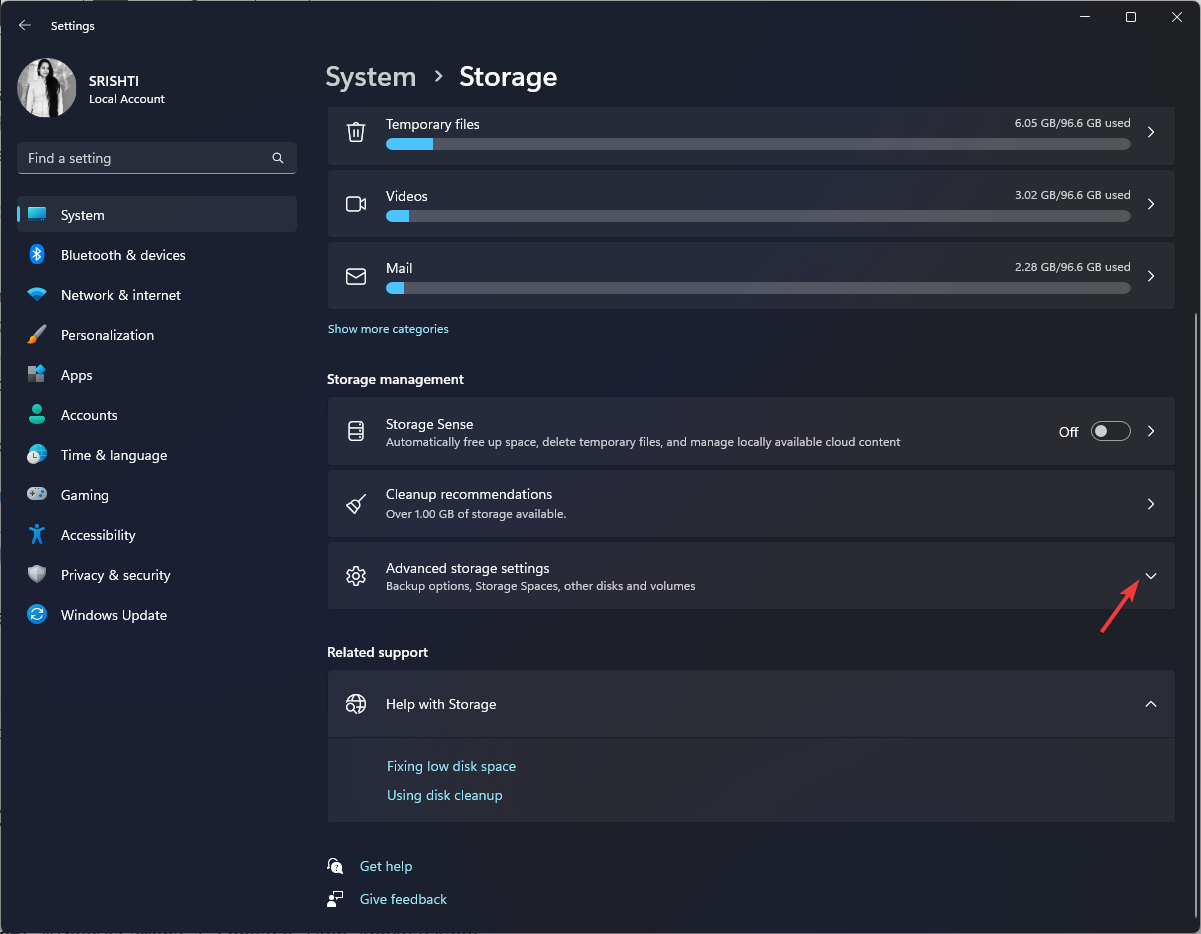
- Under Storage management, click Advanced storage settings to expand it.
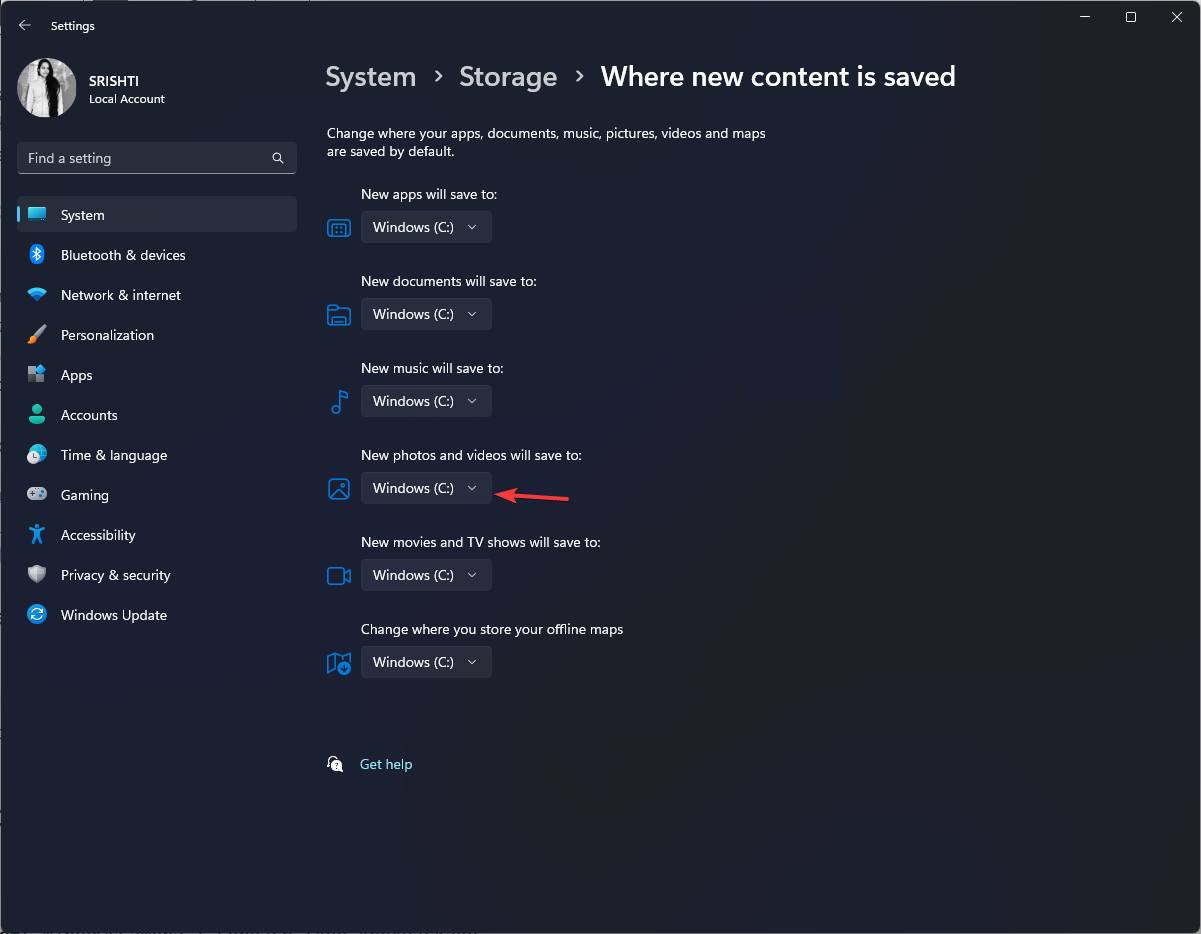
- Locate Where new content is saved.
- Look for New photos and videos will save to and choose System drive; in our case, it is C:\
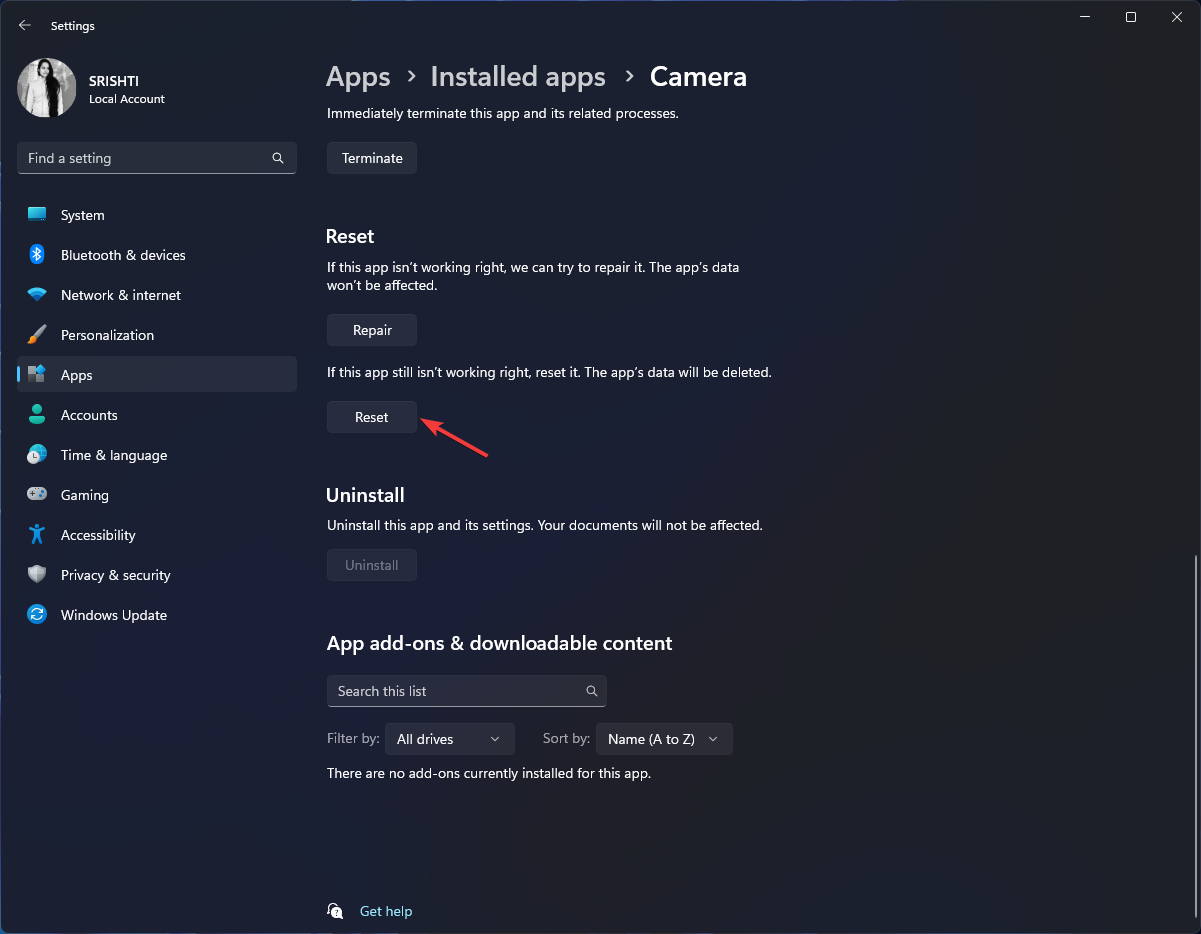
5. Reset the Camera app
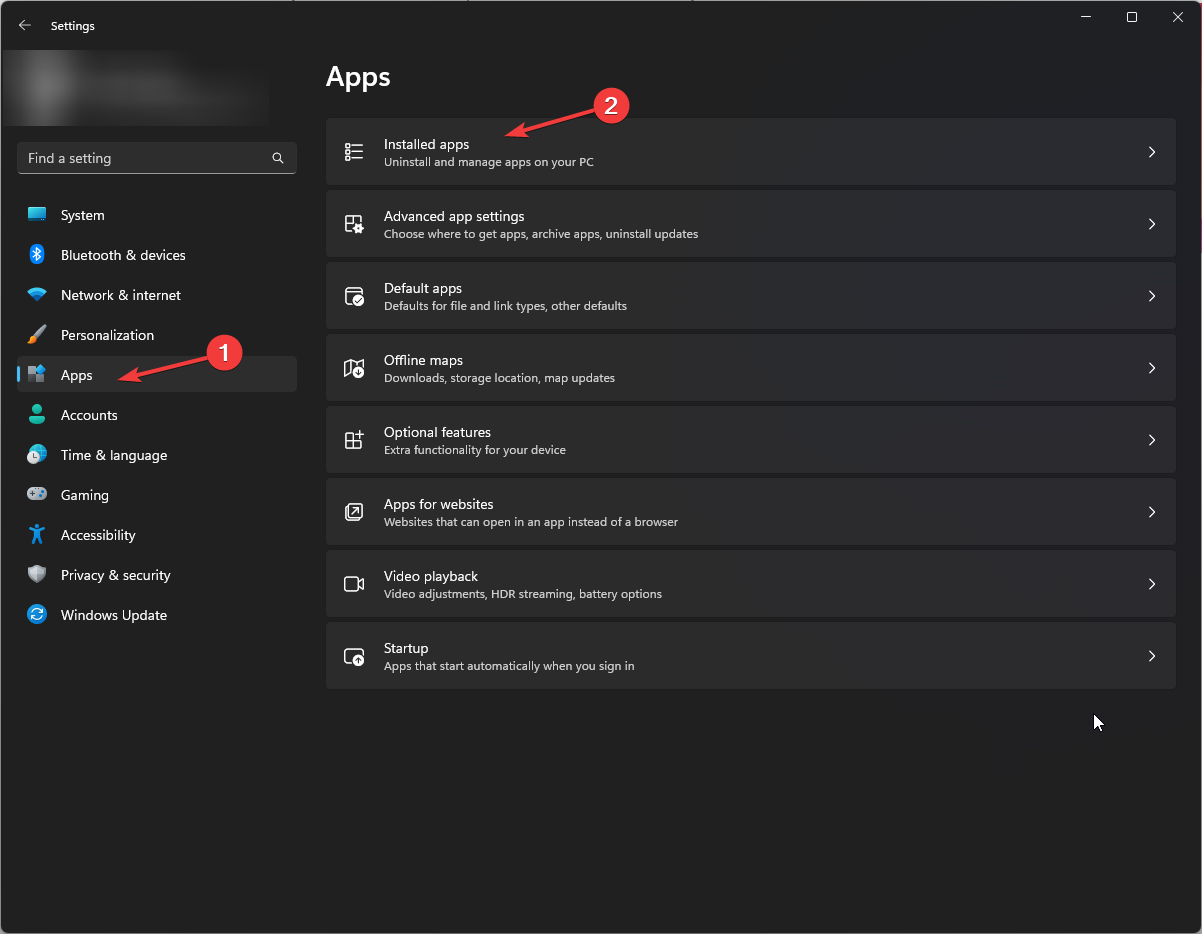
- Press Windows + I to open the Settings app.
- Go to Apps, then click Installed apps.
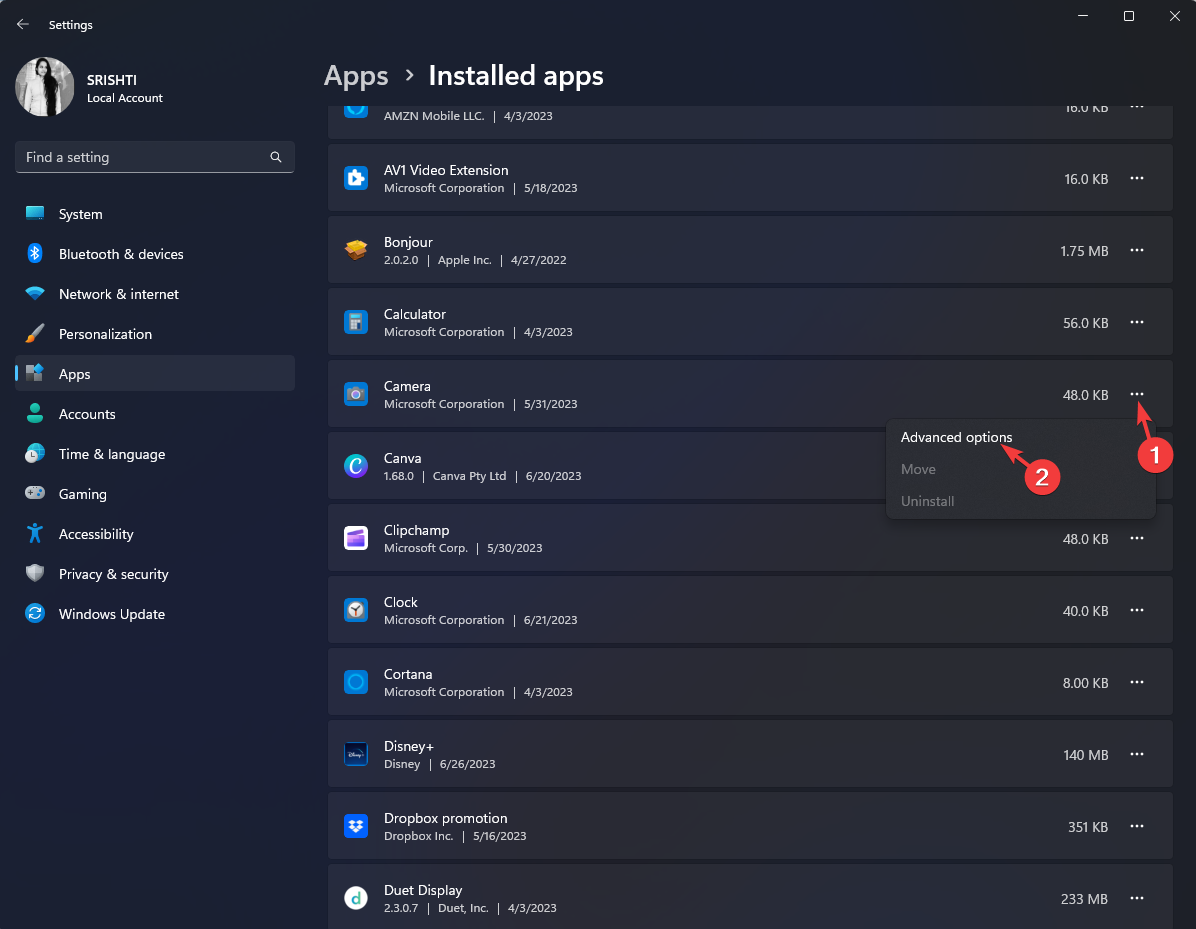
- Locate Camera, click three dots, and select Advanced options.
- Locate Reset and click the Reset button under it.
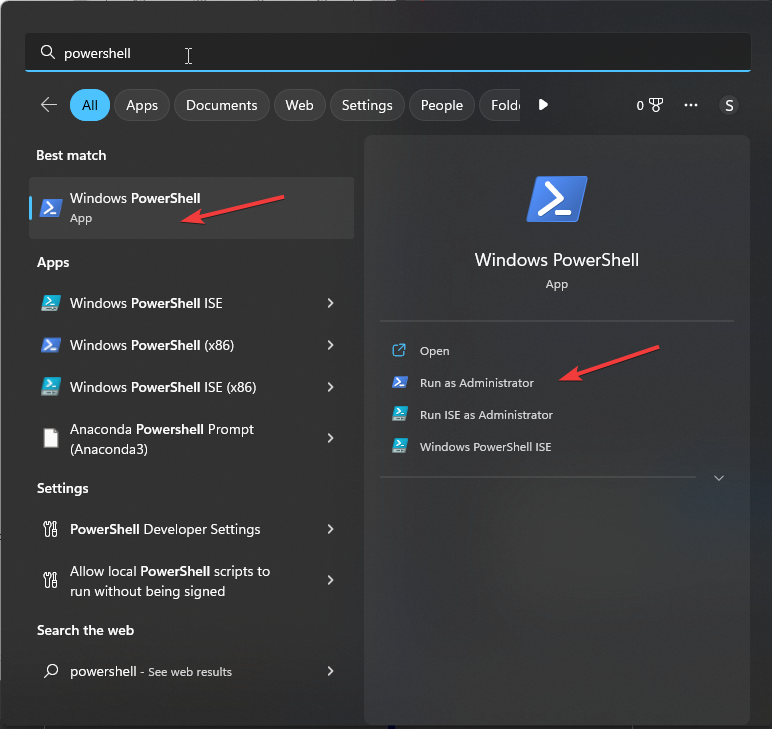
6. Re-register the Camera app
- Press the Windows key, type powershell, and click Run as administrator.
- Type the following command to re-register the camera app and hit Enter:
Get-AppxPackage -allusers Microsoft.WindowsCamera | Foreach {Add-AppxPackage -DisableDevelopmentMode -Register "$($_.InstallLocation)\AppXManifest.xml"} - Once executed, close the PowerShell window.
So, these are the multiple solutions available to help you fix this problem and regain the full functionality of your camera app.
If you face other camera-related issues, we recommend you check out the informative guide to find solutions.
Please feel free to give us any information, tips, and your experience with the subject in the comments section below.




User forum
0 messages