How to Remove an Unwanted Display Language on Windows 11: 3 Ways
Use the Language & region settings for quick removal
3 min. read
Updated on
Read our disclosure page to find out how can you help Windows Report sustain the editorial team. Read more
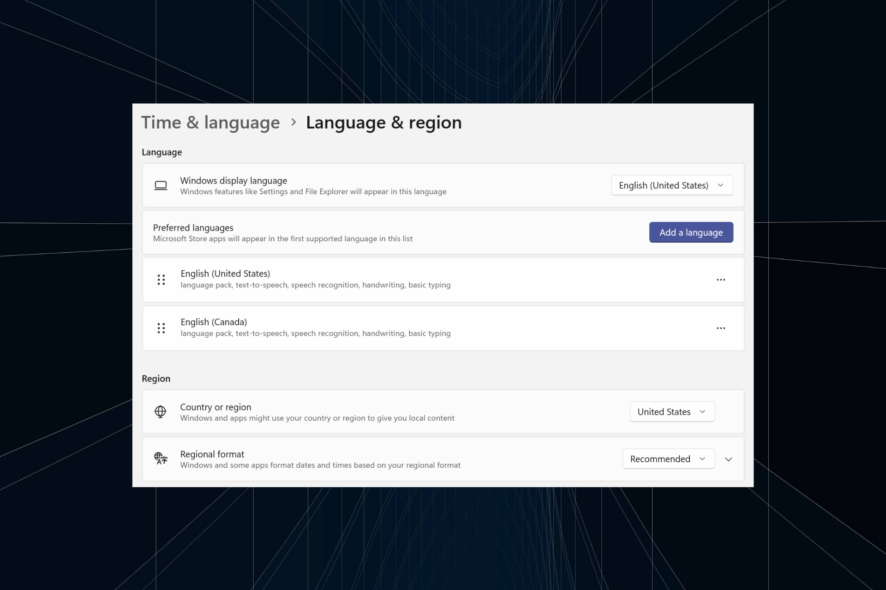
If you installed multiple language packs and are looking to remove an unwanted display language, this guide will walk you through all the steps.
Let’s get right to the methods.
How do I remove a display language from Windows 11?
1. From the Settings
- Press Windows + I to open the Settings app, go to Time & language from the navigation pane, and click on Language and region.
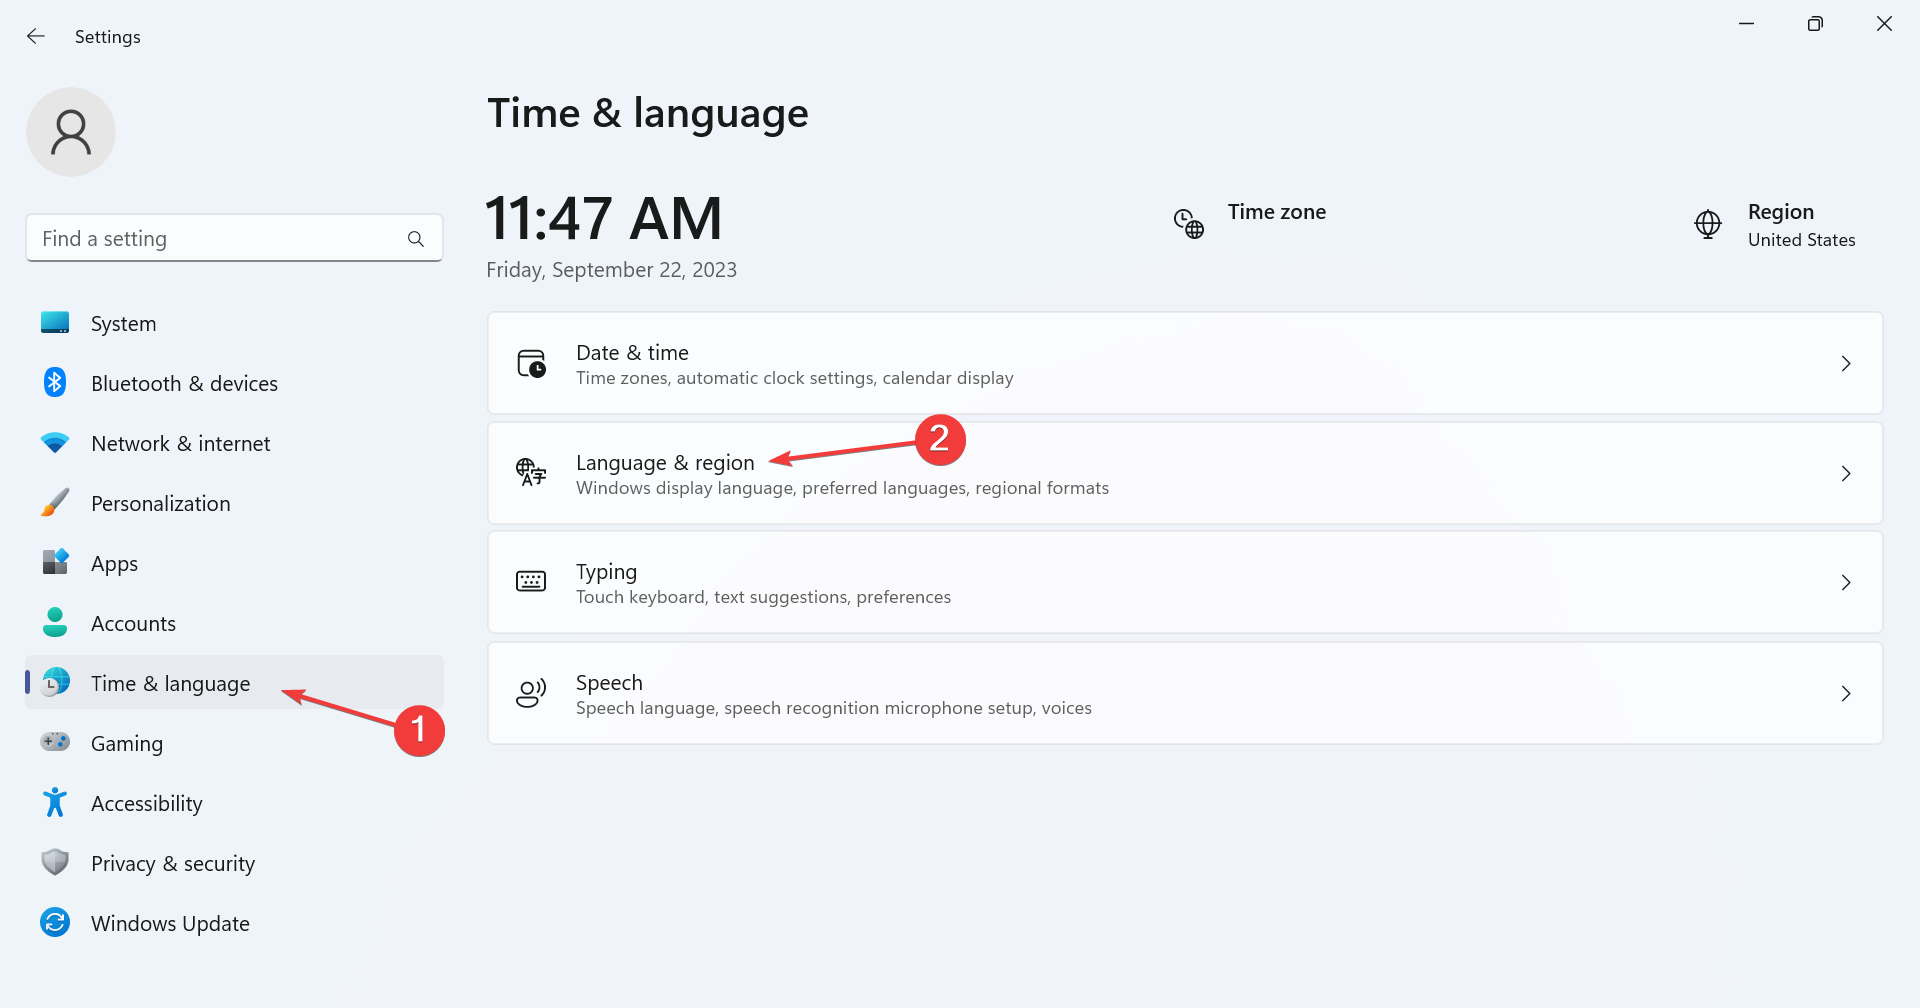
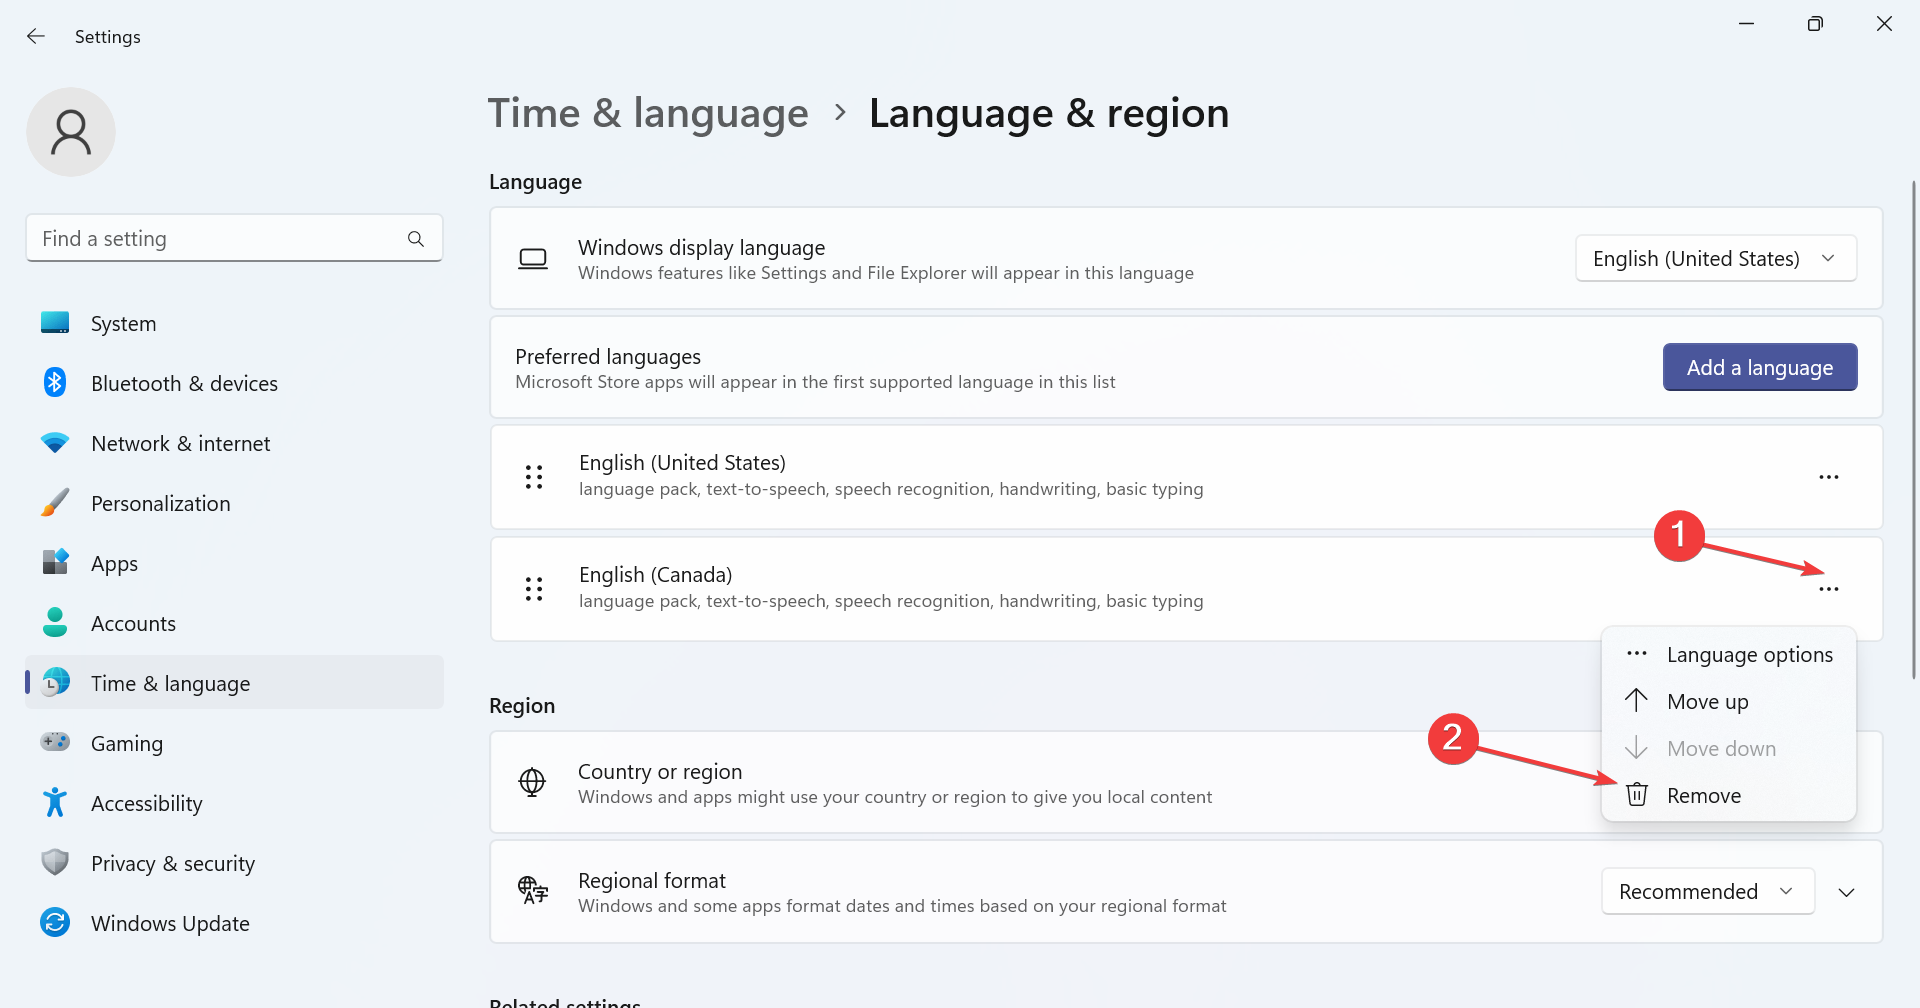
- Click the ellipsis next to the display language you want to delete, and select Remove from the flyout menu.
- Click Yes in the confirmation prompt that appears.
- Finally, restart the computer for the changes to apply.
2. With Windows PowerShell
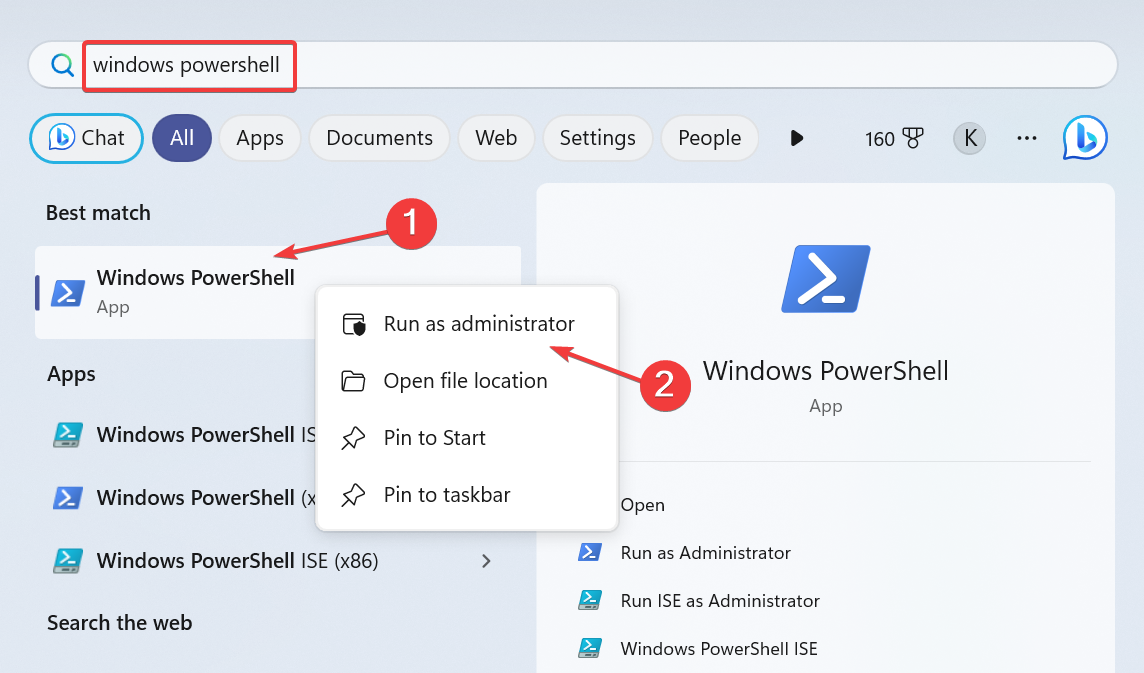
- To remove a language pack with PowerShell in Windows 11, press Windows + S to open Search, type PowerShell in the text field, right-click on the relevant search result, and select Run as administrator.
- Click Yes in the UAC prompt.
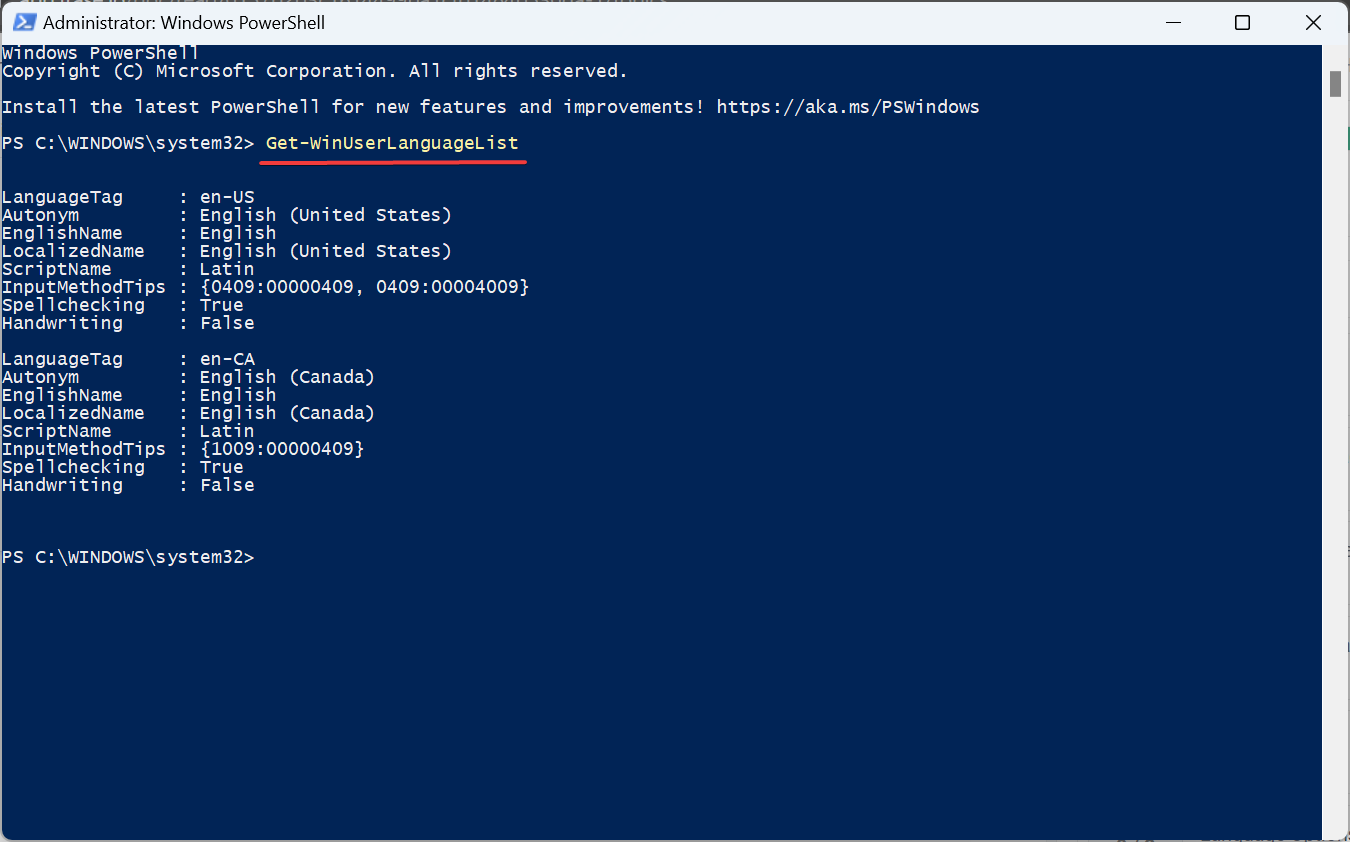
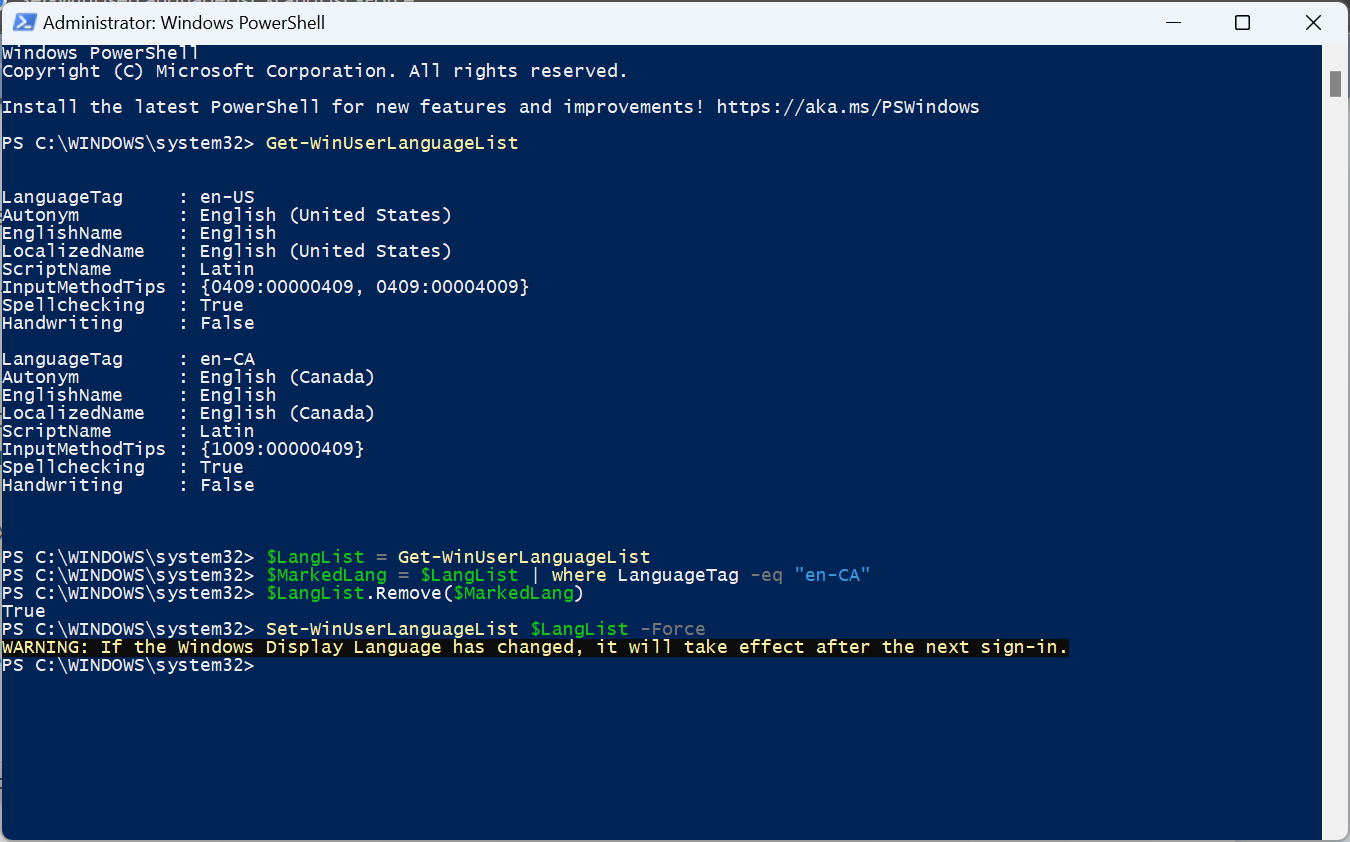
- Now, paste the following command and hit Enter to view the installed language packs:
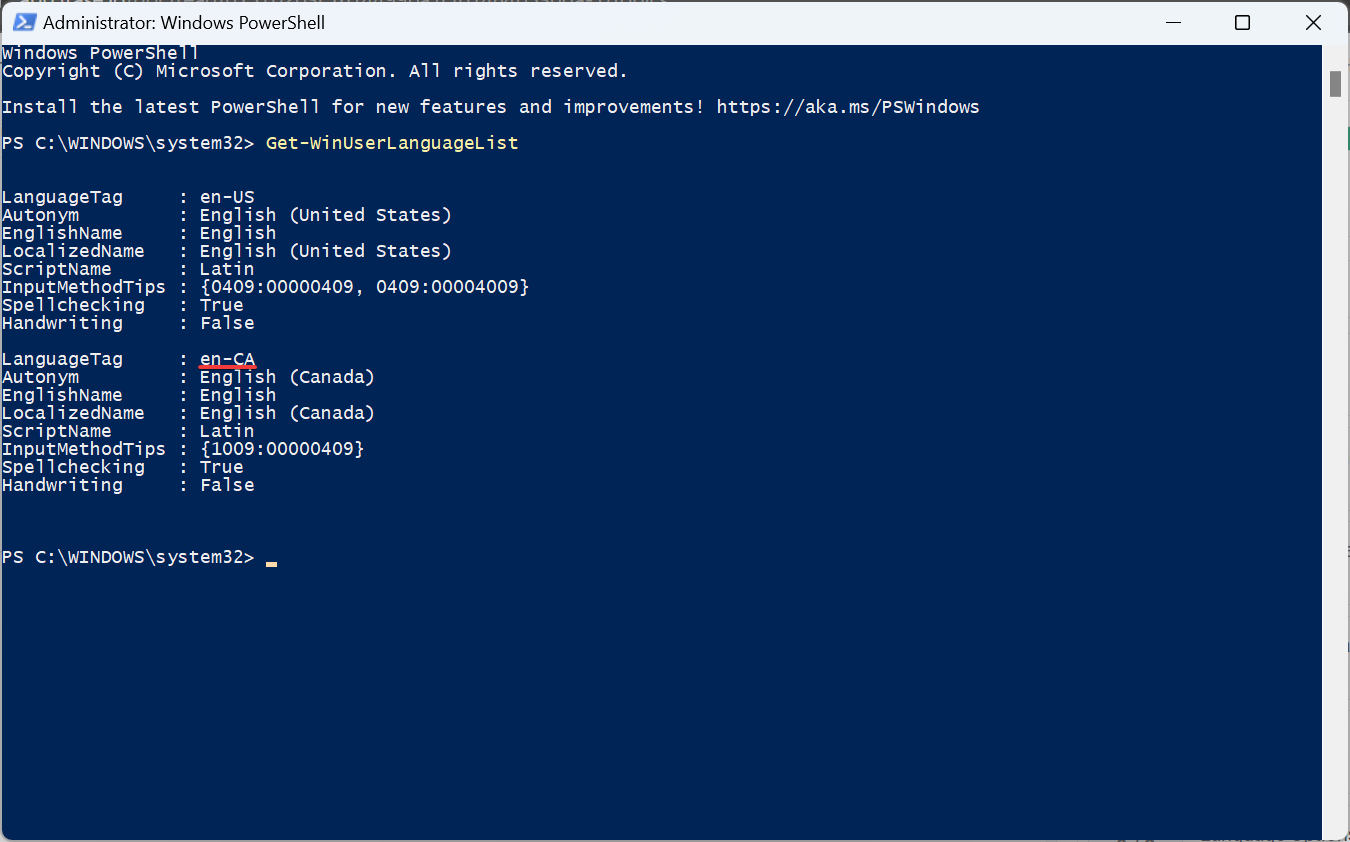
Get-WinUserLanguageList - From the language list, identify the LanguageTag for the preferred language you want to remove. For instance, it’s en-US for English (United States).
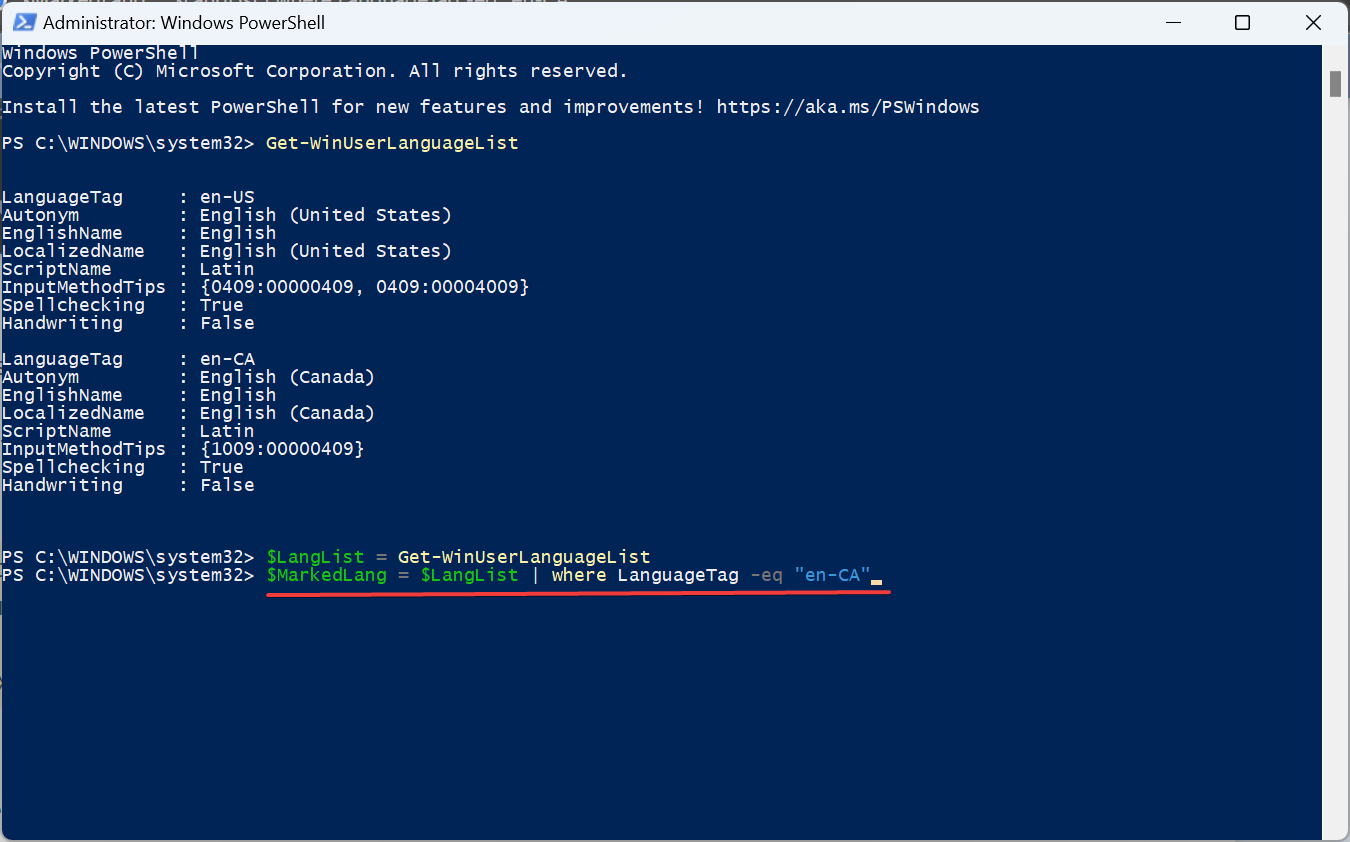
- Now, run this command:
$LangList = Get-WinUserLanguageList - Execute the following command while replacing Tag with the LanguageTag you copied earlier:
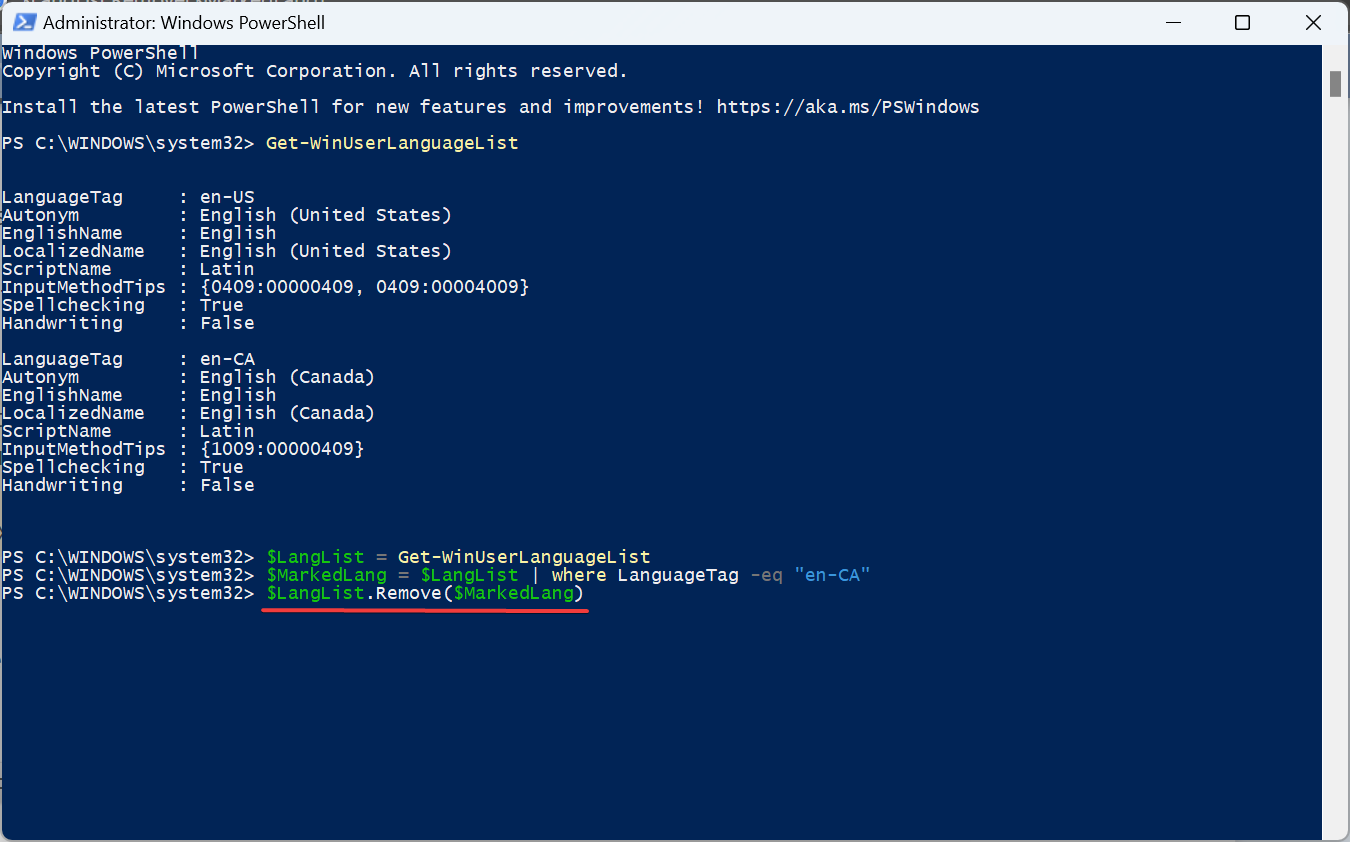
$MarkedLang = $LangList | where LanguageTag -eq "Tag" - Run this command to remove the selected language:
$LangList.Remove($MarkedLang) - Finally, execute this command:
Set-WinUserLanguageList $LangList -Force - Restart the computer for the changes to come into effect if you removed the default language earlier. And make sure to change the system language to a new one.
3. Use the Registry Editor
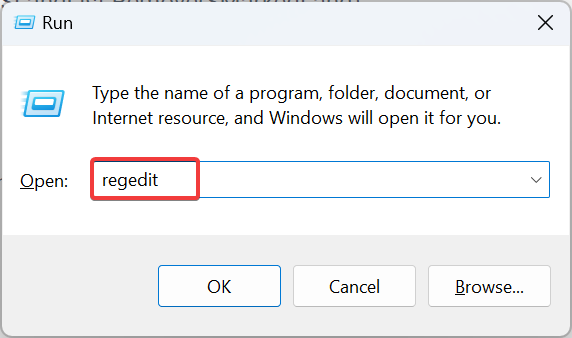
- Press Windows + R to open Run, type regedit in the text field, and hit Enter.
- Click Yes in the prompt that appears.
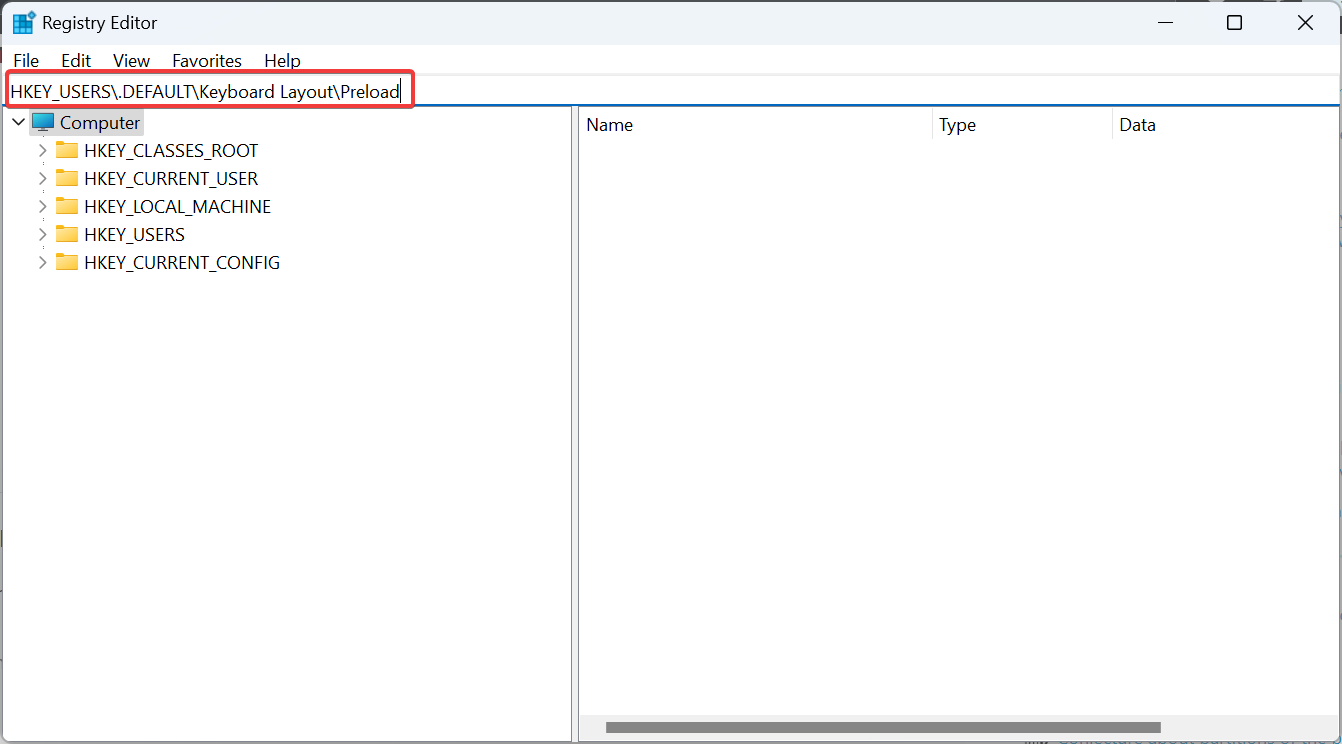
- Paste the following path in the address bar and hit Enter:
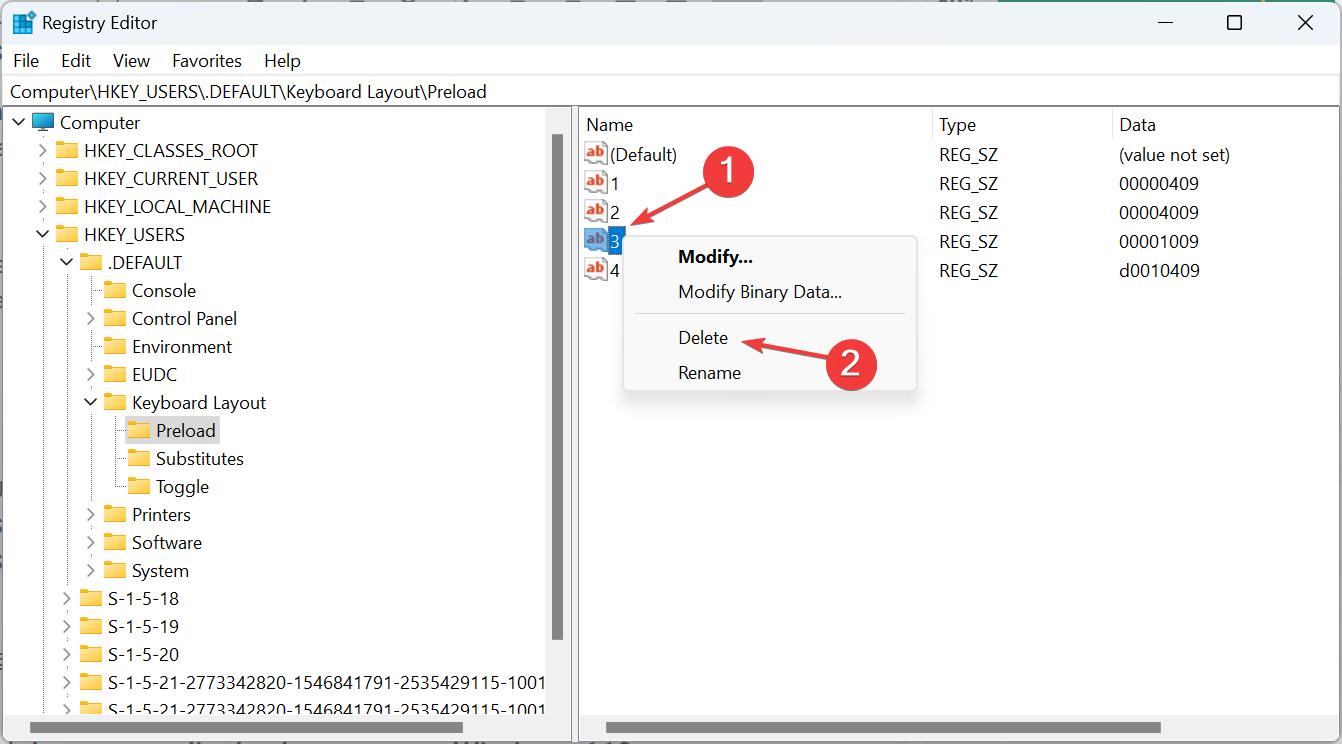
HKEY_USERS\.DEFAULT\Keyboard Layout\Preload - You will now find all the languages listed here, though not named properly. We will use the keyboard identifiers to find out.
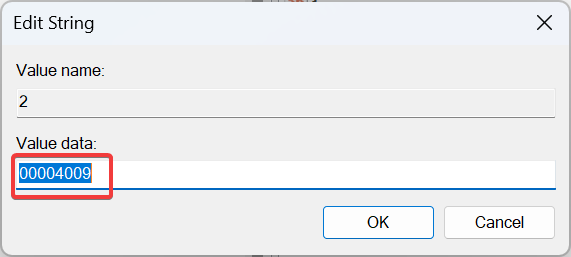
- Double-click on an entry in the Registry, and copy the Value data.
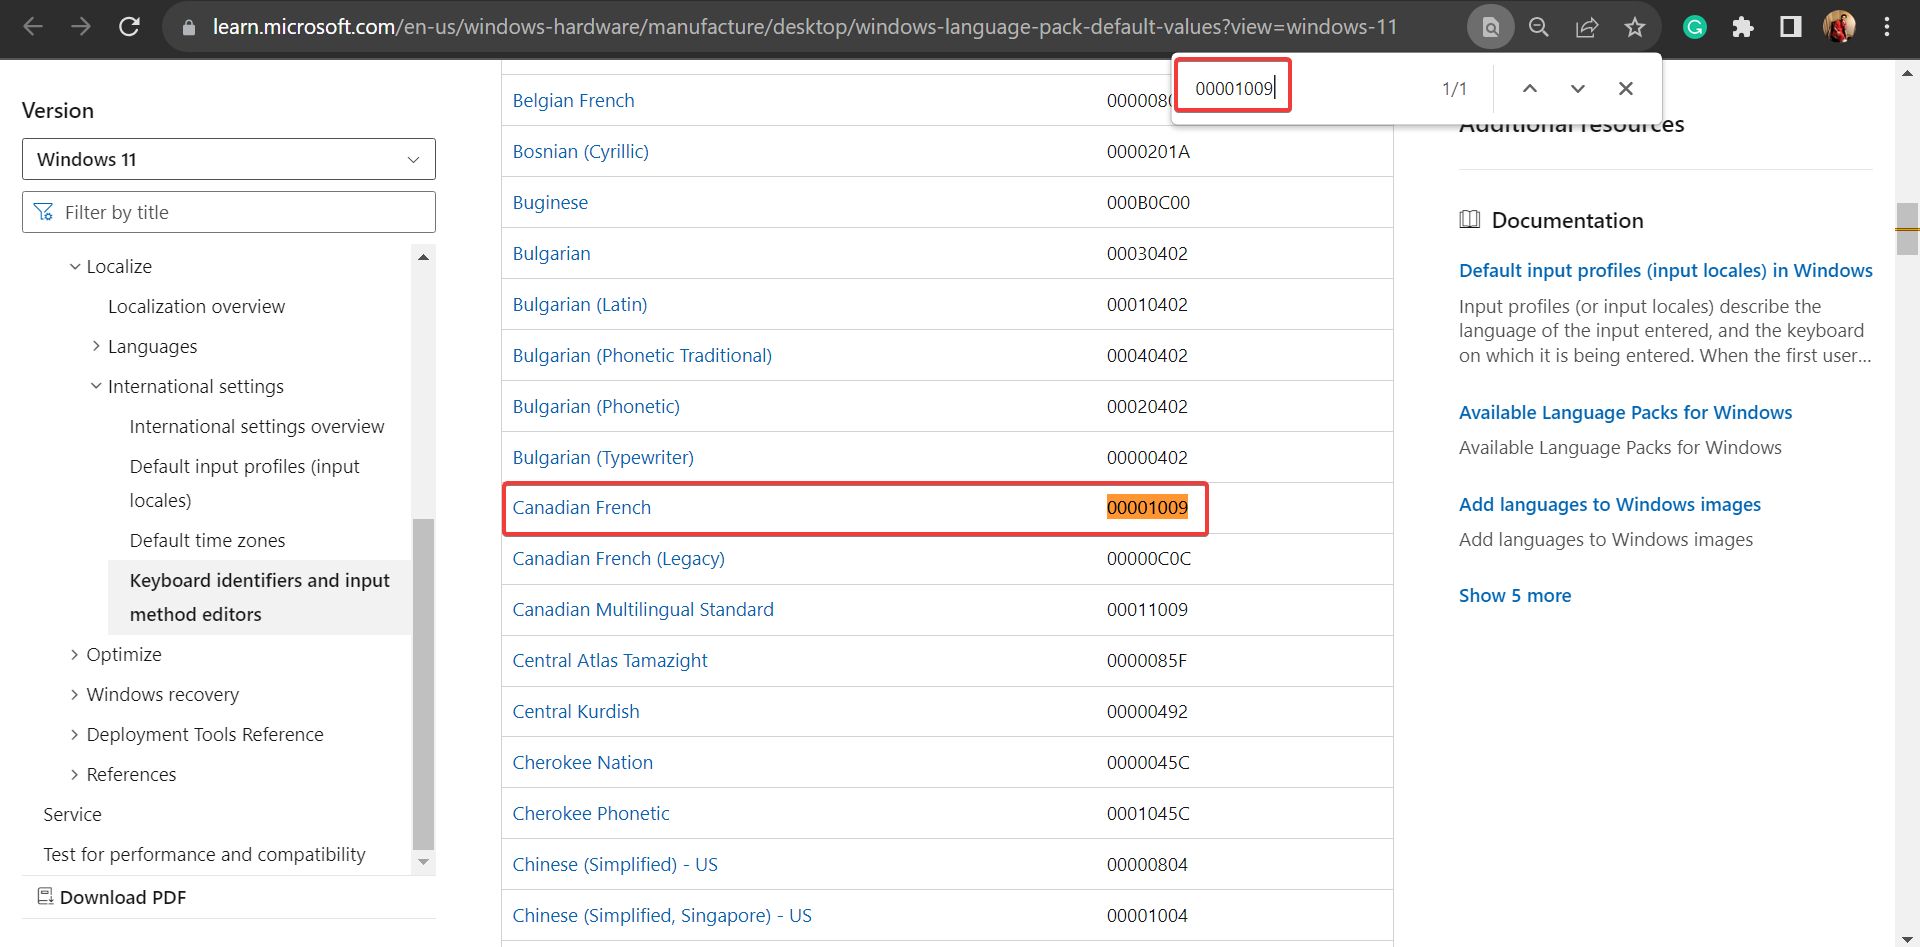
- Now, press Ctrl + F on Microsoft’s official blog post, paste the value you copied earlier, and identify the corresponding language.
- Once you find out, right-click on the key and select Delete to remove the language pack.
- Click Yes in the confirmation prompt.
- Similarly, remove the key from the following locations as well:
HKEY_CURRENT_USER\Keyboard Layout\PreloadHKEY_USERS\.DEFAULT\Control Panel\International\User ProfileHKEY_USERS\.DEFAULT\Control Panel\International\User Profile System Backup
If you cannot remove the keyboard language in Windows 11, deleting the corresponding entries in the Registry will do the trick!
A few users may encounter a situation where they can’t change the display language, and reconfiguring the region settings does the trick!
We also have a guide that can help you remove Learn about this picture on Windows 11, so don’t miss it. Solutions from our guide on how to uninstall language pack on Windows 10 can also help because of the similarity of the two systems, so don’t miss them.
For any queries or to share your experience with the Windows display language, drop a comment below.


User forum
0 messages