How to Install and Uninstall Windows 10 Language Packs
Rest assured that our tested methods won't disappoint you
Windows 10 is the world’s biggest desktop and laptop platform, with many millions of users across the globe. There are now more than 900 million devices with Windows 10 installed on them. Therefore, Win 10 supports most languages for its massive user base.
Although most users won’t need to change their default display languages in Windows 10, users can still install new Windows 10 language packs if ever required.
How we test, review and rate?
We have worked for the past 6 months on building a new review system on how we produce content. Using it, we have subsequently redone most of our articles to provide actual hands-on expertise on the guides we made.
For more details you can read how we test, review, and rate at WindowsReport.
How can I Add & Remove Language Packs in Windows 10?
1. How to Add Language Packs
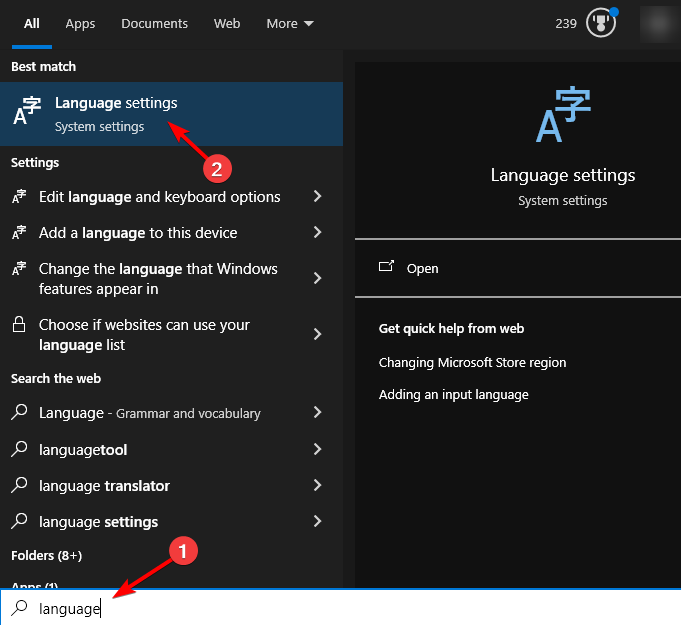
- To add a new language pack, press the Windows key + S keyboard shortcut.
- Enter the keyword ‘language’ in the search box.
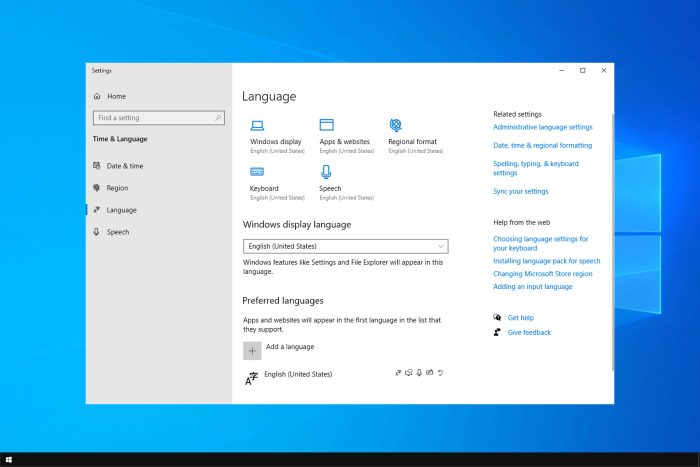
- Click Language Settings to open the window shown directly below.
- Click the Add a preferred language button to open a list of language packs users can install.
- Then click the Next button to open the window in the snapshot directly below.
- There, users can select or deselect additional language pack options as required. The language pack will become the default display language when users select the Set as my display language option.
- Click the Install button to add the language pack to Windows.
- After that, users who select the Set as my display language setting will need to reboot Windows 10 for the changes to take effect.
- Users who do not select the Set as my display language option before installing the language pack can still switch to it by clicking the Windows display language drop-down menu. Select the newly installed language pack on that menu, then restart Win 10.
You can use the same way and set any language as display language. However, if you are facing issues like can’t install the Marathi language pack, check out this guide.
2. How to Remove Language Packs
- To remove language packs from Win 10, open the Language tab in Settings again as outlined above.
- Before removing a pack, select an alternative display language to switch to on the drop-down menu.
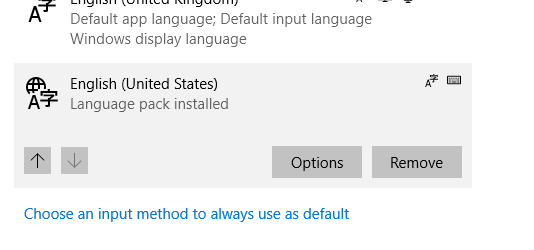
- Then select a listed language pack to uninstall.
- Thereafter, click the Remove button.
- Users can also uninstall language packs with PowerShell. To do so, enter ‘PowerShell’ in Windows 10’s search utility.
- Click Windows PowerShell to open that utility.
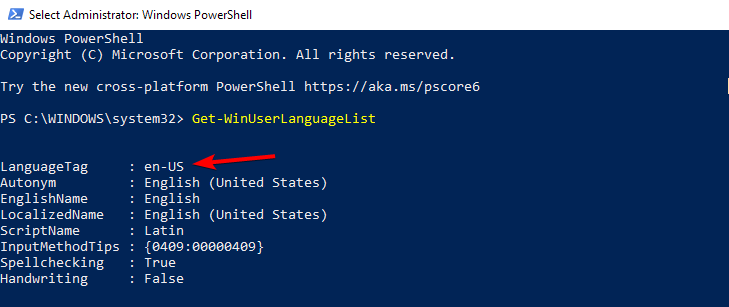
- Then enter this command and press Return: Get-WinUserLanguageList.
- Note down the language tag for the pack you need to uninstall.
- Thereafter, enter the following commands separately in PowerShell:$LangList = Get-WinUserLanguageList
$MarkedLang = $LangList | where LanguageTag -eq “<languagecode>”
$LangList.Remove($MarkedLang)
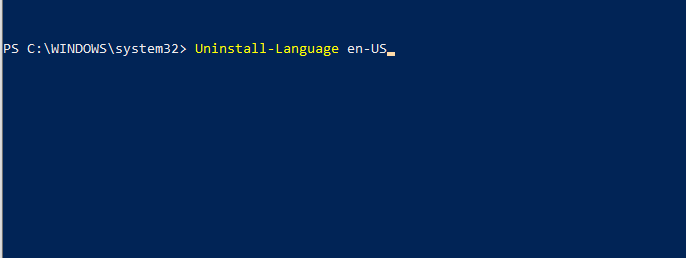
Set-WinUserLanguageList $LangList -Force - For the second command, replace <languagecode> with the language tag noted down earlier. If the tag was en-US, the command would be entered as shown directly below.
So, that’s how users can install, change, and uninstall language packs in Windows 10. Remember that language packs hog hard drive space, so it’s probably not worth installing lots of them.
However, users who need alternative display languages can add new packs and change them as required with the Settings app.