How to Install OpenCL on Windows 11: A Step by Step Guide
Ensure your system drivers are updated to the latest version
5 min. read
Updated on
Read our disclosure page to find out how can you help Windows Report sustain the editorial team. Read more
Key notes
- OpenCL lets you tap into the accelerated performance for various apps, from scientific computing to graphics tasks.
- Keep reading to know the steps of get it on your computer.
Installing OpenCL (Open Computing Language) gives your hardware the power to accelerate diverse computing tasks, like graphics rendering.
In this step-by-step guide, we will walk you through the steps to install OpenCL on your Windows 11 computer to get enhance computational efficiency.
What is OpenCL?
Open Computing Language or OpenCL is a free and open standard framework with parallel programming of diverse accelerators found in personal computers, mobile devices, and embedded platforms.
The goal of OpenCL is to help developers harness the computing power of processing units like CPUs, GPUs, and accelerators in a unified manner to improve performance.
How do I install OpenCL on Windows 11?
Before proceeding with any steps to install OpenCL on Windows 11, go through the following preliminary checks:
- Ensure you have the Visual C++ Redistributable package installed.
- Check if your computer meets the minimum requirements to run the OpenCL app and the OpenCL runtime.
- First, check the driver compatibility list from the official Khronos website.
Once done, follow these steps in the same order as mentioned.
1. Update your graphics driver
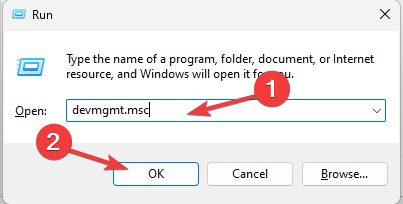
- Press Windows + R to open the Run dialog box.
- Type devmgmt.msc and click OK to open the Device Manager app.
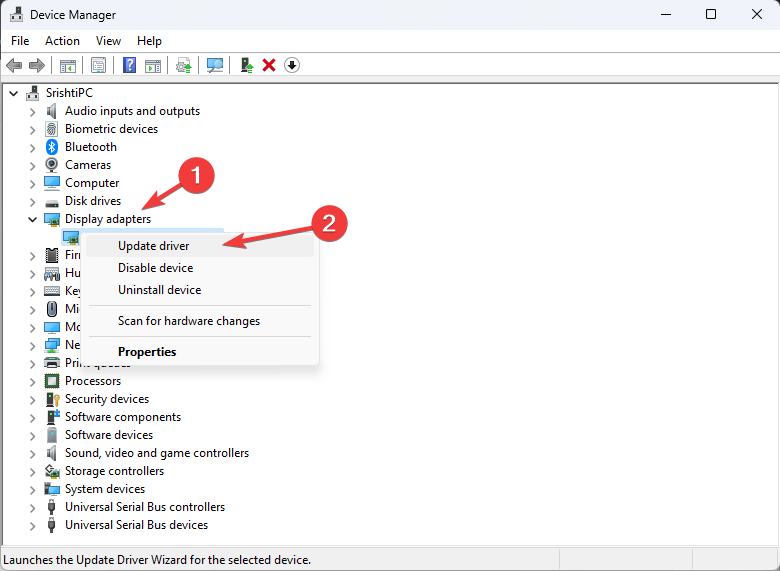
- Go to Display adapters and click it to expand it. Right-click the driver, and select Update driver.
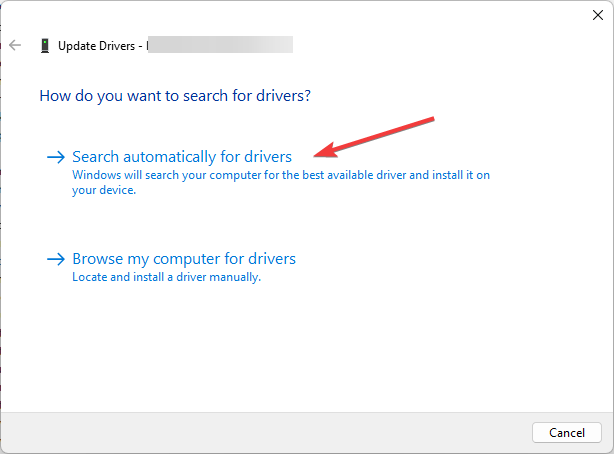
- Choose Search automatically for drivers.
- Follow the onscreen instructions to complete the process.
Specialized software, such as PC HelpSoft Driver Updater can help you keep your drivers up-to-date and maintain them by automatically scanning your computer and notifying you when they are going out of date.
⇒ Get PC HelpSoft Driver Updater
2. Check if you have OpenCL Runtime installed
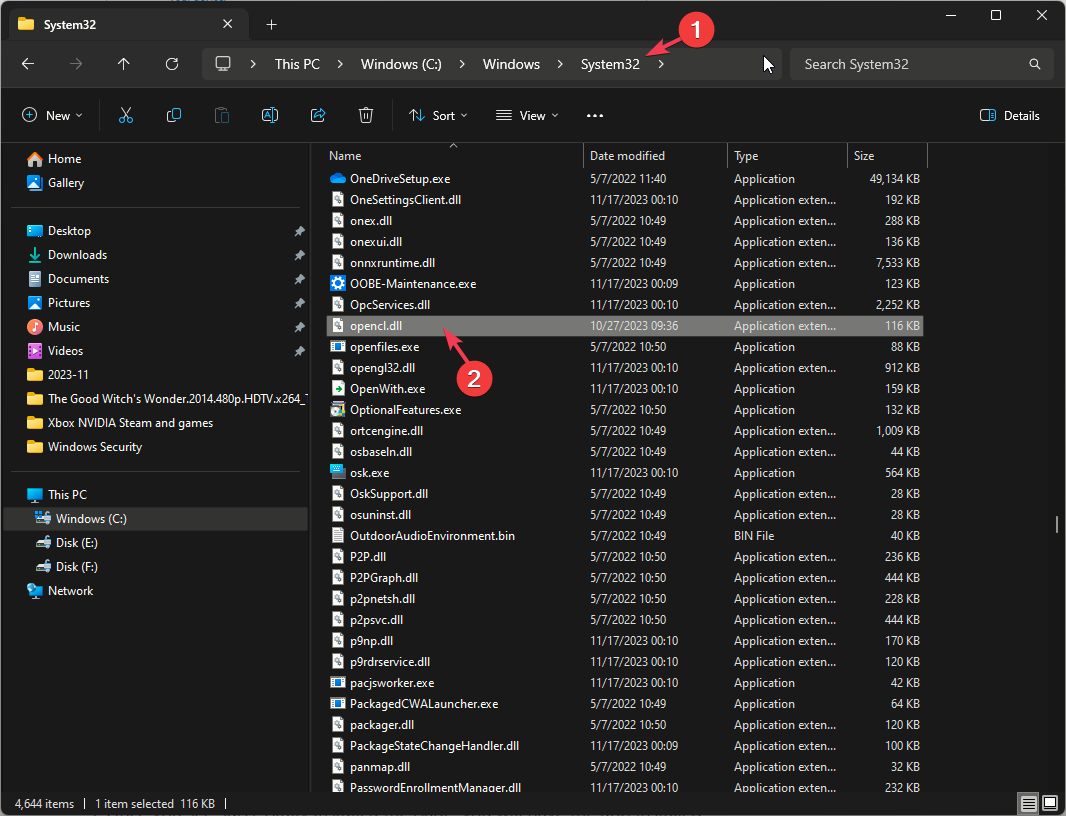
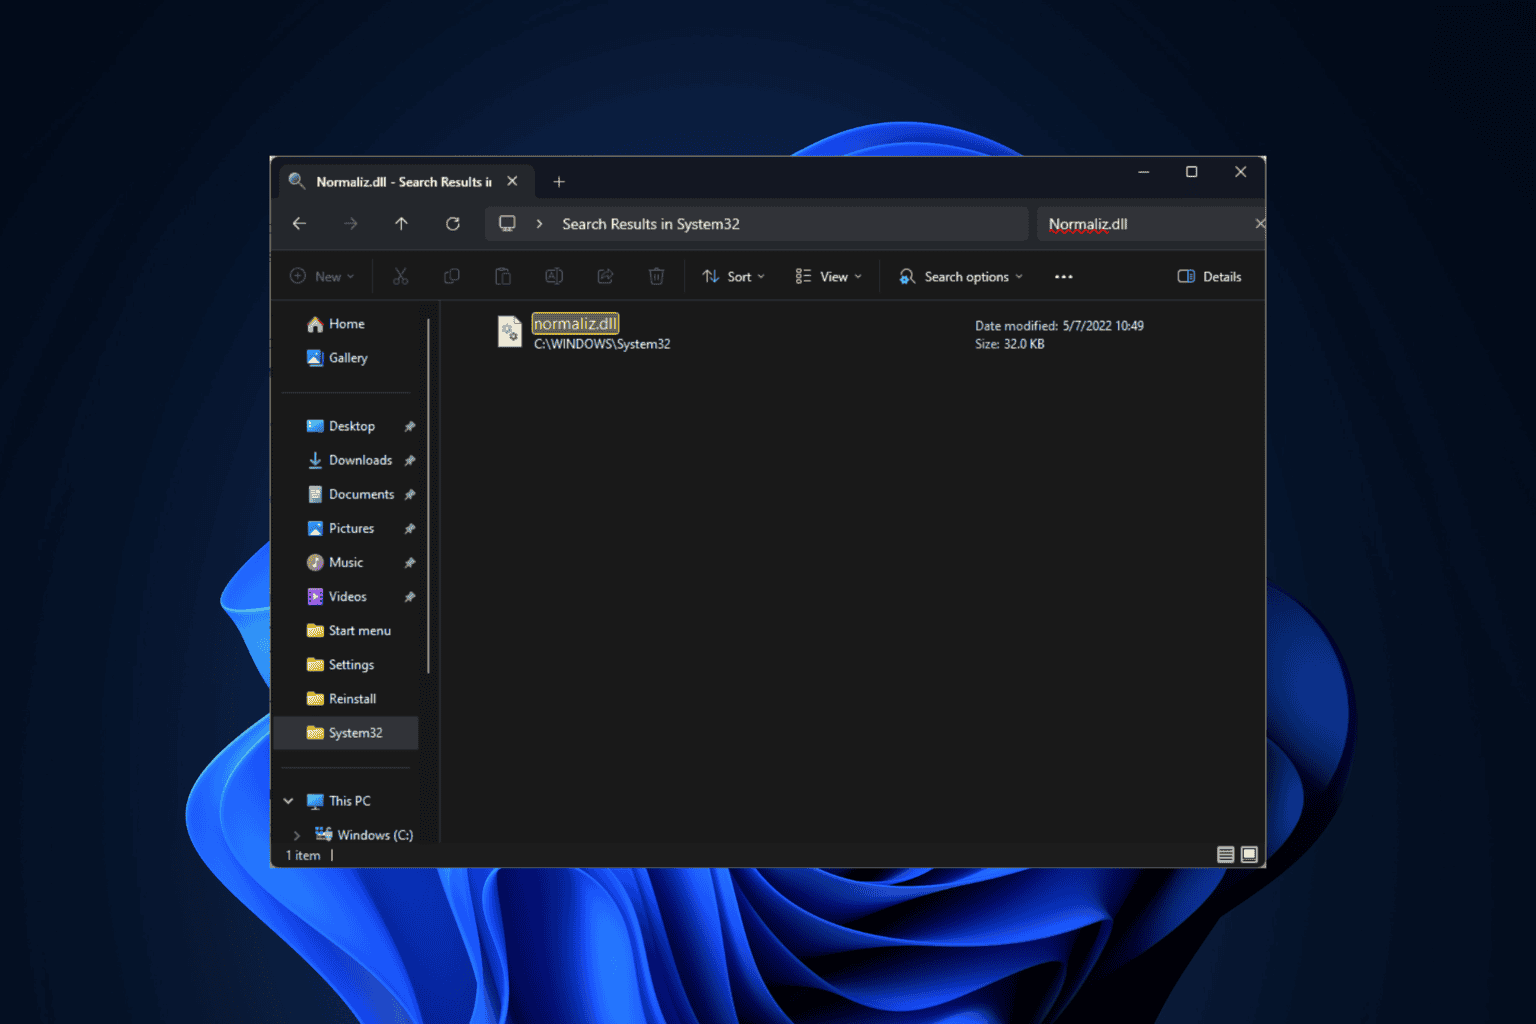
- Press Windows + E to open the Windows Explorer window box.
- Navigate to this path:
C:\Windows\System32 - Locate the OpenCL.dll file. If it is there, it means you have OpenCL runtime installed on your computer.
If you can’t find Opencl.dll there, it could be because due to outdated drivers; read this guide to learn the solutions.
3. Download C/C++ compiler
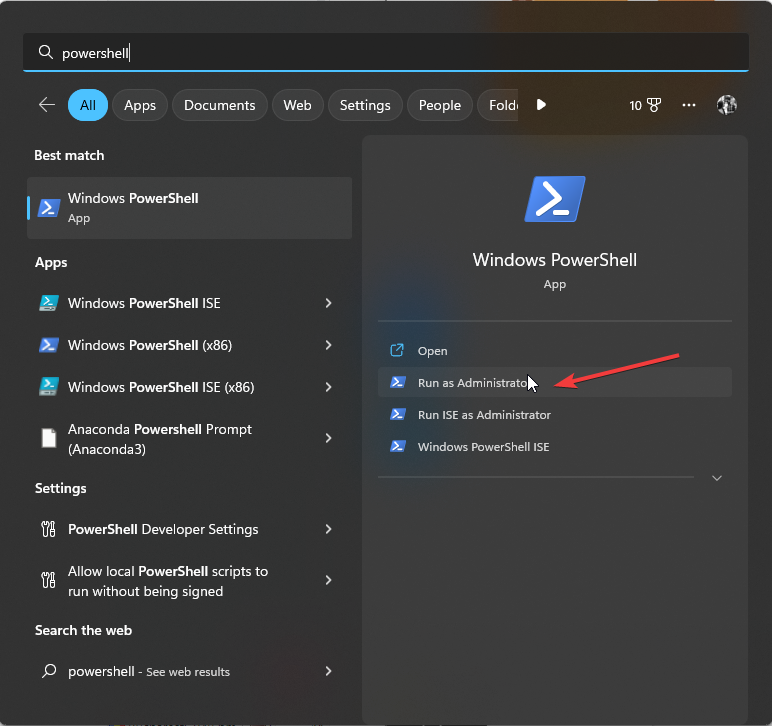
- Press the Windows key, type powershell, and click Run as administrator.
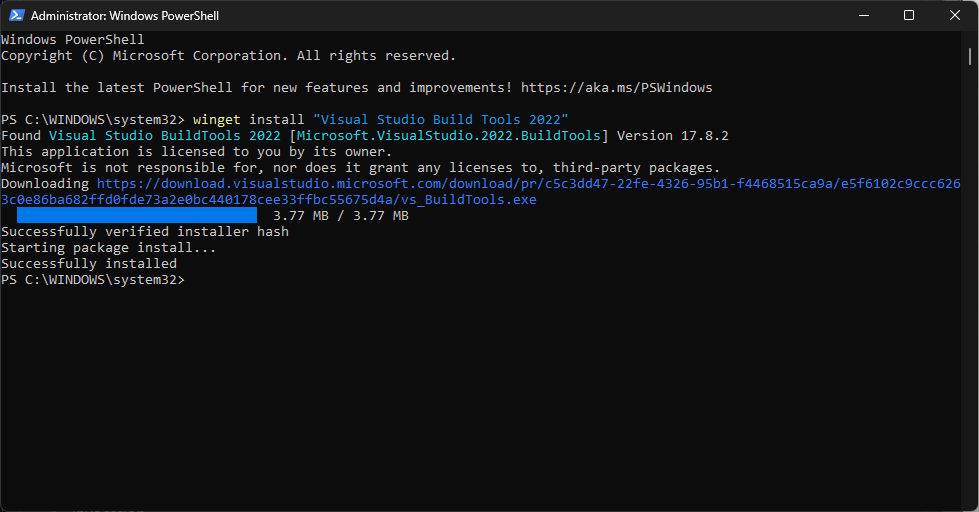
- To install a C/C++ compiler like Visual Studio Build Tools 2022, type in the following command and hit Enter:
winget install "Visual Studio Build Tools 2022" - Once you see Successfully installed message, you will have the app installed.
- Now, to get the minimum configuration using the command line, copy & paste the following command and press Enter:
& "C:\Program Files (x86)\Microsoft Visual Studio\Installer\setup.exe" install --passive --norestart --productId Microsoft.VisualStudio.Product.BuildTools --channelId VisualStudio.17.Release --add Microsoft.VisualStudio.Component.VC.Tools.x86.x64 --add Microsoft.VisualStudio.Component.VC.Redist.14.Latest ---add Microsoft.VisualStudio.Component.Windows11SDK.22000
You can use the command as it is mentioned above if working on Windows 11; however, replace –add Microsoft.VisualStudio.Component.Windows11SDK.22000 with –add Microsoft.VisualStudio.Component.Windows10SDK.19041 for Windows 10.
4. Install Git, CMake, and Visual Studio Code
- Press the Windows key, type powershell, and click Run as administrator.
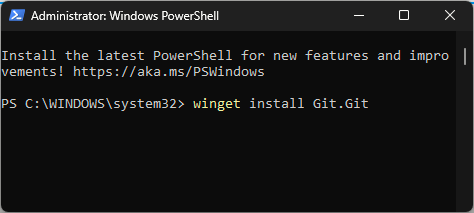
- Type the following command and hit Enter:
winget install Git.Git - Copy & paste the following command to install CMake and press Enter:
winget install Kitware.CMake - To install Visual Studio Code, type the following command and hit Enter:
winget install "Visual Studio Code" --source msstore
You can skip these steps if you already have Git, CMake, or Visual Studio Code installed on your computer.
5. Get OpenCL SDK & install Vcpkg
To develop native OpenCL apps, you need C or C++ compilers, OpenCL headers (C & optionally the C++ headers), and Dynamic library (OpenCL.dll) & Export library (OpenCL.lib)
- Press the Windows key, type git, and click Open.
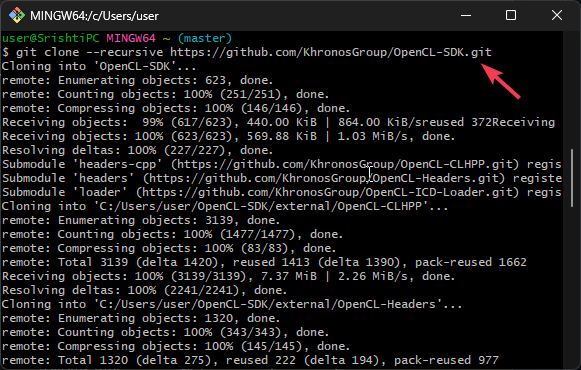
- Type the following command to clone a Git repository related to the OpenCL SDK, then configure the project using CMake, and finally build & install it via Visual Studio 2022, then hit Enter:
- To setup & initialize Vcpkg, copy & paste the following command and press Enter:
git clone https://github.com/microsoft/vcpkg.git
cd vcpkg
.\bootstrap-vcpkg.bat
6. Install OpenCL
- Now that the Vcpkg command-line utility is built type the following command to search for available packages matching the specific name in PowerShell, in this case, it is OpenCL and hit Enter:
.\vcpkg.exe search opencl
…
opencl 2.2 (2017.07…. C/C++ headers and ICD loader (Installable Client Driver) for OpenCL
- Next, copy & paste the following command to install the OpenCL library for the x64 Windows platform and press Enter:
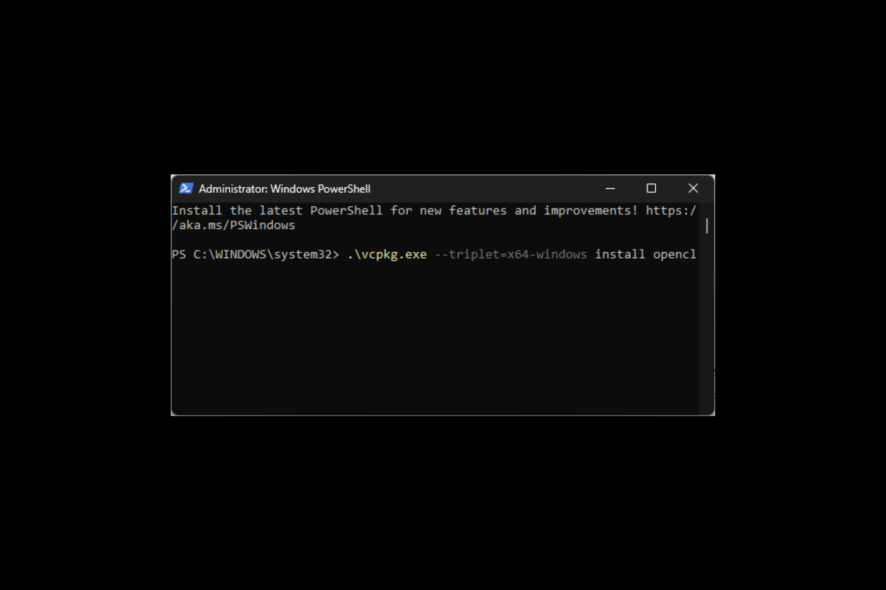
.\vcpkg.exe --triplet=x64-windows install opencl - In case you want to target 64-bit ARM, replace –triplet=x64-windows in the command with –triplet=arm64-windows
In conclusion, integrating OpenCL in a Windows 11 environment can unlock the potential for accelerated computing across various applications.
To get it installed on your computer, you must have Visual Studio Code and Visual C++ Redistributable package installed; in case you are facing problems like can’t install Visual C++ Redistributable; read this guide.
Stuck somewhere while following the steps? Feel free to mention your queries in the comments section below. We will be happy to help!

User forum
0 messages