Clfs.sys Blue Screen of Death: 6 Methods to Fix This Error
Easy ways to fix the BSoD
5 min. read
Updated on
Read our disclosure page to find out how can you help Windows Report sustain the editorial team. Read more
Key notes
- The clfs.sys error is often the result of severe problems with the driver software or with your computer's hardware.
- If you're getting the clfs.sys error message in Windows 10, make sure to test your PC for faulty hardware.
- Using a third-party solution for BSoD problems can help you with the clfs.sys is missing error.
- To get rid of the clfs.sys BSoD issue, try to update the related drivers and run a security scan.
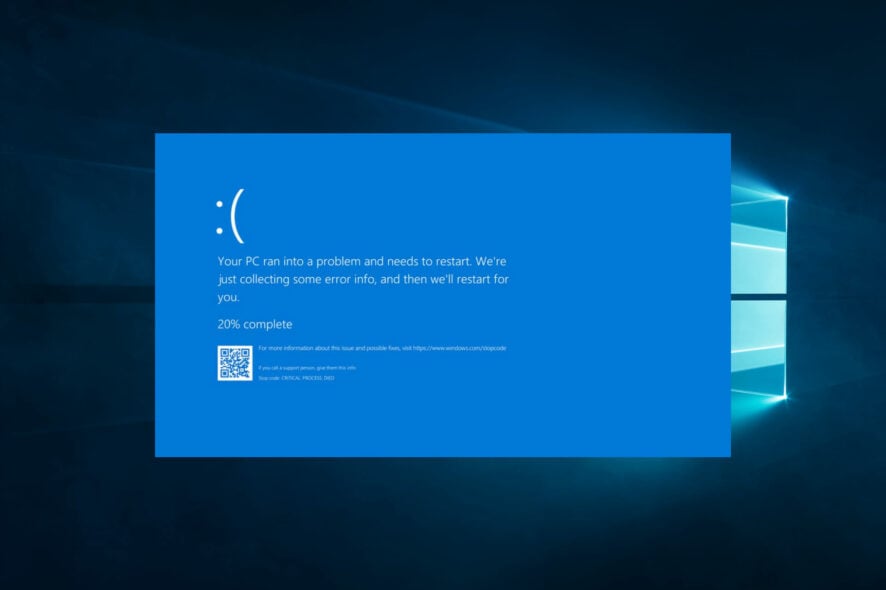
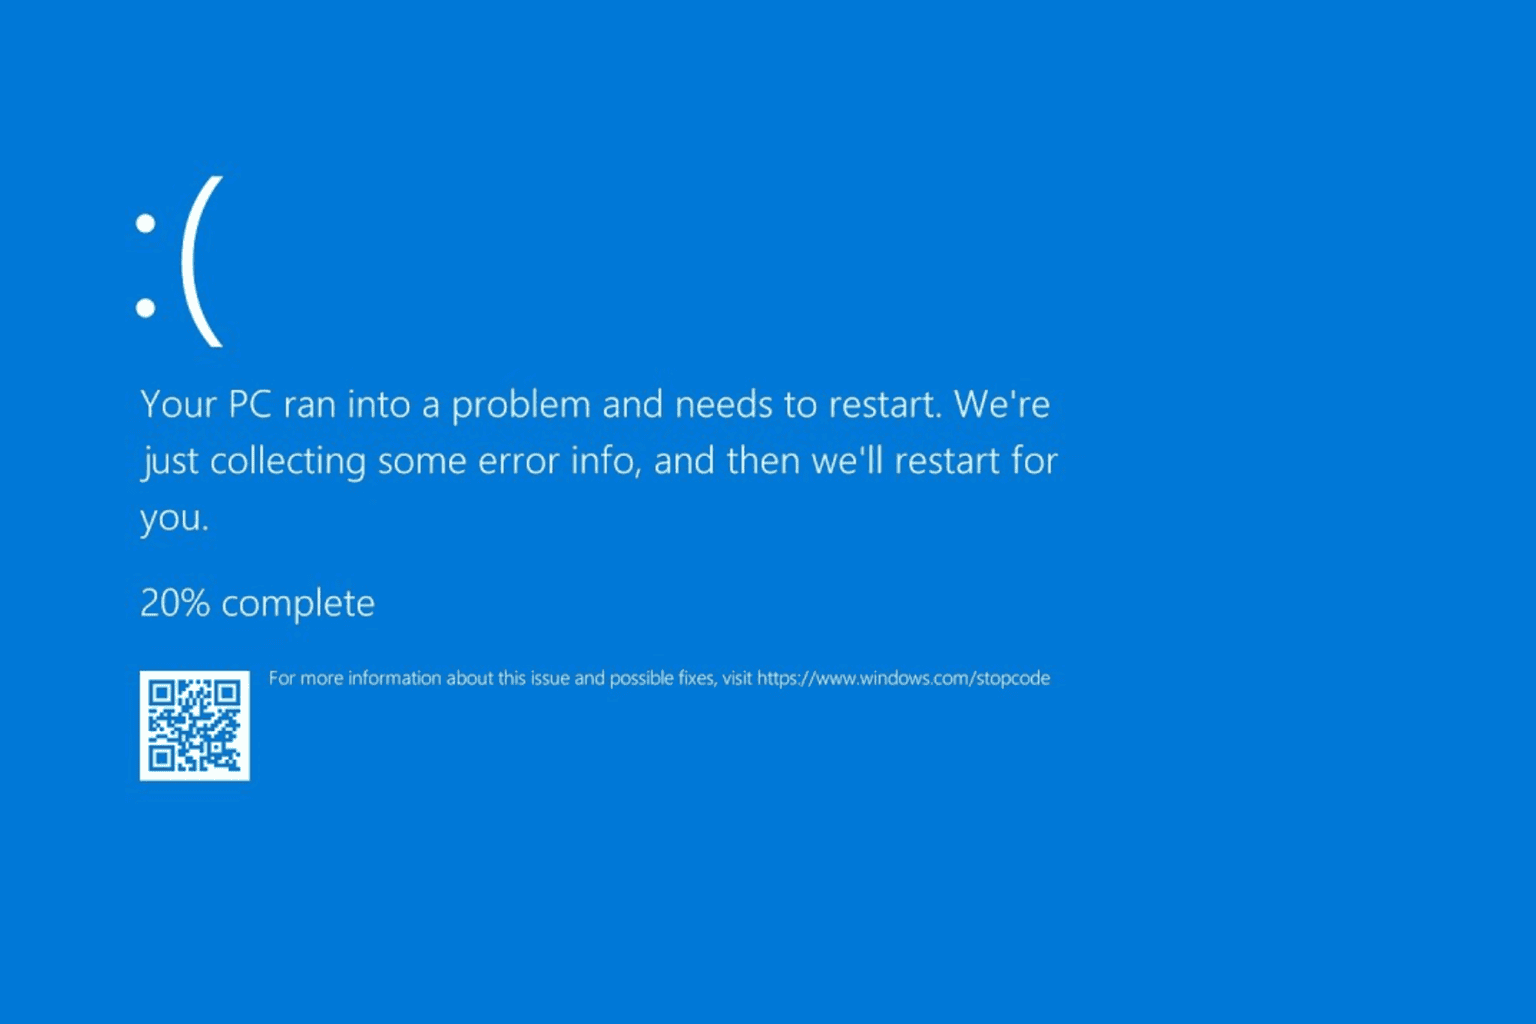
Getting the clfs.sys error message on a blue screen is a common Windows 10 issue that most users have trouble fixing.
You are in luck because you will see below a quick tutorial about the steps you need to take to solve it. Let us first explore some possible reasons you may have gotten this error.
What is a CLFS SYS error?
This error is related to the CLFS driver for this system on your operating system.
This driver helps provide recovery support and operations of transactional files on the OS. This error will typically occur for any of the following reasons:
- System conflicts – These may be conflicts between hardware and software.
- Driver issues – In most cases, this refers to corrupted drivers and outdated system or program drivers.
- Malware – Virus contributes to almost all kinds of issues on a computer, including clfs.sys blue screen error.
- Corrupted files – System files are essential in carrying out specific functions on a computer. When they become corrupt, you may expect issues such as this BSoD.
What is clfs.sys?
CLFS stands for Common Log File System. This file system is an essential part of the Windows 10 OS, and its primary function is to log files and record OS events and activity.
We will show you some of the best solutions if you encounter a clfs.sys blue screen problem.
How can I fix clfs.sys blue screen error?
1. Run a security scan
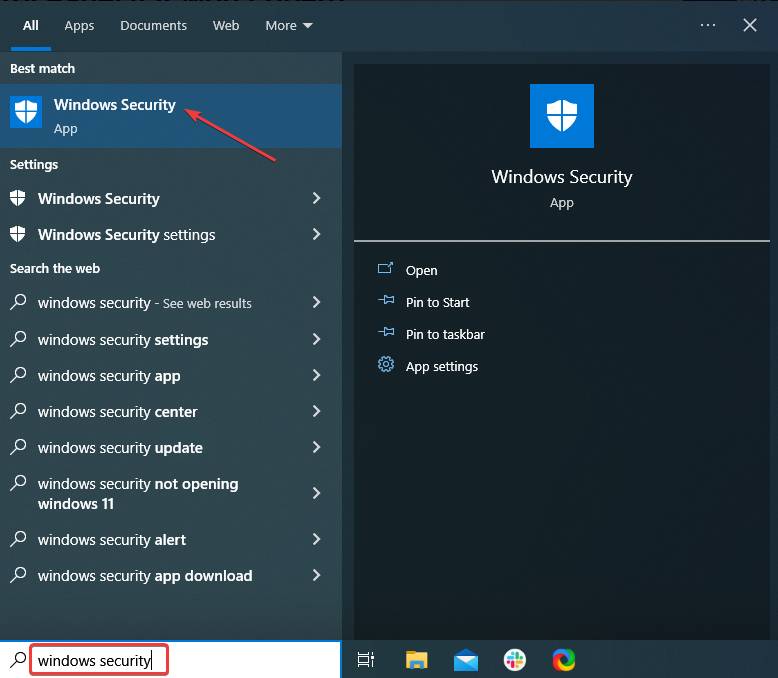
- Type Windows Security in the Search bar, and click on the relevant search result.
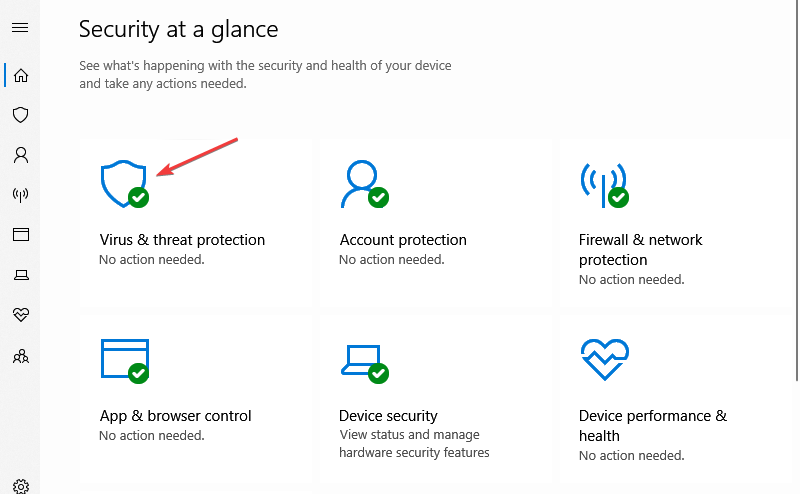
- Now, click on Virus & threat protection here.
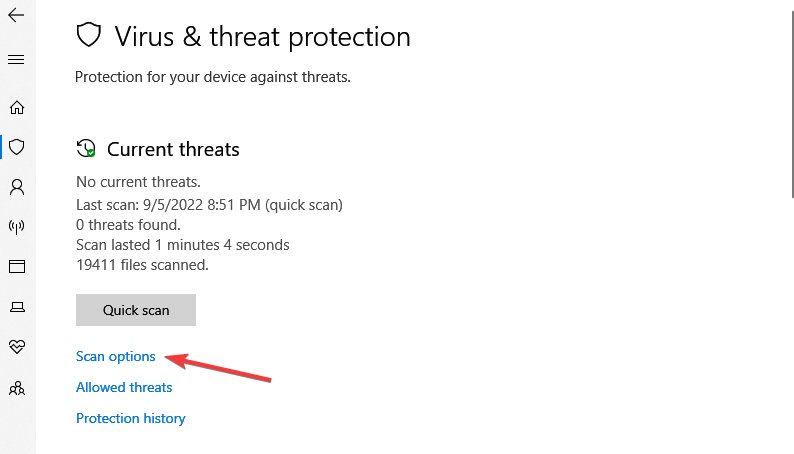
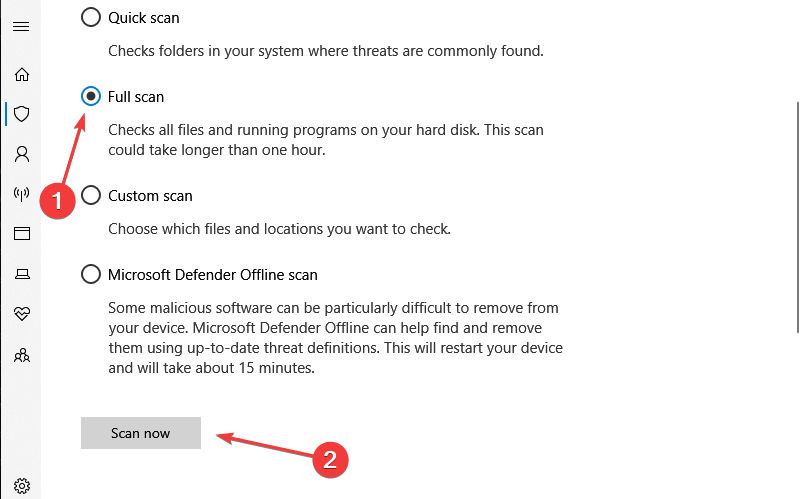
- Click on Scan options.
- Select Full scan and click the Scan now button at the bottom.
Open your antivirus and do a full system scan for any malware or viruses.
Usually, when your system registries are damaged in any way, thus getting the clfs.sys blue screen, a virus, or a malware infection might cause the error message.
After the scan is completed, reboot the Windows 10 computer. Then, check and see if you still get the same clfs.sys error message.
2. Update clfs.sys related drivers
- Press the Windows Key + S.
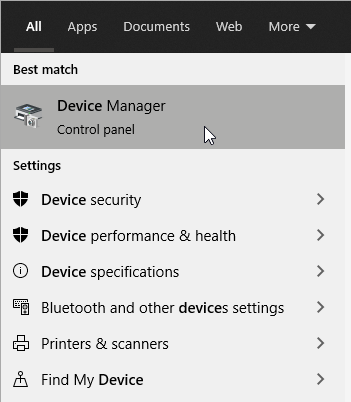
- Then, type Device Manager and select the utility.
- Expand the device category that needs to be updated, then right-click on it, then select Update Driver.
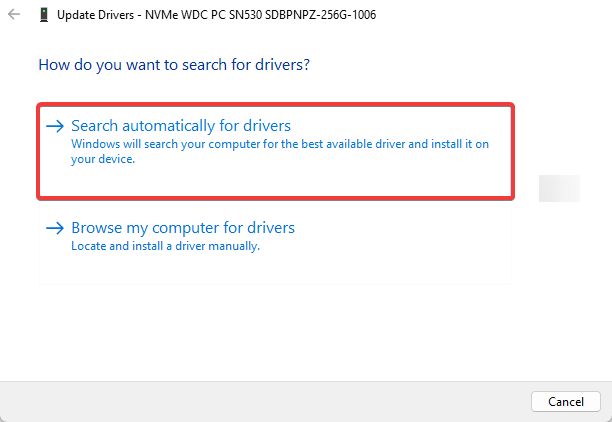
- Click Search automatically for drivers.
Updating drivers manually can be time-consuming. Instead, we recommend using a tool that automatically updates your drivers. Using such a tool will eliminate the possibility of downloading the wrong driver version.
You must click a couple of times, and the program will do the rest. This includes scanning your hardware and software for newer versions of compatible drivers and installing them.
More so, using a dedicated driver update tool will enhance your PC performance at maximum due to renewed device drivers.
In conclusion, updating drivers with this lightweight automated solution and resolving hardware issues efficiently is more beneficial.
3. Restore your system to a previous point
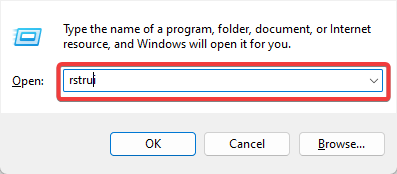
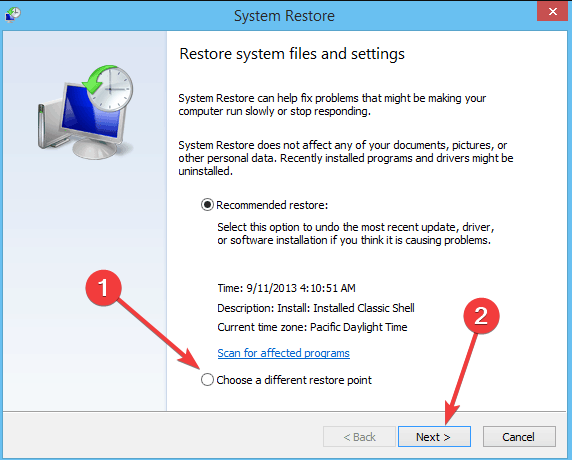
- Press Windows + R, trupe rstrui and hit Enter.
- Select Choose a different restore point option and hit Next.
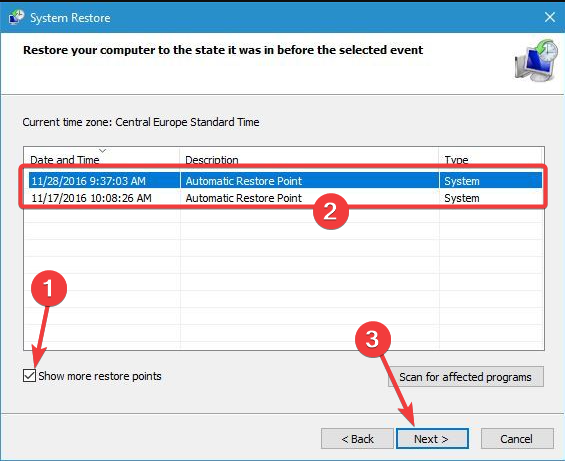
- To view the full restore list, click the Show more restore points option, select a restore point, and hit Next.
- Click Next and Finish to roll back Windows.
Note: System Restore is a built-in tool to help you fix corrupted system files. With this utility, you can restore Windows 10 before the error occurs.
4. Run an SFC scan
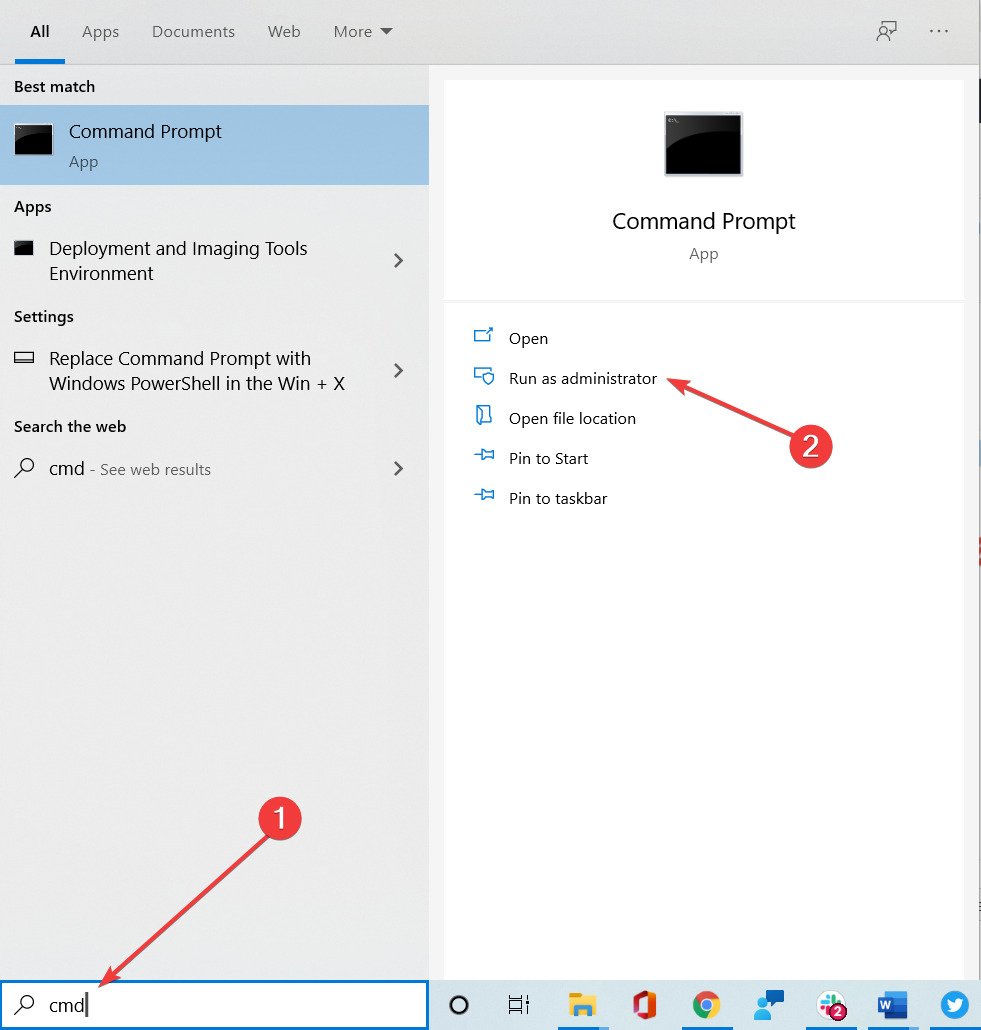
- Enter command prompt in the Windows screen search box.
- Right-click Command Prompt and select Run as administrator.
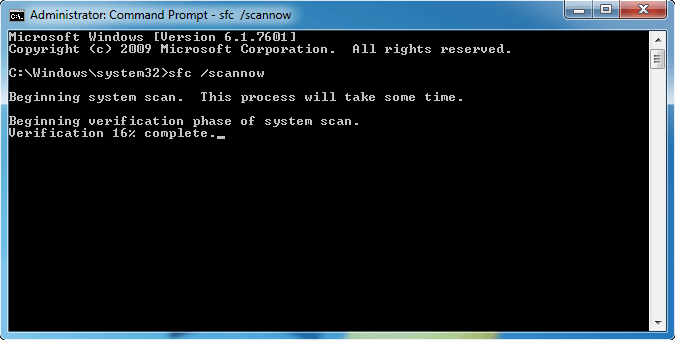
- In the command prompt window, write the following command and then press Enter:
sfc /scannow - It will take a couple of minutes until the system file checker is finished.
- After it is finished, you will need to reboot your Windows 10.
- See if it fixed your clfs.sys error message after the sfc scan was performed.
Note: If a virus or malware has corrupted your system, the System File Checker can try to repair the affected files. This built-in solution will scan system files and replace any corrupted ones with a cached copy.
Performing DISM and SFC scans is also recommended when facing Cldft.sys BSoD issues. Rest assured that solving Cldft.sys BSoD issues with simple methods is possible.
5. Run a disk check
- Write cmd in the Windows search box, then select Run as administrator.
- Click the Yes button if a user account control window pops up.
- In the command prompt window, write the following and hit Enter:
chkdsk /f - After completing the check process, you must close the command prompt window and reboot the Windows 10 PC.
Note: This process will check your disk for any errors it may have on it and try to fix them.
6. Check if your RAM is corrupted
- Download the Windows MemTest86 USB image.
- Extract it from the ZIP file on your PC.
- Insert an empty USB stick into your computer.
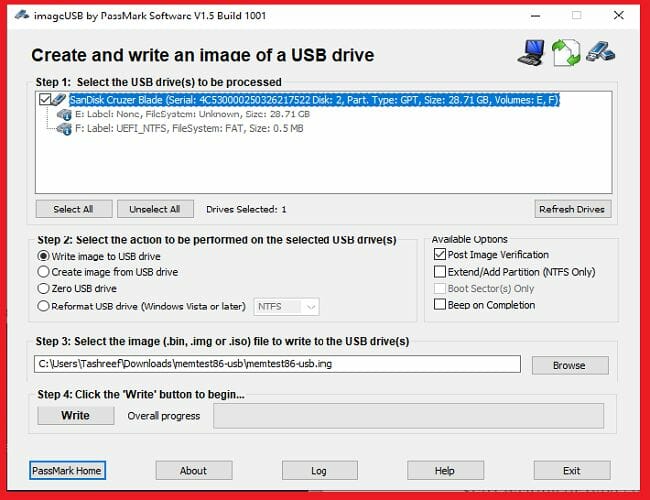
- In the extracted folder (MemTest86), run the imageUSB tool and choose your USB stick so it becomes bootable.
- Restart your PC with the USB drive as the main bootable device.
- Follow the commands from the screen while MemTest86 checks for memory issues.
Note: MemTest86 is a free memory testing program; you have to boot this one from a USB flash drive. The software can test your RAM for all kinds of issues.
You have above a couple of options to try to fix your clfs.sys error message in Windows 10.
Also, you can write us below in the comments section of the page any questions you may have on this subject, and we will help you further with this issue as soon as possible.




User forum
0 messages