Windows 11 YouTube Playing no Sound? Fast Ways to Fix it
Bringing sound back to YouTube via a new browser
![]() 5 min. read
5 min. read
![]() Published on
Published on
Share this article
Improve this guide
Read our disclosure page to find out how can you help Windows Report sustain the editorial team. Read more
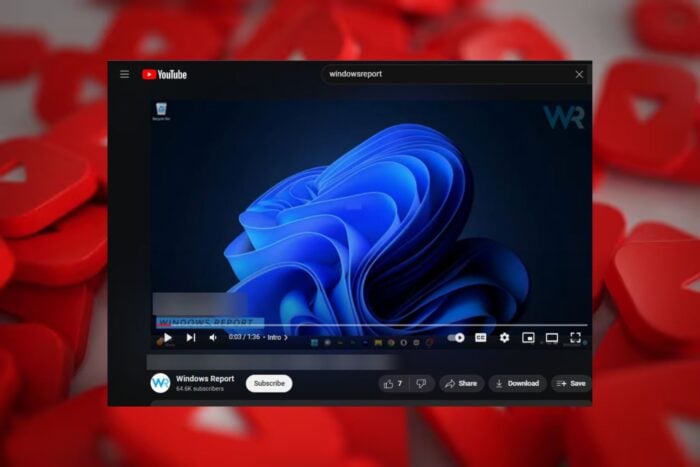
YouTube is one of the largest video repositories so it can be a real inconvenience if there’s no sound coming from your Windows 11 device during playback.
If you’re lucky, it will be something as simple as turning up your volume or switching to another audio jack if you’re using headphones. However, if the issue stems from, a damaged audio jack, outdated or missing sound card drivers, you’ll have to address this issue.
But before you start with advanced troubleshooting, check whether no sound is system-wide and test your mic to ensure it is working.
How to fix Windows 11 YouTube’s no sound?
1. System-specific sound issues
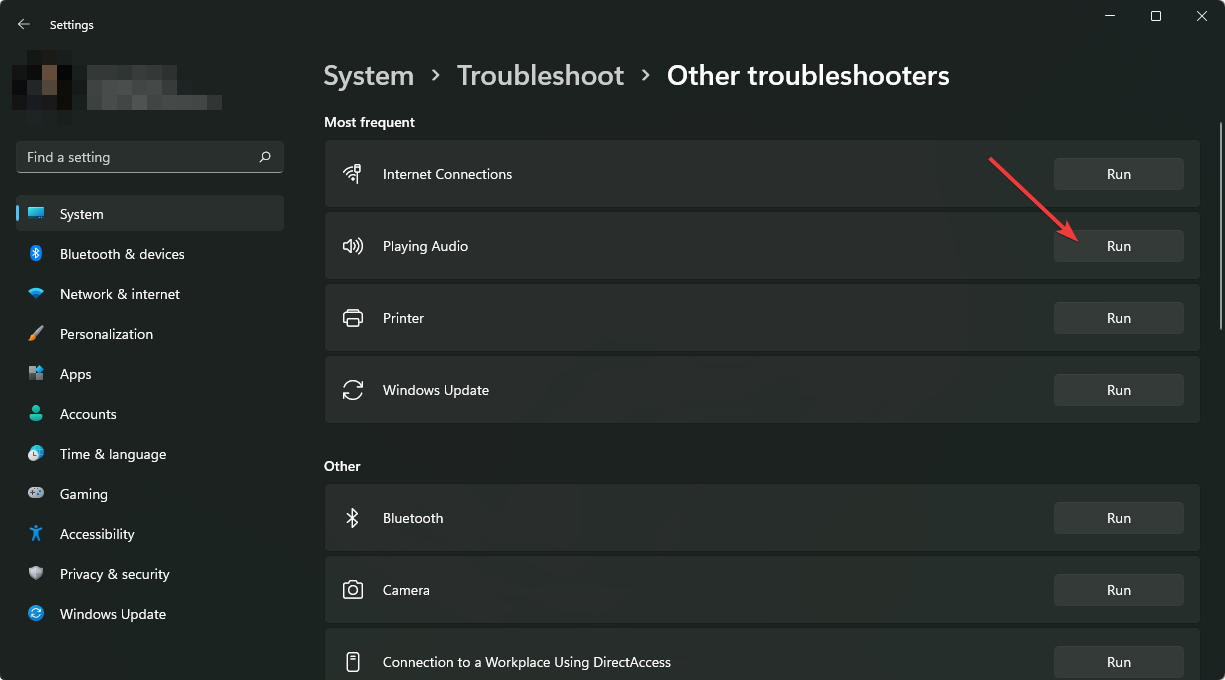
1. Run the audio troubleshooter
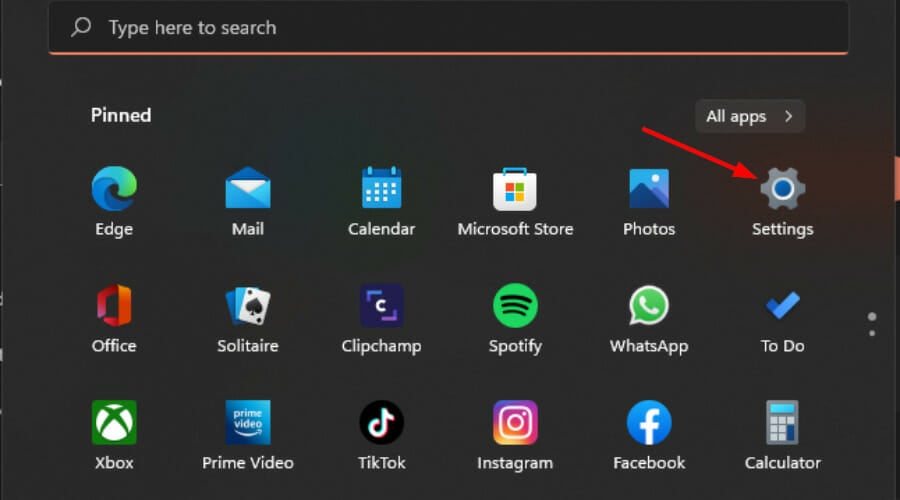
- Press the Start Menu key and select Settings.

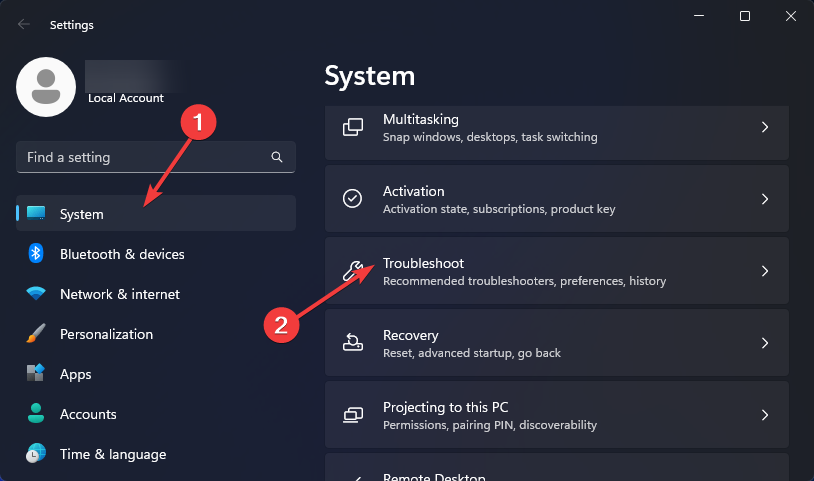
- Click on System on the left pane, then Troubleshoot on the right pane.

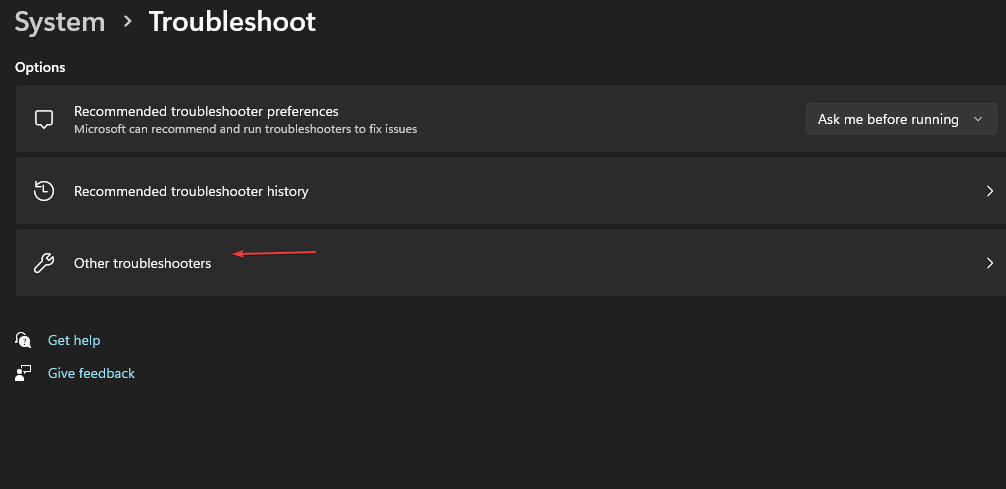
- Select Other troubleshooters.

- Locate the Playing Audio troubleshooter, and click on the Run button next to it.

2. Restart Windows Audio Services
- Right-click the Windows logo in the left-hand corner and click Run.
- Type in services.msc and hit Enter on your keyboard.

- Scroll down and locate the Windows Audio entry.

- Right-click Windows Audio, then select Restart.
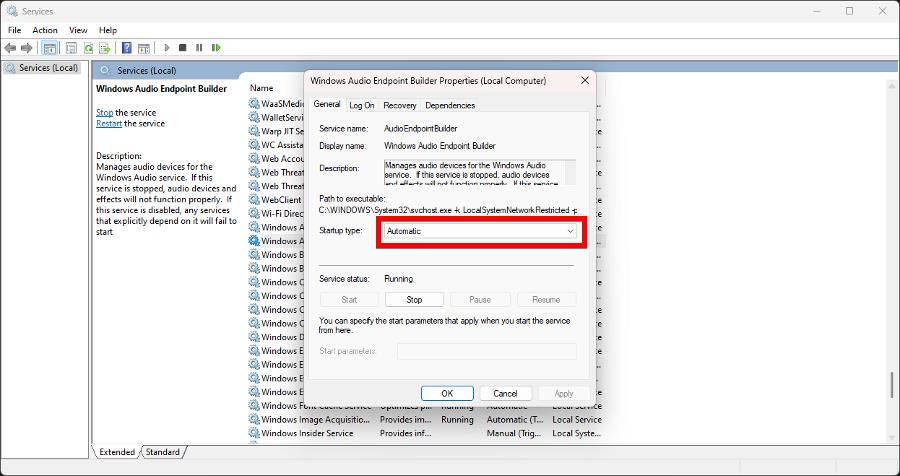
- Right-click it again and select Properties.
- Click the Startup Type menu. Change the entry to Automatic.
- Click Apply, then OK to finish.

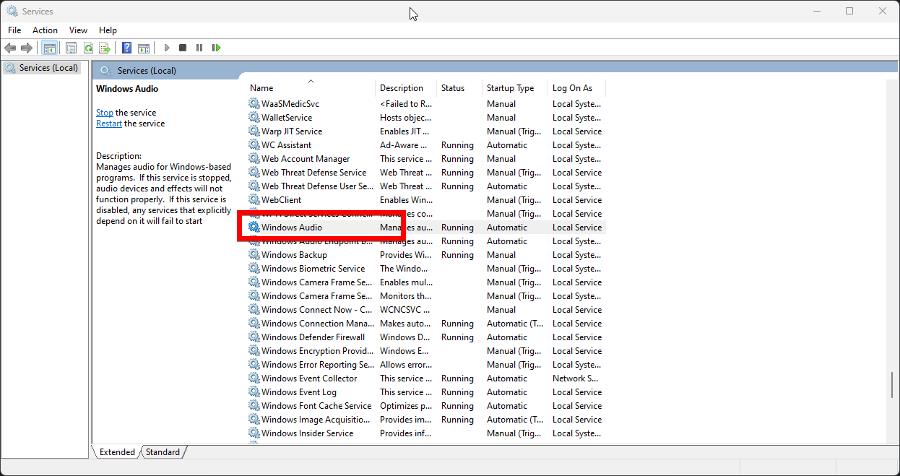
Sometimes, the audio service may stop running especially if your PC has recently been infected by malware or you installed a faulty update. restarting may potentially fix sound issues on YouTube.
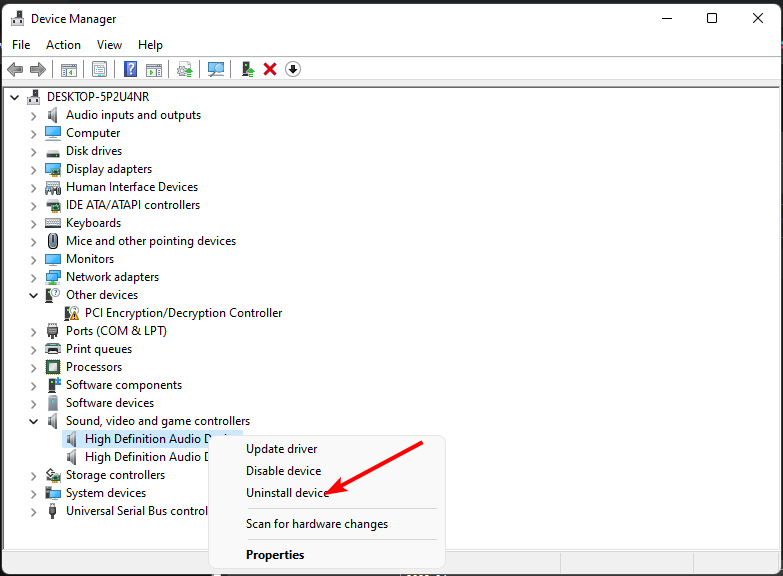
3. Reinstall audio drivers
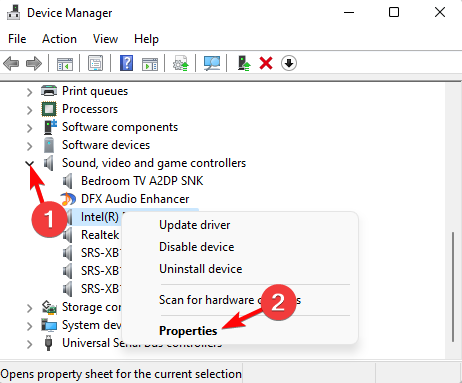
- Hit the Windows key, type Device Manager in the search bar, and click Open.
- Navigate to Sound, video, and game controllers to expand, right-click on your audio device, and select Uninstall device.

- Confirm on Uninstall.
- Restart your device, and the drivers will automatically reinstall themselves.
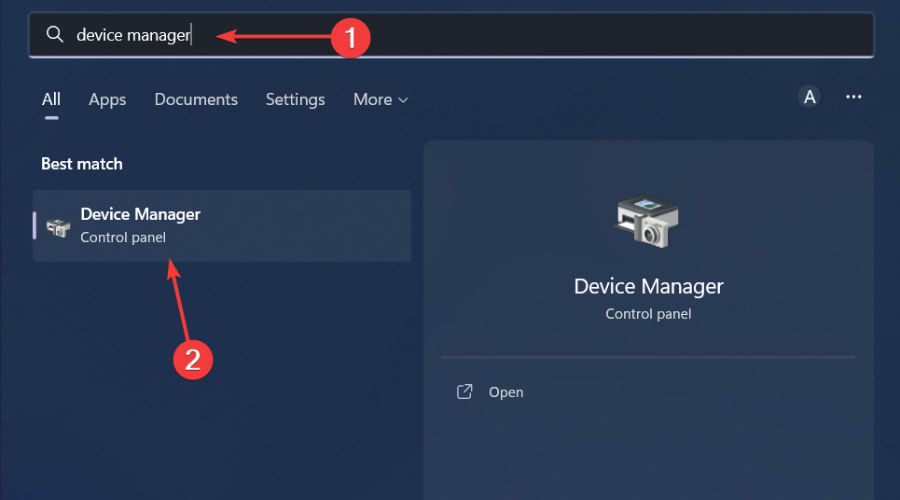
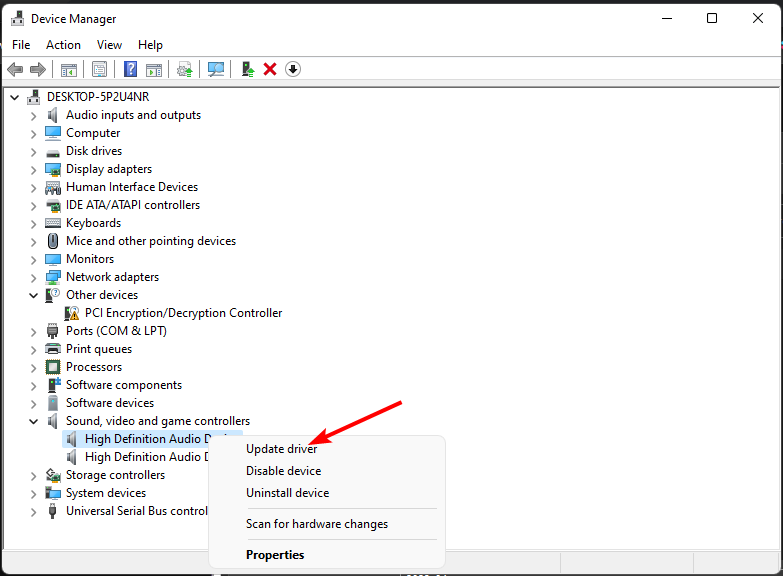
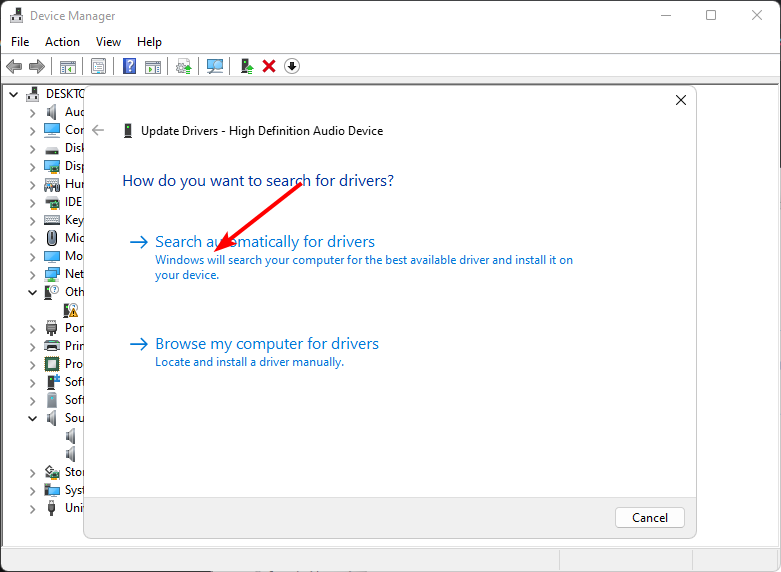
4. Update audio drivers
- Hit the Windows key, type Device Manager in the search bar, and click Open.
- Navigate to Sound, video, and game controllers to expand, right-click on your audio device, and select Update driver.
- Select Search automatically for drivers.

- Restart your PC and try reconnecting.
- Right-click the Sounds icon in the bottom right corner of the desktop and select Sounds.
- Click the Communications tab at the top.
- Now, tick the radio button for Do nothing and click OK.

- Next, click the Playback tab.
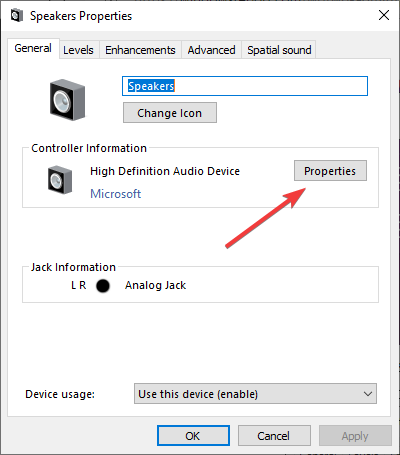
- Right-click on Speakers/Headphones and select Proprieties.

- Go to the Enhancements tab.
- Now, tick the box next to Disable all sound effects and click OK.

- Lastly, check to see if this change had any impact.


6. Enable exclusive mode for other apps
- Right-click on the sound icon at the bottom right corner and select Open volume mixer.

- Click on your playback device and select Properties.
- Navigate to the Advanced tab, check Allow applications to take exclusive control of this device option, and click OK.


7. Disable audio enhancements
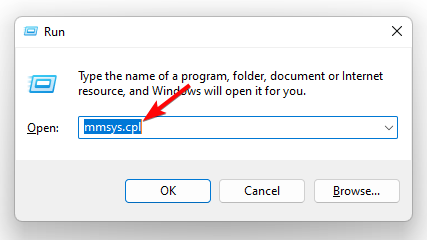
- Press the Win + R keys to open the Run dialog. Type mmsys.cpl and hit Enter to open the Sound dialog.

- In the window pop-up, right-click on your audio device, and select Properties.

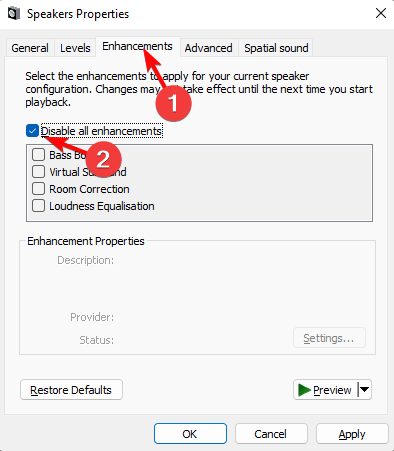
- Next, in the Properties dialog, go to the Enhancements tab, and check the box next to Disable all enhancements. Press Apply and OK.
2. Browser-specific sound issues
8. Clear the browser cache
- Launch your browser, and for this step, we shall be using Google Chrome.
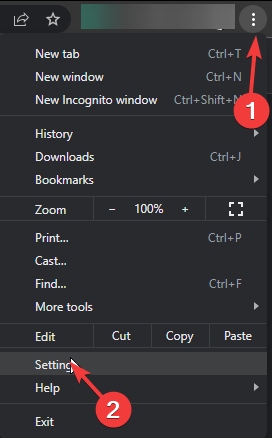
- Click the three horizontal dots and select Settings.

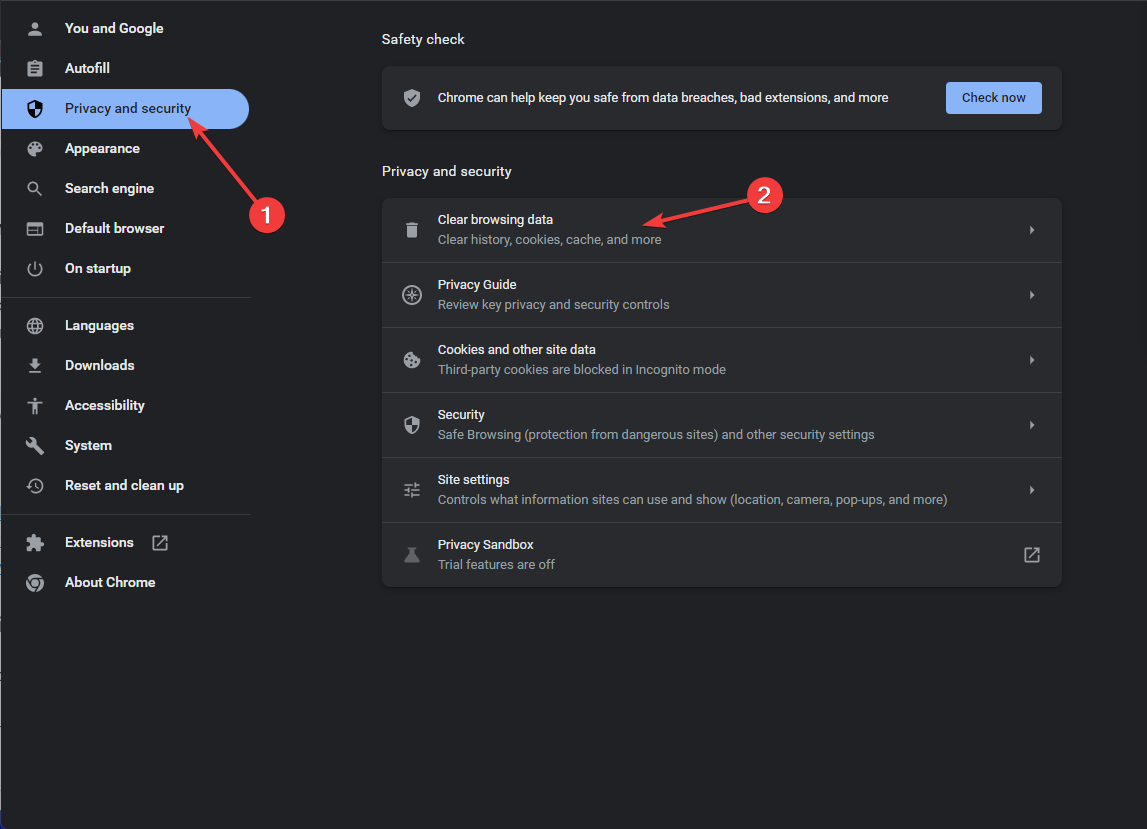
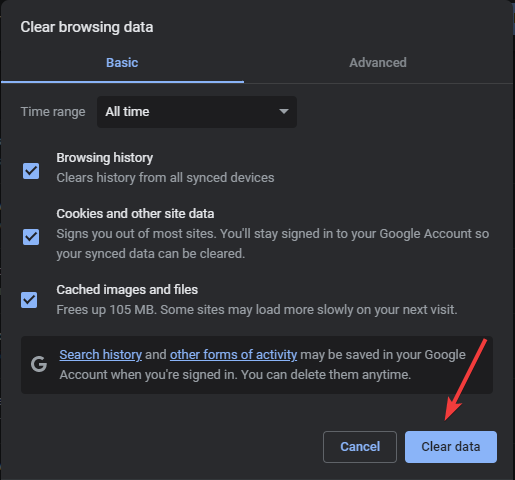
- Go to Privacy and security and click Clear browsing data.

- Select Browsing history, Cookies and other site data, & Cached images and files, then click Clear data.

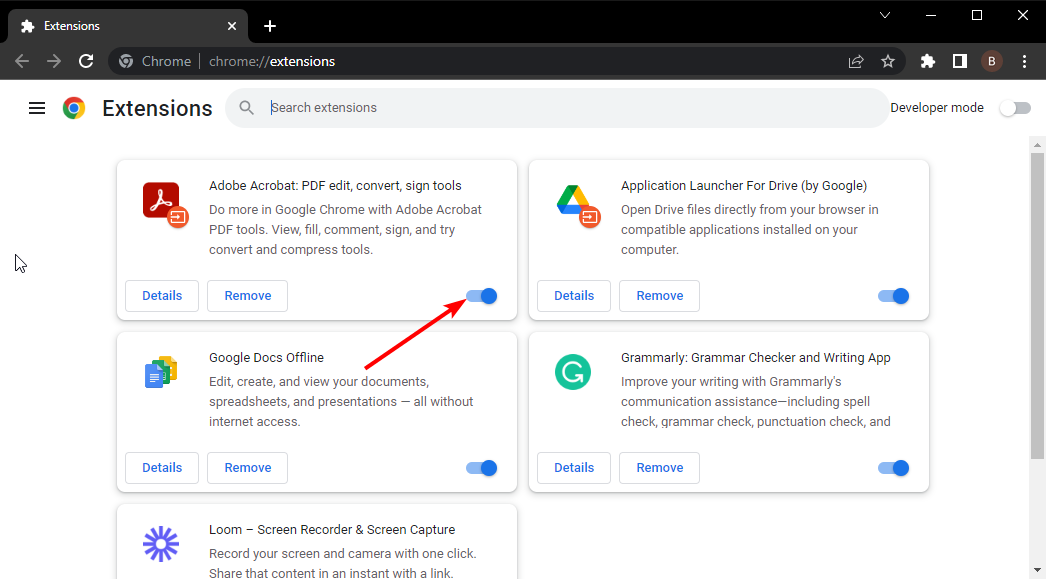
9. Disable browser extensions
- Launch your Chrome browser, and in a new tab, enter the following address:
chrome://extensions/ - Peruse through your extensions and toggle the Disable button for any suspicious-looking ones. Adblockers are common culprits so start with these.

- Repeat this step until you find the culprit.
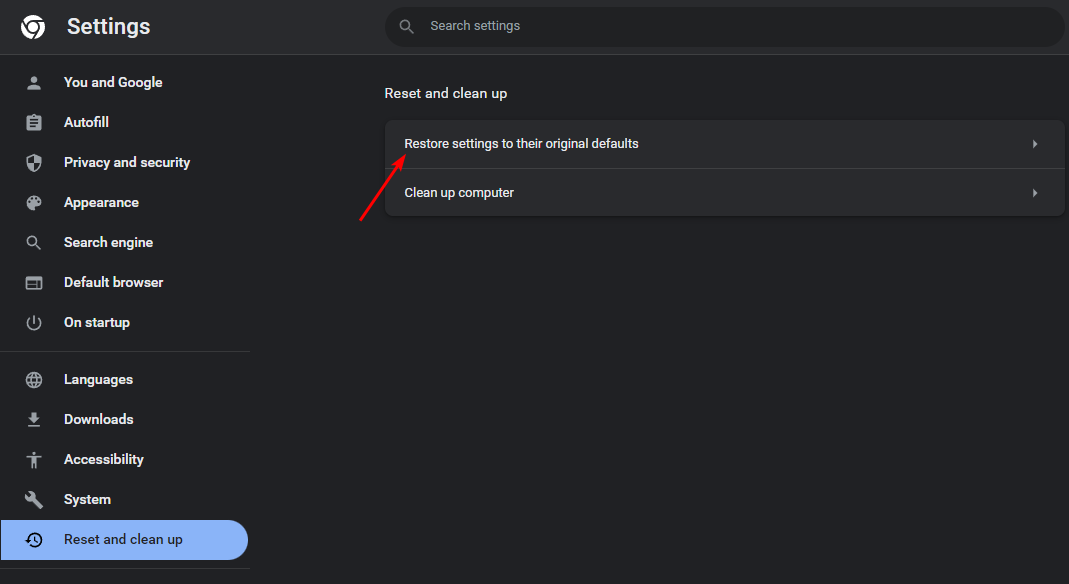
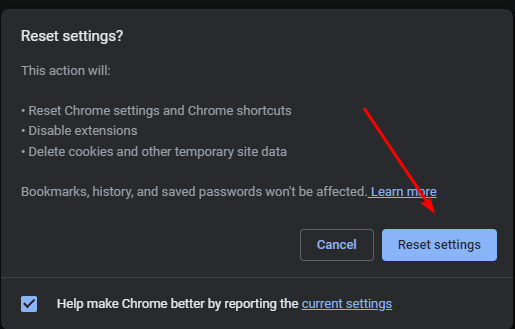
10. Reset your browser
- Open your Chrome browser and click on the three vertical ellipses at the top right corner.
- Select Settings.
- Next, click on Reset and cleanup, then select Restore settings to their original defaults.
- Confirm Reset settings in the next dialog box.

If it doesn’t work, switch to another browser or try YouTube for PC app on your Windows 11. Sometimes, certain browsers have temporary bugs and may present such issues as no sound.
And if other apps can playback sound and only YouTube has no sound, it may be app-specific. Get in touch with YouTube support and report the issue.
Should you encounter other audio-related issues such as YouTube sound too low, we’ve already addressed tested fixes in our detailed guide so feel free to check it out. For the best listening experience, consider installing YouTube volume boosters for sound enhancement.
That’s all we have for this article but if you have any other reliable and proven solutions that worked for you, please share them with us in the comment section below.


User forum
0 messages