How to Install Intel Network Drivers in Windows
Intel's dedicated driver update utility comes to your aid
4 min. read
Updated on
Read our disclosure page to find out how can you help Windows Report sustain the editorial team. Read more
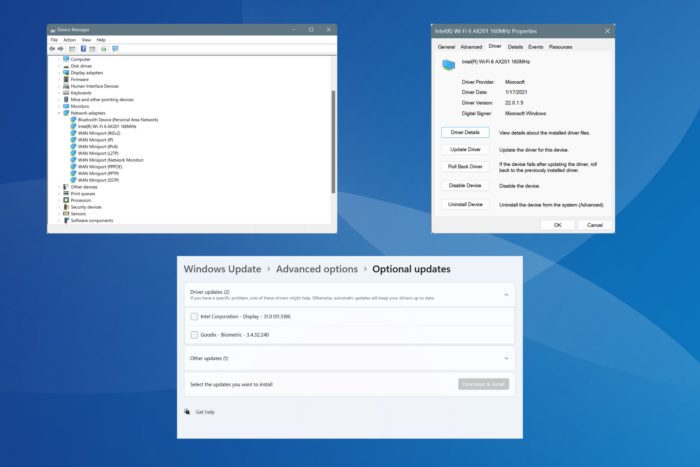
If you have an Intel network adapter on the PC, you must install and regularly update the relevant drivers for seamless and error-free performance. Although Windows does a fine job at updating drivers, manually doing so helps get rid of a wide array of network and Internet-related issues.
Intel regularly releases updates for its drivers, both via the official website and Windows Update. So, getting the latest version of Intel network drivers won’t take more than a few minutes. Let’s see how you can do that!
How can I install Intel network adapter drivers in Windows?
 NOTE
NOTE
1. Using Intel Driver & Support Assistant
You have a dedicated Intel Driver & Support Assistant (DSA), which automatically identifies any connected devices from Intel, lists the latest drivers, and facilitates quick installation.
Since it’s an official utility, Intel DSA is completely safe to use!
2. Via Device Manager
2.1 Automatically install the driver
- Press Windows + X to open the Power User menu, and select Device Manager from the list.
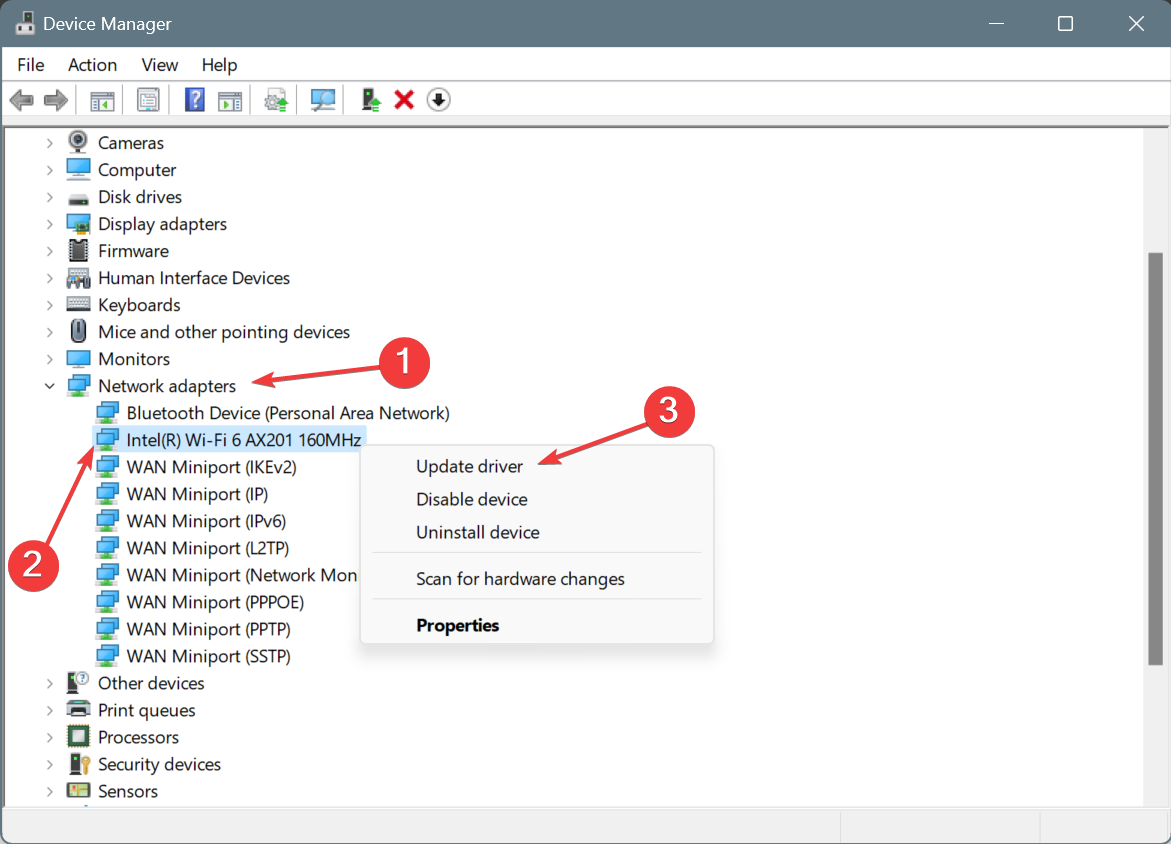
- Expand the Network adapters entry, right-click on the Intel adapter, and select Update driver.
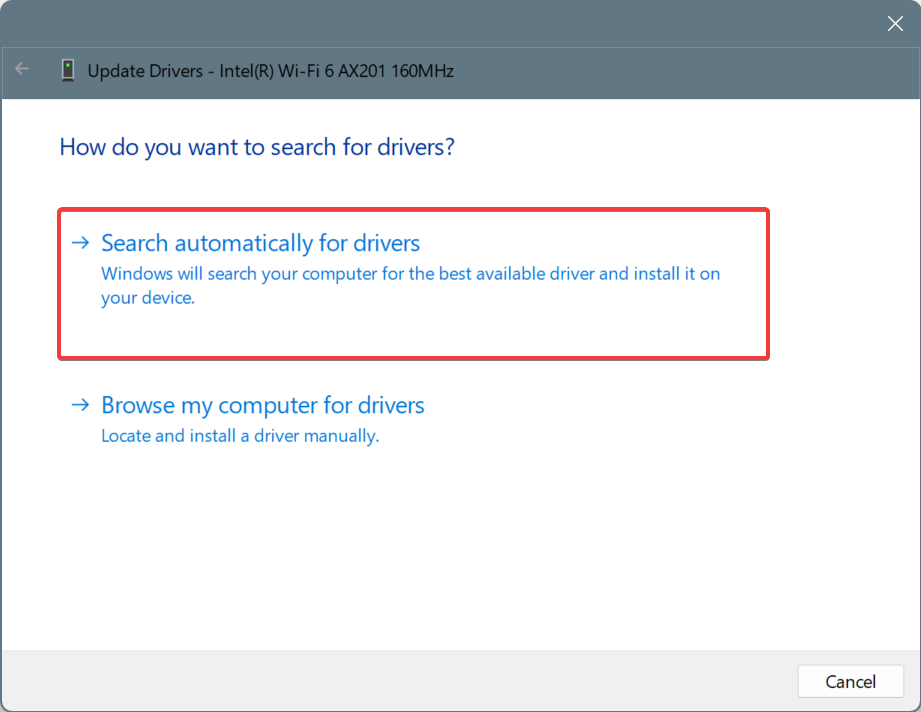
- Choose Search automatically for drivers and let Windows install the best locally available version.
- Restart the computer to apply the changes.
Letting Windows automatically install the best Intel network adapter driver is quick and straightforward and, at the same time, reduces the likelihood of post-installation issues.
2.2 Manually install the driver
- In the Device Manager, locate the Intel network adapter, right-click on it, and choose Update driver.
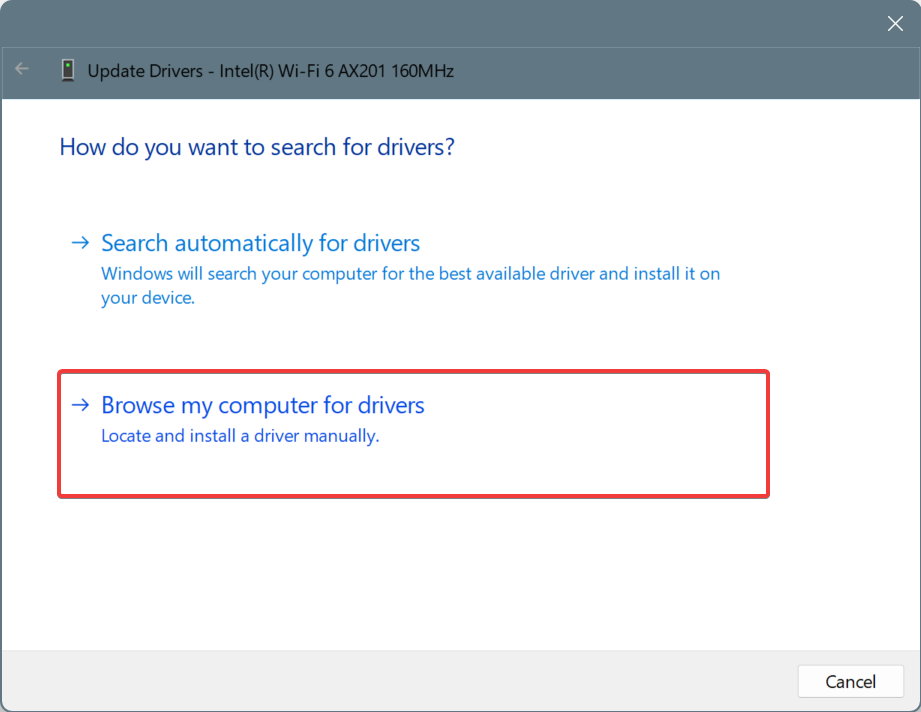
- Select Browse my computer for drivers.
- Click on Let me pick from a list of available drivers on my computer.
- Tick the checkbox for Show compatible hardware, then pick a driver from the list, and click on Next to install it.
- Once installed, restart the computer.
Often, when the current version throws an error, you can manually install another Intel network driver in Windows, perhaps an older or generic (says Microsoft next to it) version.
3. Via Windows Update
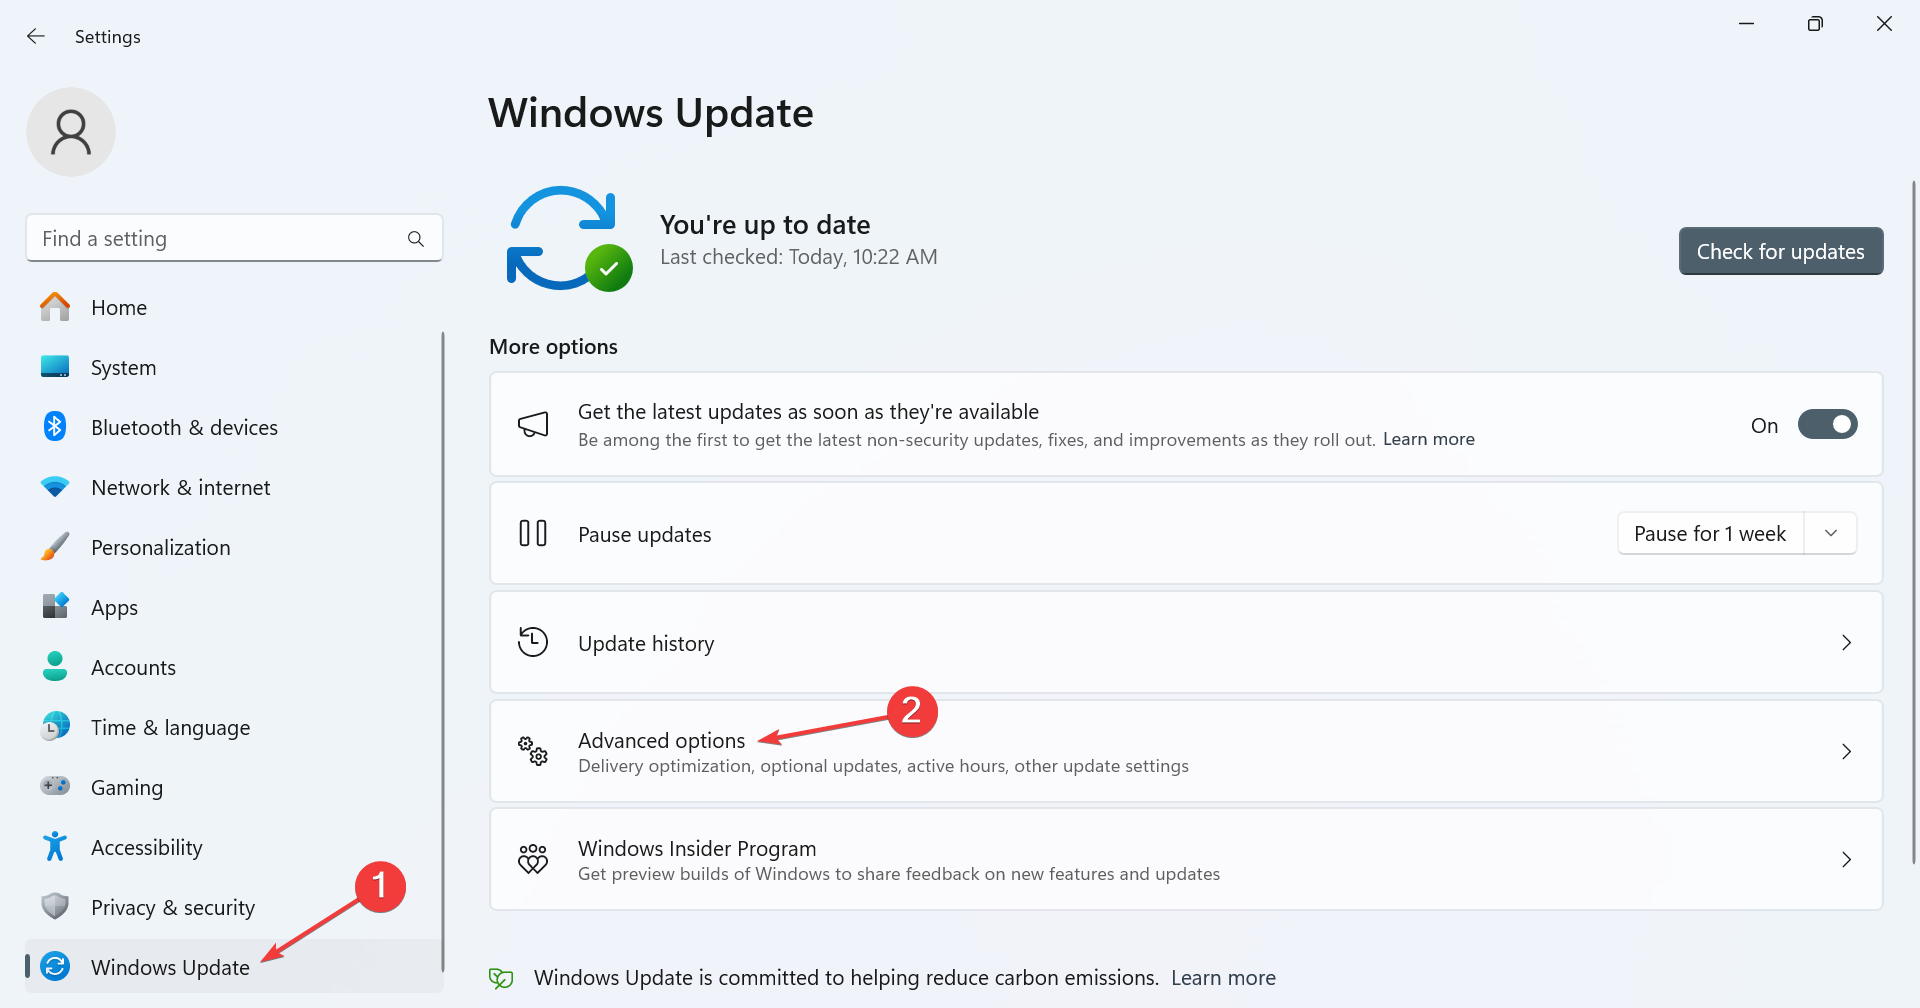
- Press Windows + I to open Settings, go to Windows Update from the left pane, and click on Advanced options.
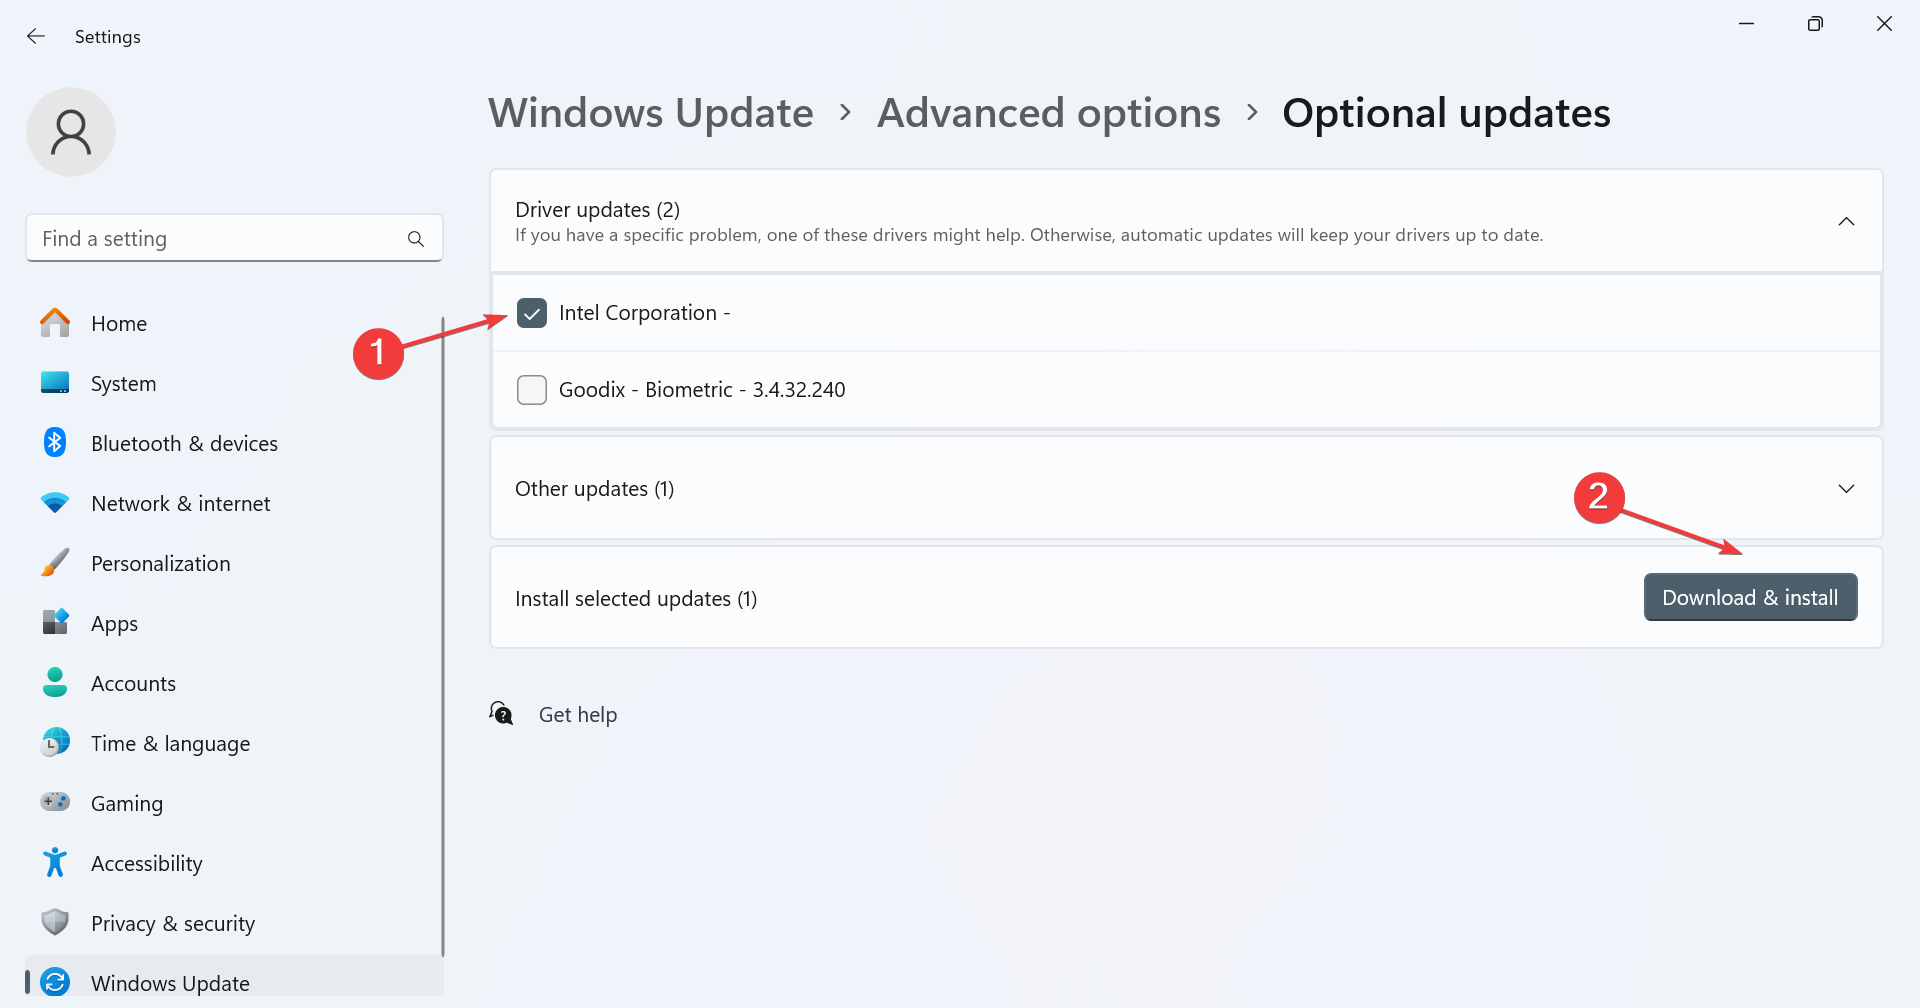
- Click on Optional updates.
- Now, expand the Driver updates section, tick the checkbox for the Intel network adapter driver, if one is available, and click on Download & install.
4. Via the manufacturer’s official website
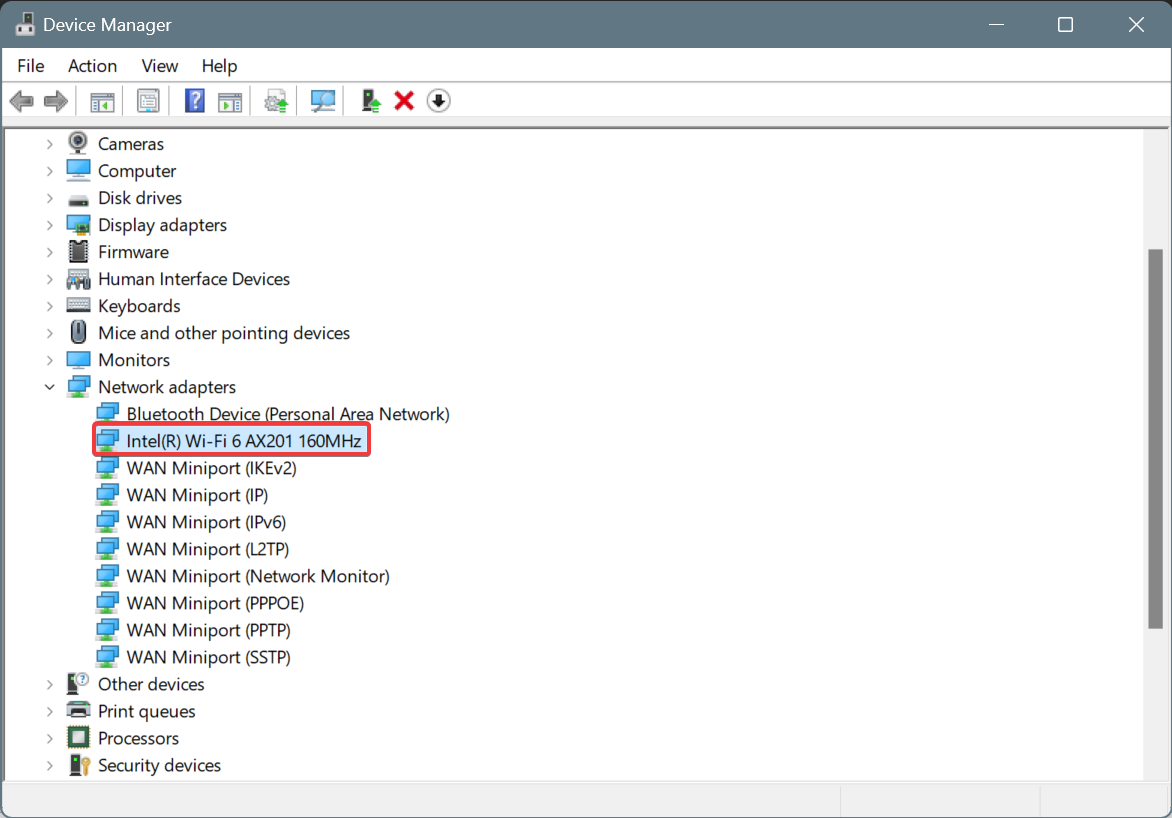
- In the Device Manager, identify the Intel network adapter available on the PC.
- Now, open any search engine and search for the network adapter’s driver update. In my case, I had the Intel Wi-Fi 6 AX201 160MHz Wi-Fi adapter. So the search query became, Update Intel Wi-Fi 6 AX201 driver.
- Next, go to Intel’s or your computer manufacturer’s official website from the search results.
- Open the driver page and download the driver setup (.exe file). If it’s a compressed file (.zip), you will first have to extract the contents.
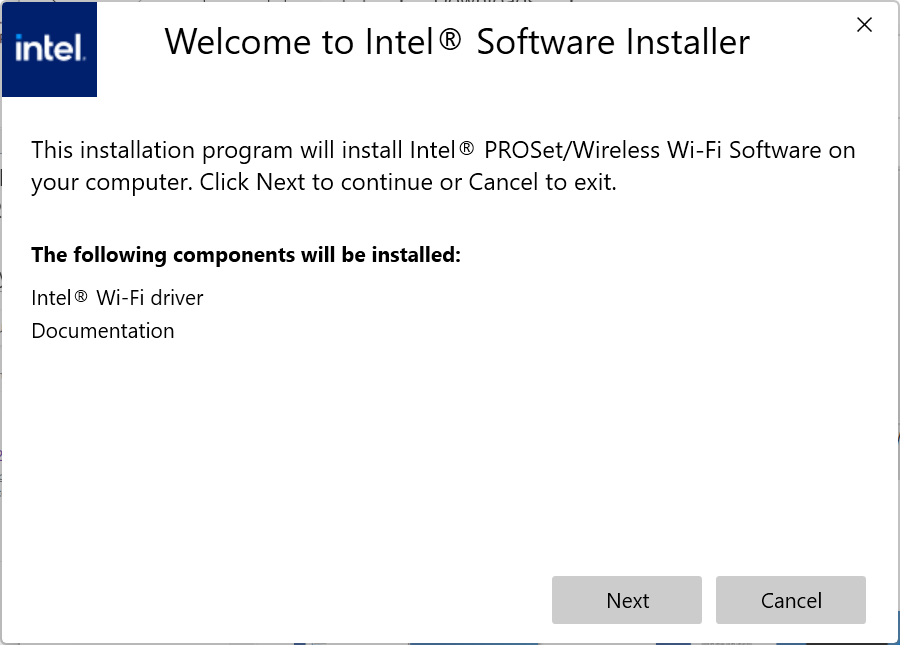
- Run the setup and follow the on-screen instructions to complete the installation process.
- Restart the computer for the changes to come into effect.
If you want to install the latest Intel network drivers on Windows 11 and 10, the best option is to manually search and download them from the official website.
Although, you will have to be careful, as installing the wrong drivers can affect the network adapter’s functionality, lead to performance-related issues, or slow the Internet speed.
5. Using a driver updater utility
The safest and most straightforward option for installing Intel network drivers is to use an effective driver updater utility. A dedicated tool will automatically identify all network adapters and install the latest driver version available for each.
Also, there are free driver update utilities, in case you don’t want to purchase a license just yet, but these lack in terms of functionalities.
What can I do if Intel network drivers won’t install?
If the Intel network drivers are not installing, these solutions will help:
- Manually install an older driver version and then proceed with the update
- Reset the network adapter
- Install any pending Windows updates
- Perform a system restore
With these methods and tips, you can quickly install Intel network drivers, both Wi-Fi and Ethernet, and not run into any issues. Also, if you have another adapter, the steps to install network drivers in Windows 11 remain the same.
Many tend to use specialized tools to update their drivers, however, this can lead to issues, and we already wrote what to do if Intel Driver Support Assistant is not working, so don’t miss it.
Which method worked best for you? Share with our readers in the comments section.



User forum
0 messages