Install NVM on Windows - Step-by-Step Guide

XINSTALL BY CLICKING THE DOWNLOAD
FILE
Want to install NVM on Windows? Node Version Manager (NVM) is a popular tool for managing multiple versions of Node.js. I’ll show you how to simplify switching between them.
Let’s begin!
How To Install NVM on Windows
Here are the steps:
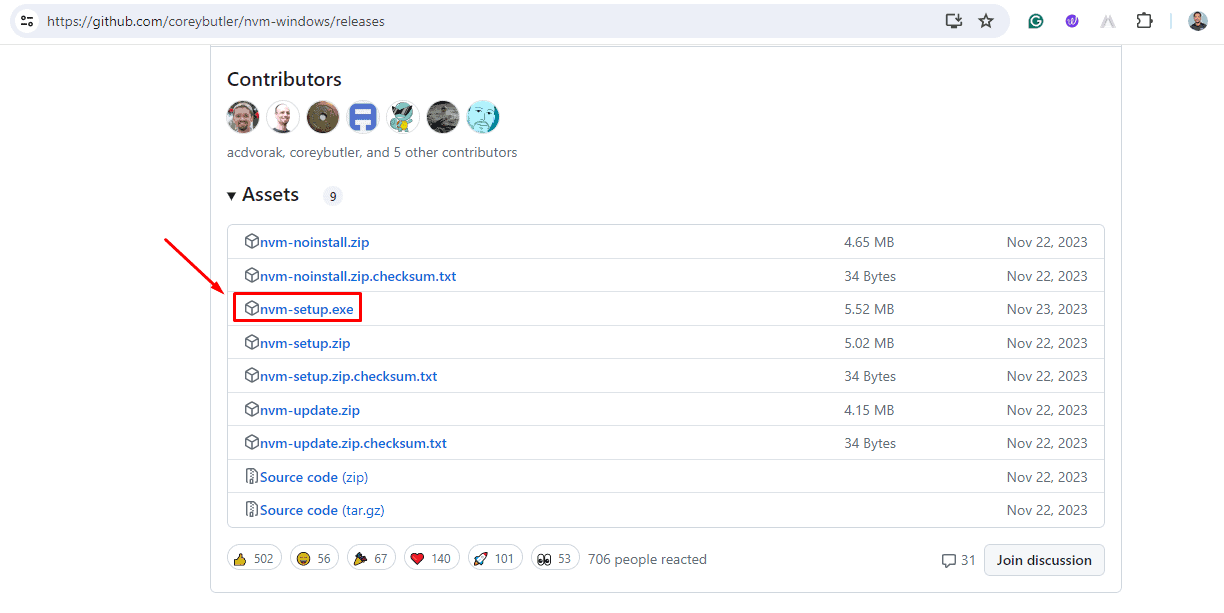
- Open your browser and go to the NVM for Windows GitHub releases page.
- Tap on the setup file to download it.
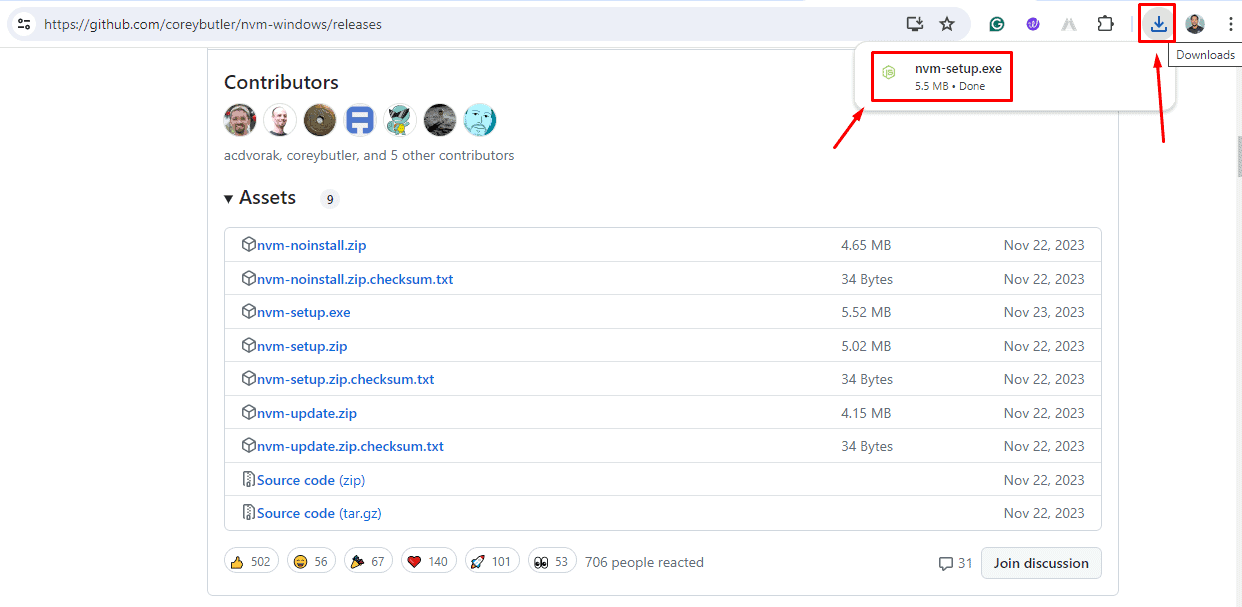
- Click on the download icon on the top right corner of your screen to access the installer. Double-click on it to start the installation process.
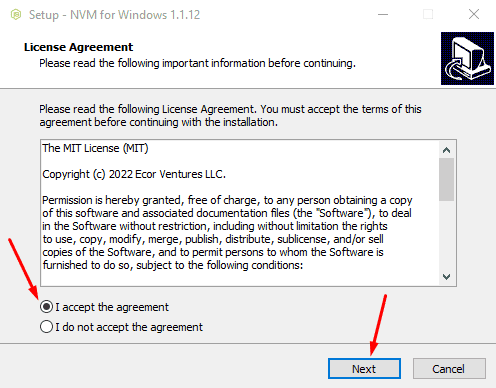
- Read and accept the license agreement, then click “Next.”
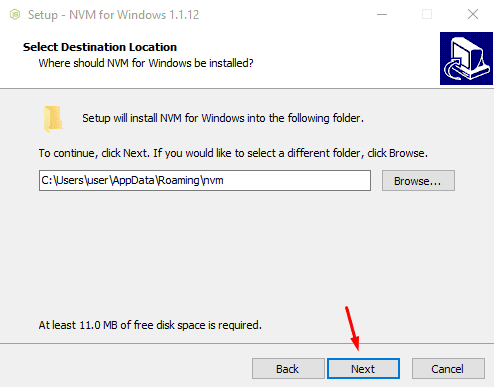
- Select a destination location and tap Next.
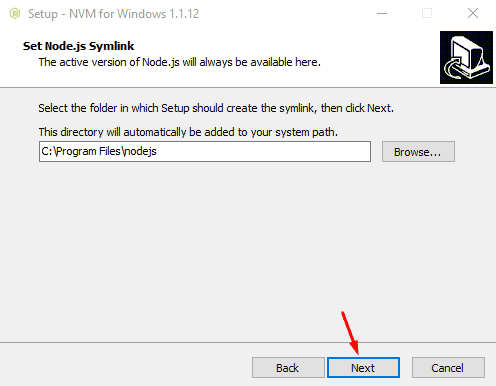
- Pick a folder where the setup should create the symlink. The default is usually fine, but you can change it if needed. Then hit Next.
- Click “Install“, then hit Finish once complete.

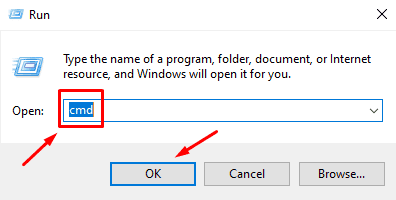
- After installation, tap the Windows Icon + R, then type cmd to run a prompt command.
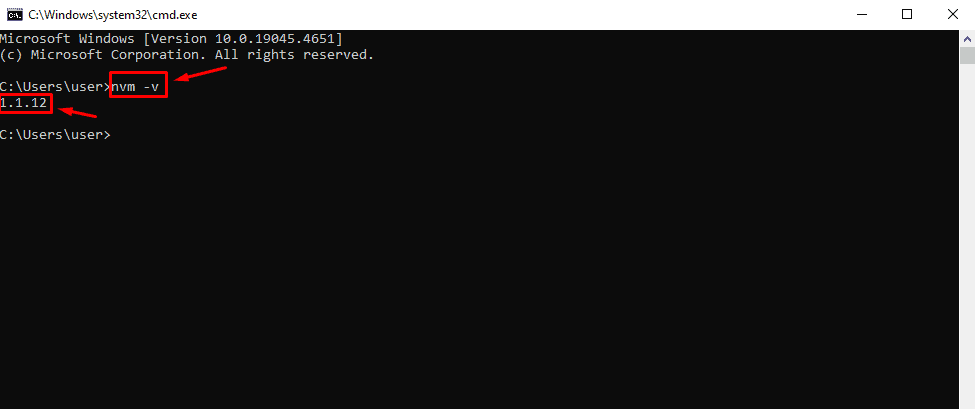
- Type nvm -v and press Enter. You should see the installed version of NVM, confirming that the installation was successful.
You’re done!
So, now you know how to install NVM on Windows. By following these steps, you can easily switch between different Node.js versions to suit your project’s needs.
Additionally, if you want to update your Node version, we have just the guide for that.
Readers help support Windows Report. We may get a commission if you buy through our links.

Read our disclosure page to find out how can you help Windows Report sustain the editorial team. Read more


Improve this guide


User forum
0 messages