ATX 12V PSU: Everything you Need to Know
The CPU needs the 8-pin ATX 12V cable for additional power
4 min. read
Published on
Read our disclosure page to find out how can you help Windows Report sustain the editorial team. Read more
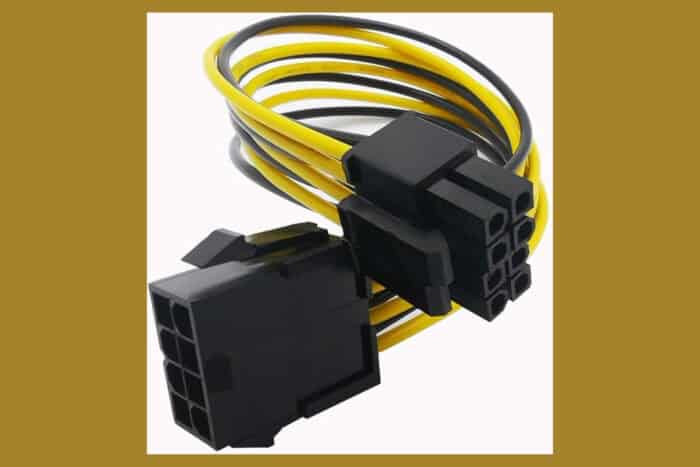
Navigating the world of power supplies and connectors can be daunting, especially when dealing with the ATX 12V standard. This guide will walk you through the essentials, ensuring your PC build is both stable and efficient.
How do I choose the right ATX 12V PSU?
Understanding the 8-pin ATX 12V power connector
The 8-pin ATX 12V power connector is primarily meant to provide additional power to the CPU. This connector typically consists of two 4-pin connectors that can be used together (as an 8-pin) or separately (as a 4-pin). The 20+4 pin connector on the other hand is designed to provide power to the motherboard and its peripherals.
Using the 8-pin connector properly ensures that your CPU receives the necessary power for optimal performance. This prevents system instability and potential hardware damage
2. Extension cables for the ATX 12V power connector
If the 8-pin ATX 12V cable from your PSU is too short to reach the connector on your motherboard, you can use an extension cable. Here’s how to do it:
- Purchase an 8-pin EPS extension cable.
- Connect the male end of the extension cable to the female end of the PSU’s 8-pin connector.
- Route the extension cable through the back of the case for better cable management.
- Plug the female end of the extension cable into the 8-pin connector on the motherboard.
Using an extension cable allows you to maintain a clean build with proper cable management, reducing clutter and improving airflow within your case.
3. Identifying correct connectors
When dealing with modern power supplies, the 8-pin connector might be split into two separate 4-pin connectors. Here’s how to ensure you’re using the correct connector:
- Locate the 4+4 CPU power connector on your PSU.
- Join the two 4-pin connectors together to form an 8-pin connector.
- Match the shape of the pins to the corresponding 8-pin socket on the motherboard.
- Plug the unified 8-pin connector into the 8-pin ATX 12V socket on the motherboard.
Ensuring each connector is correctly identified and connected prevents improper installation that can cause power delivery issues or damage components.
4. Upgrading to a compatible PSU
If your current PSU lacks the necessary connectors or does not meet the power requirements of your new build, consider upgrading to a compatible PSU:
- Identify a PSU that meets your system’s power requirements (at least 500 watts recommended).
- Make sure the PSU has an ATX 12V 2.3 or later version which typically includes the necessary 8-pin connectors.
- Purchase from reputable brands like Corsair, EVGA, or Seasonic.
Upgrading to a modern and compatible PSU ensures reliable power delivery to all components, ensuring system stability and longevity.
5. Using an adapter for older PSUs
If you have an older PSU and need to connect to a more modern motherboard, adapters may help. Here’s how:
- Purchase an ATX 20-pin to 24-pin adapter for the main power connector.
- If needed, purchase a 4-pin to 8-pin CPU power adapter.
- Connect the adapters to the corresponding connectors on your PSU.
- Plug the adapted connectors into the motherboard.
Using adapters allows older PSUs to be compatible with newer motherboards, saving cost on immediate PSU replacement while still powering your system correctly.
However, we don’t recommend this approach because most likely, the older PSU doesn’t have enough power to distribute the necessary resources to your CPU. Our advice is to change the PSU with one that comes with the 12V 8-pin cable and sufficient power.
By following these solutions and guidelines, you can ensure that your ATX 12V power connections are properly managed, which will help maintain the stability and performance of your PC build. Always double-check connections and consider future upgrades to keep your system running smoothly.
We have a convenient guide on how to check the PSU wattage if you don’t know it by heart. If the motherboard doesn’t get enough power, click the highlighted link for proper solutions.
That being said, feel free to use the comments section below to write any additional questions you might have.

User forum
0 messages