Ways to Access Quick Assist Administrator Mode
The quickest way is to use the Search bar
![]() 3 min. read
3 min. read
![]() Published on
Published on
Share this article
Improve this guide
Read our disclosure page to find out how can you help Windows Report sustain the editorial team. Read more
Quick Assist is an inbuilt Windows remote assistance tool for receiving and providing technical or general help remotely. If you use Quick Assist often, you must know that you need to enter the app using administrator mode for troubleshooting purposes. In this guide, we will discuss different ways to access the app with elevated rights.
How can I access Quick Assist in administrator mode?
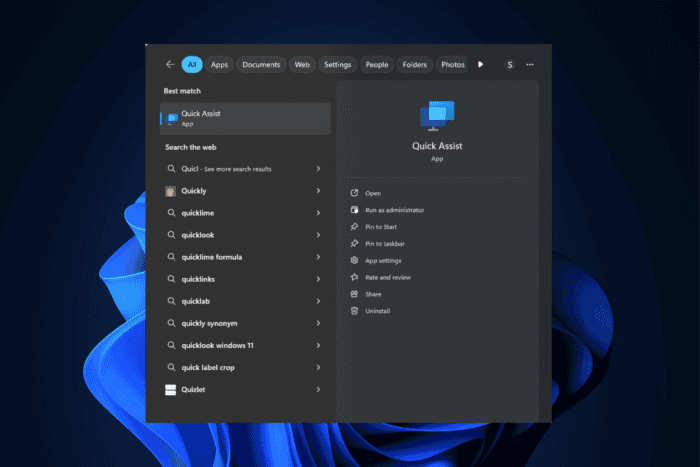
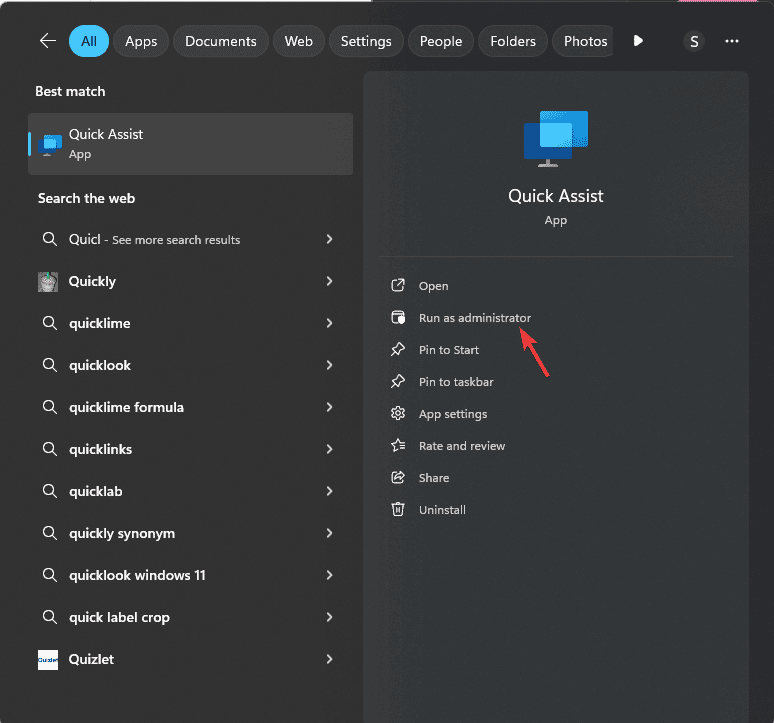
1. Using the Windows Search bar
- Press the Windows key and type quick assist in the search box.
- Select Quick Assist from the result and click Run as administrator.

- You can also right-click Quick Assist and choose Run as administrator from the context menu.
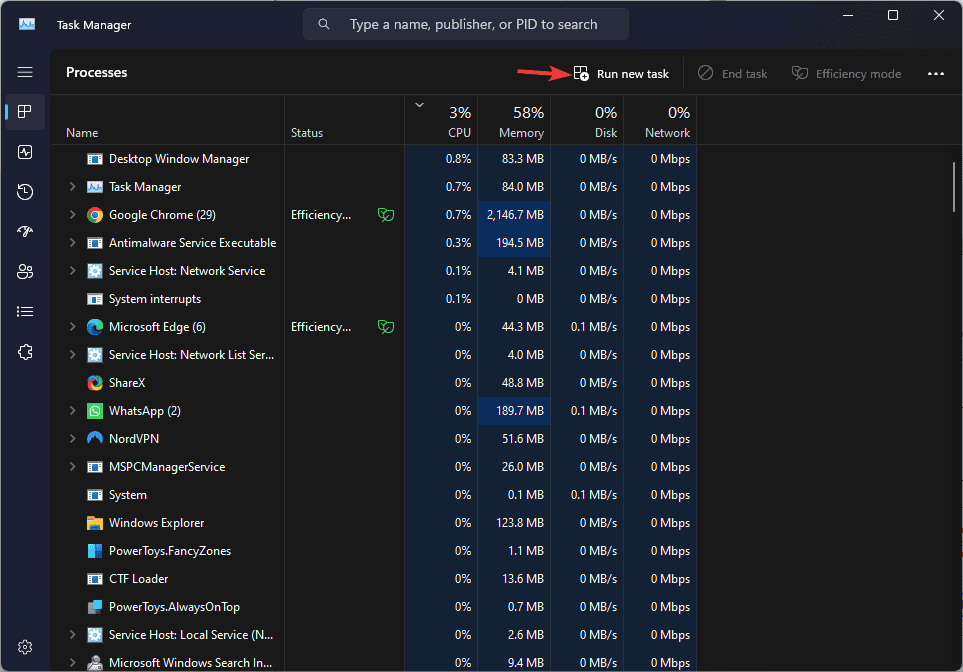
2. Using the Task Manager
- Press Ctrl + Shift +Esc to open Task Manager.

- On the Task Manager window, locate and click Run new task.
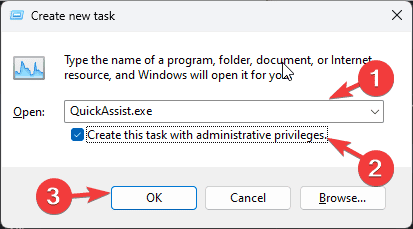
- In the Create new task window, type QuickAssist.exe and place a checkmark next to Create this task with administrative privileges, then click OK to launch Quick Assist in administrator mode.

3. Using a shortcut
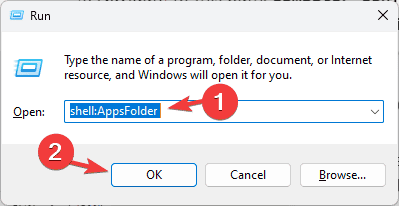
- Press Windows + R to open the Run dialog box.

- Type in the path: shell:AppsFolder and click OK to open a window that contains apps installed from the Microsoft Store.
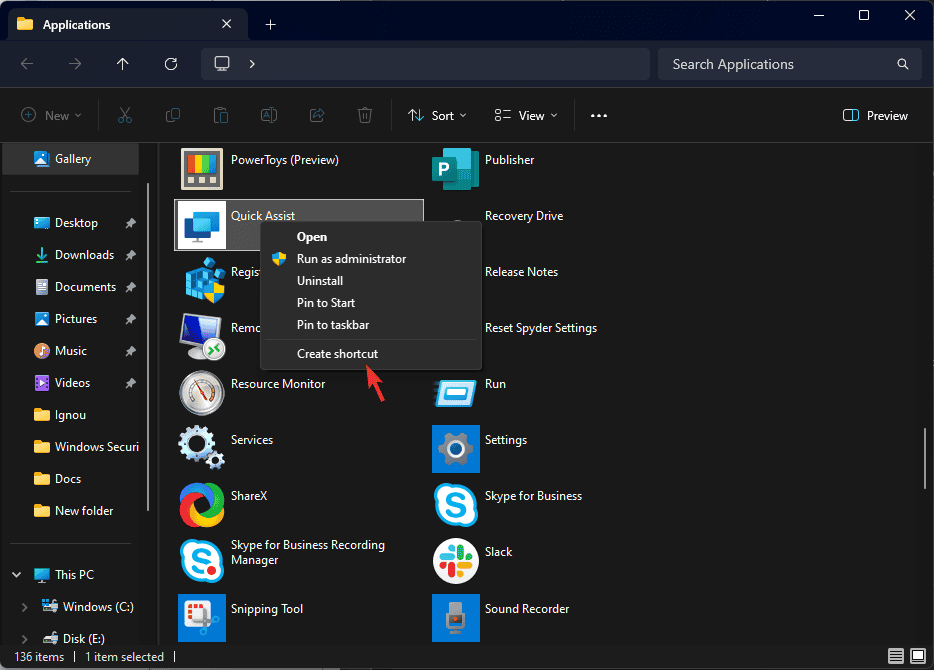
- From the list of apps, look for Quick Assist. Right-click it and select Create a shortcut.

- It will prompt you to create a shortcut on Desktop; click Yes to complete.
- Once the shortcut is created, right-click it and select Run as administrator.
4. Using the apps folder
- Press Windows + R to open the Run dialog box.
- Type in the path: shell:AppsFolder and click OK to open a window that contains apps installed from the Microsoft Store.
- From the list of apps, look for Quick Assist. Right-click it and select Run as administrator.

5. Using the Group Policy Editor
- Press Windows + R to open the Run dialog box.
- Type gpedit.msc and click OK to open the Group Policy Editor.
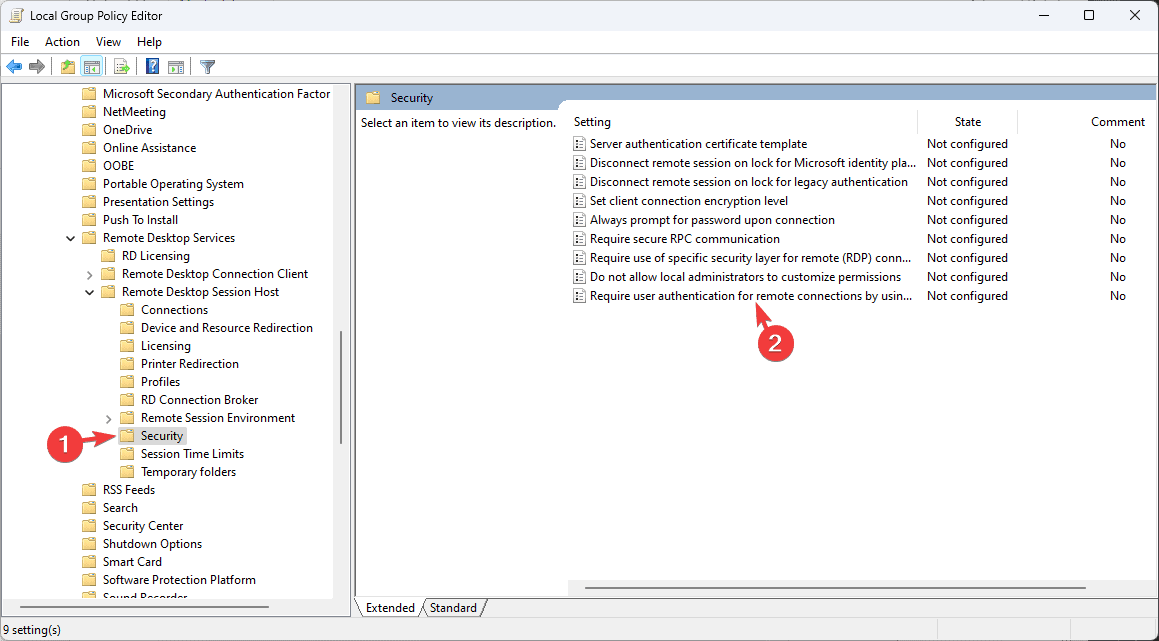
- Navigate to this path:
Computer Configuration\Administrative Templates\Windows Components\Remote Desktop Services\Remote Desktop Session Host\Security - From the right pane, locate and double-click Require use of a specific security layer for remote (RDP) connections to open Properties.

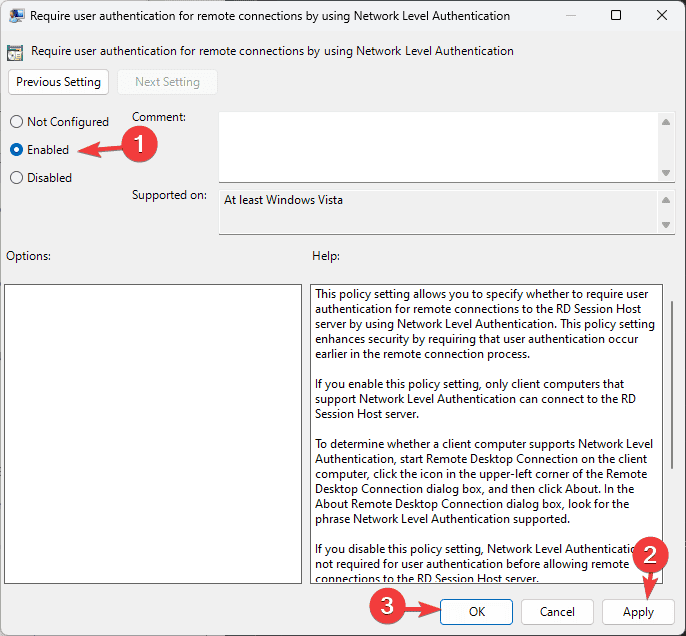
- Click Enabled, then click Apply, then OK.

- Now do the same for these options:
- Require user authentication for remote connections by using Network Level Authentication
- Allow users to connect remotely by using Remote Desktop Services
- Always prompt for password upon connection
- Once done, restart your computer to save the changes.

These steps can be used to create shortcuts for other apps installed in the Microsoft Store, such as Skype, Snipping Tool, PowerToys, and more.
If you are facing issues like Quick Assist not working, opening, or loading, it could be due to bugs or outdated apps; check out this guide to find solutions to fix it.
While we are talking about Quick Assist, you can also check out our detailed guide on viewing Quick Assist Logs with Event Viewer.
You can use any of these methods to launch Assist in administrator mode. Which method do you prefer, and how Quick Assist helps you troubleshoot issues? Share your thoughts with our readers in the comments section below.

User forum
0 messages