How to Fix the WIN32K_CALLOUT_WATCHDOG_BUGCHECK Error
Make sure the graphics driver is up to date
5 min. read
Published on
Read our disclosure page to find out how can you help Windows Report sustain the editorial team. Read more
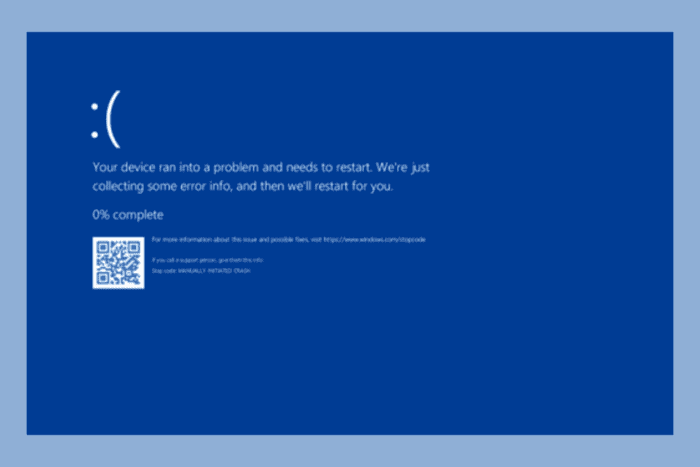
The WIN32K_CALLOUT_WATCHDOG_BUGCHECK with the bug check code 0x000001A2 is a Blue Screen of Death (BSoD) stop error that occurs due to a watchdog timeout in the win32k.sys driver appears due to hardware, driver issues, or software bugs.
The win32k.sys file is an important part of the Windows kernel, which handles graphical user interface operations, user input, and Windows management. To begin with, run a full system scan with a Windows Defender tool or any other reliable antivirus tool.
How can I fix the WIN32K_CALLOUT_WATCHDOG_BUGCHECK error?
1. Update the graphics driver
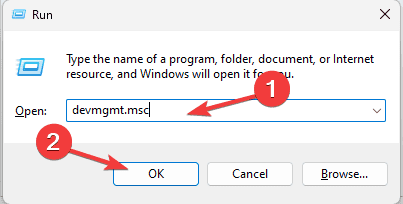
- Press Windows + R to open the Run window.
- Type devmgmt.msc and click OK to open the Device Manager app.
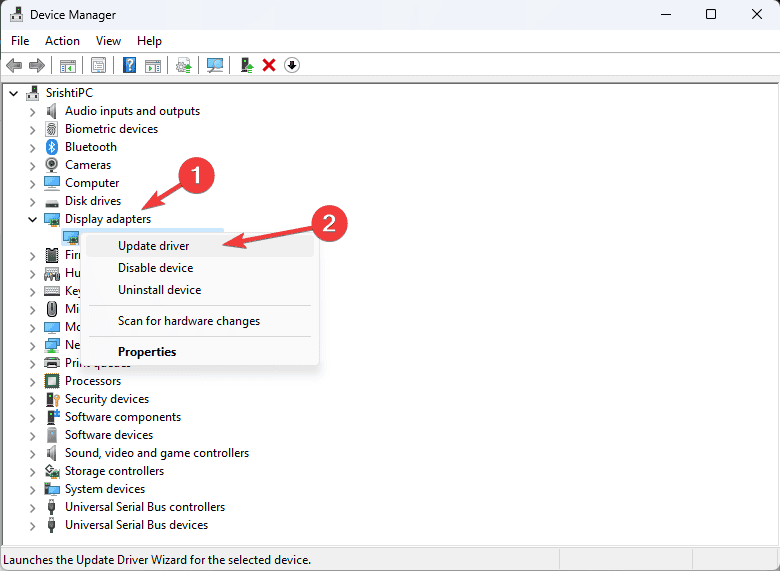
- Locate and click the Display adapters category to expand it, then right-click the graphics driver and select Update driver from the context menu.
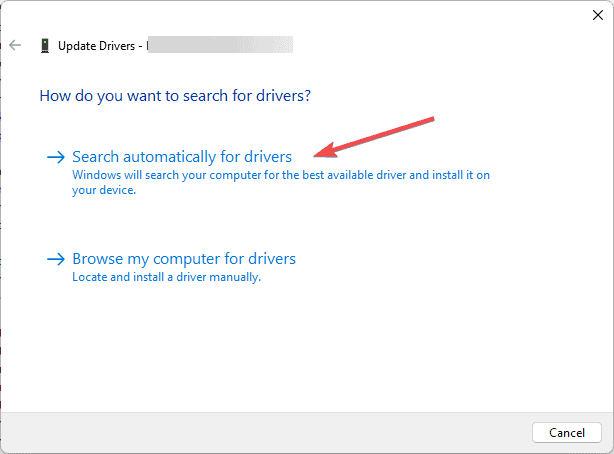
- Click Search automatically for drivers and Windows will try to find the best version of driver.
If Windows is not able to find the latest version of the driver, head to the manufacturer’s website and get the updates installed. Alternatively, you can download & install a reliable driver updater tool to ensure all the drivers on the computer are up to date.
If this doesn’t work, you can roll back display driver to fix the WIN32K_CALLOUT_WATCHDOG_BUGCHECK BSoD error by following these steps:
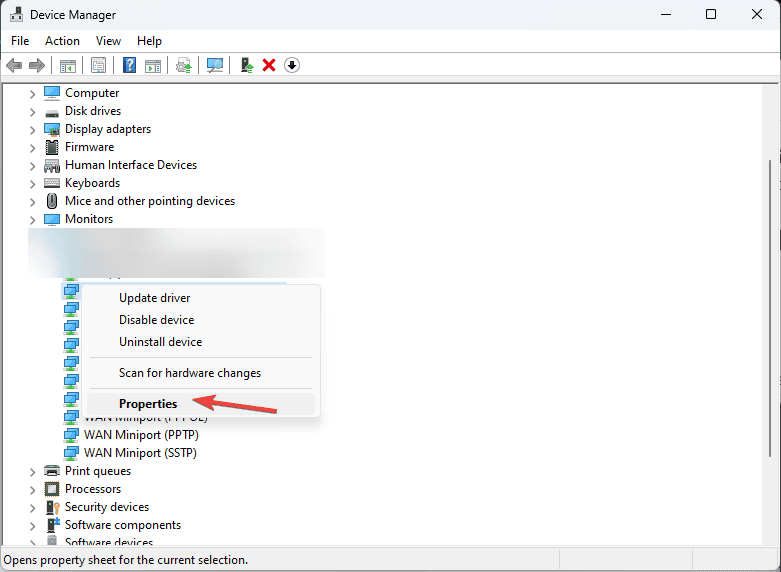
- Open the Device Manager app, then click Display adapters to expand.
- Right-click the graphics driver and select Properties from the context menu.
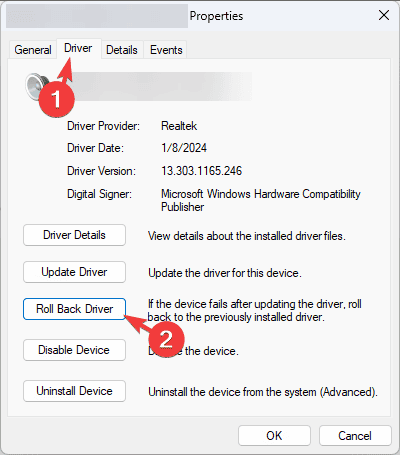
- Go to the Driver tab, then click the Roll Back Driver button.
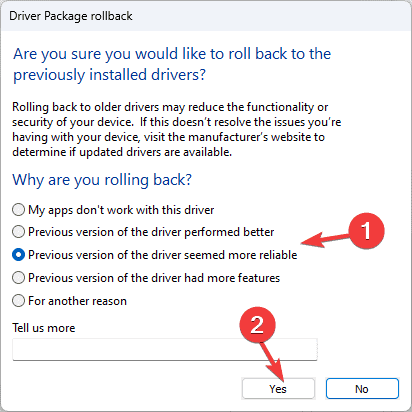
- On the following screen, select the reason and click Yes.
2. Check for Windows Updates
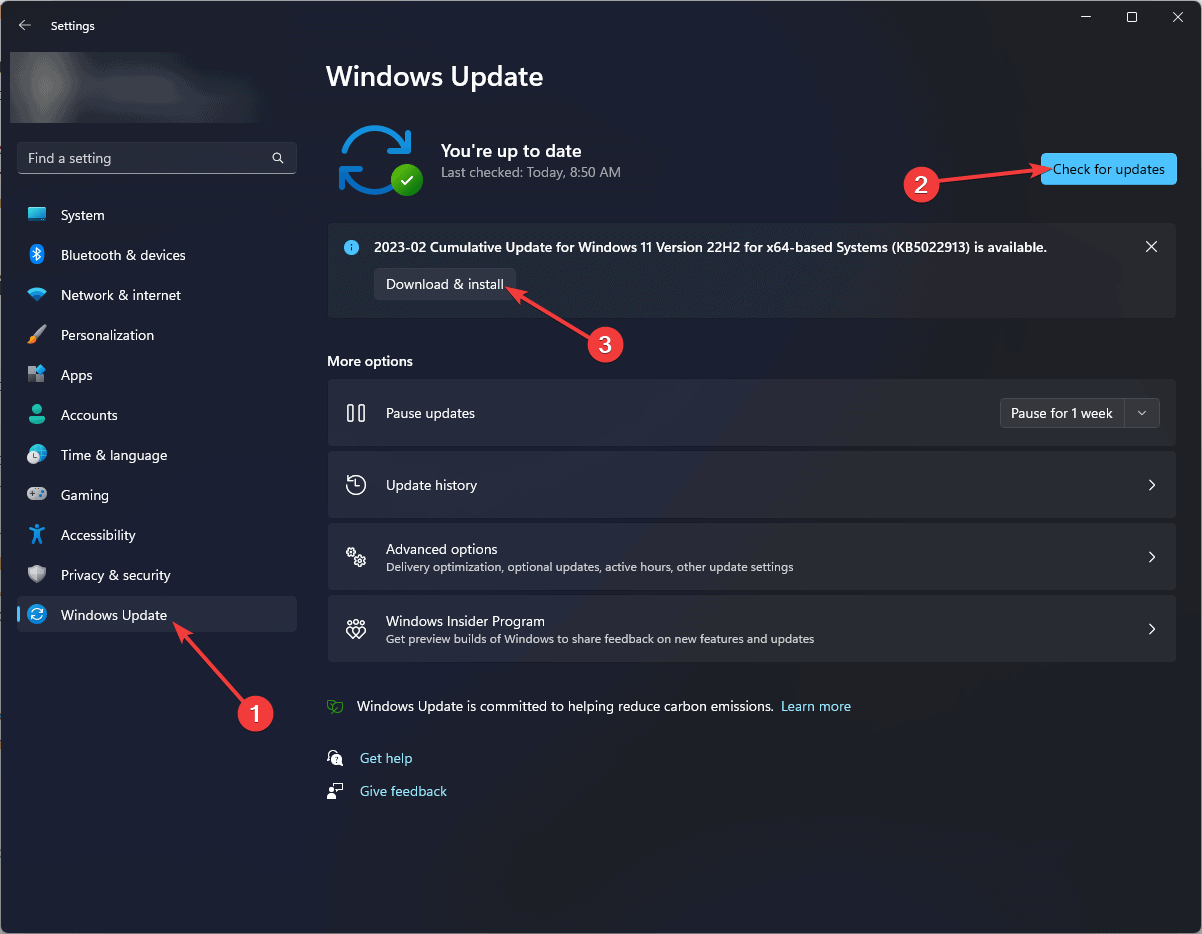
- Press Windows + I to open the Windows Settings app.
- Navigate to Windows Update, and click the Check for updates button.
- If there is an update available, click Download & install to install the latest updates.
3. Perform a system file check scan
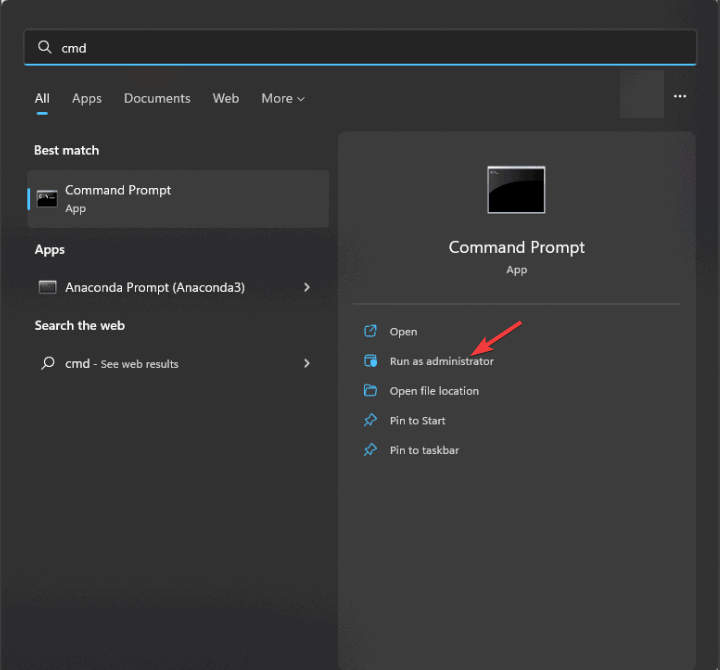
- Press the Windows key, type cmd in the search box, and click Run as administrator from the list of options to launch the Command Prompt with elevated rights.
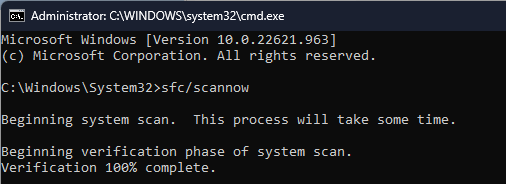
- To scan and repair corrupted system files, type the following command and hit Enter:
sfc /scannow - Wait for the scan to complete, reboot your computer to let the changes take effect.
4. Check your PC for disk issues
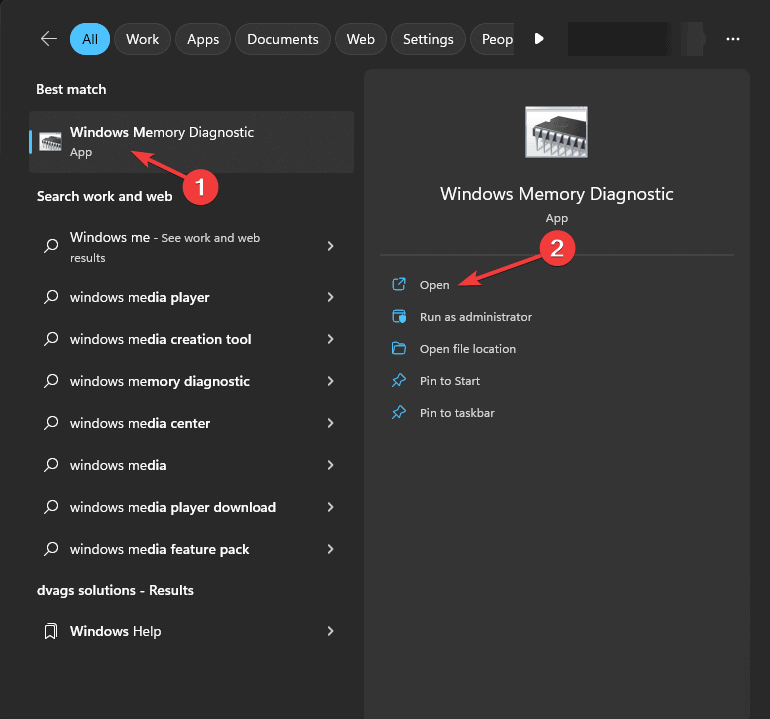
- Press the Windows key, type windows diagnostic tool in the search box, and click Open from the list of options.
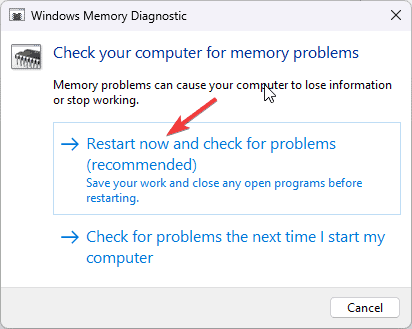
- Click Restart now and check for problems.
- Make sure you have saved all your work, then reboot your PC.
If issues are found in RAM, you may need to reseat your memory modules. Now, follow the steps again to scan your disk, and if the issues persist, you might need to replace your RAM or one of the modules.
5. Restart your PC in a clean boot environment
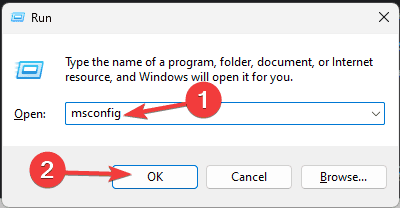
- Press Windows + R to open the Run window.
- Type msconfig and click OK to open the System Configuration window.
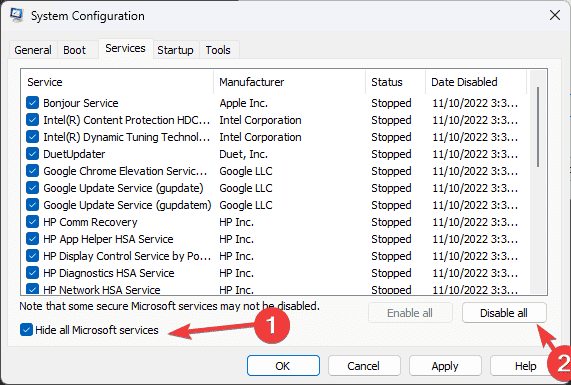
- Go to the Services tab, then place a checkmark next to Hide all Microsoft services, then click the Disable all button.
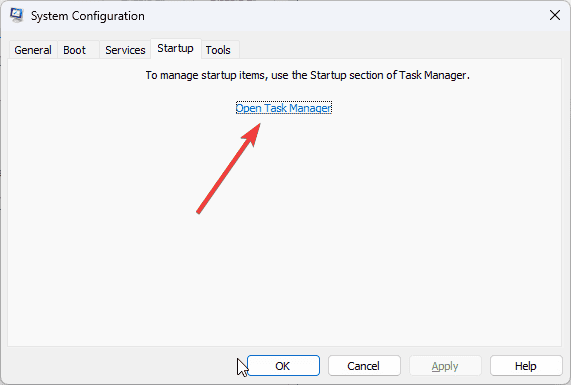
- Switch to the Startup tab, click Open Task Manager.
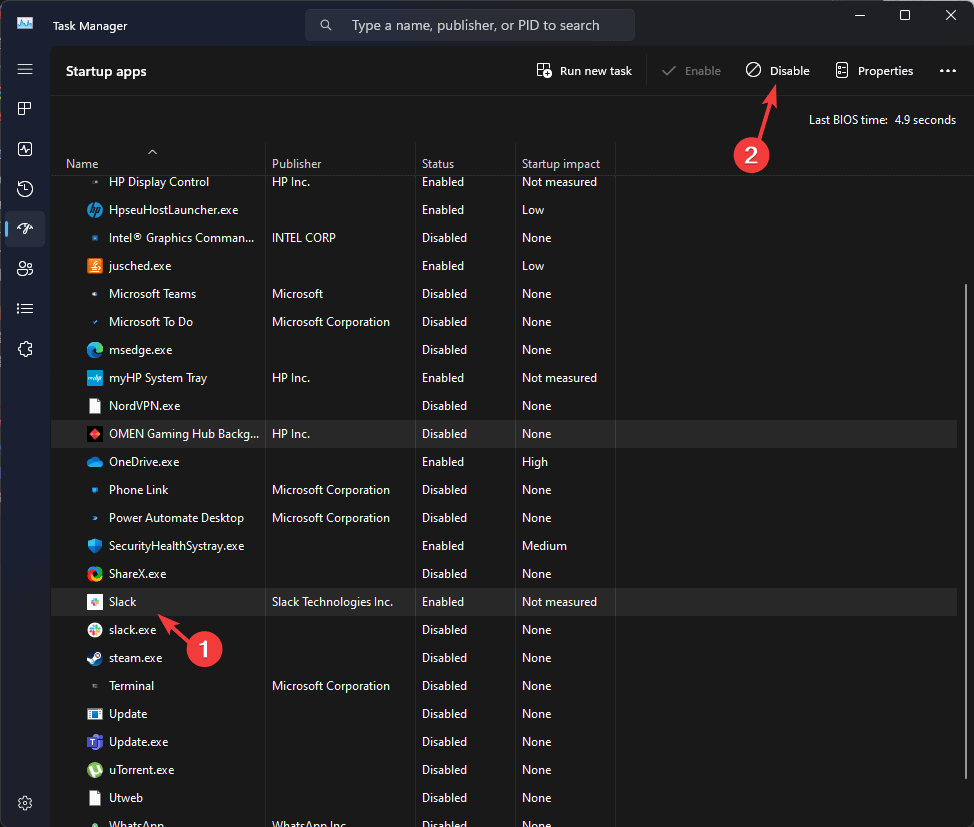
- On the Task Manager window, select Enabled items one by one and click Disable, then close the window.
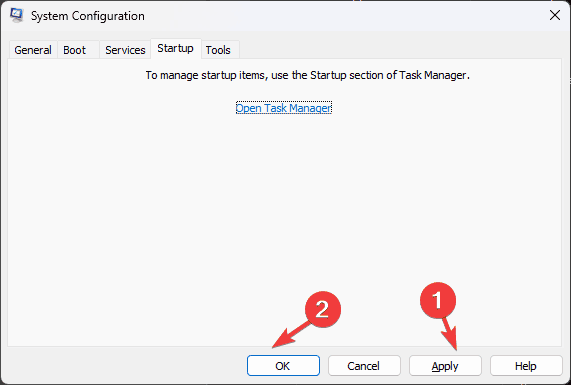
- Back on the System Configuration window, click Apply, then OK to save the changes.
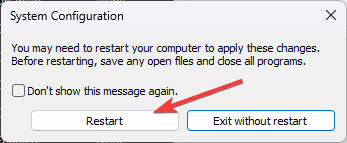
- Click Restart.
Once your computer restarts without third-party startups and services, you can try to enable services and startup apps one by one to look for the culprit conflicting with your computer’s functioning. If none of these are responsible, reverse engineer these steps to boot your PC normally.
6. Reinstall Windows on your PC
 NOTE
NOTE
Create an installation media
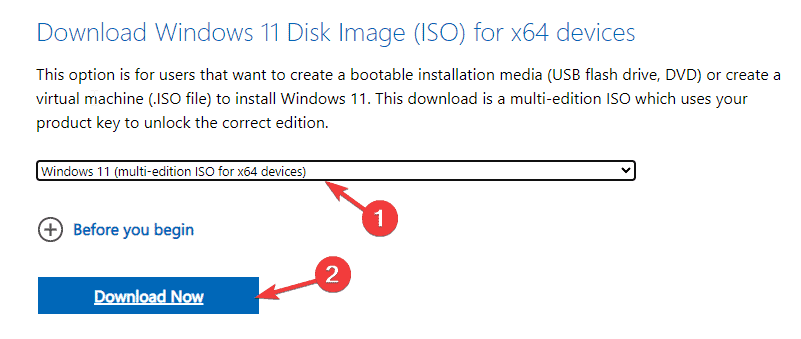
- Go to the Microsoft software download website on another PC and click Download Now.
- Once the mediacreation.exe file is downloaded, double-click to open it and click Yes on the UAC prompt.
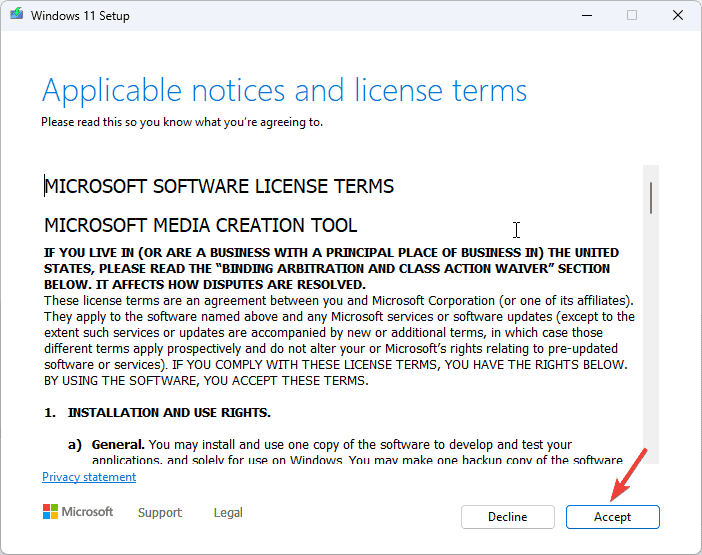
- On the Windows 11 Setup wizard, click Accept to agree to the license terms and agreements.
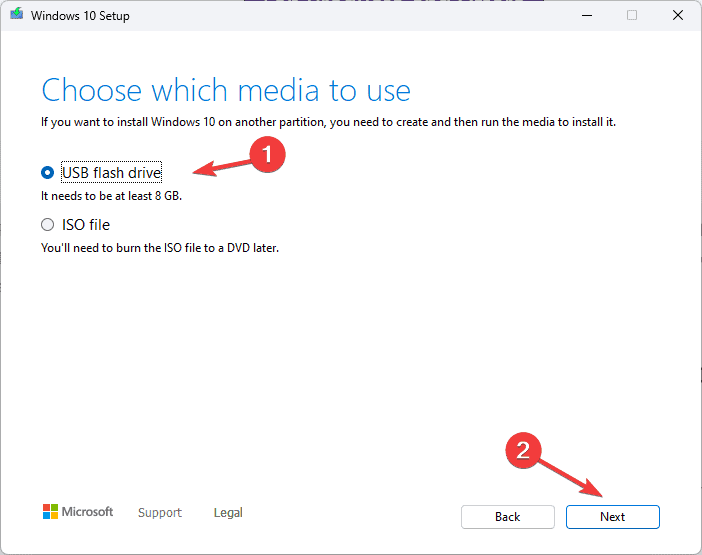
- Plug in your flash drive, and choose the USB flash device option, and click Next.
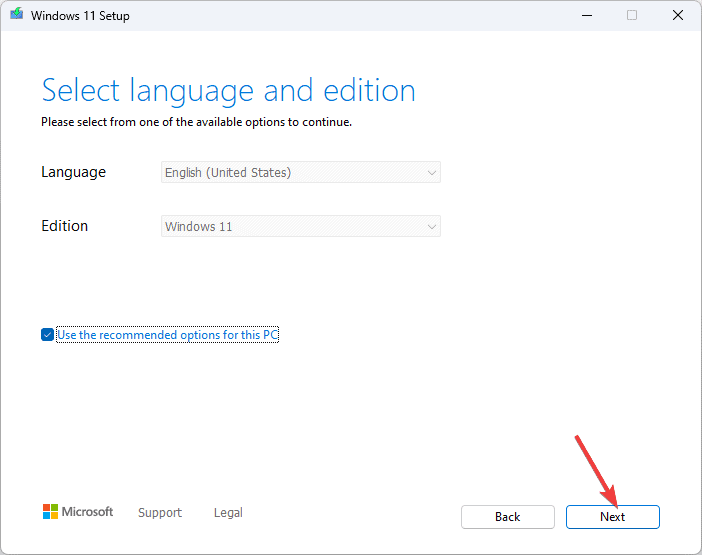
- Select the language, edition, and architecture, then click Next.
- Choose the USB device and click Next.
- Follow the on-screen steps, click Finish, and remove the USB device safely from the PC.
Reinstall Windows
- Plug your USB drive into the affected computer, then press Windows + E to open File Explorer.
- On the USB drive’s folder, look for the setup.exe file, double-click it, and then click Yes on the UAC prompt.
- Choose Change and select any of these options as per your preference:
- Keep personal files and apps – Keeps personal data, apps & settings
- Keep personal files only – Preserves data & settings, but apps are deleted
- Keep nothing – Deletes all the settings, data, and apps.
- On the following screen, click Install to reinstall Windows 11 on your computer to fix the WIN32K_CALLOUT_WATCHDOG_BUGCHECK error.
Your PC will restart several times, and once it is done, it will take you to the login screen. You can log in to your PC, check for Windows updates, configure your device, and then use it as usual.
In conclusion, to fix the WIN32K_CALLOUT_WATCHDOG_BUGCHECK 0x000001A2 error, ensure Windows is up to date, run the SFC scan, look for bad RAM sectors, update all graphics drivers, restart your PC in clean boot, or reinstall Windows.
If you often see BSoD errors on your computer, we recommend you check out this guide to learn the common reason for their occurrence.
Did we miss any step that helped you fix the BSoD error? Please share it with our readers in the comments section below.


User forum
0 messages