Windows 11 Check Administrator: 7 Ways To Verify Your Account
![]() 6 min. read
6 min. read
![]() Published on
Published on
Share this article
Improve this guide
Read our disclosure page to find out how can you help Windows Report sustain the editorial team. Read more
Windows 11 lets you check administrator rights for your account if you’re uncertain about its privileges.
Various routine and troubleshooting tasks require an administrator account. You might need to modify a work file located in the protected system directories, change network settings for better security, or even install fonts.
You can perform all these tasks with admin privileges, saving the back-and-forth communication with the IT support team. Also, you won’t get those annoying Administrator Access Denied pop-ups!
Here’s how to verify your status in just a few steps.
How To Check If You’re an Administrator on Windows 11
I covered seven different methods you can try:
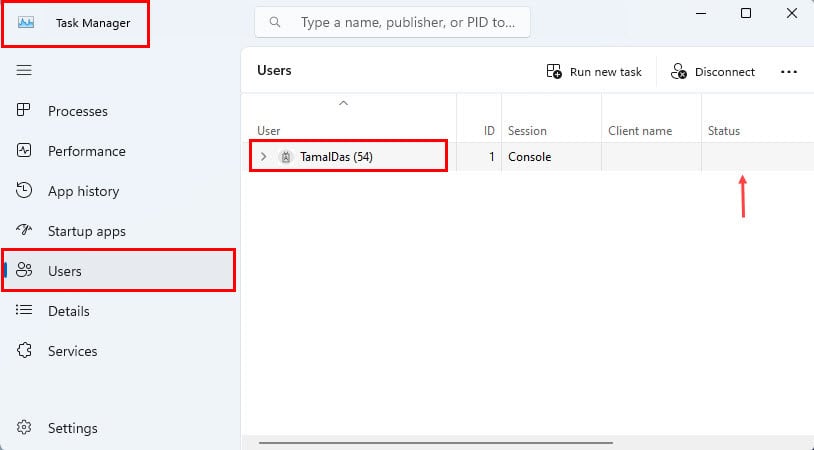
Task Manager Tool
- Bring up the Task Manager dialog box by pressing Ctrl + Shift + Esc.
- Navigate to the Users menu in the left-side navigation panel.
- Find your account name below the User column header.
- If it’s an admin account, you’ll see the word Administrator in one of the columns to the right.
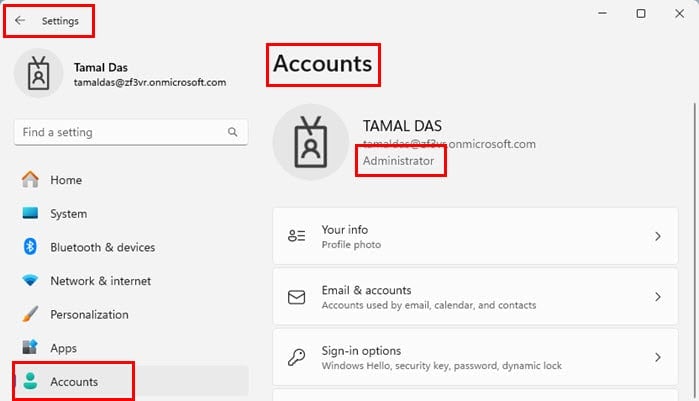
Settings App
- Click on the Start menu button and type Settings.
- The Settings System app will show up below the Best match section.
- Click on that to open Settings.
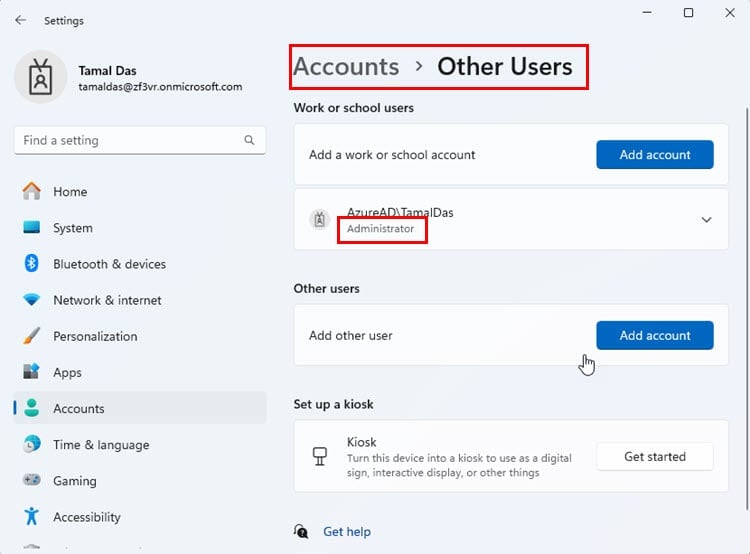
- Tap the Accounts menu in the left-side navigation panel.
- Your currently logged-in account will show on the right side.
- Below the name, you should see the type, like Administrator.
- If you’re on another account and would like to know who is the admin, click on the Other Users card on the right-side menu.
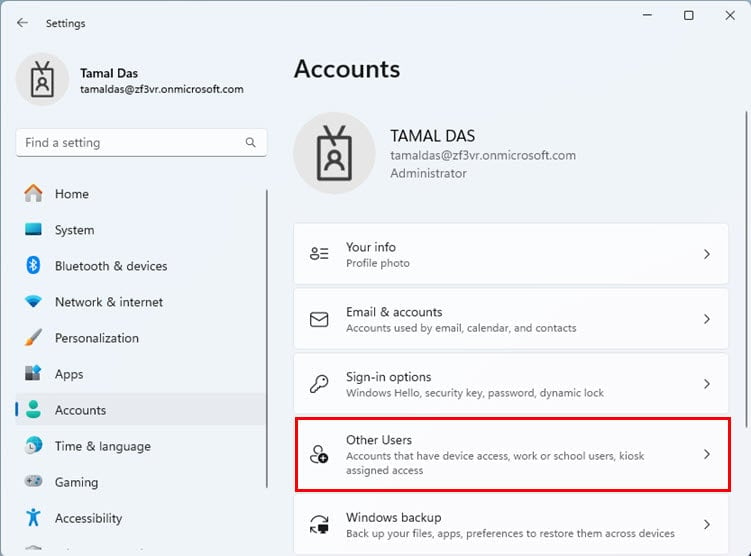
- The Settings app will load all the available ones.
- Look for the Administrator tag below the account names.
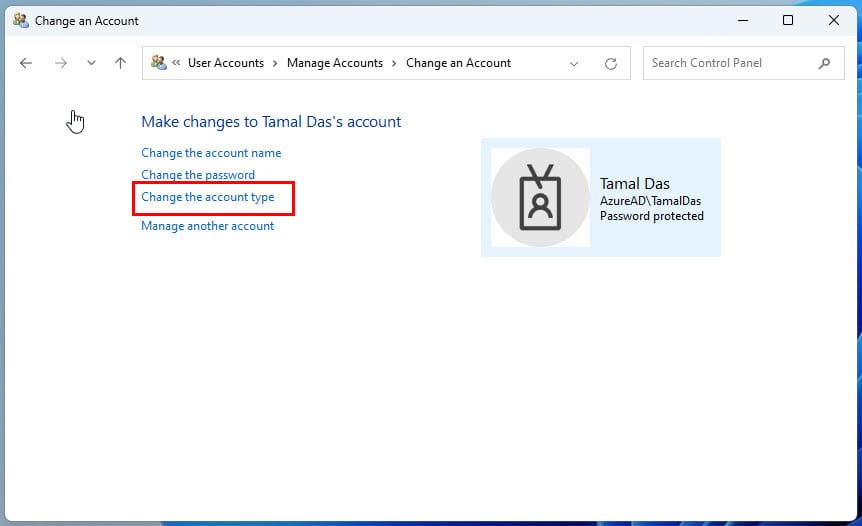
Control Panel
- Press Windows + S to launch Windows Search.
- Type Control and click on the Control Panel icon.
- You’ll see a list of tools there. Select the User Accounts option.
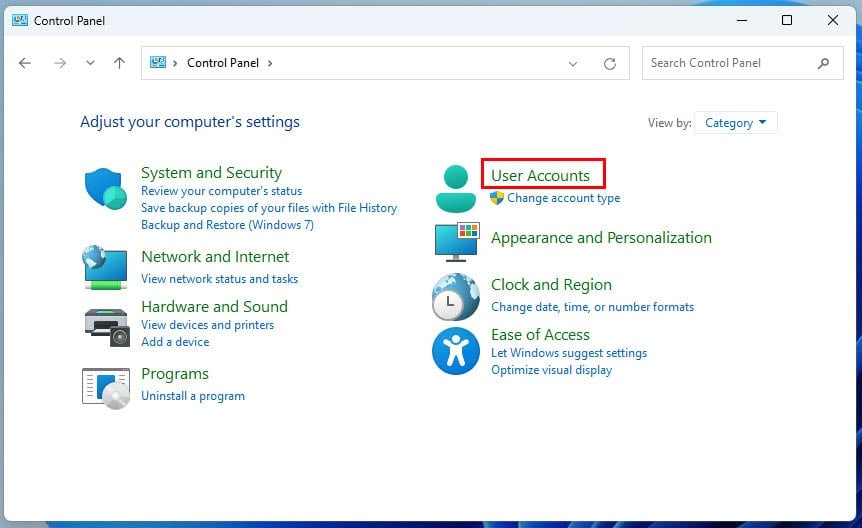
- If it’s not there, click on the Category drop-down arrow near View by.
- Select the Small icons option.
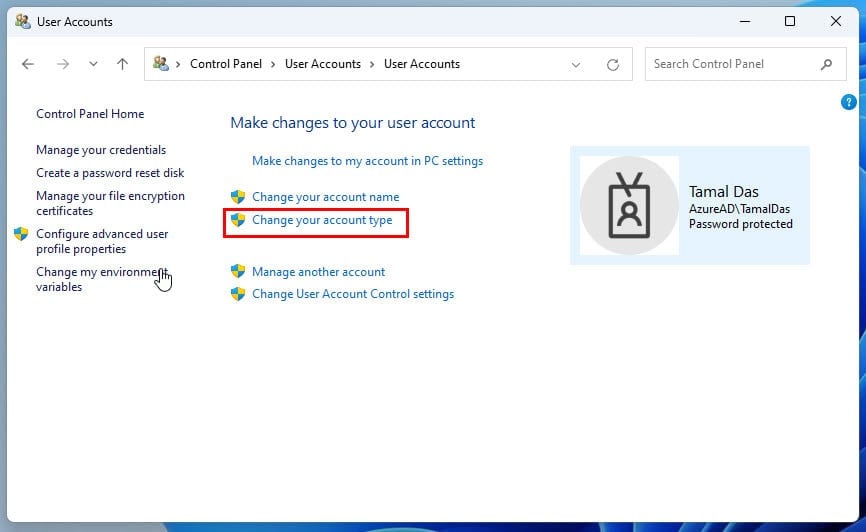
- Now, access the User Accounts menu.
- Click the Change your account type hyperlink.
- If the currently selected account type is Administrator and the Change Account Type button is greyed out, you’re logged in as an admin.
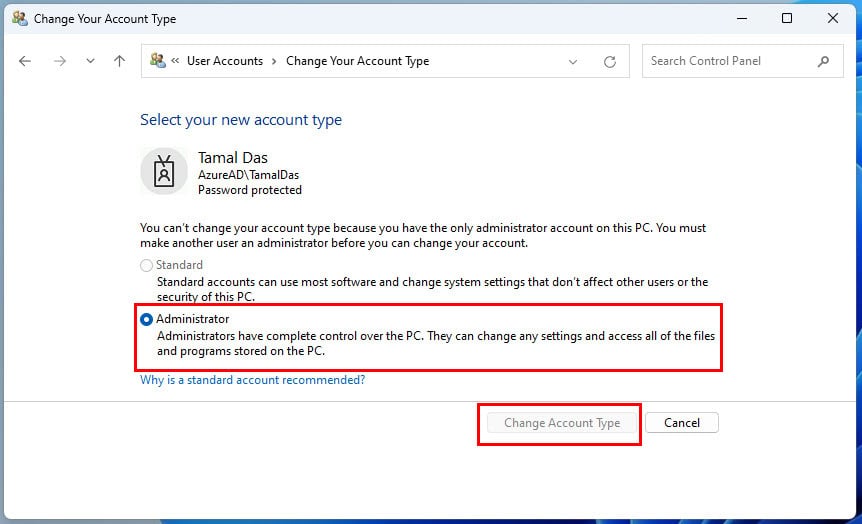
- If you wish to find out if there are other admin accounts on the PC, go back to the User Accounts screen.
- Click on the Manage another account link.
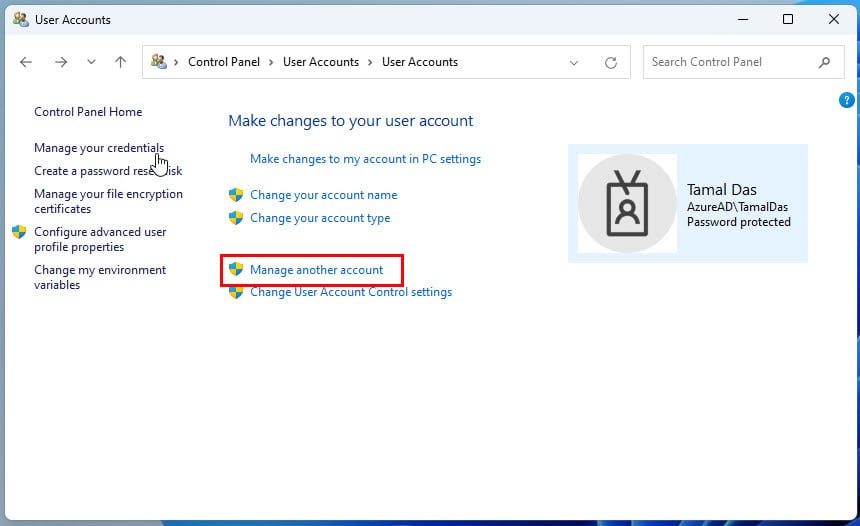
- Choose a different user from the list and access the Change the account type link.
Windows File Explorer
- Open the File Explorer tool.
- Right-click on the Windows 11 installation drive or the C: drive.
- Click on Properties from the context menu.

- Go to the Security tab on the Properties dialog box.
- Find your user account in the Group or user names of the Security tab.
- There might be two accounts with the same name. One will be for admin and the other is for standard users.
- Select the one that says administrator along with your name.
- Look for the checkmarks for the Permissions for Administrators table.
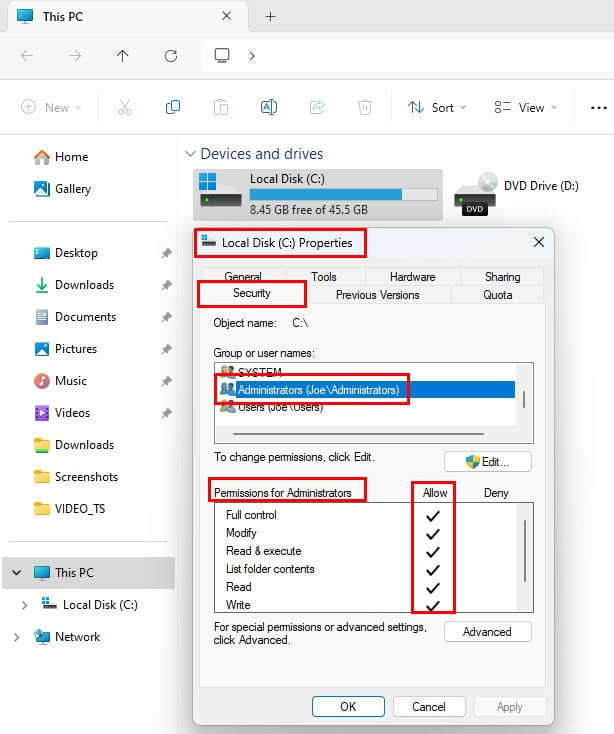
- If everything is checked including the Full Control item, you’re using an admin account.
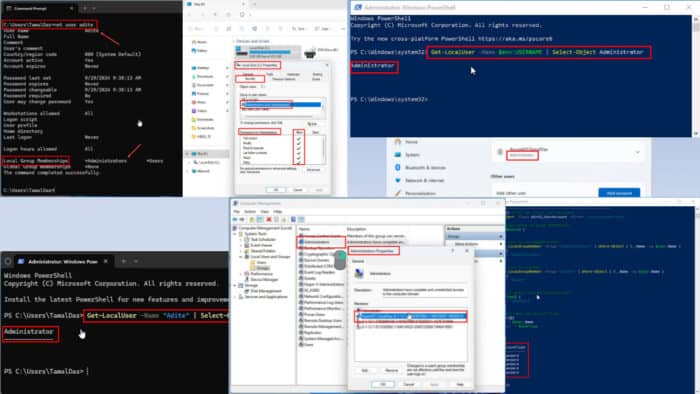
Computer Management Tool
- Bring up the Windows Search by pressing the Windows + S keys.
- Type Computer Management.
- Click on the app that shows up below the Best match section, named Computer Management System.
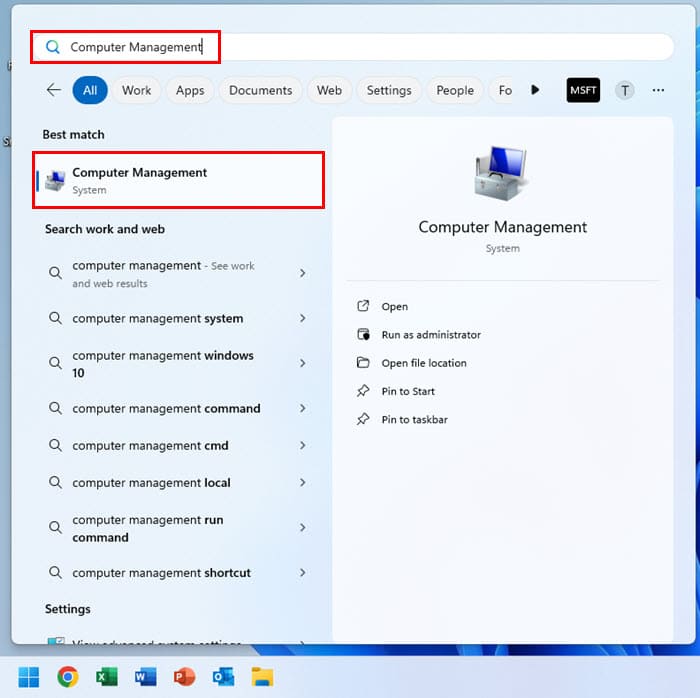
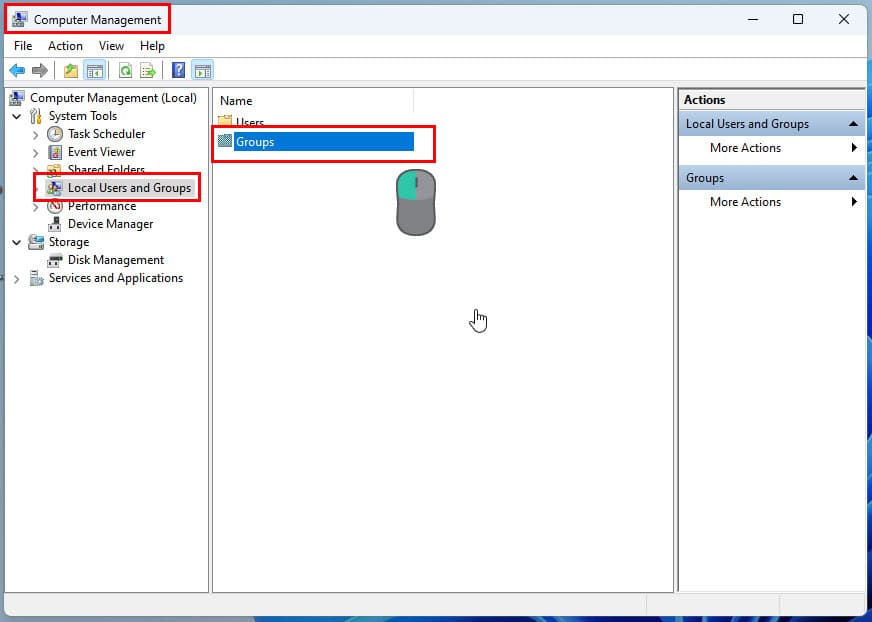
- Select the Local Users and Groups option on the left side navigation panel.
- Now, double-click on the Groups menu on the right side to access a full list of items.
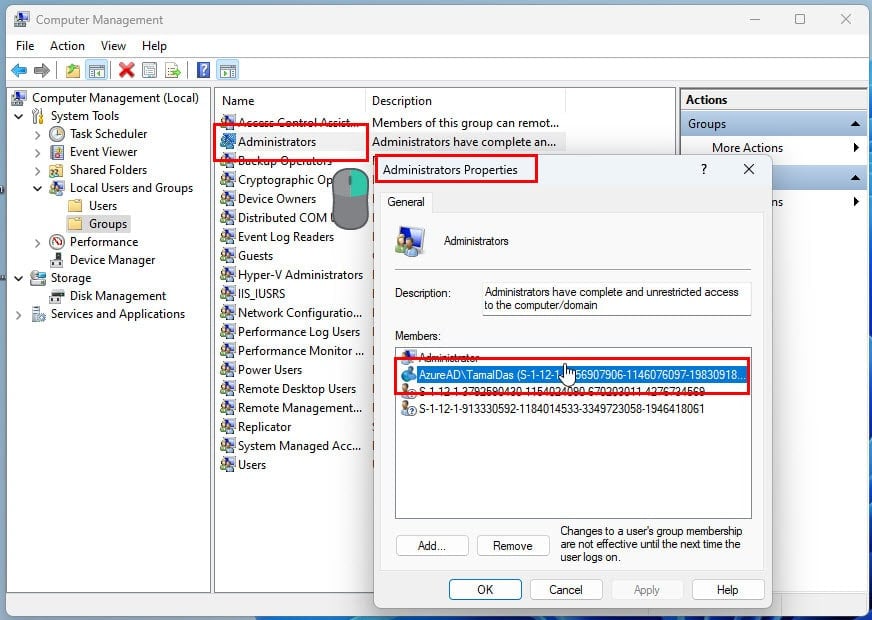
- Right-click on Administrators and select Properties from the context menu.
- The Administrators Properties dialog box will show.
- If you find your user name in the Members table, you’re logged in using an administrator account.
Local Users and Groups Command
- Press the Windows + R keys together to launch the Run command.
- Type in
lusrmgr.msccommand inside the Open field and hit Enter.
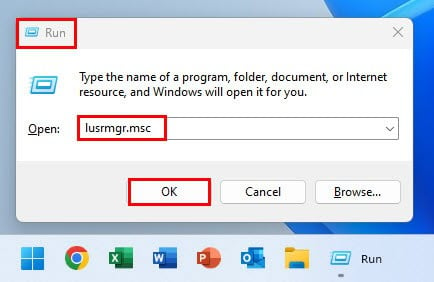
- The Local Users and Groups dialog box will open.
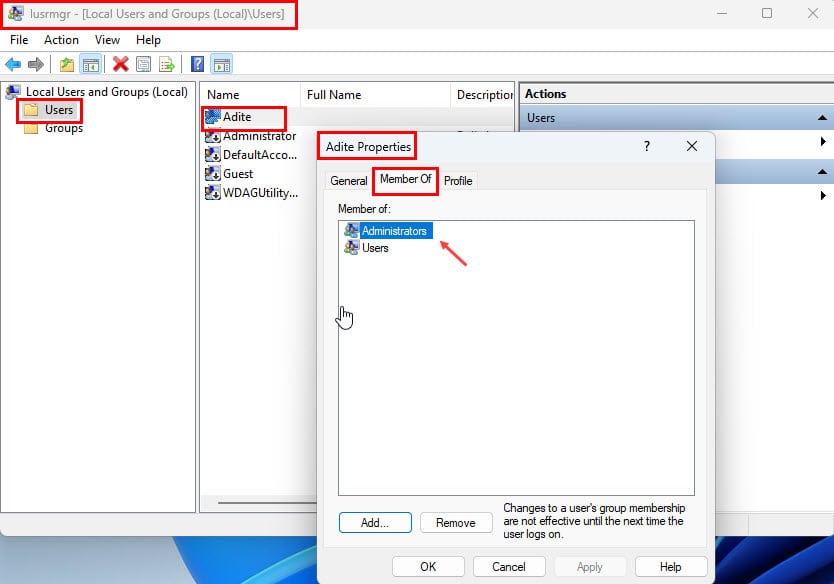
- Double-click on the User directory in the left-side navigation panel.
- A detailed list with all user accounts and profiles will open on the right side.
- Double-click on the target user name and navigate to the Member Of tab.
- If you see the Administrators member group inside this table, the selected account has admin privileges.
Windows Command Line Interfaces
Here are the Windows 11 check administrator methods that involve various command line interfaces and relevant commands:
Command Prompt
- Open Command Prompt from the Start menu.
- Copy and paste the following inside the console:
net user adite- The actual command is the
net user. Anything after that should be your username. - Hit Enter.
- CMD will list user account details.
- Scroll down to the bottom and locate the Local Group Memberships item.
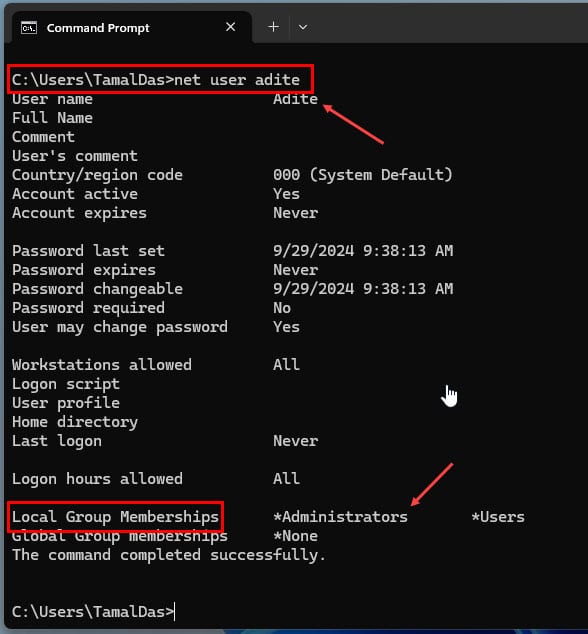
- If you see Administrators next to it, your user account is an admin.
You can cycle through the same command by simply changing the user name at the end to find out if any other names hold admin rights or not.
PowerShell
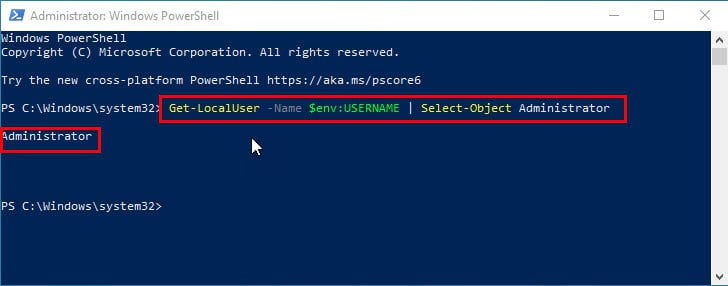
- Right-click on the Start menu icon and select Terminal from the context menu.
- Enter the following Windows PowerShell script inside the terminal and hit Enter:
Get-LocalUser -Name $env:USERNAME | Select-Object Administrator- Windows PowerShell will automatically detect the currently logged-in user account and show if it’s an admin.
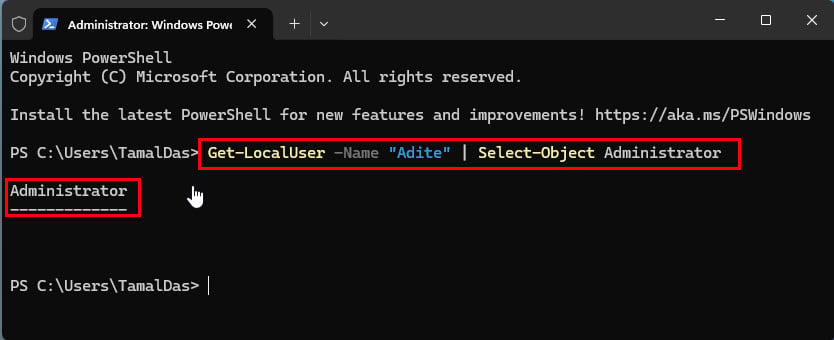
- If you’d like to find out if a specific user has admin rights or not, run the following script instead:
Get-LocalUser -Name "Adite" | Select-Object Administrator- Change the user name in the Name code element before executing the script.
- Use the following script if you’d like to list all the user accounts of the PC along with their account type information, like admin, standard, or guest:
# Get all local user accounts
$users = Get-WmiObject -Class Win32_UserAccount -Filter "LocalAccount=True"

# Define account types based on group membership
foreach ($user in $users) {
    $userType = ""

    # Check if the user is an administrator
    $isAdmin = Get-LocalGroupMember -Group "Administrators" | Where-Object { $_.Name -eq $user.Name }
    if ($isAdmin) {
        $userType = "Administrator"
    }

    # Check if the user is a guest
    $isGuest = Get-LocalGroupMember -Group "Guests" | Where-Object { $_.Name -eq $user.Name }
    if ($isGuest) {
        $userType = "Guest"
    }

    # If not admin or guest, assume standard user
    if (-not $userType) {
        $userType = "Standard"
    }

    # Output the user name and account type
    [PSCustomObject]@{
        'UserName' = $user.Name
        'AccountType' = $userType
    }
}- You might see the Paste Anyway pop up on PowerShell when you copy and paste the above script.
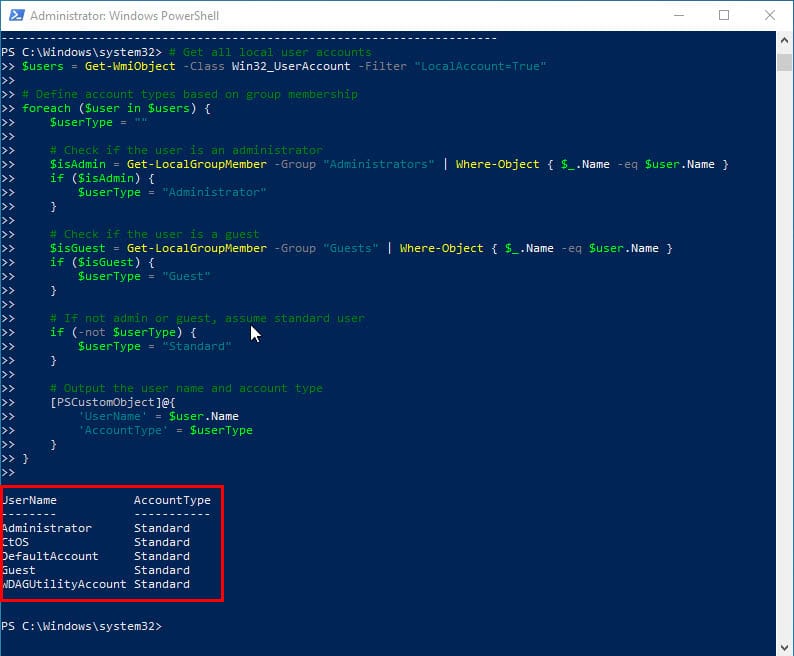
The script doesn’t require any manual editing. It’ll work on all Windows 11 and 10 PCs.
Summary
Did any of these Windows 11 check administrator methods work for you? Comment below to share your feedback and experience.
You can also read how to make yourself admin on Windows 10, how to fix accidentally deleted admin accounts, and what to do if a Windows 10/11 admin account is missing.

User forum
0 messages