5 Ways to Fix the ERROR_COMPRESSION_DISABLED
First, ensure the Volume is NTFS
4 min. read
Updated on
Read our disclosure page to find out how can you help Windows Report sustain the editorial team. Read more
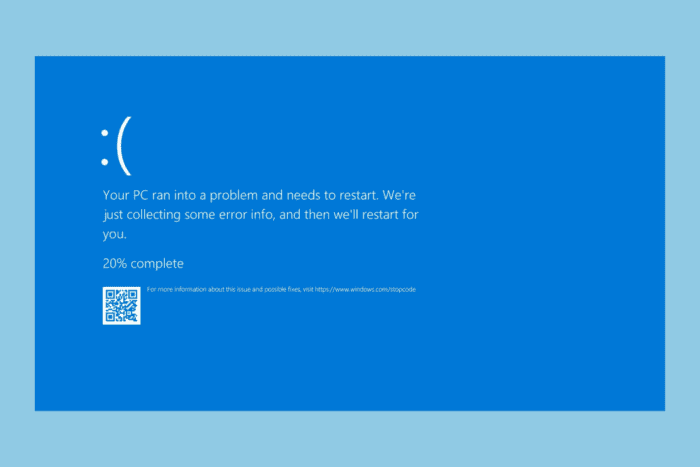
The ERROR_COMPRESSION_DISABLED 769 (0x301) with the error description “Compression is disabled for this volume” appears when you try to perform operations that require compression; however, compression is disabled for the drive you are working with.
How can I fix the ERROR_COMPRESSION_DISABLED?
1. Enable compression for the Drive
- Press Windows + E to open the File Explorer window.
- Right-click the drive or folder and select Properties from the context menu.
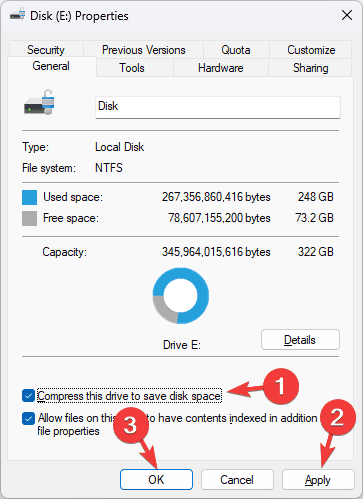
- In the General tab, select Compress this drive to save space.
- Click Apply, then OK to save the changes.
2. Check if the Volume is NTFS
- Press Windows + E to open the File Explorer window.
- Right-click the drive or folder and select Properties from the context menu.
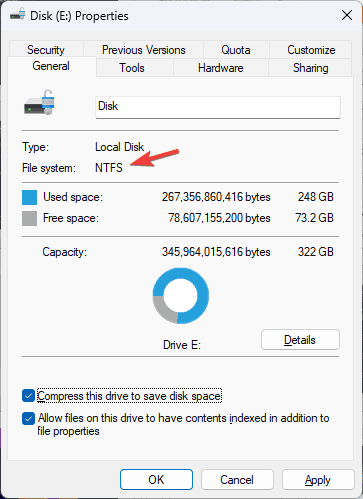
- In the General tab, look for the File System field. If it says NTFS, you can use compression
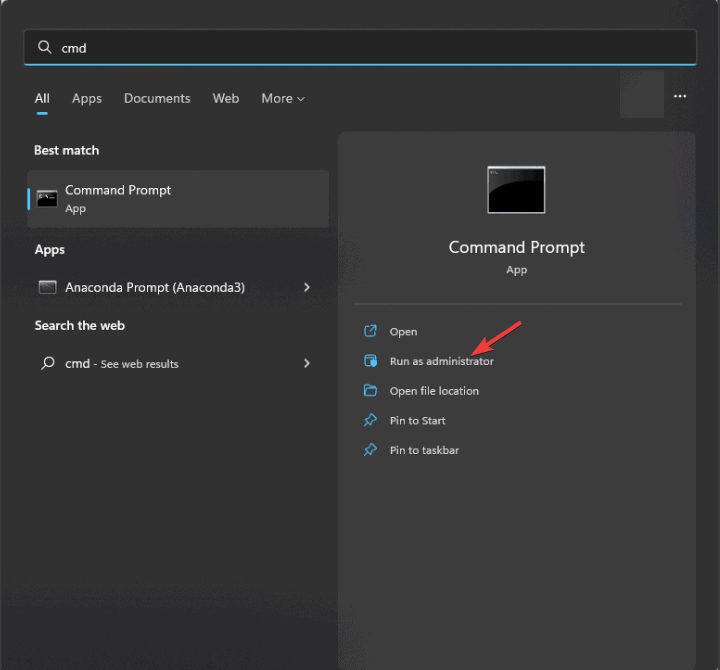
- If not, you need to convert the file system FAT32 to NTFS. Press the Windows key, type cmd in the search box, and click Run as administrator from the list of options.
- Type the following command to convert FAT32 to NTFS after replacing [drive letter] with the letter of the drive you want to convert, then hit Enter:
convert [drive letter]: /fs:ntfs
3. Edit the Group Policy Settings
- Press Windows + R to open the Run window.
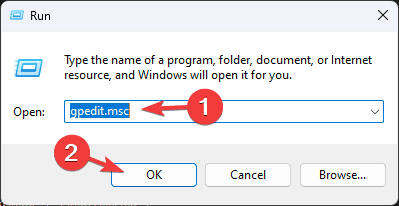
- Type gpedit.msc and click OK to open the Group Policy Editor window.
- Navigate to this path:
Computer Configuration\Administrative Templates\System\Filesystem - Look for a policy called Do not allow compression on NTFS volume.
- Double-click the policy to open its Properties window, then select Not Configured or Disabled to allow NTFS compression.
- Restart your computer to let the changes take effect.
4. Check your disk health
- Press the Windows key, type cmd in the search box, and click Run as administrator from the list of options to launch Command Prompt with administrator rights.
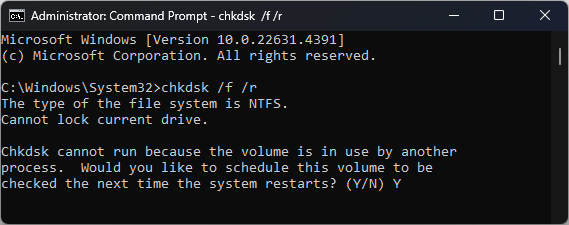
- Copy & paste the command to scan for disk errors and hit Enter after replacing C with the system drive letter:
Chkdsk C: /f /r - If your chosen disk is still in use, you must schedule the scan after restarting. Type Y and press Enter.
- Now save your work and reboot your PC to initiate the scan.
Checking the disk health can also help you fix another error, ILLEGAL_ATS_INITIALIZATION; read this guide to learn more.
5. Reinstall Windows (As a Last Resort)
 NOTE
NOTE
Create an installation media
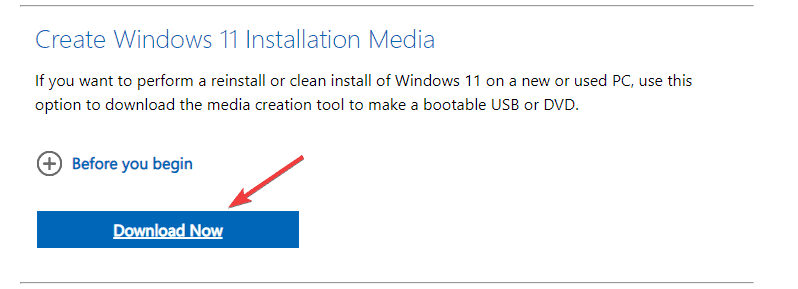
- Visit the official Microsoft website to download Windows 11 from another computer and click Download Now.
- An executable file named the mediacreation.exe will be downloaded. Double-click it to open, and click Yes on the UAC prompt.
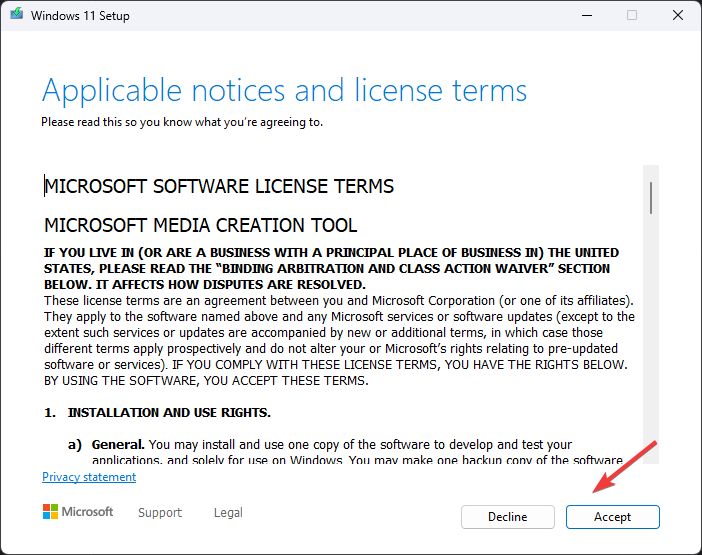
- On the Windows 11 Setup wizard, click Accept to agree terms and conditions.
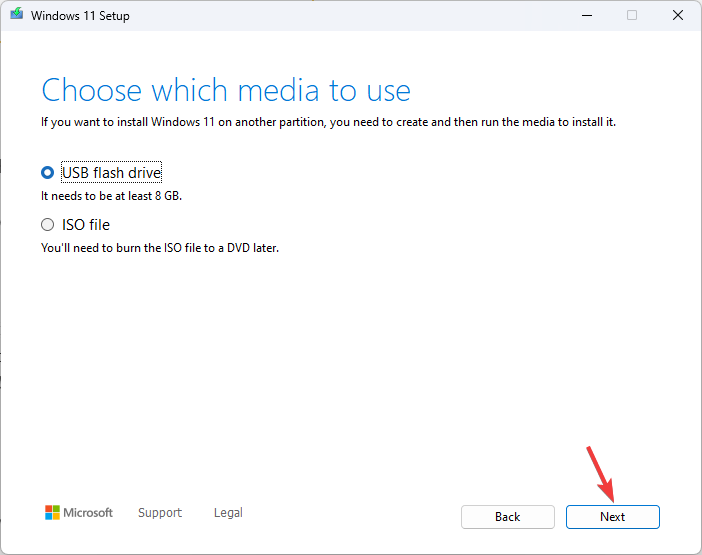
- Plug into the flash drive, select the USB flash drive, and click Next.
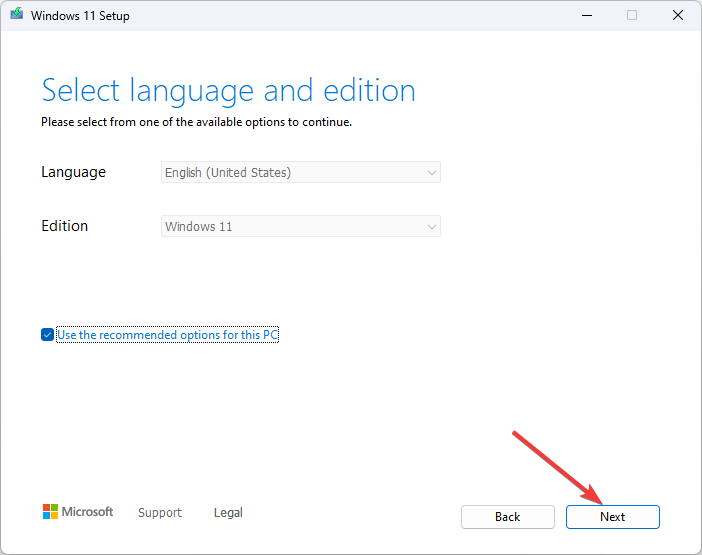
- Choose the language, edition, and architecture, then click Next.
- Select the USB device option and click Next.
- Click Finish, follow the on-screen instructions, and safely remove the USB device from the computer.
Reinstall Windows
- Plug the USB drive into the affected computer, then press Windows + E to open File Explorer.
- Open the USB drive, locate & double-click the setup.exe file, and click Yes at the UAC prompt.
- Choose Change and select any of these options as per your preference:
- Keep personal files and apps – Saves personal data, apps & settings
- Keep personal files only – Preserves data & settings, but apps are deleted
- Keep nothing – Deletes all the settings, data, and apps.
- Click Install to reinstall your PC to fix the ERROR_COMPRESSION_DISABLED 769 (0x301).
During installation, ensure your laptop is connected to the power cable. Your PC will restart a couple of times. Once it has restarted, you will get the login screen. Log in to your PC, install the Windows update, and configure your device settings according to your preferences.
In conclusion, to fix the ERROR_COMPRESSION_DISABLED, enable compression for the drive, check if the volume is NTFS, edit the group policy settings, or check your disk health. If nothing works, you can reinstall Windows.
Do you often see BSoD errors on your computer? Then, you should check out this guide to learn the common reason for their occurrence.
If you want to check the BSoD log to understand the blue screen of death, here is the guide with a detail way to check it.
If you have any questions or suggestions about the BSoD error, please share them with our readers in the comments section below.



User forum
0 messages