Fix: Wi-Fi Stopped Working After Windows 10 Update
Get back online if the Windows 10 update broke the connection
4 min. read
Updated on
Read our disclosure page to find out how can you help Windows Report sustain the editorial team. Read more
If you encounter issues with your WiFi no longer working after a Windows update, you’re in the right place. You should know that some updates change network settings, and that’s what could be at fault.
More exactly the option for IPv6 is now checked and this is one of the reasons why the Internet connection has stopped working.
Here’s how to fix it:
How do I fix the Wi-Fi connection after Windows 10 update?
1. Disable IPv6
- Left-click on the WiFi icon on the lower right side of the screen.
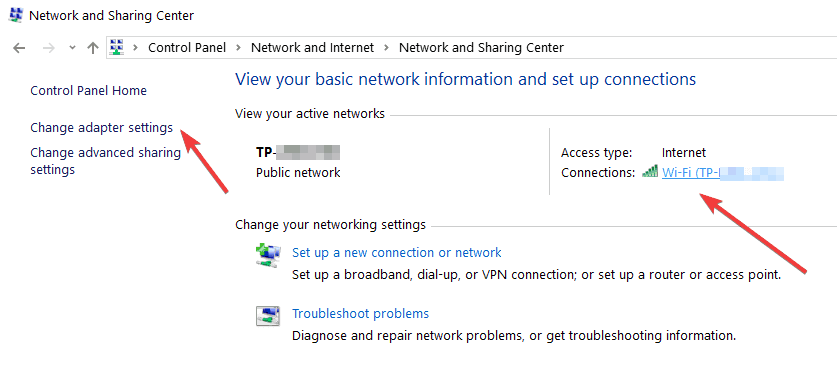
- Select Open Network and Sharing Center feature.
- Now you should have a Network and Sharing Center window in front of you.
- Click on the Change adapter settings link situated in the left side panel of the Network and Sharing Center window.
- Look for the connection you have to the Internet and right-click on it or just hold tap if you are using a touchscreen device.
- From the menu that appears, you will need to left-click on the Properties feature.
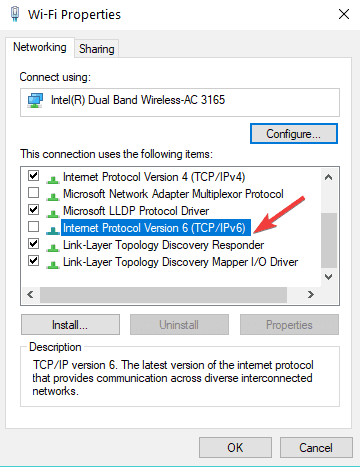
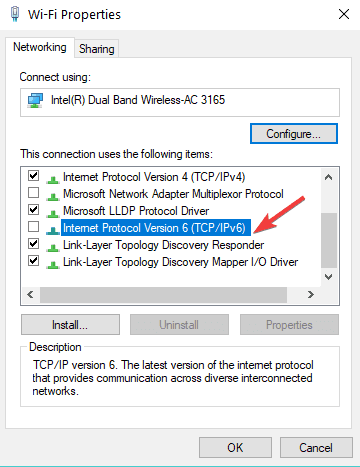
- On the upper side of the Properties window, select the Networking tab.
- Search for the IPv6 option.
- Remove the check-mark from the IPv6 option.
- Left-click or tap on the OK button to close the window.
2. Allow the PC to turn off the Wireless adapter
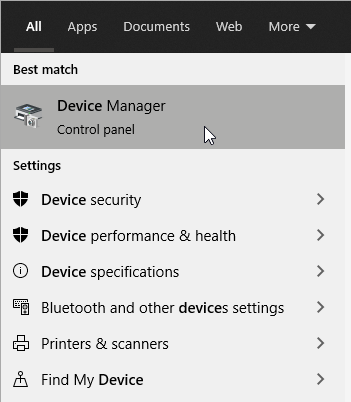
- Press the Windows Key + S and type Device manger.
- Press Enter to open the Device Manager.
- Expand the Network Adapters icon.
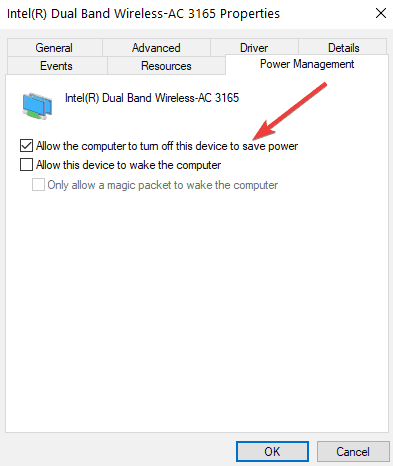
- Look for your wireless adapter in the list, right-click on it, and go to Properties.
- Select the Power Management tab situated on the upper side of this window.
- Uncheck Allow the computer to turn off this device, then press Ok.
- Close every window you opened so far.
3. Update your drivers
3.1 Update drivers manually
- Press the Windows Key + S.
- Type Device Manager and press Enter.
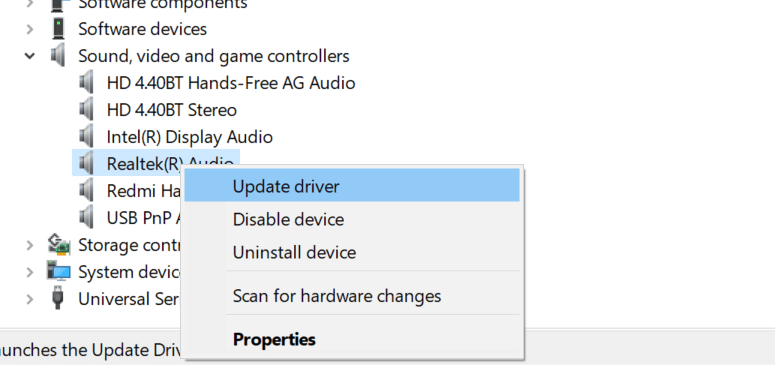
- Go to the device you’d like to update and right-click on it.
- Then, select Update driver and follow the instructions.
- Repeat the step for all the devices you want to be updated.
3.2 Update drivers automatically
An easier way to update your system drivers is by installing third-party software that will do it for you, thus you won’t waste so much time searching.
The program will automatically scan all of your computer’s hardware and software for the latest compatible driver versions and install them for you.
4. Change the power settings
- Press the Windows Key + X.
- Search for Control Panel and press Enter.
- Select the Small Icons feature in Control Panel.
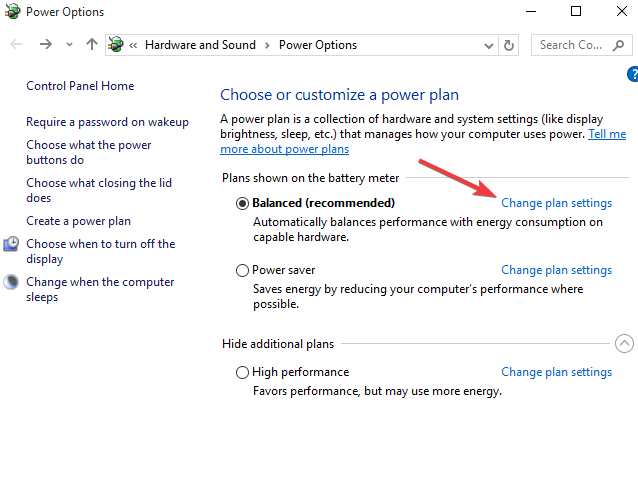
- Search for Power Options and expand it.
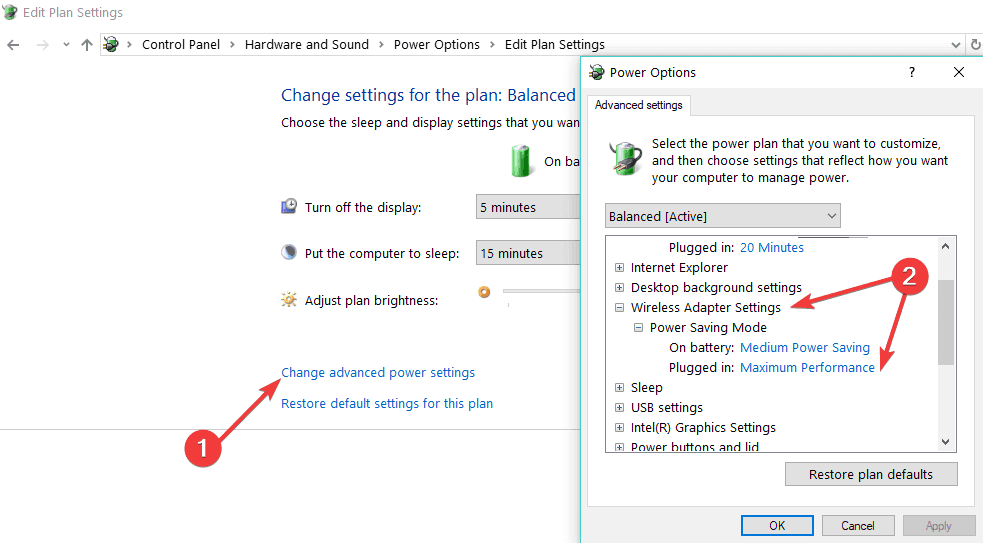
- Click on Change plan settings (for the selected Power Plan).
- Then, click on Change advanced power settings.
- Expand Wireless Adapter Settings.
- Go to the Power Savings Mode.
- In the Power Savings Mode select Maximum Performance.
- Click Ok to save your changes.
- Close the windows you opened so far.
- Reboot your Windows 10 operating system.
- After the device starts check if your Wi-Fi internet connection is working properly.
5. Run the Internet Troubleshooter
- Press the Windows Key and select Settings.
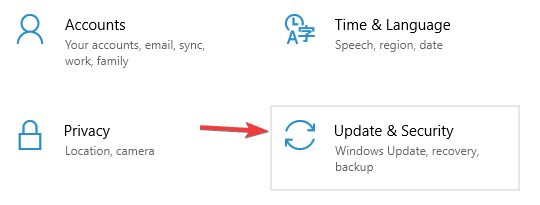
- Then, go to Update & Security.
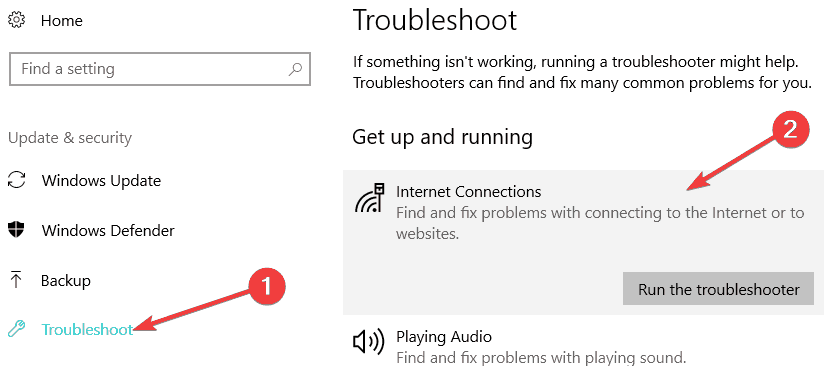
- Next, go to Troubleshoot.
- Click on Run the troubleshooter.
6. Clear DNS Cache
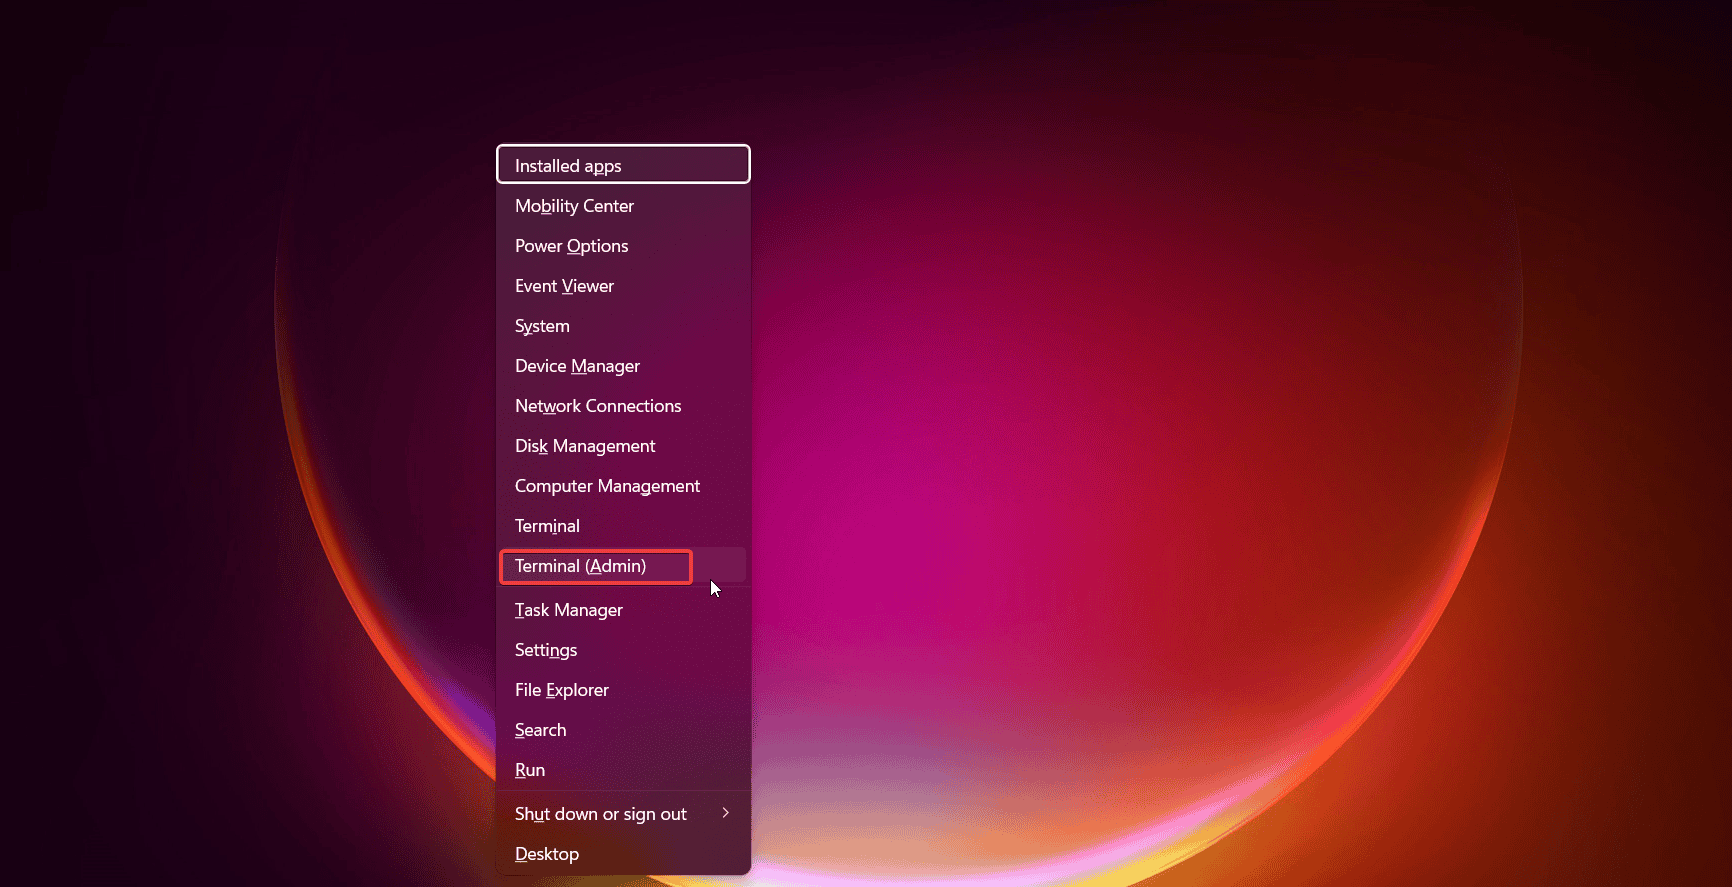
- Press Windows + X.
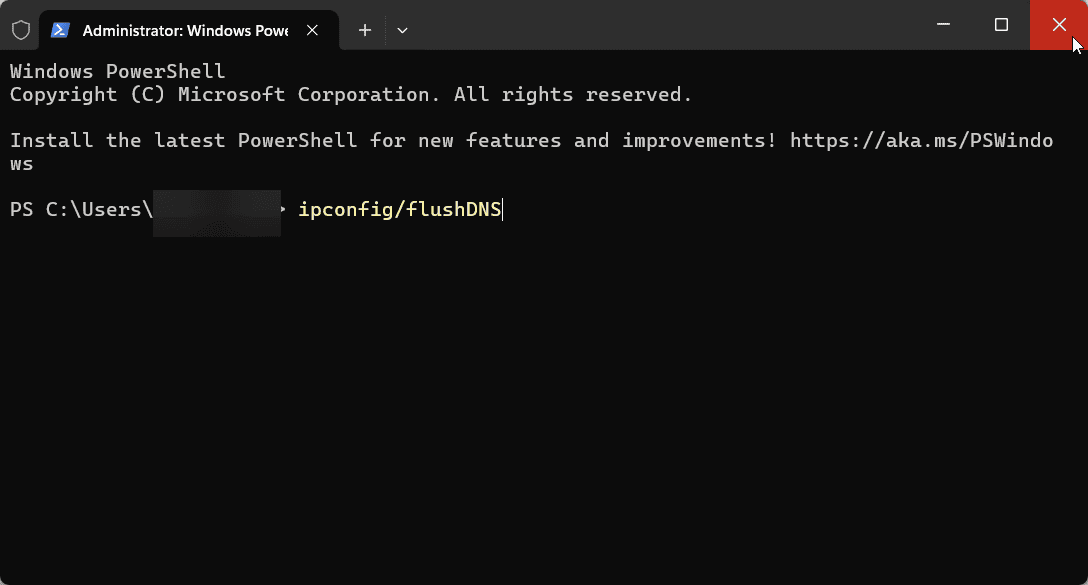
- Select Windows Terminal (Admin) or Command Prompt (Admin).
- Type the following command: ipconfig /flushdns.
- Press Enter and wait for the process to complete.
7. Reset Network settings
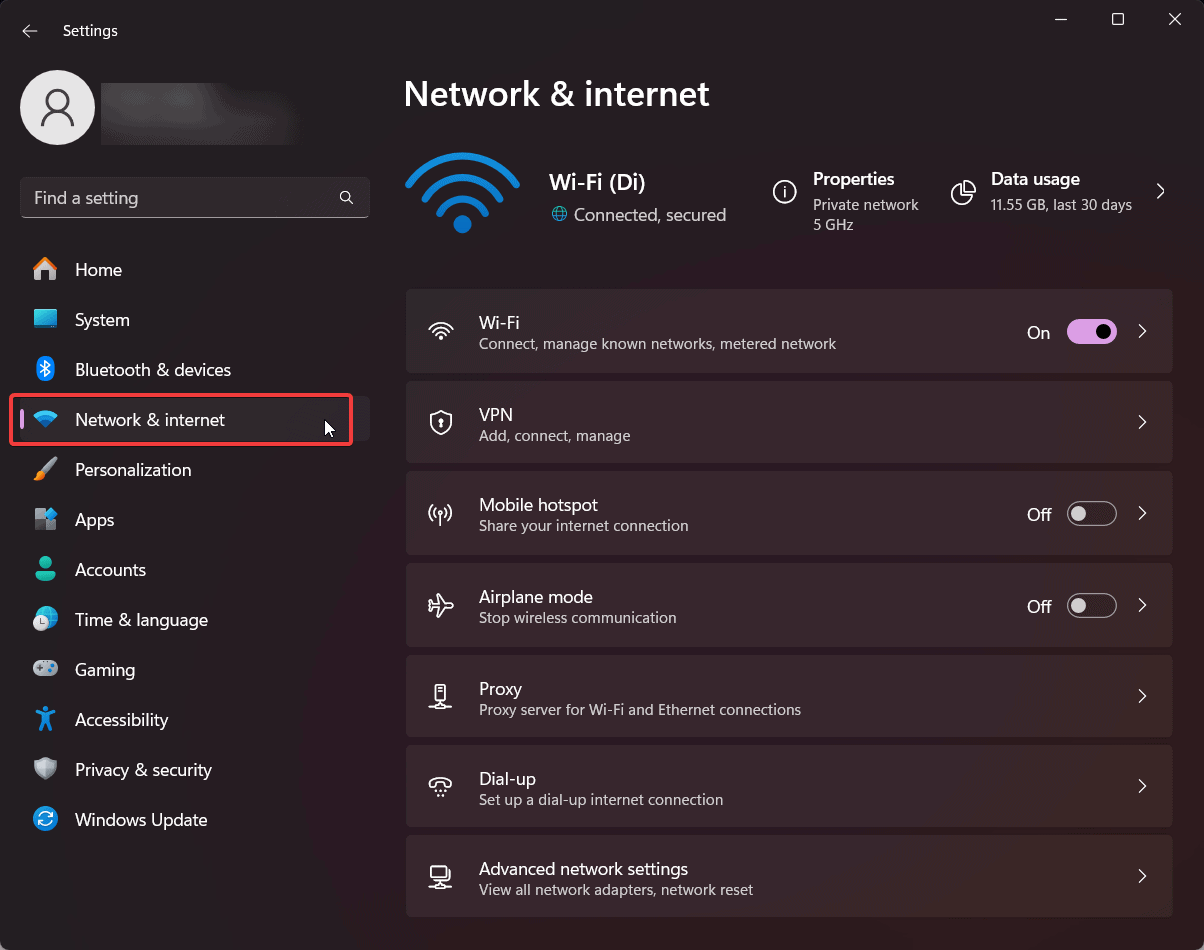
- Open Windows Settings.
- Click on Network & Internet.
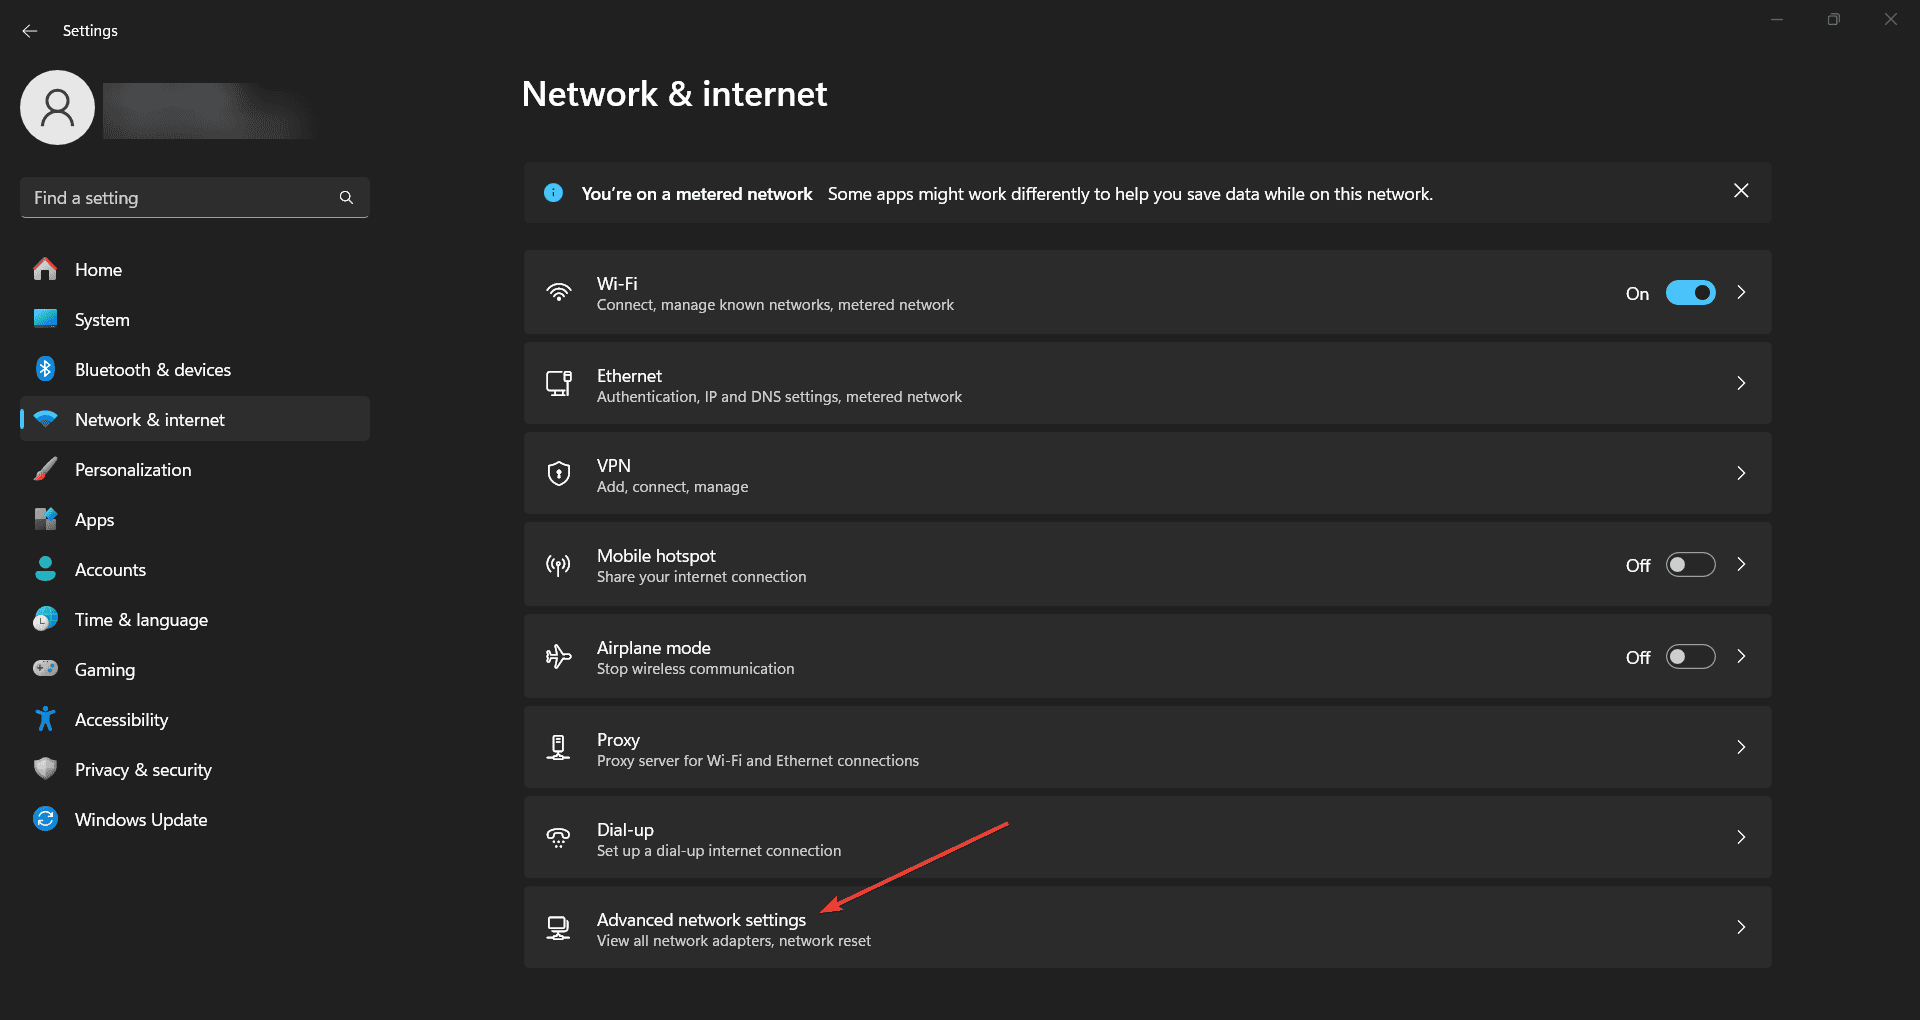
- Go to Advanced network settings.
- Under the More settings section, find Network reset.
- Select Reset now.
- Confirm by clicking Yes.
- Restart your PC.
Another quick way to fix Wi-Fi connectivity issues after Windows 10 updates is to run the Internet Troubleshooter built into your Windows 10.
That’s about it for this article. We hope that our solutions helped you get your internet connection back on. Note that a Windows update may also cause the WLAN Extensibility module has stopped error, so don’t forget to uninstall it if you spot this error.
If you have additional questions related to this subject, you can write us in the comments section below and I will help you further as soon as possible.




User forum
66 messages