WLAN Extensibility Module has Stopped: How to Fix it
Revive your network by freeing your PC of unwanted Registry keys
Key notes
- If the WLAN Extensibility module has stopped, just disable and re-enable your wireless connection.
- And if that doesn't do the job, uninstall the most recent Windows update, as it could be buggy.
- Sit tight as we explore more ways to establish a stable Wi-Fi connection.

If you’re unable to connect to your network or it keeps dropping, it’s most likely the WLAN Extensibility Module has stopped error. This article will show you how to bypass this error.
What does WLAN Extensibility Module has stopped mean?
The WLAN extensibility module is responsible for managing wireless network connections. If it has stopped, your device will not be able to connect or will keep receiving an intermittent connection. This can be blamed on outdated network drivers, software conflicts, or corrupt system files.
The complete error message will be accompanied by a location based on your Network card manufacturer. For instance, Broadcom Corporation users will see: C:\WINDOWS\System32\bcmihvsrv64.dll
How do I fix the WLAN Extensibility Module has stopped error?
Begin troubleshooting this error with the following preliminary steps:
- Uninstall any third-party network-related software you’ve installed recently, then disable and re-enable your wireless network.
- Roll back the previous Windows update since Wi-Fi tends to stop working after a Windows update.
- Power cycle your router, perform a network reset, restart your device then try again.
1. Run the necessary troubleshooters
1.1 Run the Network adapter troubleshooter
- Hit the Windows key and click on Settings.

- Click on System, then select Troubleshoot.
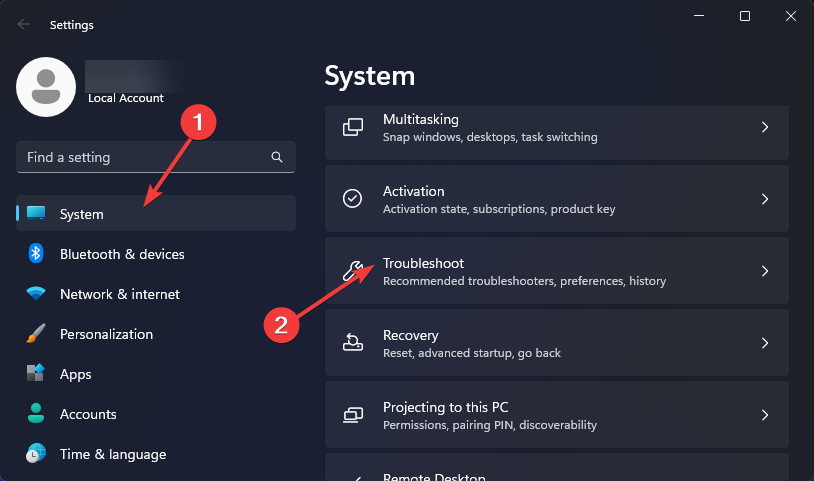
- Select Other troubleshooters.
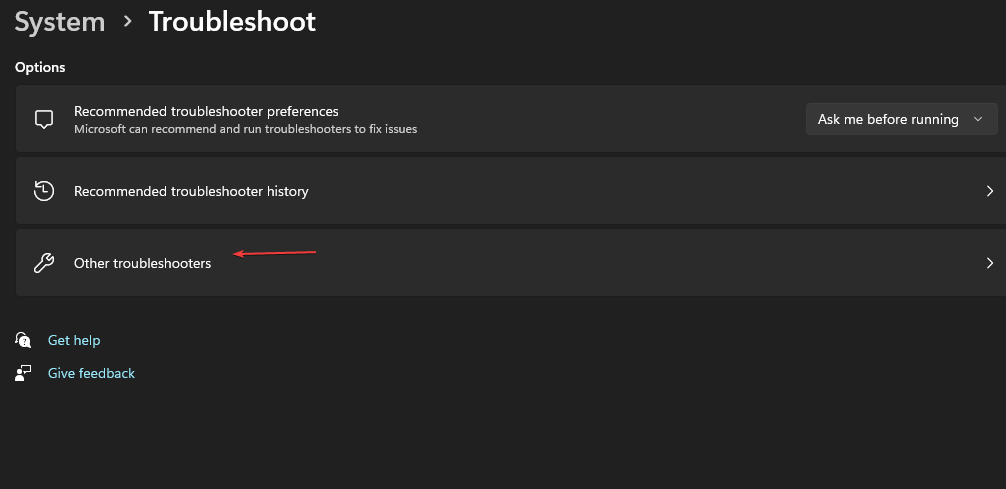
- Locate the Network Adapter troubleshooter and click on the Run button next to it.

1.2 Run the Internet Connections troubleshooter
- Hit the Windows key and click on Settings.
- Go to System, and click Troubleshoot.

- Now click Other troubleshooters.

- Locate Internet connections, and click Run.
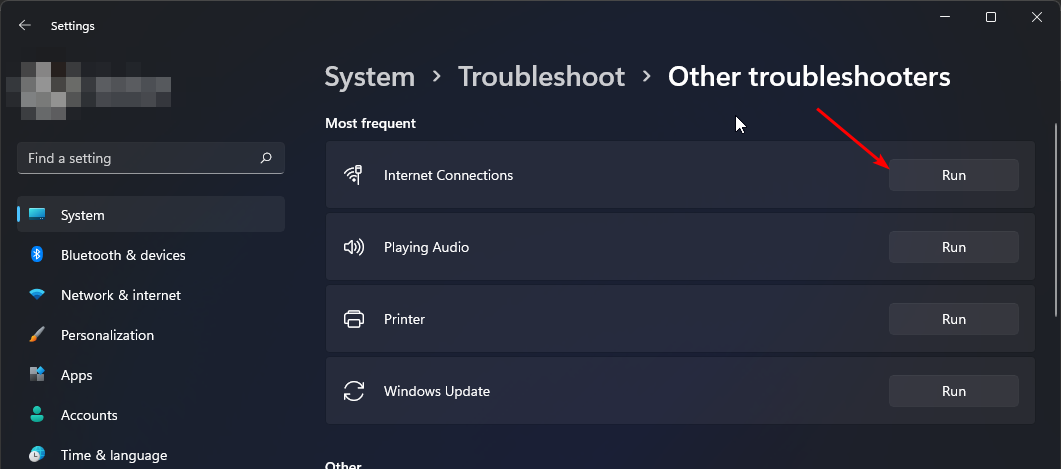
- Follow the onscreen prompts to complete the process.
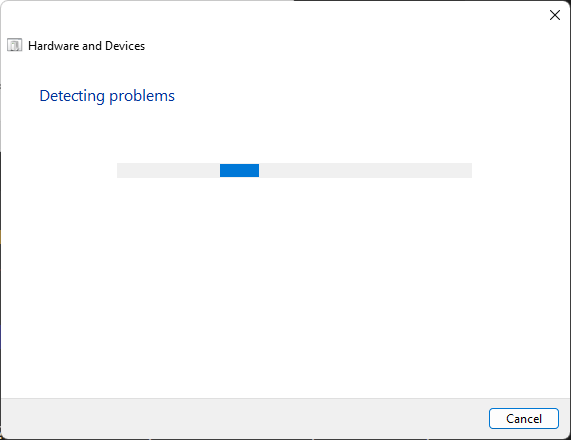
1.3 Run the Hardware and Devices troubleshooter
- Hit the Windows key, type cmd, and select Run as administrator.

- Type the following command and hit Enter:
msdt.exe -id DeviceDiagnostic
- In the Hardware and Devices dialog that appears, click Next.
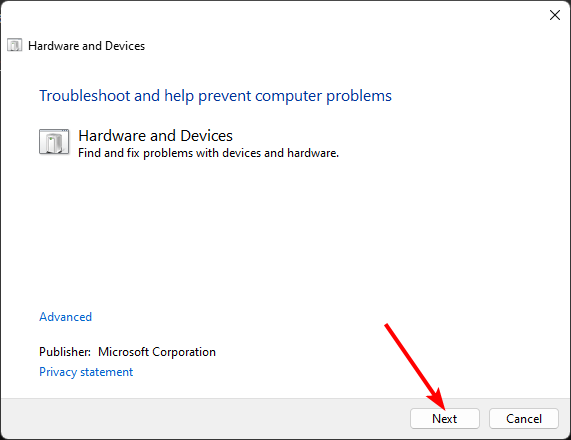
- The tool will start scanning for any problems with your hardware and recommend a fix. After it is done, try again and check if the WLAN Extensibility Module has stopped error persists.
The above troubleshooters should be able to pinpoint whether it is a network or hardware problem. If everything is good, proceed with the next steps.
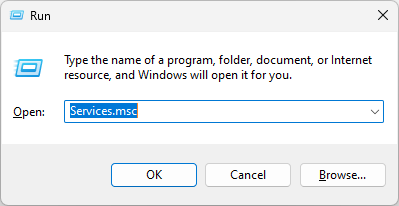
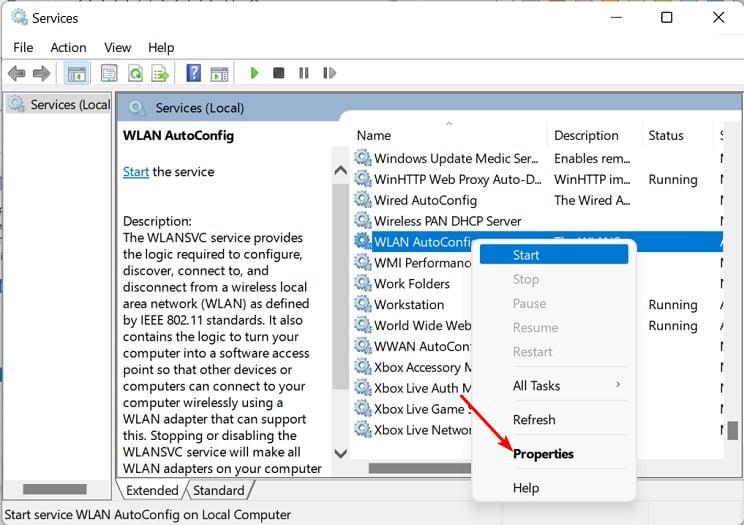
2. Restart the WLAN service
- Hit the Windows + R keys to open the Run command.
- Type services.msc and hit Enter.
- Locate the WLAN AutoConfig service, double-click on it, and select Properties.
- Navigate to the General tab. Under Startup type, select Automatic from the drop-down options and click on the Start button.
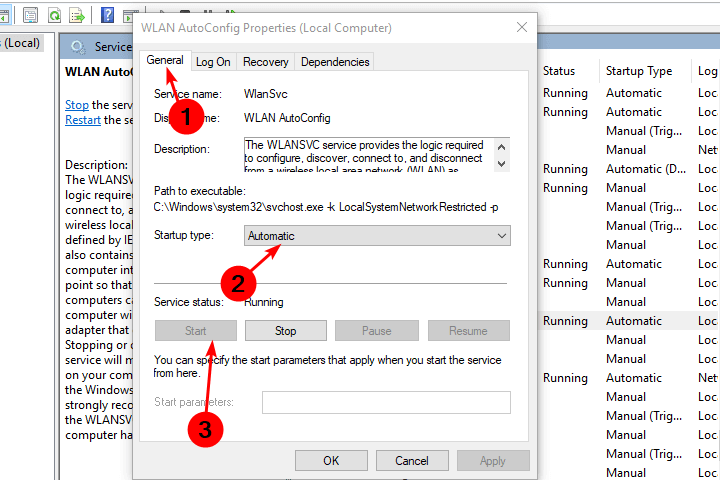
- Next, click Apply and then OK.
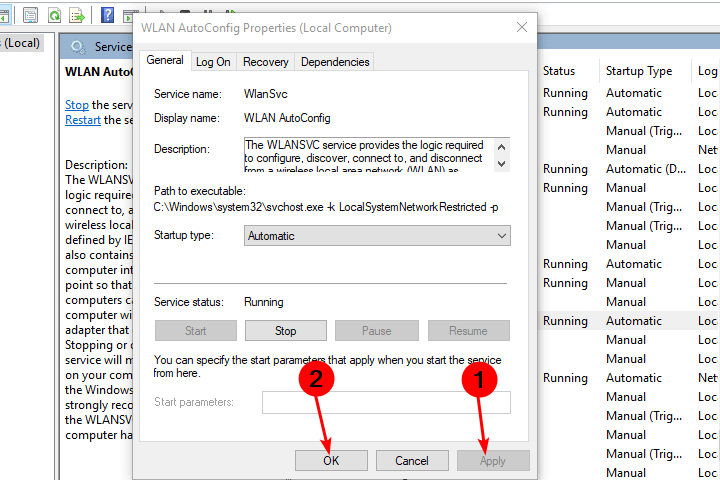
Check again after a few minutes and see if the service is still running. Sometimes, the WLAN autoconfig service keeps stopping and, you may need to address this issue.
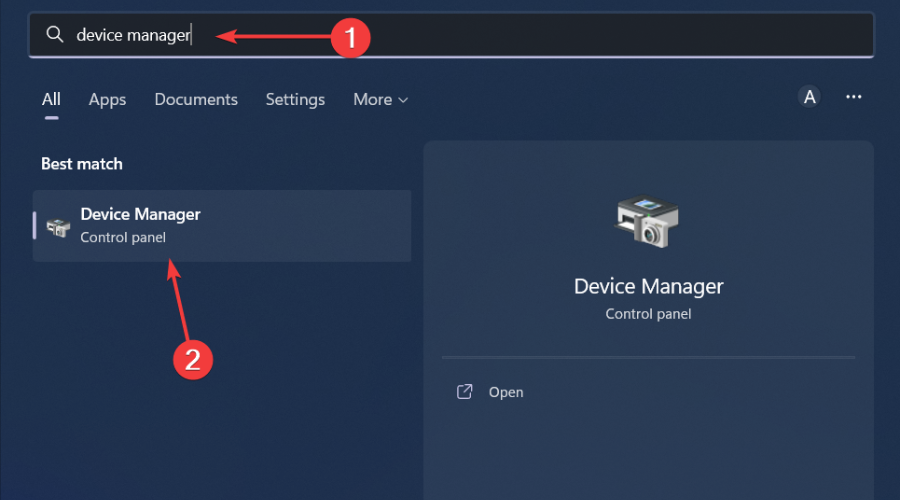
3. Update your network drivers
 NOTE
NOTE
- Hit the Windows key, type Device Manager in the search bar, and click Open.
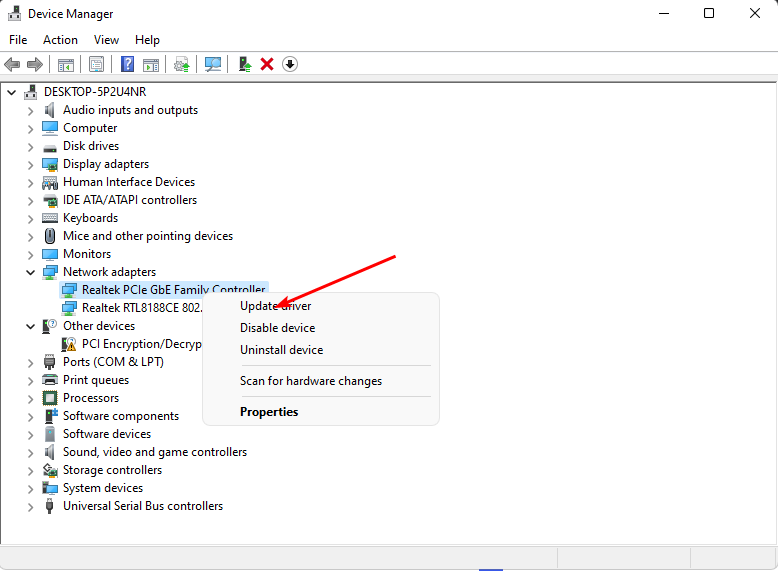
- Navigate to your Network adapter, right-click on it, and select Update driver.
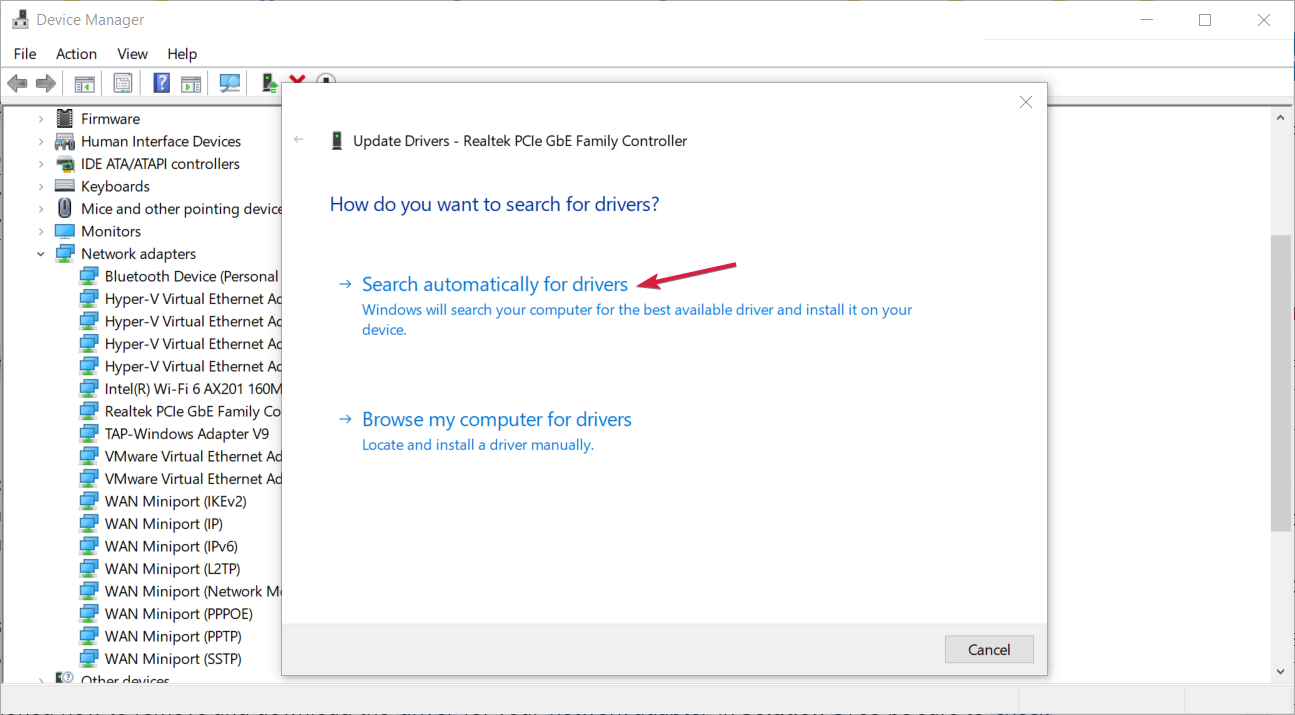
- Select Search automatically for updated drivers.
- Download and install Outbyte Driver Updater.
- Launch the software.
- Wait for the app to detect all faulty drivers.

- Now, it will show you all the malfunctioning drivers listed to select the ones to Update or Ignore.
- Click on Update & Apply Selected to download and install the newest versions.
- Restart your PC to ensure the applied changes.

Outbyte Driver Updater
Secure your Windows PC with Outbyte from various errors caused by problematic drivers.4. Reinstall your network drivers
- Click on the Start Menu icon, type Device Manager in the search bar, and click Open.
- Navigate to your Network adapter, right-click on it, and select Uninstall device.
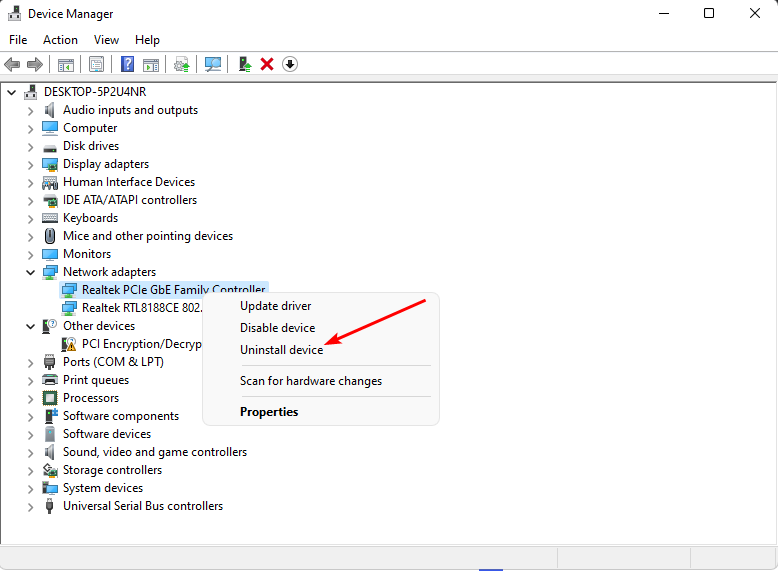
- Confirm Uninstall in the next confirmation dialog.
- Restart your PC, and your drivers will be automatically reinstalled.
5. Disable specific driver updates
- Right-click on Start, then choose Device Manager.
- Find any conflicting drive among your network drivers and right-click on it.
- Select Properties from the list of options.
- Go to the Details tab, and in the Property drop-down menu, click on Hardware ID.
- Select all IDs, then copy + paste the data into any text editor.
- Press the Windows key, type gpedit.msc, and select Run As Administrator.

- Next, navigate to the following path:
Computer Configuration/Administrative Templates/System/Device Installation/Device Installation Restrictions - Select Prevent installation of devices that match any of these device IDs.

- In the Policy window, click Enabled and then Show.
- Copy IDs one by one from the saved document and paste them into separate Volume columns.
- Save changes and exit Group Policy Editor.
- At the next update, you should be prompted with an error. That is the confirmation that the tweaks were successful, and the selected drivers won’t install anymore.
6. Delete Registry keys
- Ensure you back up your Registry or create a restore point before making any changes.
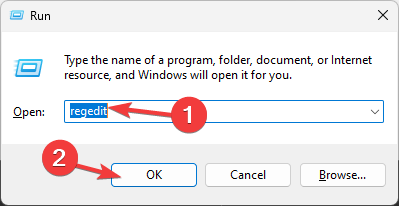
- Press the Windows + R keys and type regedit. Click OK or press Enter to start Registry Editor.
- When Registry Editor starts, navigate to the following key in the left pane:
HKEY_LOCAL_MACHINE/ SYSTEM/CurrentControlSet/Control/Class/{4d36e972-e325-11ce-bfc1-08002be10318}/0010 - Search for the IHVExtensions key and delete it with all its subkeys.
- Close the Registry Editor and restart your PC.
IHV Extensions are software modules provided by hardware vendors to enhance the functionality of their WLAN adapters. However, removing them may be necessary in some cases. If they are causing Wi-Fi connectivity issues or conflicts with the operating system, it’s best to delete them.
Wireless networks are a bit tricky because the WLAN autoconfig service may stop running at times. You may also want to check the wlanext.exe file and verify whether it plays a role in your connection problems.
The effectiveness of these steps can vary depending on your specific system configuration and your Network card’s manufacturer. If the issue persists after trying these steps, a repair upgrade should suffice.
However, if you have other solutions that don’t involve overhauling your OS, we’re open to hearing them. Do leave us a comment with your suggestions.
Read our disclosure page to find out how can you help Windows Report sustain the editorial team. Read more


Improve this guide


User forum
0 messages