How to use your PC as a DVR
4 min. read
Updated on
Read our disclosure page to find out how can you help Windows Report sustain the editorial team. Read more
Key notes
- Your PC can be used as a DVR by installing Windows Media Center and setting up a few details.
- In this article, we'll guide you through the whole process.
- Find out more tips & tricks and get the best out of your device using our recommendations in the Windows 10 Hub.
- Use our tech tutorials on the How-To page to find the right answers to any digital-related question.

Millennials or younger generations might not understand the trouble of having to wait until a certain hour to watch your favorite television show or movie.
Today, time is no longer a factor. Cable TV, YouTube, torrents, and video-on-demand online subscriptions have changed the landscape so that watching your favorite flicks, or series, at any time, and from any location is a matter of a few clicks.
Buying a standalone digital video recorder (DVR), or even renting one may be costly over time, so if you don’t have a DVR, there are various options available. And one is using your own PC as a DVR.
As strange as it may sound, especially if you haven’t tried it before, it actually works, whether you’re using an old or new PC.
How can I use my PC as a DVR?
Before going into the details, there are four things you need:
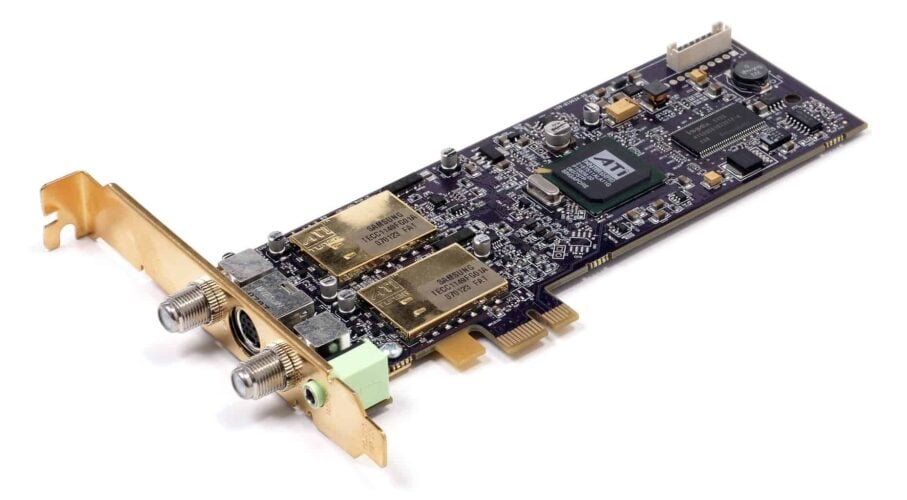
- A TV tuner to pick the broadcast TV signals for Windows Media Center. If your PC doesn’t have one, you can buy an internal device (plugged into your PC’s motherboard) or an external one (plugged into the USB port). If you have a cable box, you don’t need a TV tuner card.
- TV signal. Check that your area of residence has sufficient OTA (over the air) reception for TV signals and local channels.
- 500 GB or more of hard drive space because one show may take up more than 7GB.
- The right software. In this case, use the Windows operating system (except Windows RT which doesn’t include the Windows Media Center software).
How to set the PC as a DVR?
- If you use cable TV, plug it directly to the back of your computer.
- Use the Media Centre remote that came with your computer.
- Click on the green button at the center of the remote.
- From the Start screen, scroll to Tasks.
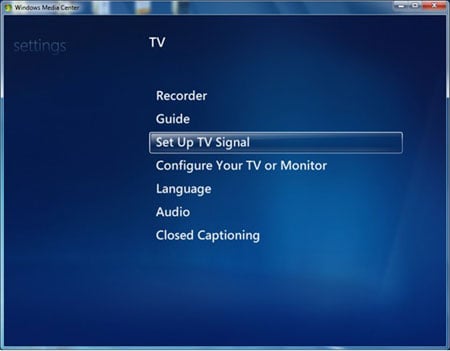
- Click Settings and select TV.
- Click Set up TV Signal so that Media Center detects the programs and their channels. (This is done once.)
- Go back to the Start screen.
- Hit TV and Movies.
- Click Recorded TV and then Add recording.
- Use the Guide to find your favorite programs in Media Center.
- Find the program you want to record then click Record on your remote.
- Click the More button for other options like Record Series.
You can record as many shows as you like depending on the memory on your computer.
Any recorded programs are saved on your computer’s hard drive as a .wtv file. If you want to watch any programs you have saved, you can go to Recorded TV screen.
Instead of this setup, you could use an app to stream all your favorite content – not just the video content. CyberLink PowerDVD can serve perfectly as a media player for videos, TV shows, music, and photos.
Get the Ultra plan and you receive 100GB of personal storage, so you can easily download your favorite media file in the Cloud and then copy and share it with your friends and family.
You can also rewind, pause, fast forward, or record programs and store them for playback at a later time, record multiple programs at the same time, and burn DVDs of your recorded programs.

CyberLink PowerDVD
The complete solution to set up multiple monitors on your PC and manageSo, are you ready to use your PC as a DVR?
Share with us your experience if you’ve tried it before, and if you’re just starting, let us know whether the steps listed here helped, by dropping your comment in the section below.
User forum
1 messages