FIX: Stuck at making sure you're ready to install Windows 10
6 min. read
Updated on
Read our disclosure page to find out how can you help Windows Report sustain the editorial team. Read more
Key notes
- Sometimes, when trying to update to the latest OS, users get a Making sure you're ready to install prompt and the process halts.
- The options to fix the problem are numerous, and we're listing them below.
- To be prepared for any similar error beforehand, scroll through our Windows Installation Errors Hub for more articles.
- Bookmark our Windows 10 Troubleshooting Hub for easy access.

Microsoft has made transitioning from old Windows versions to Windows 10 easier. However, some Windows users experience problems when upgrading to Windows 10.
A common error is that the installation gets stuck at Making sure you’re ready to install prompt while upgrading.
This could be attributed to many causes. Sometimes upgrading problems could be caused by antivirus software and bloated software.
Therefore, we have come up with applicable workarounds to fix the upgrade to Windows 10 problem.
How to fix the ready to install Windows 10 prompt
- Preliminary fixes
- Run SFC command
- Run CHKDSK
- Turn off Windows Defender and firewall
- Turn off automatic updates
- Rebuild Boot Configuration Data
- Clean install Windows 10
1. Preliminary fixes
First of all, get your PC ready for the installation of the new OS with a full clean-up, maintenance, and optimization process.
After the quick installation, use the One-Click Optimizer option that you can find under System Maintenance. The tool will help you find web browsing traces, hidden data junk, superfluous Registry entries, and system vulnerabilities that might interfere with other processes.
The tool will also remove unwanted software installations, plus it will scan all of your system components to make sure your drivers are up-to-date.
Its improved Defrag option merges free space on your device and retrims used space to make sure your drive is used to its full capacity.
Additionally, you can also check the following preliminary details:
- Disconnect any unnecessary peripherals such as external hard drive, SSD, etc.
- Ensure that drivers for Printer, Ethernet/Wireless webcam, SATA/RAID controller, Chipset, and sound chip are fully updated.
- Don’t only disable your antivirus but uninstall it.
- Uninstall any motherboard or OC utilities such as MSI Afterburner, Speedfan, Motherboard Overclocking tools, etc.
- Uninstall software for peripherals such as mouse, keyboard, USB drives, webcam, etc if you have any.
- Ensure you have at least 20GB free space on your local disk.
Some Windows users reported quick success by try out any of the preliminary fixes we mentioned above. On the other hand, you can proceed to other solutions for ready to install Windows 10 problem.
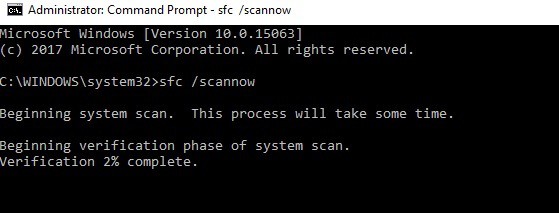
2. Run SFC command
- Go to Start, type Command Prompt in the search bar and open as administrator.
- In the command line type sfc /scannow.
- Wait for the process to be completed.
- Afterwards, close the Command Prompt
Sometimes, important system files might be corrupted or modified due to several reasons such as malware infection, program uninstallation, old Windows updates, and many more. The corruption of the system files damages the Windows Registry.
This is why we recommend you to run the System File Checker (SFC), which checks for and repair corrupt system file violations.
If SFC scan did not fix the ‘ready to install Windows 10’ problem, you might want to proceed to the next method.
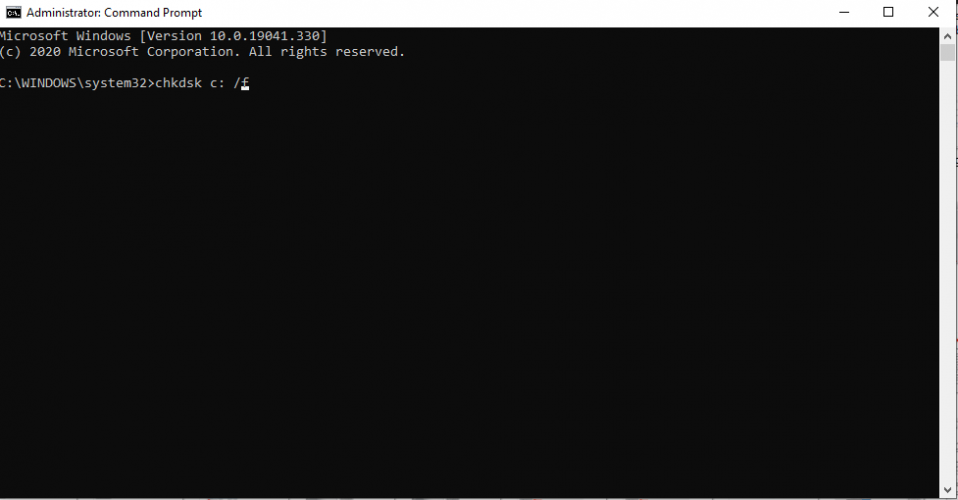
3. Run CHKDSK command
- Go to Start, type Command Prompt in the search bar and open as administrator.
- Now, type
chkdsk c: /f. - Then, type
chkdsk c: /rand hit Enter. - After the process completes, restart your PC.
The CHKDSK command verifies the file system integrity of a drive and fixes detected system errors.
4. Turn off Windows Defender and firewall
The antivirus program can prevent Windows upgrade to Windows 10 resulting in the ready to install problem. So, you have to disable the antivirus protection, uninstall it, and then proceed to upgrade your Windows PC to Windows 10.
However, Windows Defender cannot be uninstalled because it is a built-in software by Windows. But you can turn off Windows Defender completely and prevent it from flopping your Windows upgrade.
- Go to Settings, then to Update & Security.
- Open Windows Defender.
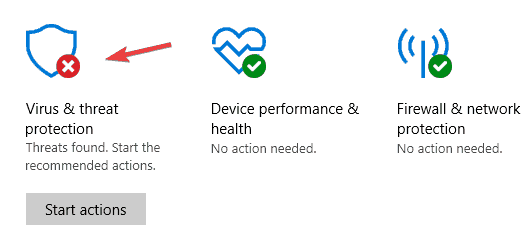
- Now select Virus & threat protection.
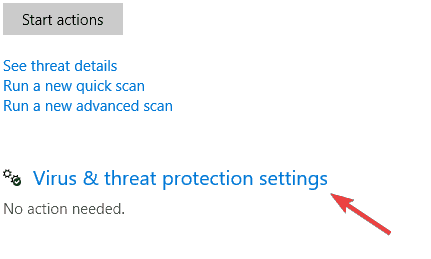
- Navigate to Virus & threat protection settings.
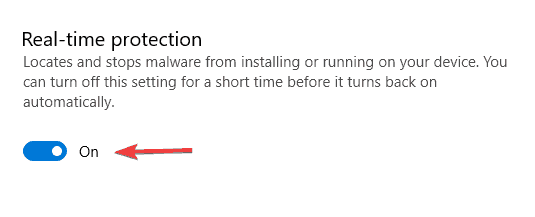
- Now locate Real-time protection and disable it.
In addition, you can also switch off Windows Defender Firewall as well. Follow these steps to do that:
- Open Run with the Windows key + R.
- Enter Control Panel in the text box, and click the OK button.
- Then enter firewall in the search box, and click Windows Defender Firewall to open further options.
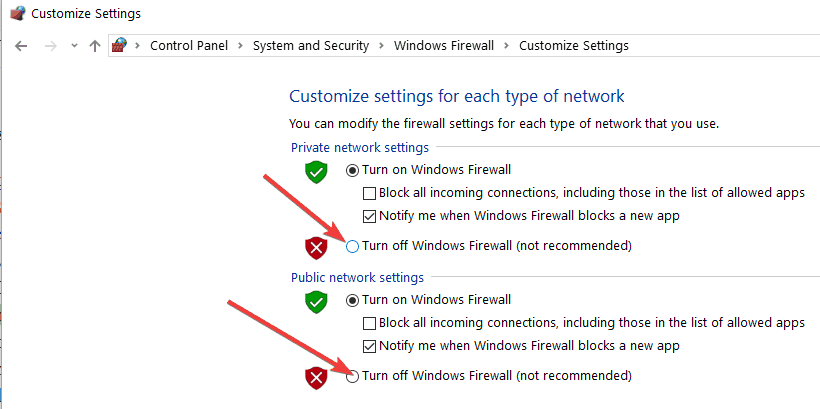
- Click Turn Windows Defender Firewall on or off.
- Select both the Turn off Windows Defender Firewall options, and press the OK button.
5. Turn off automatic updates
- Go to Start, and open Control Panel
- Go to System and security, then to Windows Update
- Choose Change settings
- Make sure Recommended updates checkbox is unchecked
This prevents your Windows PC (running older Windows 10 versions) from downloading and installing updates meant for newer Windows 10 versions.
6. Rebuild Boot Configuration Data
- Insert the Windows 7 bootable media (USB stick or DVD) and restart your PC.
- Set USB/DVD as the primary boot device. Either by entering the Boot menu (F10, F11, or F12) or from the BIOS settings.
- The loading process of the installation file should commence.
- Select the language, time/format, and keyboard input of choice and click the Next button.
- Choose Repair your computer from the bottom left corner.
- Open the Troubleshoot option.
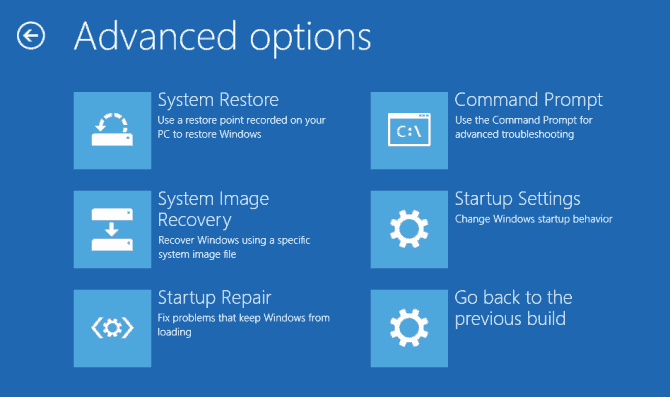
- Select Advanced Options.
- Open Command Prompt. Select your account and enter the password if asked.
- Copy-paste the following commands and press Enter after each and reboot after the process finishes:
bootrec /FixMbrbootrec /FixBootbootrec /ScanOsbootrec /RebuildBcd
Note: After rebuilding BCD using Windows 7 installation disk, you can proceed to the next solution in order to clean install Windows 10 OS just as intended.
The BCD (Boot Configuration Data) is rarely affected, but it still can get corrupted. Incomplete OS installation, incompatible OS updates, malware, ransomware, and many more might affect the BCD getting you stuck at making sure you’re ready to install Windows 10 screen.
7. Clean install Windows 10
Clean installing Windows 10 prevents you from being stuck while upgrading to Windows 10 with the Making sure you’re ready to install prompt.
Before you proceed, you should ensure that you backup all your important files on an external drive or USB flash drive. Also, you should create an ISO file with the media creation tool, and burn it on DVD or create a bootable USB drive with it.
Note: The proposed USB drive for the Windows 10 installation must be at least 6GB and it’s preferable to be a 2.0 instead of 3.0 or 3.1.
Here’s how to clean install Windows 10:
- Download the Media Creation Tool.
- Plug in the USB flash drive with at least 4 GB.
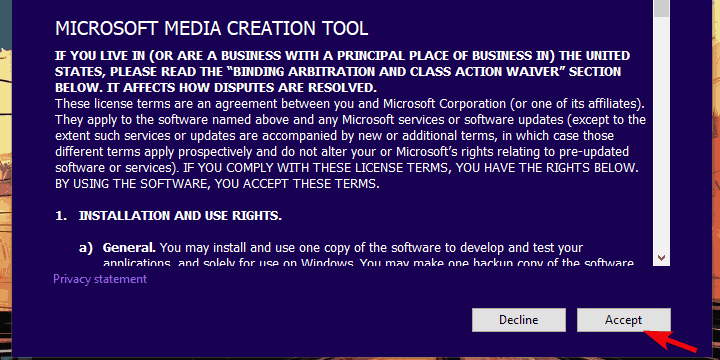
- Run Media Creation Tool and accept the License Terms.
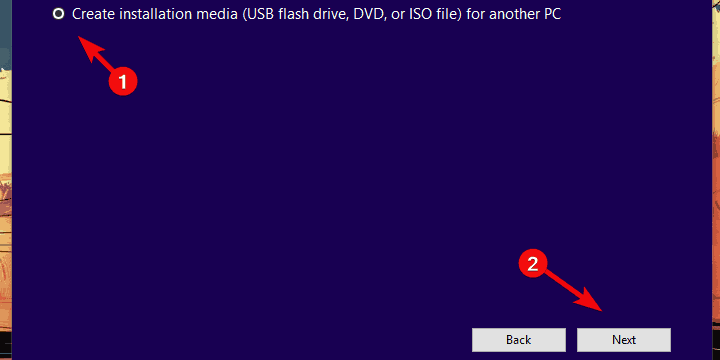
- Select the Create installation media (USB flash drive, DVD, or ISO file) for another PC option.
- Pick the preferred language, architecture, and edition and click Next.
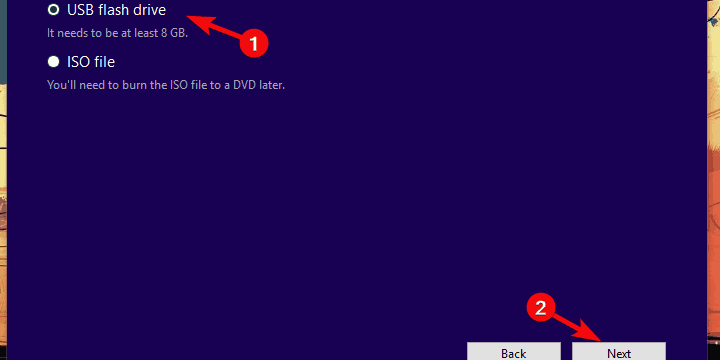
- Choose USB flash drive and then click Next.
- Media Creation Tool will download the setup and copy the installation files onto the USB flash drive.
- Finally, restart your PC.
- Plug in USB and start the Setup.
In conclusion, any of the aforementioned solutions should be able to prevent you from being stuck at Making sure you’re ready to install Windows 10 prompt.
Have you tried any of our fixes above? We do appreciate it if you share your experience with us. Let us know in the comment section below.



User forum
0 messages