Could Not Create the Java Virtual Machine: 4 Easy Fixes
Don't hesitate to take a closer look at our quick solutions
4 min. read
Updated on
Read our disclosure page to find out how can you help Windows Report sustain the editorial team. Read more
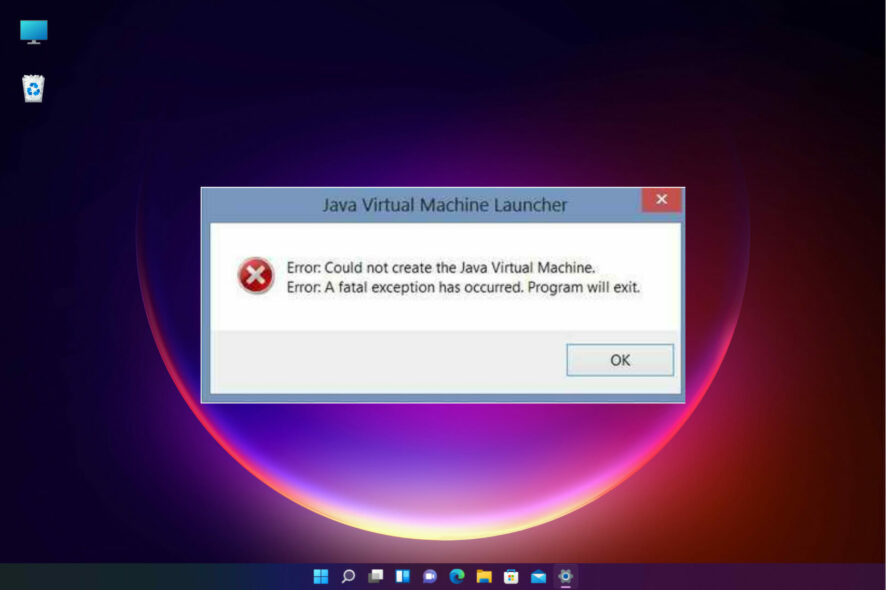
The Java virtual machine fatal exception error pops up for some users when they try to launch software built on Java. Minecraft users are no strangers to this issue.
The full error message states: Could not create the Java Virtual Machine. Error: A fatal exception has occurred. This is due to memory size issues and incorrect path settings or corrupt files.
How do I fix Could not create the Java Virtual Machine error?
1. Remove JDK (Java Development Kit)
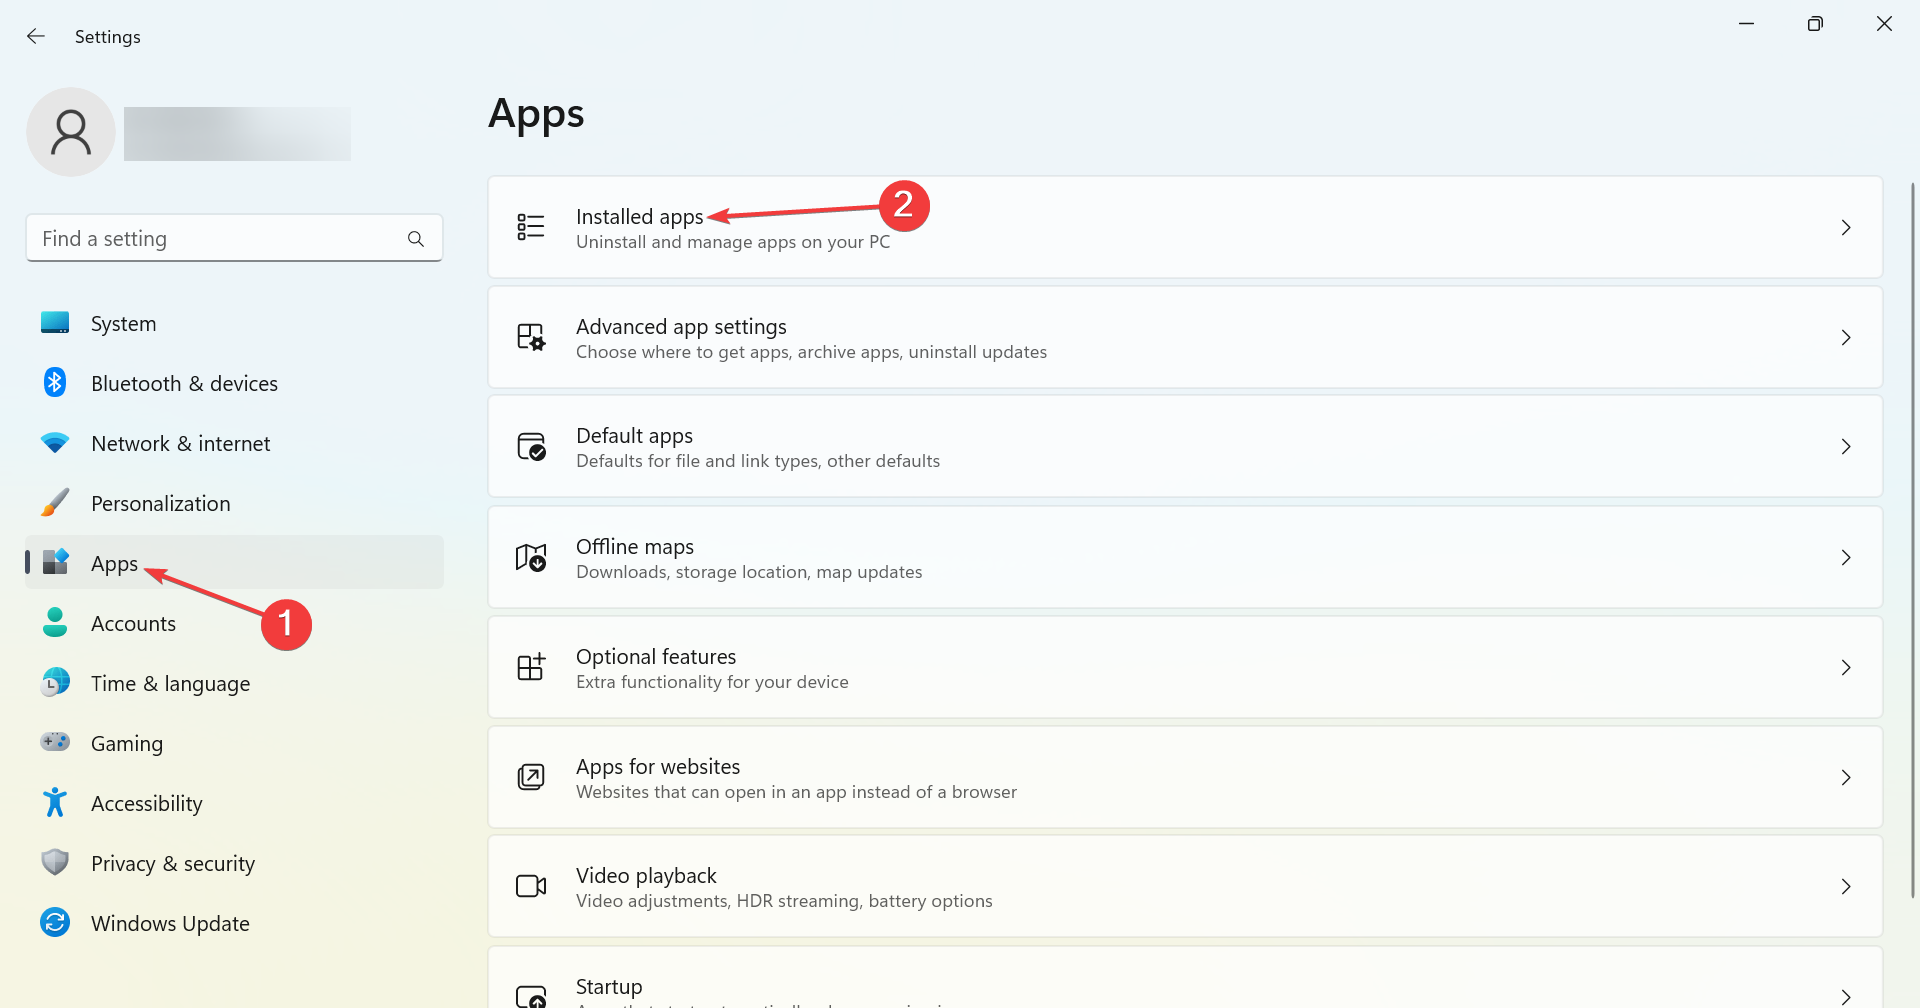
- Press Windows + I to open Settings, head to Apps from the navigation pane, and click on Installed apps.
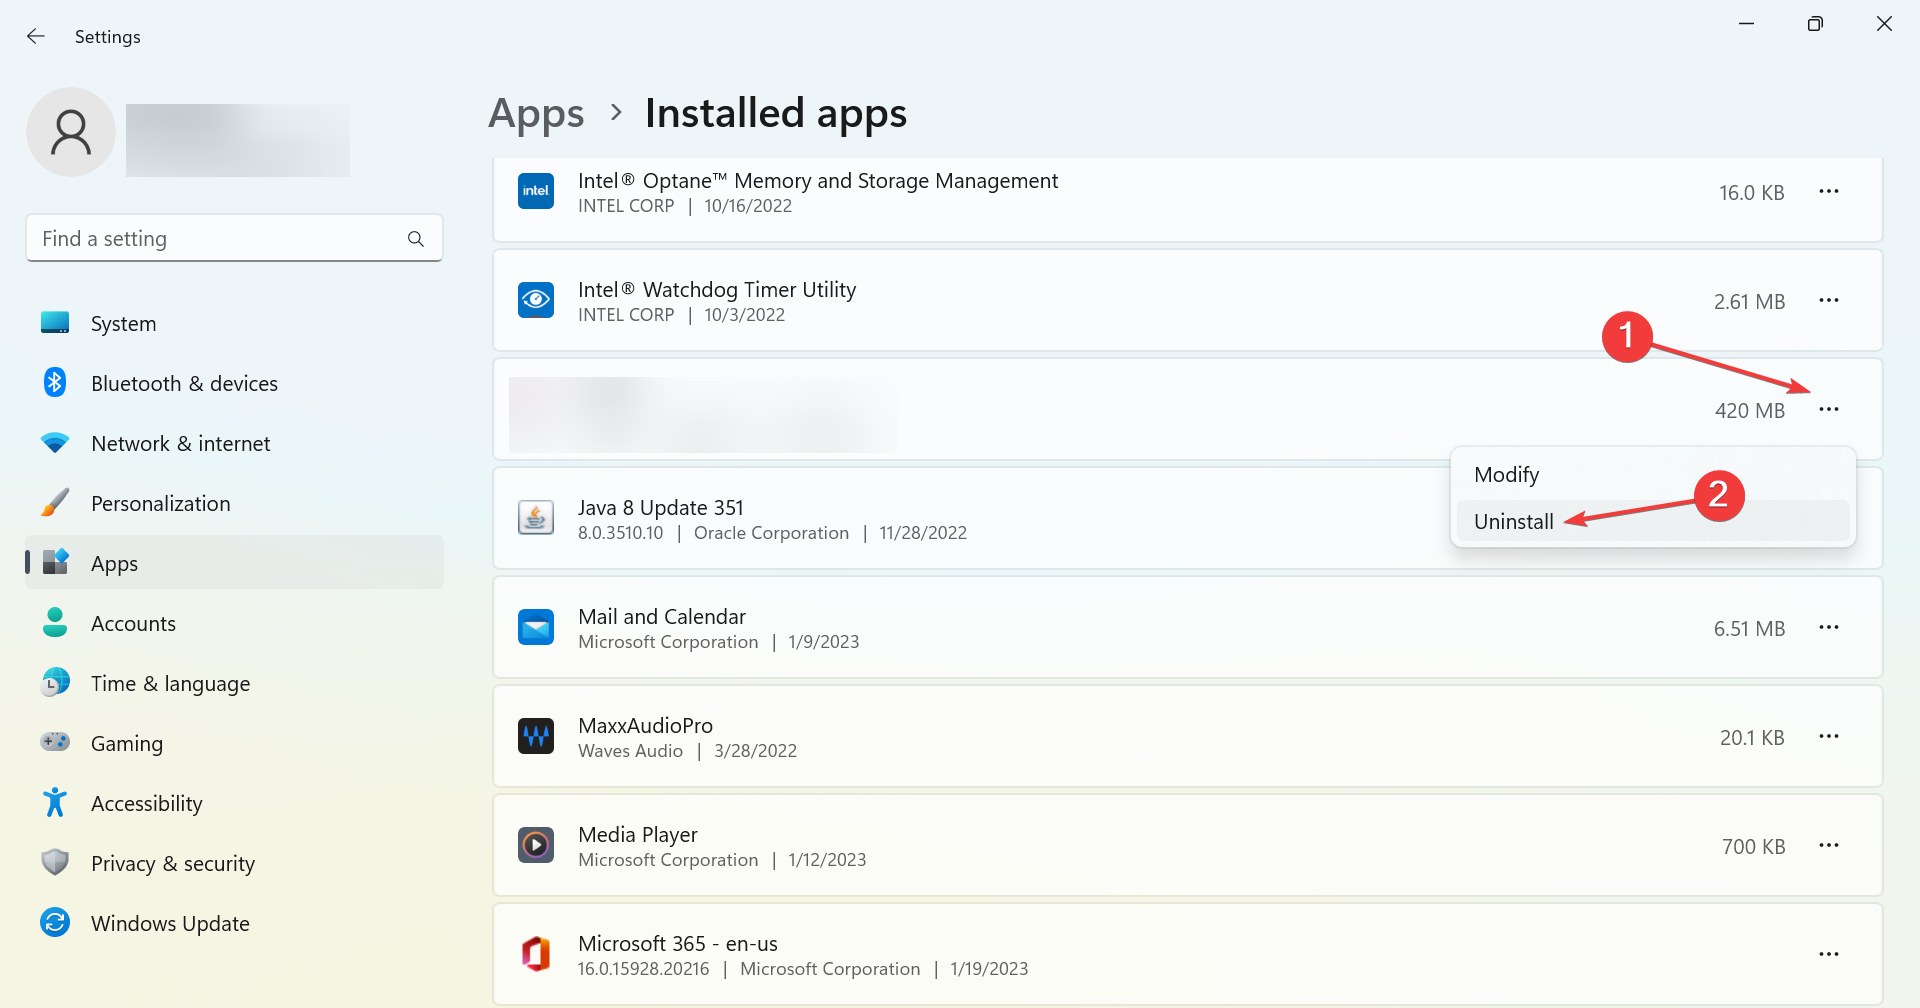
- Locate the Java Development Kit, click on the ellipsis next to it, and choose Uninstall.
- Follow the on-screen instructions to complete the process.
That’s it! Our readers pointed out that it was the development kit that conflicted with the process and led to the Could not create the Java Virtual Machine error, and uninstalling the program did the trick.
2. Set up a new system variable for Java
- Open Run with the Windows key + R keyboard shortcut, then enter sysdm.cpl in Run and click OK.
- Select the Advanced tab on that window, and click the Environment Variables button.
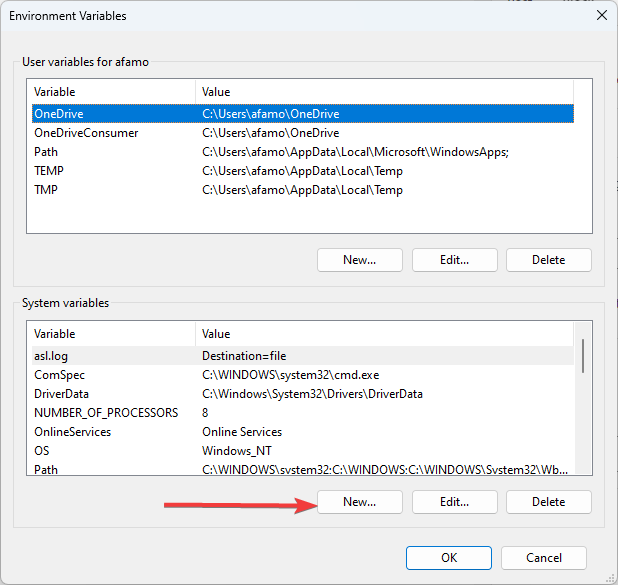
- Click the New button under the System variables box.
- Enter _JAVA_OPTIONS in the Variable name text box.
- Then, enter –Xmx512M in the Variable value text box, which increases RAM allocation to 512 megabytes.
- Click the OK button to close the window, then press the OK button on the Environmental window.
Importantly, note that instead of using a double hyphen in the Variable value as stated above, you can use a single hyphen (-Xmx512M) as this is often more effective, and would not spark up other complications.
3. Select the Run as administrator option for Java
1. Press the Windows key + S keyboard shortcut, and enter Java. Right-click on Java and select Open file location to open Java’s folder in File Explorer.
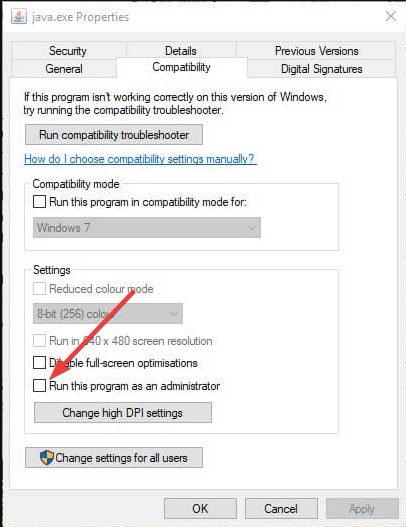
2. Right-click java.exe and select Properties.
3. Head to the Compatibility tab and select the Run this program as an administrator option.
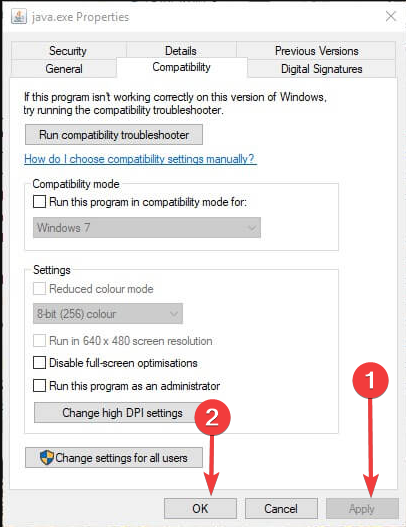
5. Select the Apply option, and click OK to close the window.
The Java Virtual Machine error can also be due to insufficient admin rights. Thus, some users might need to assign admin rights to Java. You can try the steps below to apply this solution.
4. Reinstall Java
- First, open the Run accessory by pressing the Windows key + R.
- Type the command below and hit Enter.
appwiz.cpl - Select Java from the program list and click Uninstall.
- Click Yes on any confirmation window that opens.
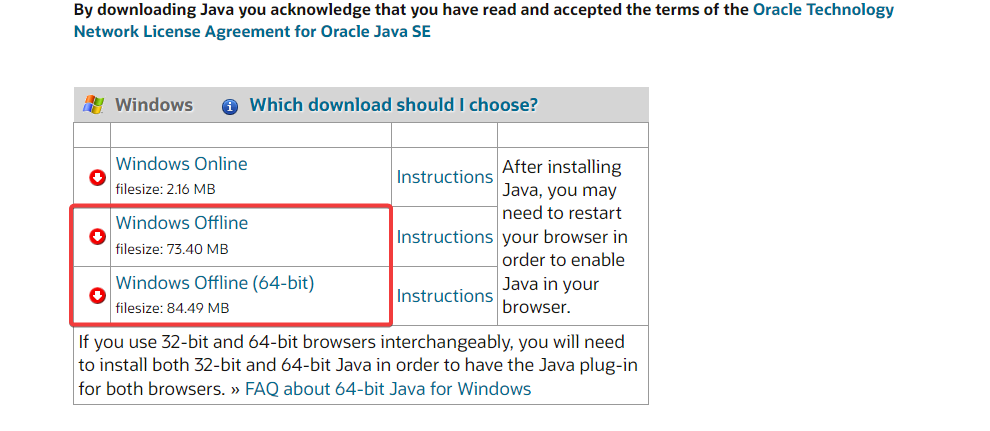
- Restart Windows, open the Java download page in a browser, and download either the 32 or 64-bit offline Windows versions.
- Users need 32-bit Java for 32-bit programs and 64-bit Java for 64-bit software. If in doubt, your best bet is to download and install both Java versions.
- Thereafter, open the Java setup wizard, and click the Install button.
That’s how users can fix this fatal error and get back to running the required Java software.
Do I need to install JVM?
Any machine on which you want to run Java code must have the Java Runtime Environment (JRE) installed. This is because Java does not run natively on a computer as C++ or C does; instead, someone must translate Java’s instructions into machine code, which the JVM does.
This error may come in different shades, including Could not create the Java Virtual Machine in Android Studio, Docker, Pentaho, Elasticsearch, Sonarqube, Minecraft, Eclipse, React Native, and IntelliJ, yet rest assured that you’ll find our solutions useful.
Any of the previously mentioned solutions may be successfully applied when getting a Java virtual machine launcher error which arises even if nothing has changed on your computer, and it’s most likely related to Java installation.
Things are no different when it comes to the Could not create the Java virtual machine a fatal exception has occurred error. This problem also seems to appear randomly. Make sure you aren’t using a 32-bit VM and a 64-bit Eclipse.
Minecraft could not create the Java virtual machine is an error that shows up when trying to launch Minecraft. The main reason is that it needs admin access in order to function properly. Also, read our detailed guide on how to install Java on Windows 11.
If you have any other questions or advice for other users to try, don’t hesitate to leave a comment below.








User forum
5 messages