5+ ways to recover an Excel file that was not saved on Mac
Key notes
- Whether you have lost an entire spreadsheet or just a few edits, it can feel a lot of frustration to have to start everything from start.
- Gladly, you can recover your unsaved Excel file very easily and without loss.
- To recover Excel files, you can use both native Mac tools as well as third-party tools.
- Hence, you can use online backup services or system options such as Time Machine to help you recover lost files.

Working on an Excel spreadsheet only to leave the work unsaved could cause some panicking moments.
There could be a lot of reasons for not saving the file. Your device could close unexpectedly due to a system crash, power failure, etc.
Don’t wory though, regardless of why this has happened, we can help you recover your unsaved Excel on Mac.
In this article we will offer you more detailed information, so make sure to keep on reading.
How can I recover an unsaved Excel file on Mac?
1. Restore the files from the Temporary Folder
- Go to Applications and select Utilities from the menu.
- Next, click on the Terminal option.
- Type open $TMPDIR and press Return. This will open the Temporary files folder.
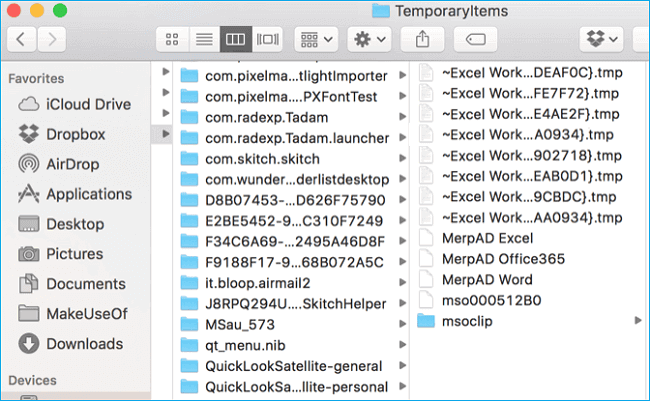
- Select the TemporaryItems folder.
- Search for your unsaved Excel file and click on Restore.
Make sure to copy the auto-saved Excel file in a different one than the Temporary folder.
Because the temporary file doesn’t have file extensions it can happen that their names are non-descriptive.
With that in mind, the best thing to do in order to find your file would be to look at the file creation date and then check all the files that were created near the date when losing the Excel file took place.
2. Use the AutoSave option
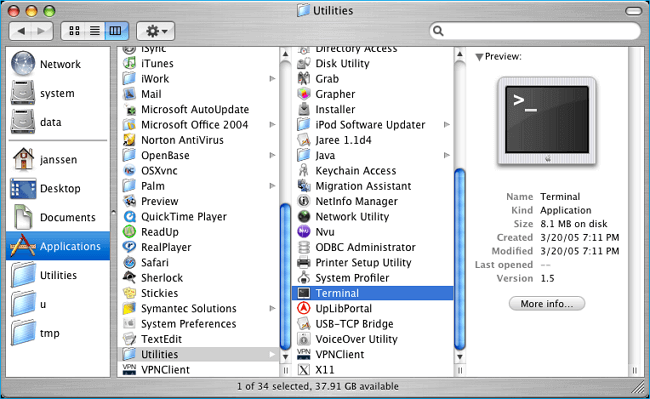
- Go to Applications and select Utilities.
- Next, click on Terminal to open it.
- Type defaults write com.apple.Finder AppleShowAllFiles true.
- Next, press Enter.
- Click Finder and once you localized your excel file press on Return.
- Once you find the unsaved spreadsheet file you can select it and press on Recover.
The AutoSave option saves the changes to your document every two seconds which helps reduce data loss.
With this amazing feature, you can rest assured that your document’s data has been saved even though you did not press the Save button.
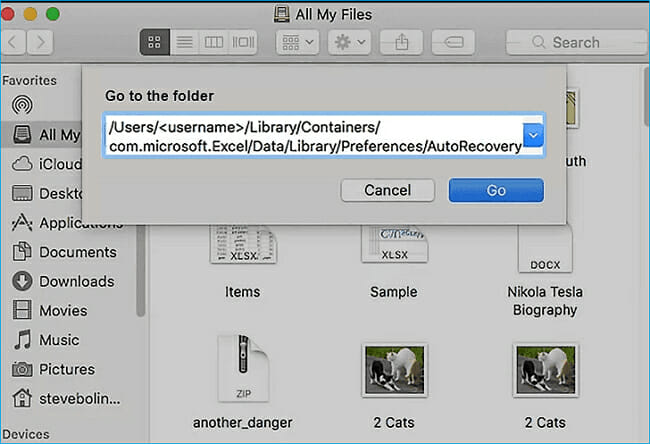
The AutoRecover option on the other hand will allow you to find and restore the last AutoSave version of your Excel file.
Follow these steps in order to enable the AutoRecover option:
- Open the Excel menu and click on Preferences.
- Click on the Save button located under the Sharing and Privacy option.

- Tick the Save AutoRecover info and make sure to enter the frequency of file saving.
- Next click Ok to save these changes.
Also, if you open Excel after an unexpected crash due to system failure or other reasons, the automatically recovered file will show up on Document Recovery.
This list is located on the left-hand side. You can simply click and open the most recent version of your Excel file from there.
3. Use the Save List option
- Open an Excel spreadsheet on your Mac.
- Go to File and select the Open recent option.
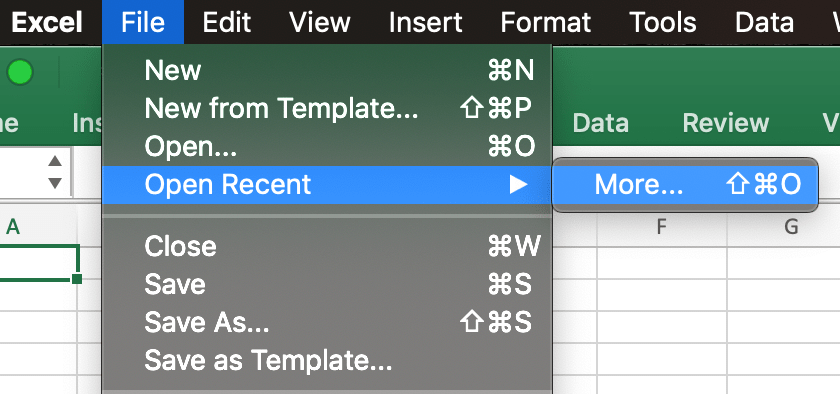
- Select from the list your Excel file and press Save.
4. Look in the Mac Trash folder
- Launch Trash and click on the Change the item arrangement option.
- Arrange the files to be shown based on Date Added.
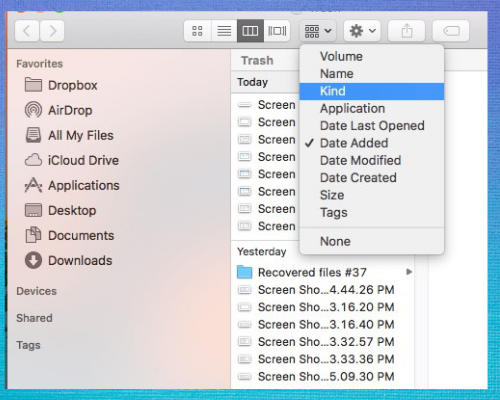
- Locate the deleted file and right-click on it.
- Next, choose the Put back option.
5. Use the Time Machine option
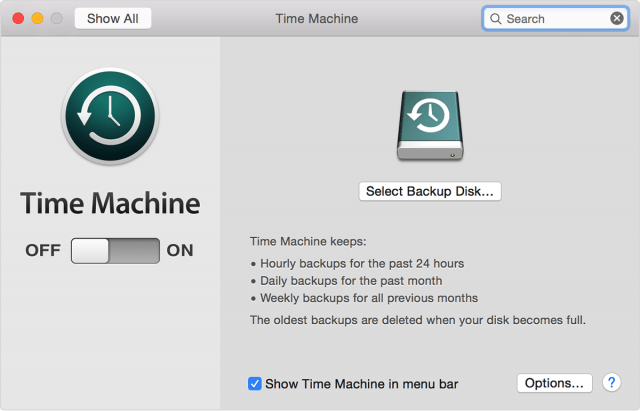
- Go to Finder and select the Application option.
- Next, click on Time Machine.
- Go to Finder and select All my files.
- Now, select the version you want to recover for your unsaved Excel file.
- Finally, click on Restore to retrieve the lost file.
6. Use an Online Backup service
In iCloud
- Login into your iCloud account using your username and password.
- Go to Settings and select Advanced.
- Next, click on Restore Files.
- Select the Excel file you want to recover, then click Restore File.
In Google Drive
- Log into your Google account and go to Google Drive.
- Go to Trash, find your deleted Excel files.
- Right-click on the deleted Excel file, then click on the Restore option to retrieve the Excel file on your Mac.
In OneDrive
- Go to OneDrive and type in your username and password.
- Go to the Recycle bin and find the deleted Excel file.
- Right-click on the file and choose the Restore option to recover the deleted Excel file.
We hope that this guide has proven useful in your situation and that you managed to recover the Excel file that wasn’t saved.
Feel free to share your experience with us by using the comment section below.
Read our disclosure page to find out how can you help Windows Report sustain the editorial team. Read more


Improve this guide


User forum
0 messages