Fix: Error /usr/bin/xcodebuild Failed with Return Code 65
Make sure that the address code signing and certificate are valid
5 min. read
Published on
Read our disclosure page to find out how can you help Windows Report sustain the editorial team Read more
Key notes
- To fix the error /usr/bin/xcodebuild failed with return code 65, first, check the address code signing and certificate from Project Settings.
- Fix the project settings, run individual tests, and clean your build to clear this problem quickly.
- Read the guide below to see the detailed steps to apply in this case.
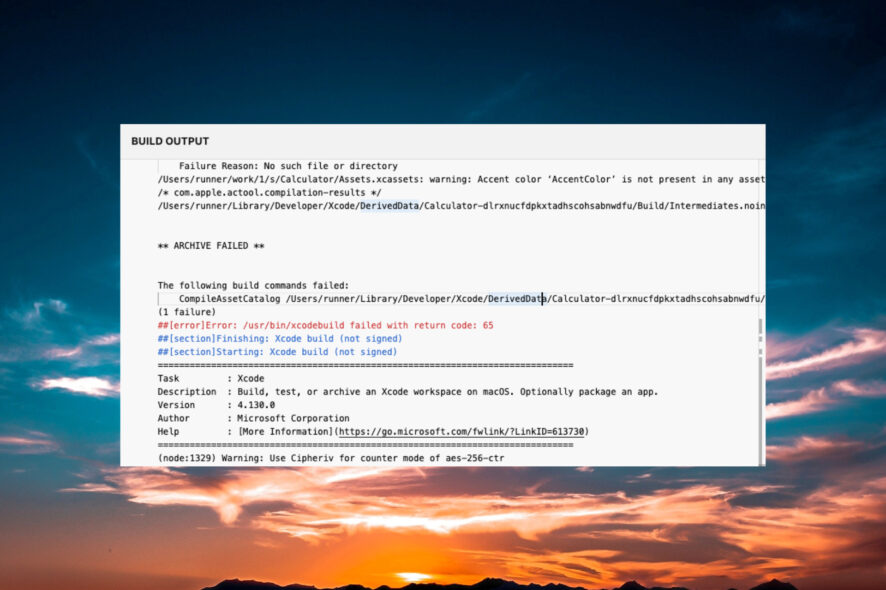
The error /usr/bin/xcodebuild failed with return code 65 is one of the most dreaded coder nightmares because it doesn’t offer a lot of specific instructions on how to fix it. However, our WR software team has some solutions and tips if you have this issue.
What is error code 65 in Xcodebuild? Error code 65 in Xcodebuild is called an exit error and it can be caused by so many issues that make it so hard to pinpoint:
- Outdated Xcode version
- Issues with code signing
- Incorrect project settings
- Problematic library and dependencies
- Test failures
How do I fix Error /usr/bin/xcodebuild failed with return code 65?
1. Fixing the address code signing issues
There are a few steps that you need to perform in order to make sure that you will avoid any address code signing problems:
- Verify if your Apple Developer Program membership is active, then go to Project Settings and double-check your signing certificate for your project.
- In Project Settings, also make sure that the provisioning profile is the same as the one from Apple Developer Account. You may also refresh the provisioning profile in Xcode to make sure.
- If the Error /usr/bin/xcodebuild failed with return code 65 is still present, revoke your signing certificate and create a new one.
The address code signing is the main problem when getting the return code 65 in Xcodebuild so make sure that everything is alright with the membership and signing certificate.
2. Fixing incorrect project settings
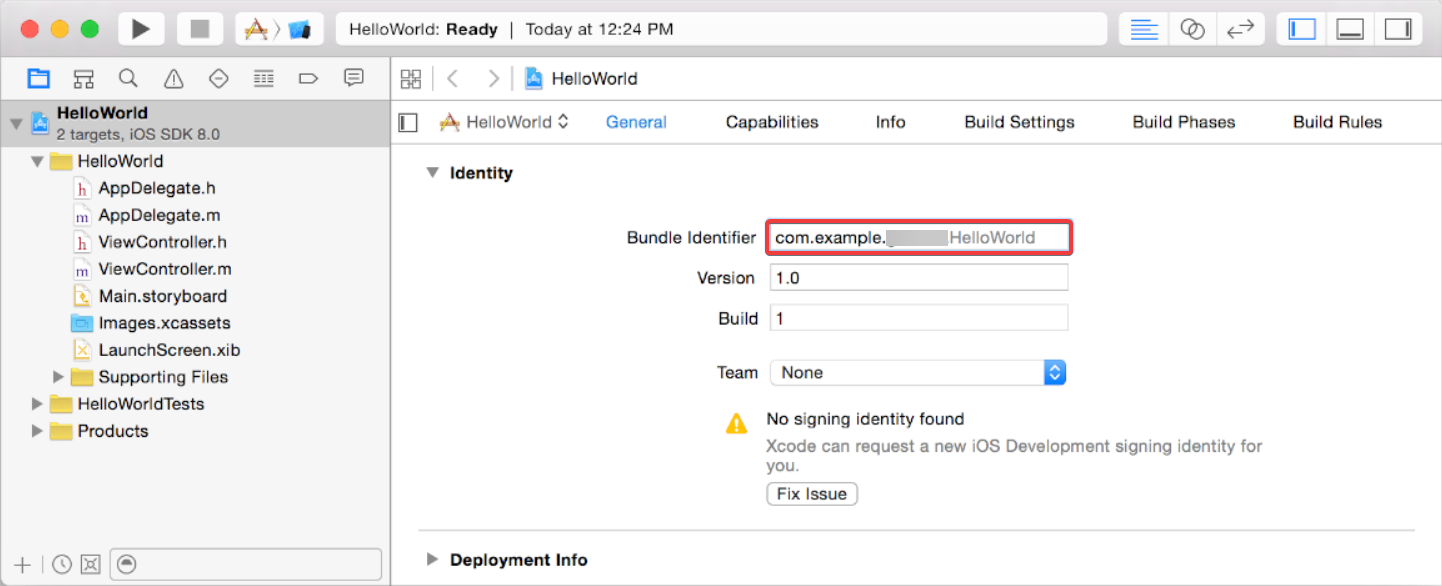
- Go to the General tab in the Project Settings of your project, then locate Bundle Identifier and see if it matches the one in your Apple Developer Account.
- On the same General tab, check the Deployment Target. That is the lowest iOS version your app supports, and it must not be higher than the one on your simulator.
- Check all the options in the Project Settings and verify if you have the same in the Apple Developer Account.
- After you have made all the changes, clean and rebuild your project in Xcodebuild.
3. Running tests individually and debugging
To pinpoint the exact issue when dealing with the /usr/bin/xcodebuild error 65, try to run the tests individually, not all at the same time. This way, you will see exactly which one is causing the problem.
Then, use the debugger which will point out the specific issues that you need to address. Rerunning and debugging is the key to getting this problem sorted.
4. Cleaning the Build folder and checking for errors
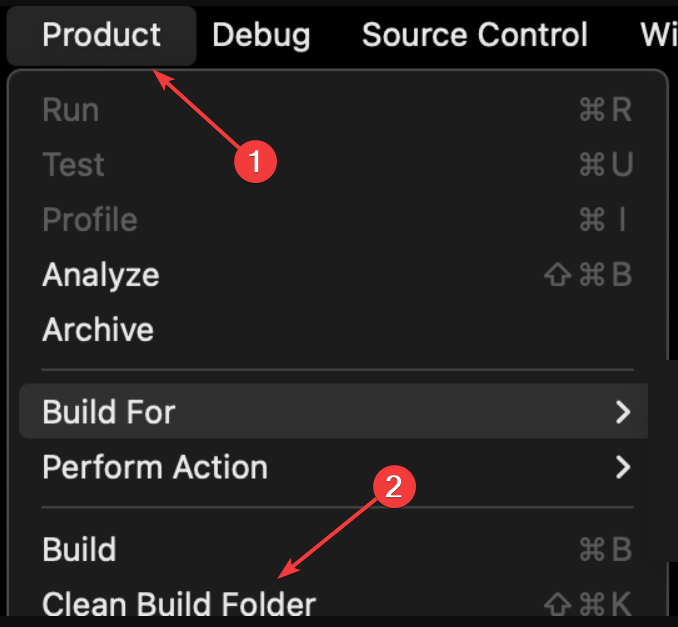
- In Xcode, go to the Product menu and select Clean Build Folder to delete all the files from your previous builds.
- Now, go to Product again and select Build to create a clean build.
- Check if the error persists.
5. Uninstall and reinstall Xcode
If all else has failed, you may try uninstalling and reinstalling Xcodebuild. To do that, go to the Applications folder, locate Xcode, and move it to the Thrash bin.
Empty the bin, then run the installer. If you don’t find it, go to the dedicated Apple Developer Xcode page and get it from there. Make sure you get the latest version that works on your macOS.
If the Xcode install is stuck, follow this guide for solutions on how to fix it.
6. Resetting the iOS Simulator
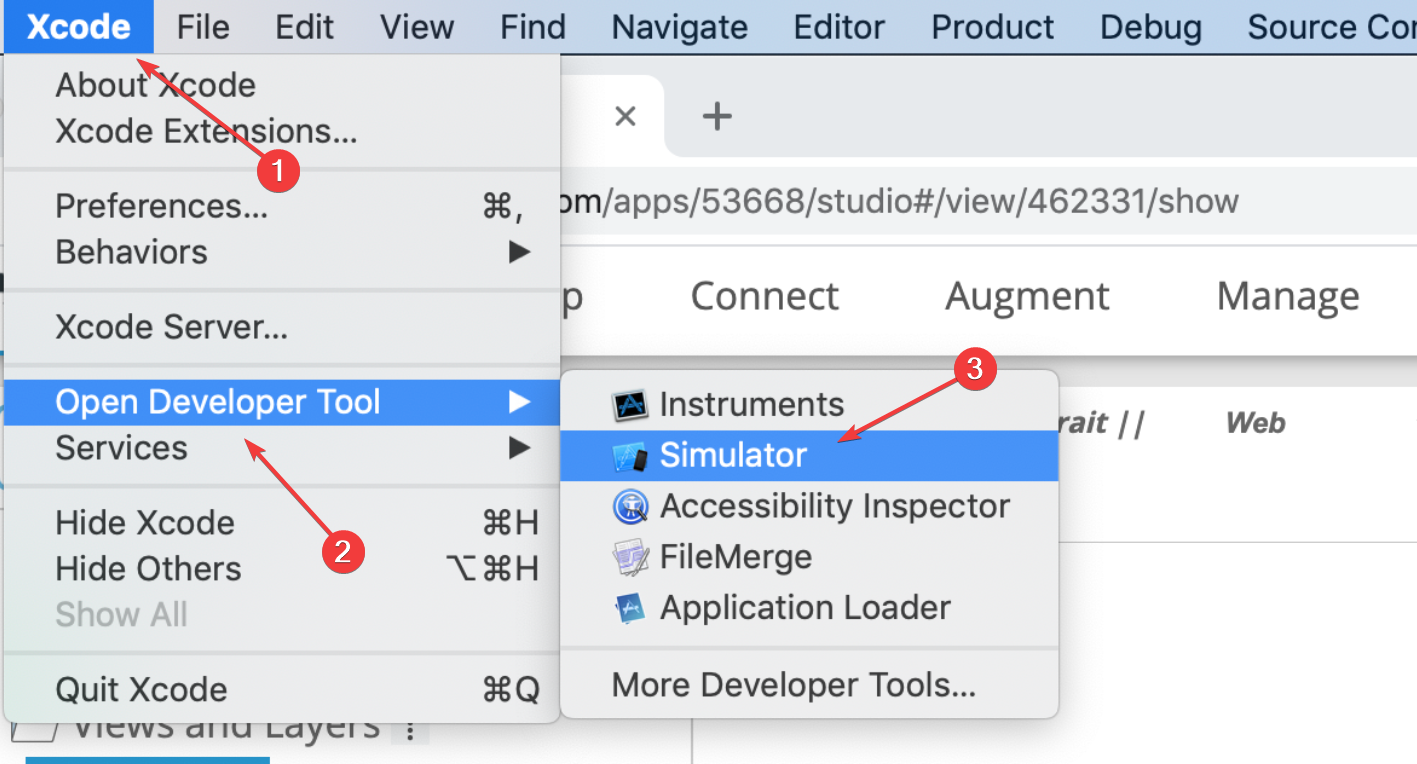
- Go to Xcode, select Open Developer Tool, and choose Simulator.
- Click on Device and select Erase All Content and Settings.
- Once you reset the Simulator to default settings, rebuild your project and see if you still get the error.
7. Fixing the Libraries and Dependencies
Unfortunately, the libraries and dependencies are often causing the error /usr/bin/xcodebuild failed with return code 65. Check if they are on par with the Xcode version you’re running and also with the iOS version you’re building the project for.
Check the Dependencies configuration and update them in the process. Some of the dependencies can cause this problem so you may need to remove them and look for replacements that offer the same functionality.
Of course, if you make any changes to the libraries or dependencies, don’t forget to rebuild your project as in Solution 4 from this guide.
Tips on how to avoid the /usr/bin/xcodebuild failed with return code 65 error
- Keep your Xcode updated to avoid any bugs or lack of functionality.
- Clean your build regularly to remove the clutter that can cause issues with your code.
- Use Git to control any changes in your code and revert the build whenever problems occur.
- Review your dependencies and test your build as often as possible.
Because the Error /usr/bin/xcodebuild failed with return code 65 has so many possible causes you need to review all the aspects of your build.
To review our guide, first, make sure that the address code signing and certificate are correctly set. Then, look at the project settings, make individual tests, and clean your build. If none of these work, reinstall Xcode, reset the Simulator, and fix your libraries and dependencies.
If you’re an advanced coder, you might also want to install the Xcode command line tools.
Hopefully, our guide on how to fix Error /usr/bin/xcodebuild failed with return code 65 helped you and now your project is moving forward.
You may also be interested in the best cross-platform code editors that might offer additional help.
For any other suggestions on how to fix this error, feel free to use the comments section below and let us know.

